Home > Widget Setup
Categories: Customization | Tips & Tricks
(Last Updated On: November 29, 2022)
About This Article
This article explains widgets and how to add, remove and rename them.
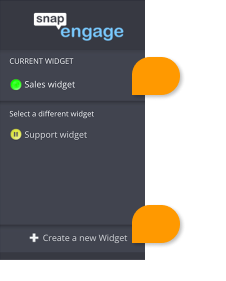
Widgets
Widgets enable different configurations for different sites, products or customers. For example, a Sales widget and a Support widget.
To add a widget:
1. Account Owners can log into your Admin Dashboard.
2. Click on the widget drop down and select “create a new Widget” at the very bottom.
3. At this point you will be brought to the Options tab to set up your new widget (or you will be prompted to purchase a new widget if you have exceeded the number of widgets in your plan).
4. To purchase a new widget come chat with a SnapEngage agent. Once the new widget has been purchased repeat steps 1-3.
To rename a widget:
1. Log into your Admin Dashboard, in the settings, and select the widget you want to rename.
2. Click on Options (2.1), and the first line will be where you can rename the widget. Then Save Changes (2.2).
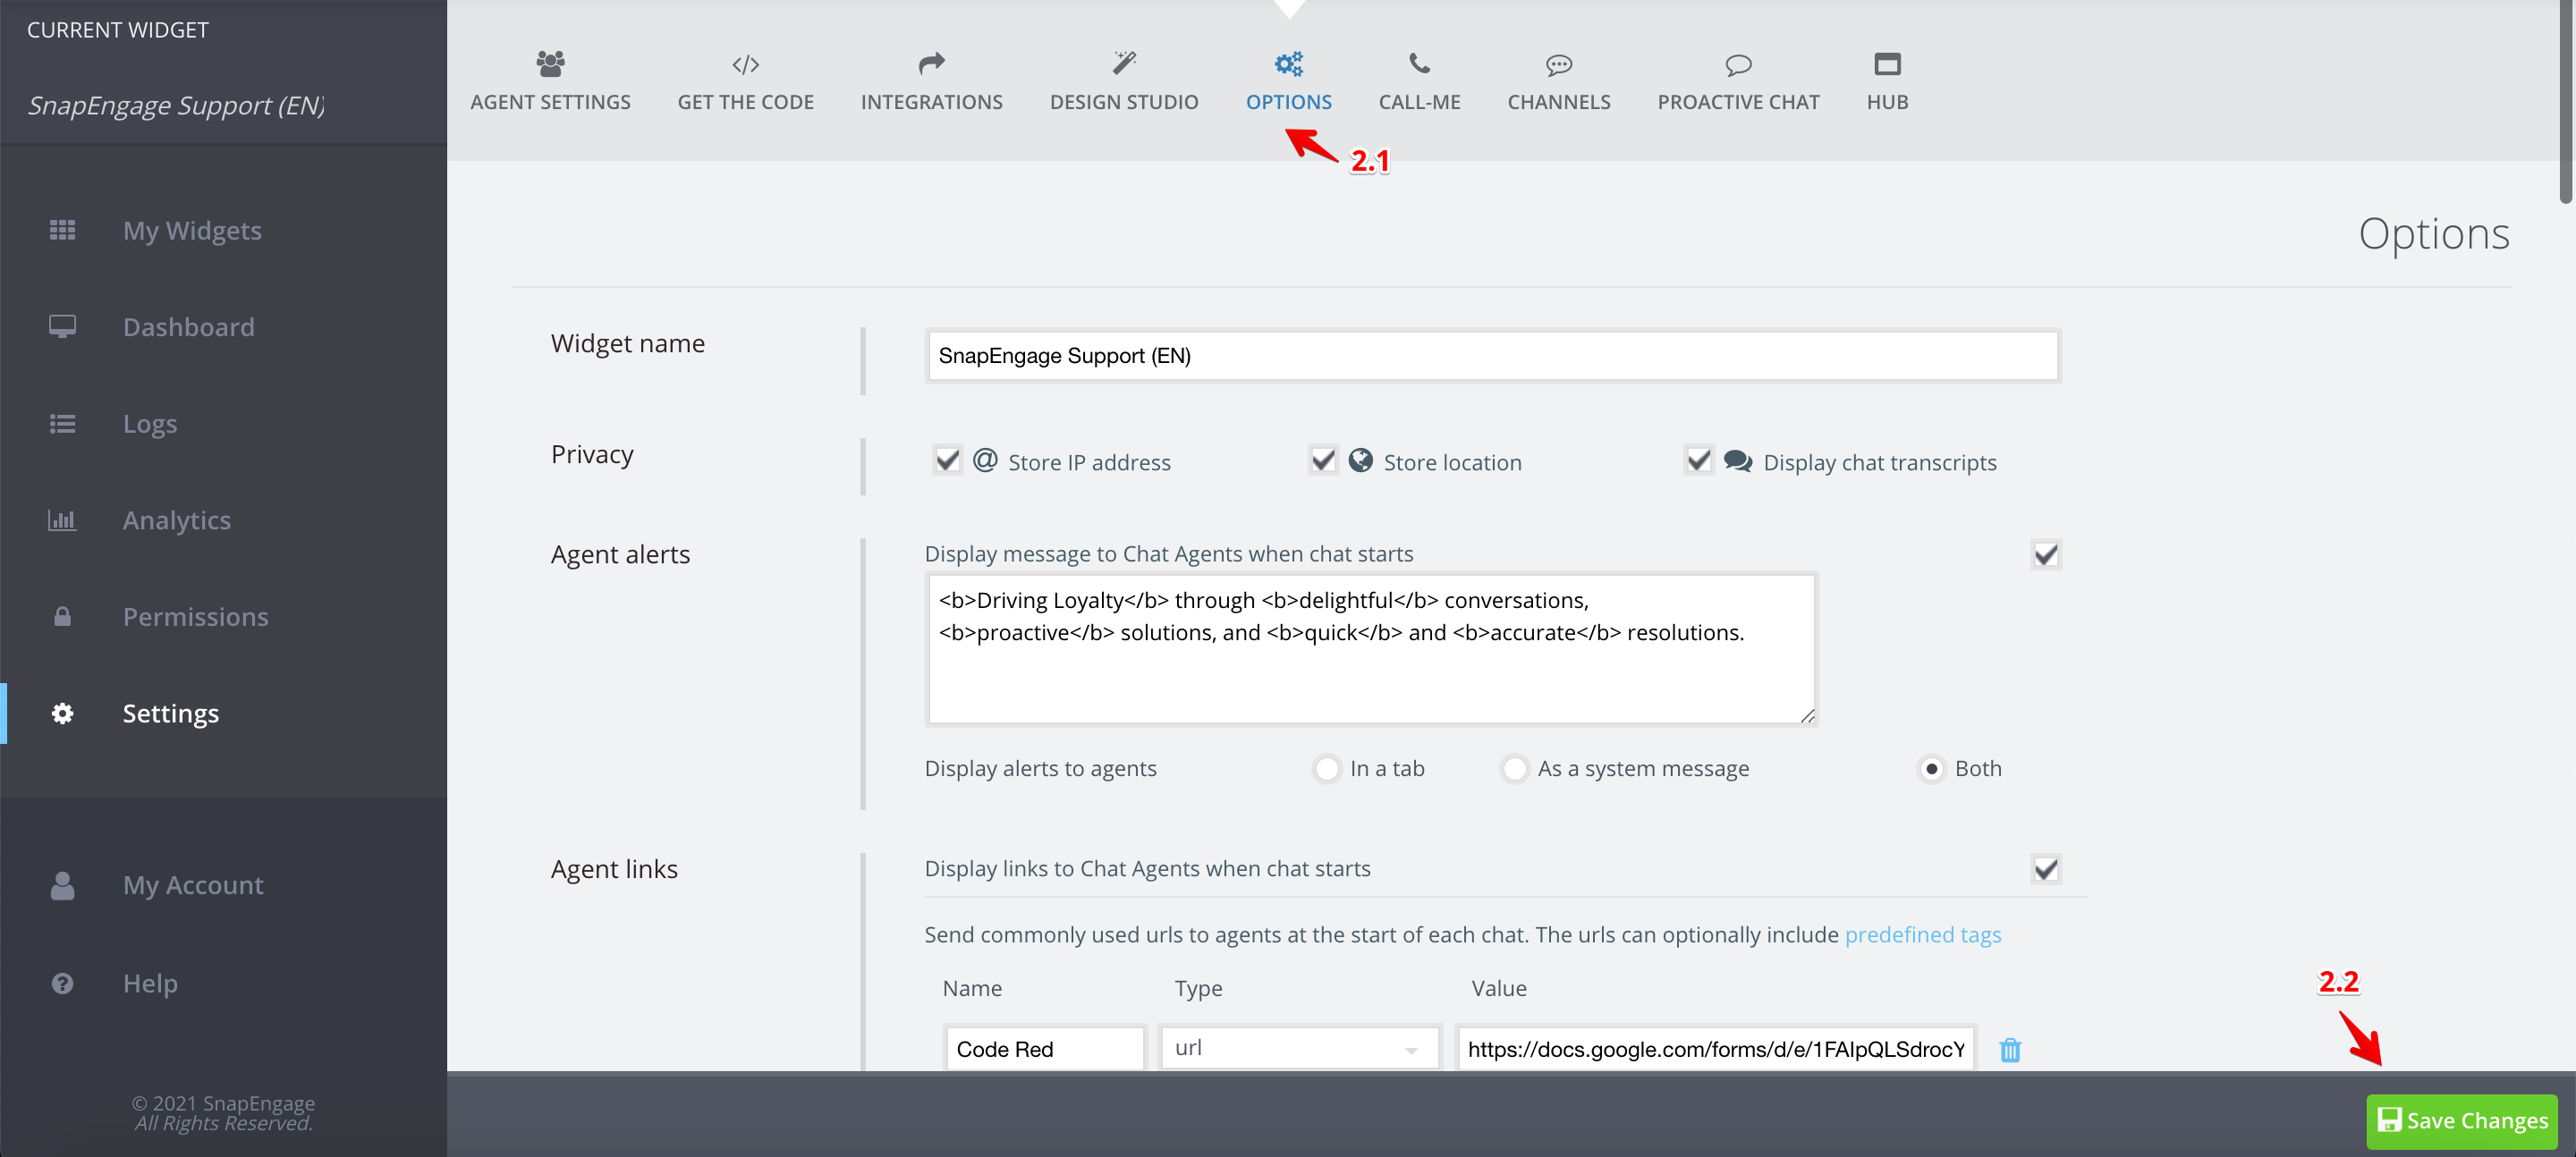
Note: The widget name will be used in the “Thank you” note that your clients receive after sending an offline request (if the setting is enabled under the “Options’ tab)
To delete/remove a widget:
For protection of you widget settings, deleting a widget requires the help of a SnapEngage agent to remove it. You can take these preliminary steps to prepare. Once a widget is deleted, it is not recoverable!
1. Log into your Admin Dashboard, in the settings.
2. Go to Options (as done in the previous step)
3. Rename the widget DELETEME. All one word, no spaces.

5. Click Save!
6. For the last part, we need the admin to come chat with an agent letting us know you want a widget deleted or have the admin send an email to [email protected]. We will handle the rest from there.
Did you find this article helpful?

 (9 votes, average: 4.11 out of 5)
Published October 29, 2012
Reader Feedback
No comments yet