Home > How to integrate SnapEngage with Microsoft Dynamics CRM online
Categories: Integrations & Plugins
(Last Updated On: July 27, 2021)
About this Article-
This article goes over how to integrate with MS Dynamics CRM Online and set up.
SnapEngage will automatically notify you when your website visitors contact you. You can either receive offline requests and chat transcripts by email or directly in your preferred Help Desk, CRM or Bug Tracker.
If you would like to receive transcripts and messages in Microsoft Dynamics CRM 365 (online), then follow the steps below.
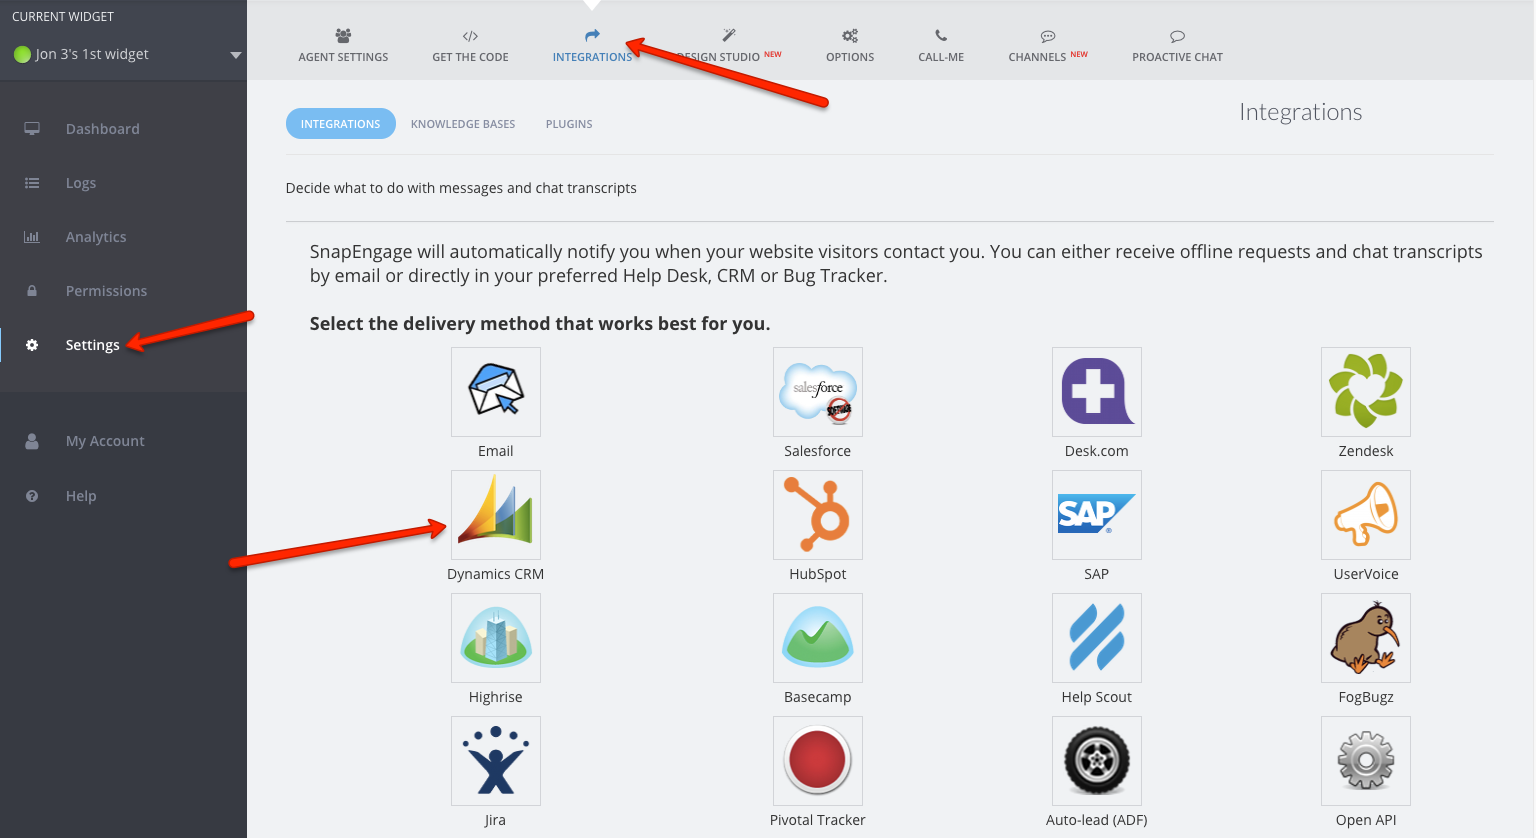
1. Log into your Admin Dashboard, go to your Settings.
2. Select the Integrations tab.
3. Click on the Microsoft Dynamics Icon.
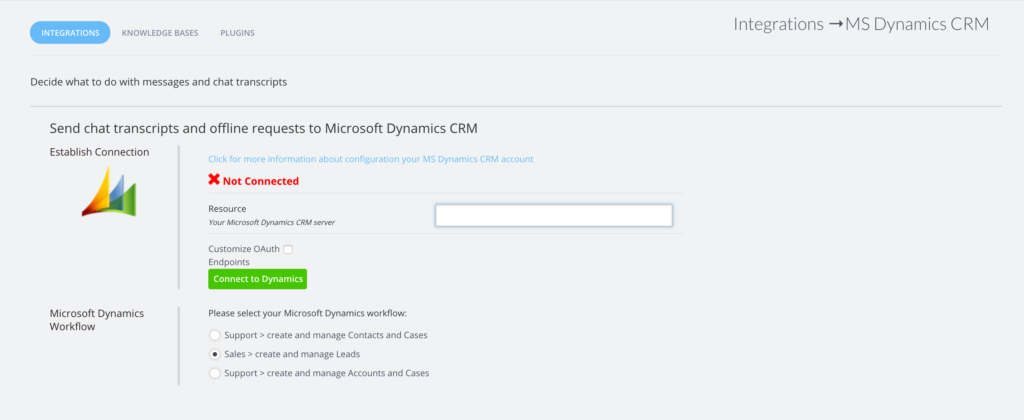
4. Input your Microsoft Dynamics CRM server on its field
Click on “Connect to Dynamics”
**Please be aware that this is a pop-up, if the pop-up blocker is turned on on your browser you will need to allow pop-ups
If your connection credentials are correct, you will see ‘Connected’
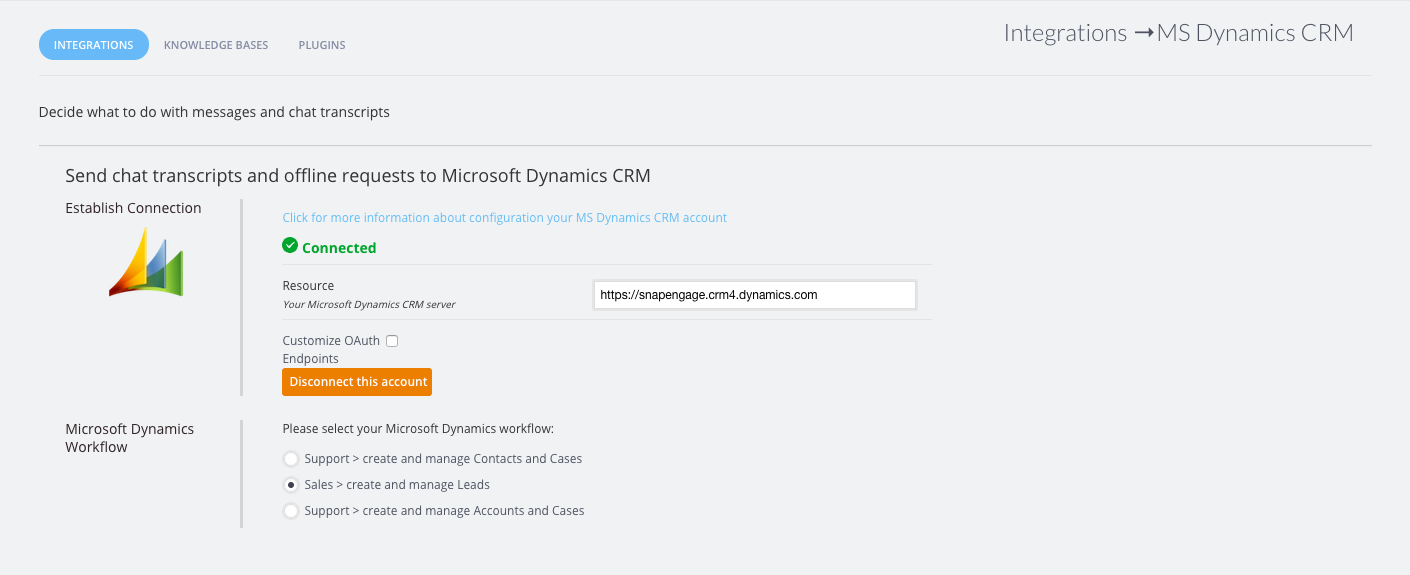
The next step is to choose the workflow SnapEngage will integrate with Microsoft Dynamics.

Support workflow (Contact and Cases):
After a chat ends or an offline message is sent, SnapEngage will attempt to create a “Contact” entity from your website visitor’s email address. (The Contact will be created if this Contact does not already exist in your CRM system.) After creating a Contact, we will then create a “Case” with the chat transcript or offline message; the visitor will be the Contact for this Case entity.
Sales workflow (Leads):
After the chat ends or an offline message is sent, SnapEngage will create a “Lead” entity from your website visitor’s email address. (The Lead will be created if this Lead does not already exist in your CRM system.) After creating the Lead, a Note will be attached to the Lead with the chat transcript or offline message.
Support workflow (Account and Cases):
After the chat ends or an offline message is sent, SnapEngage will create an “Account” entity from your website visitor’s email address. (The Account will be created if this Account does not already exist in your CRM system.) After creating an Account, we will create a “Case” with the chat transcript or offline message; the visitor will be the Account for this Case entity.
Choose one and Save.
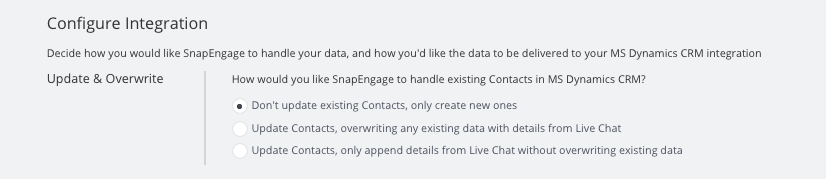
Next, select how you want the cases updated in the system
- Create a new case for each chat
- Update and overwrite existing cases, will create new cases for new visitors
- Update and append details without overwriting existing data
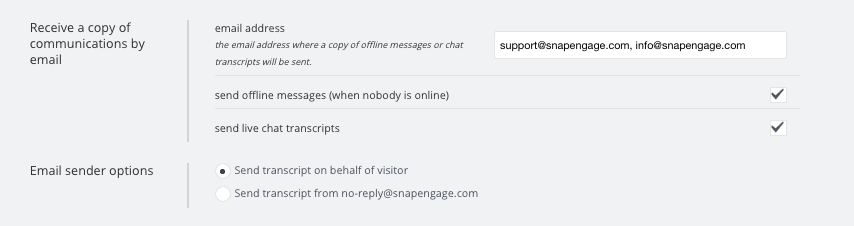
Now, select how you want the transcripts sent – Automatically, only with a valid visitor email, or do not send

Pick where you want additional copies of the transcript to send as well as offline messages. Also pick how it is sent to your integration.
Custom Mappings
For custom mappings, please refer to this article https://help.snapengage.com/custom-data-mapping-for-ms-dynamics
Did you find this article helpful?
 (2 votes, average: 5.00 out of 5)
Published August 1, 2017