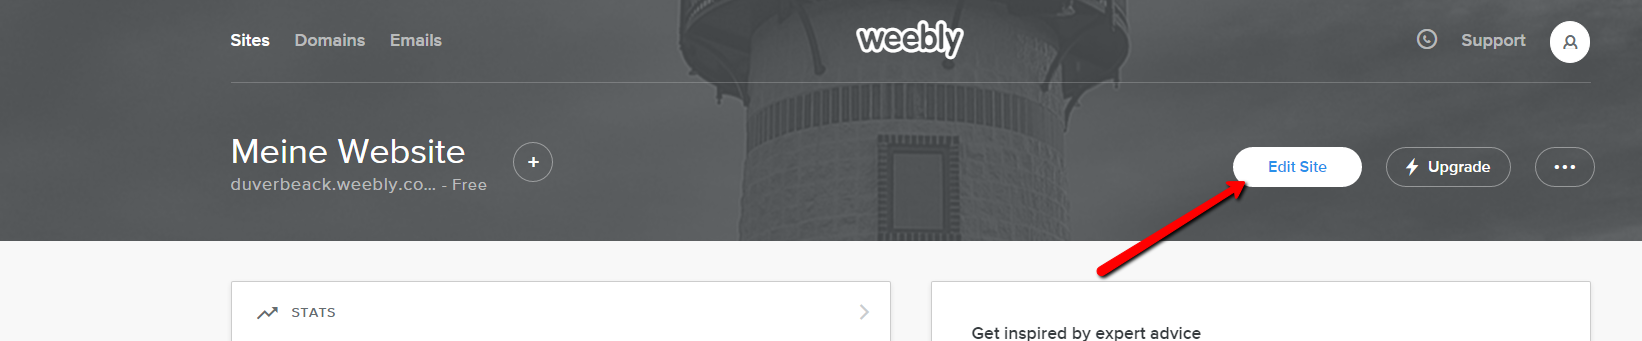
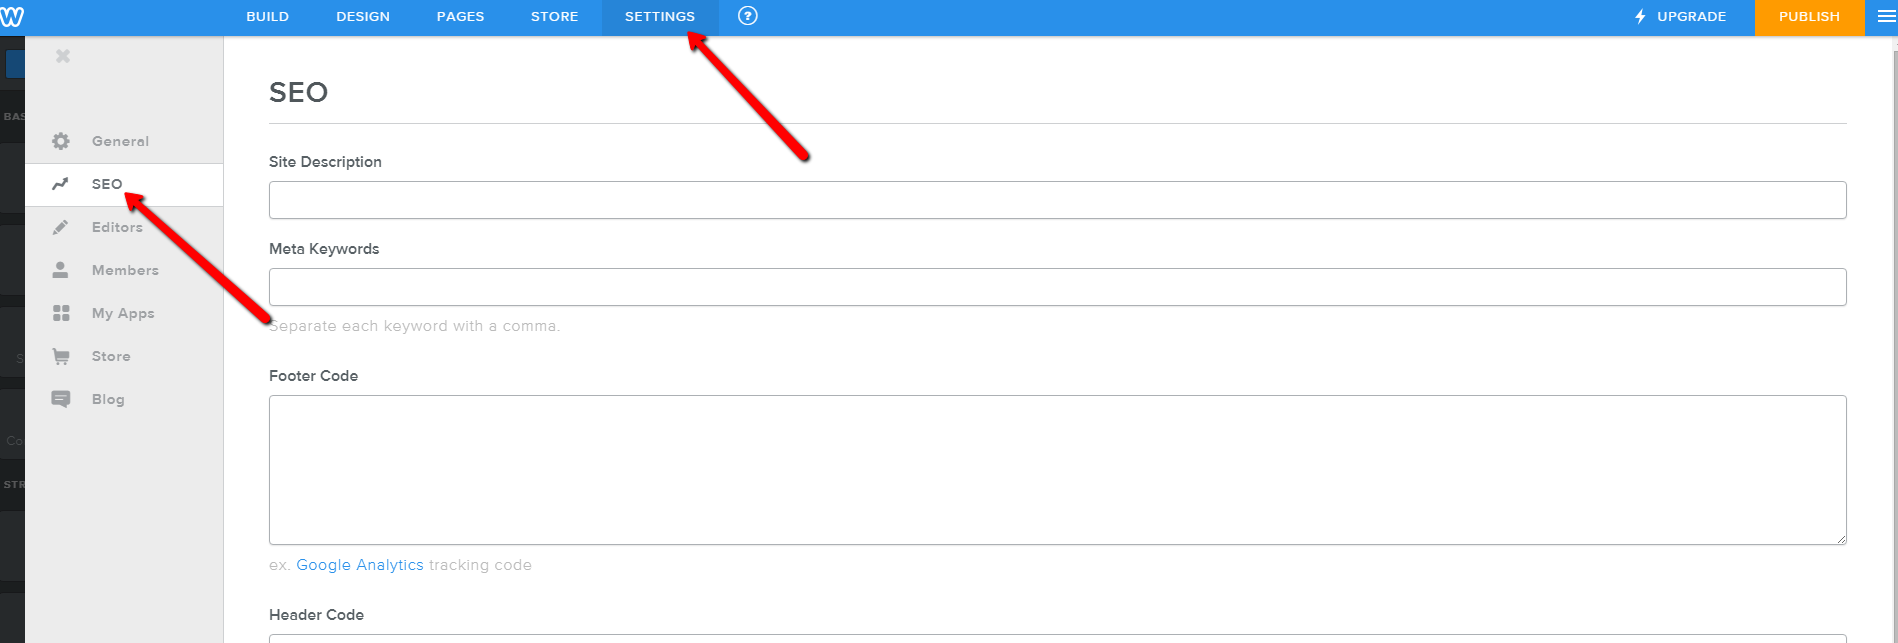
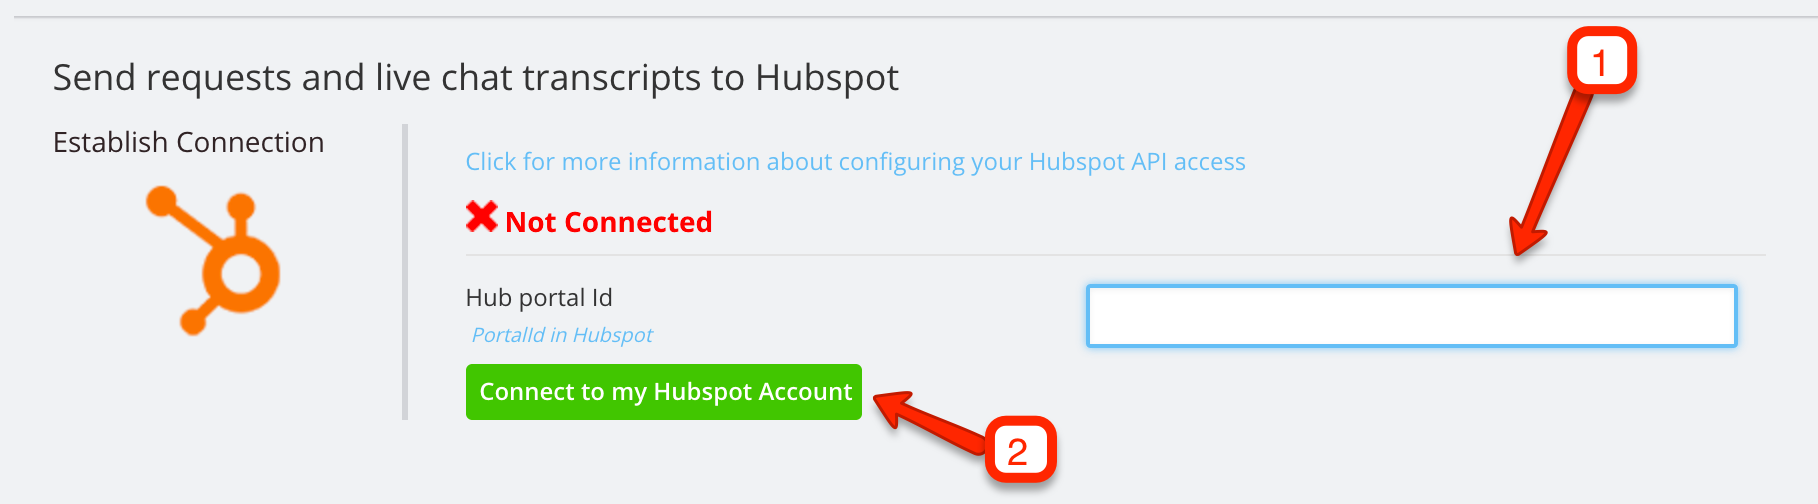
How to Add WhatsApp as a New Channel
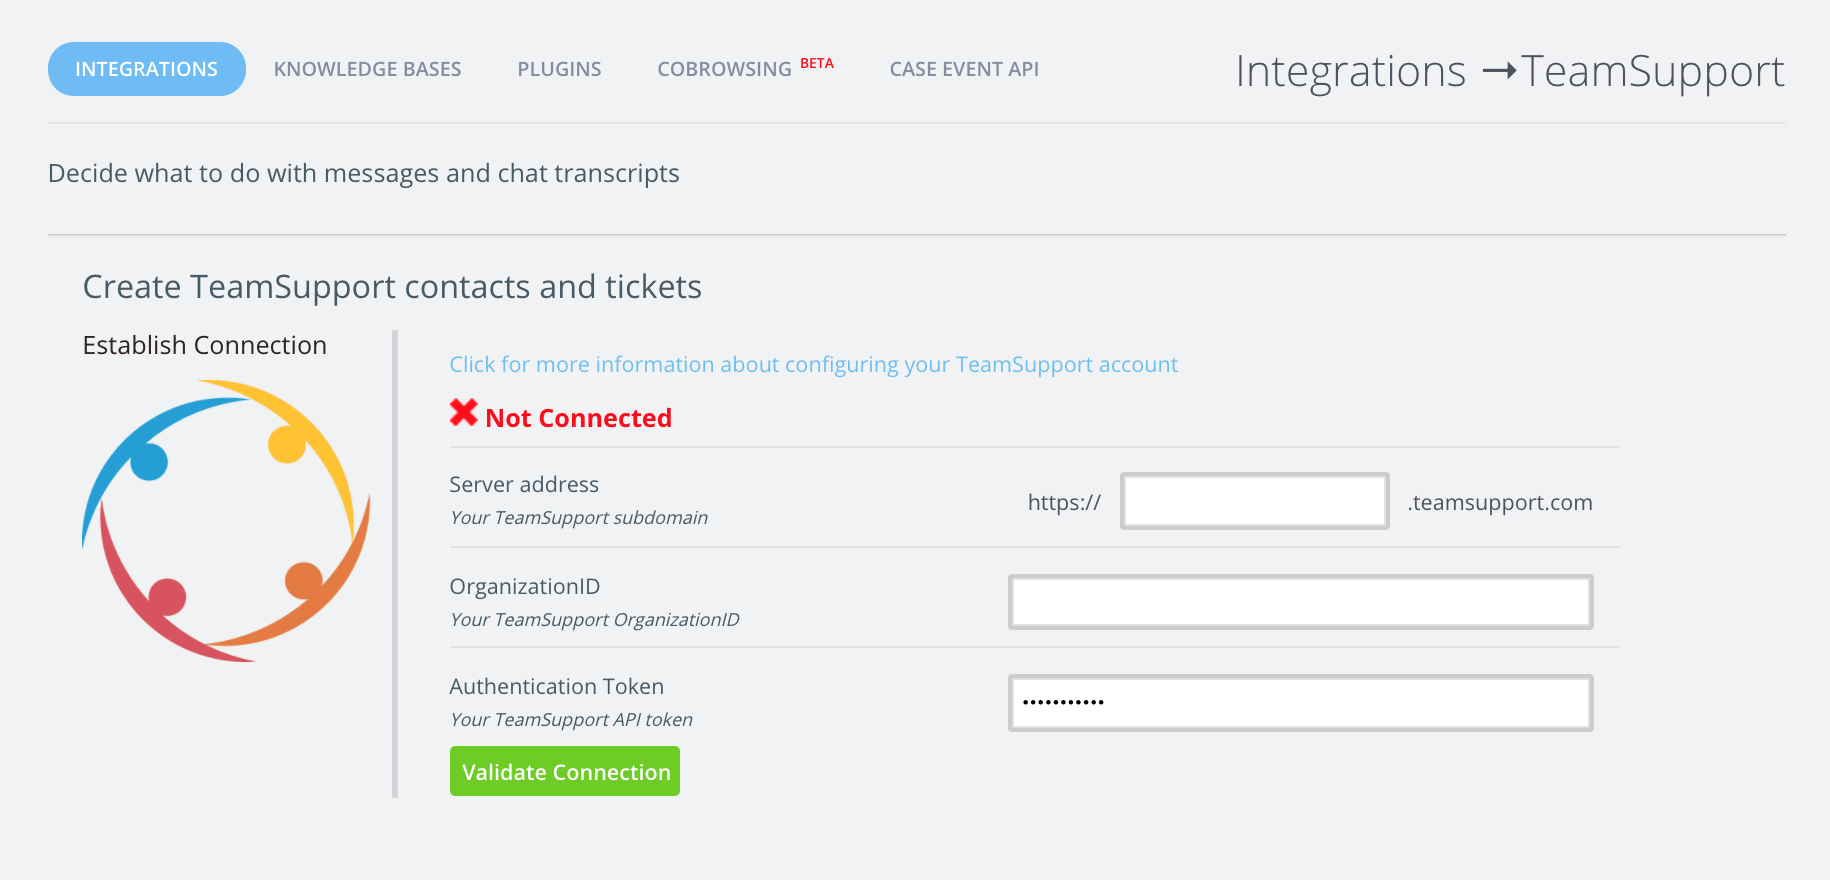
About the WhatsApp Business Channel Integration
Help your customers reach you with the scale of WhatsApp Business. Customers can now reach out to you via your WhatsApp Business number. Integrate your TeamSupport account with WhatsApp Business and bring all your conversations from WhatsApp Business directly into TeamSupport Messaging and Live Chat. You can then have customers interact with either chatbots …
READ FULL ARTICLE