Home > How to add or remove an agent
Categories: Getting Started | Chat Agent Docs | Tips & Tricks
(Last Updated On: August 26, 2022)
About This Article
The purpose of this article is to provide a comprehensive overview of how to add or remove an agent.
What are agents?
Agents are what we call the people who will be using SnapEngage chat to help your customers with their questions. They are the front line of customer service, so you want to set them up as best as you can!
Here we will go into detail on what settings you will be able to add to their profiles:
Getting Started!
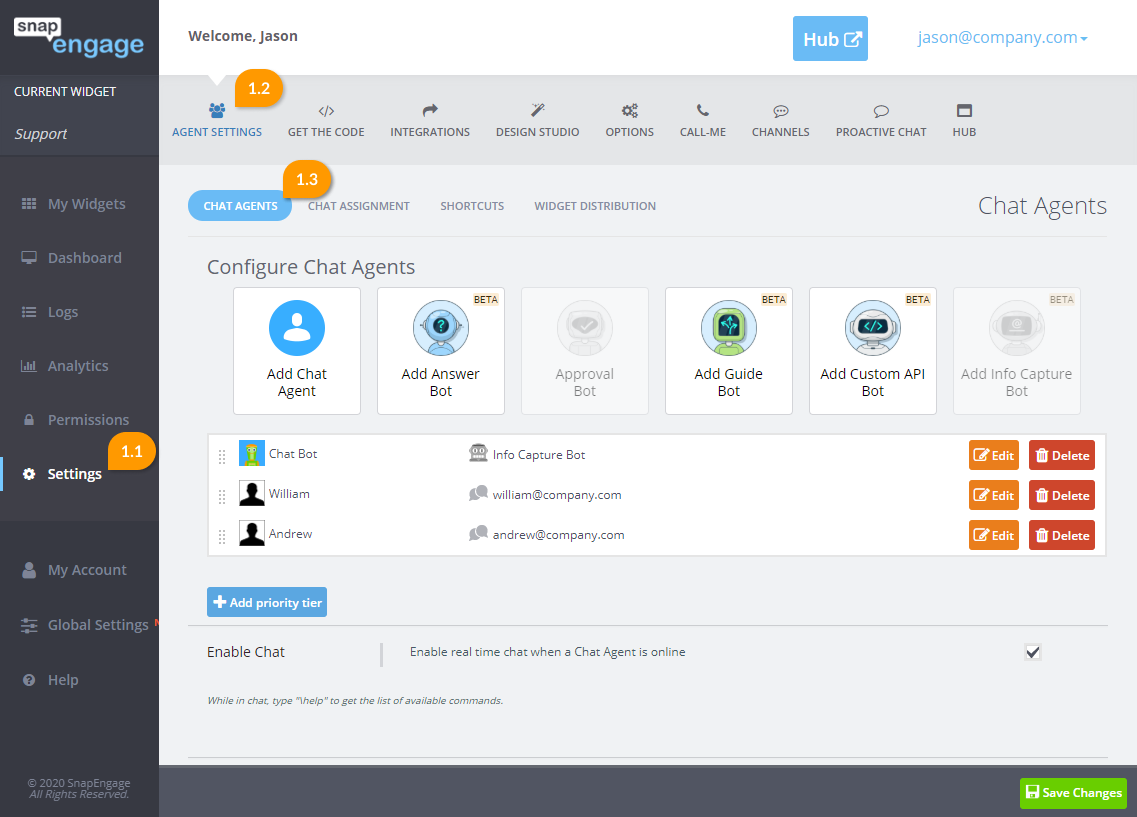
Go to Settings (1.1) > Agent Settings (1.2) > Chat Agents (1.3) as shown here:
In the Agent Settings tab, you will see the following:
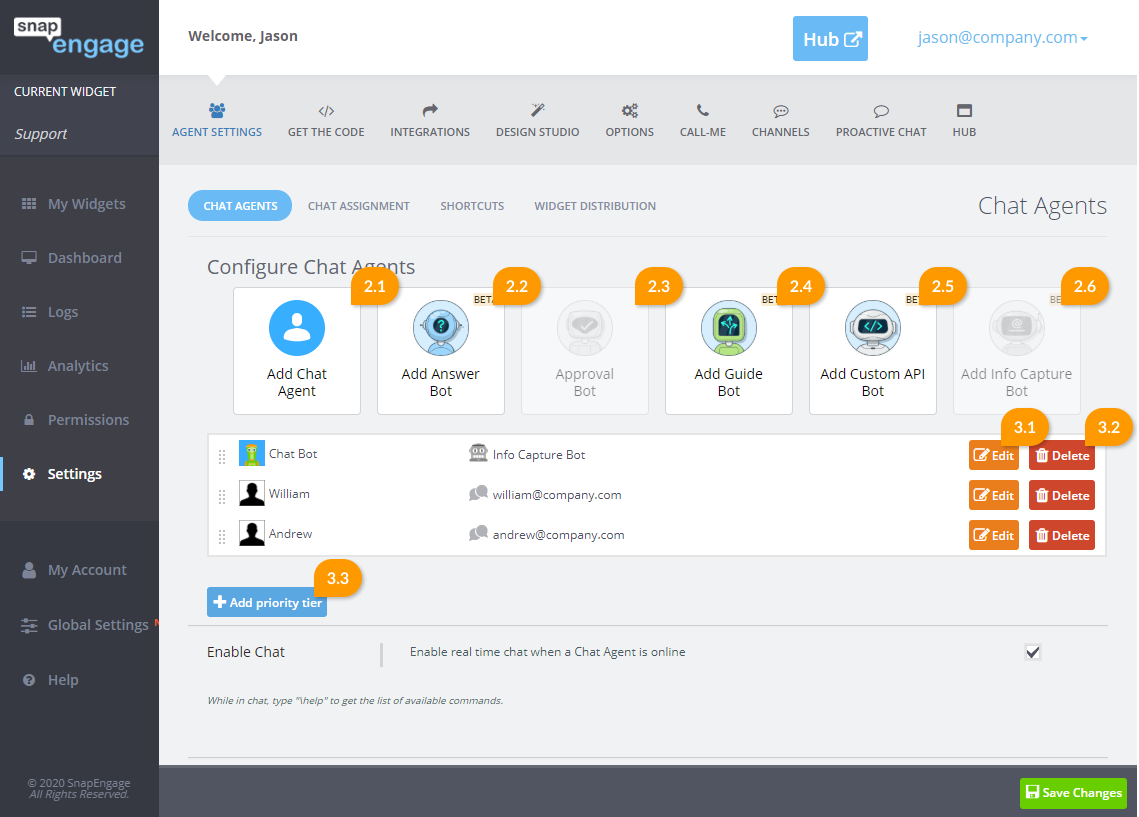
2.1. Add Chat Agent
To add and start configuring your agents, first click the “Add chat agent” button. Once you do that, a Popup Box will show up. Here, you can edit the agent’s account.
2.2. Add Answer Bot
You can click this button to add an Answer Bot. You can read more about the Answer Bot here.
2.3. Approval Checker
This is set under Settings > Agent Settings > Chat Assignment. You can read more about the Approval Checker here.
2.4. Add Guide Bot
You can click this button to add a Guide Bot. You can read more about the Guide Bot here.
2.5. Add Custom Bot API
You can click this button to add a Custom Bot API. You can read more about the Custom Bot API here.
3.1. Edit Agent
This will allow you to change the agent’s name, email or other relevant information. See the next section below for an in-depth look at the individual Agent Settings.
3.2. Delete Agent
This will permanently delete this agent from this widget. If the agent is added to other widgets also, you will also need to follow these steps in the other widget to remove them from there.
3.3. Add Priority Tier
For Professional Accounts or higher, you have the option of separating your agents in to tiers. You can read more about this here.
Editing an Agent
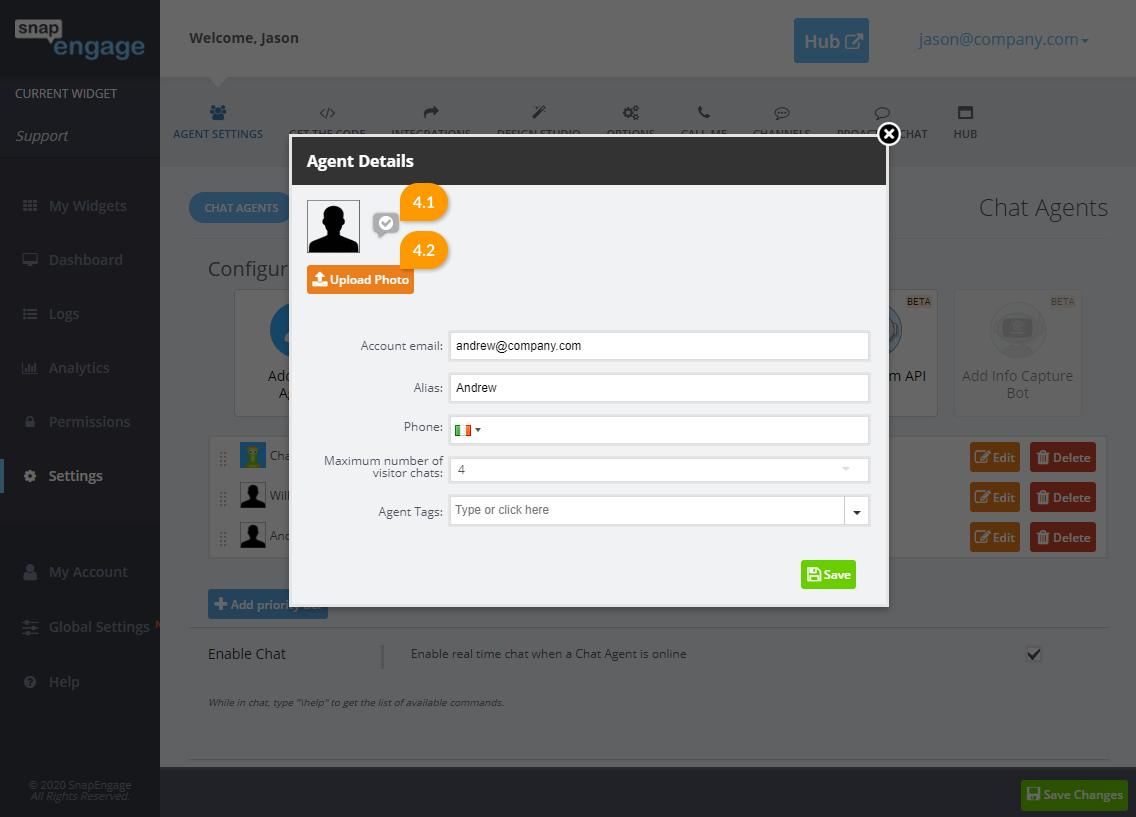
4.1. Changing agent’s status
You can change an Agent’s availability status by clicking the icon next to the agent image. This is especially useful if an agent has forgotten to log out, for example.
4.2. Update Agent Photo/Delete Agent Photo
This allows you to change the Agent’s visitor-facing photo. This photo will be shown to visitors when this agent answers a chat. If a photo has already been added, you will also see the option to delete the photo. Note: for agent avatar photos (agent photo ) the image minimum size requirement is 53×53 px. If you attempt to load a 55×34 px image it will not work. Additionally, the avatar gets converted to a png and resized to 512×512 when it’s uploaded in the agent dialog in the Admin Dashboard.
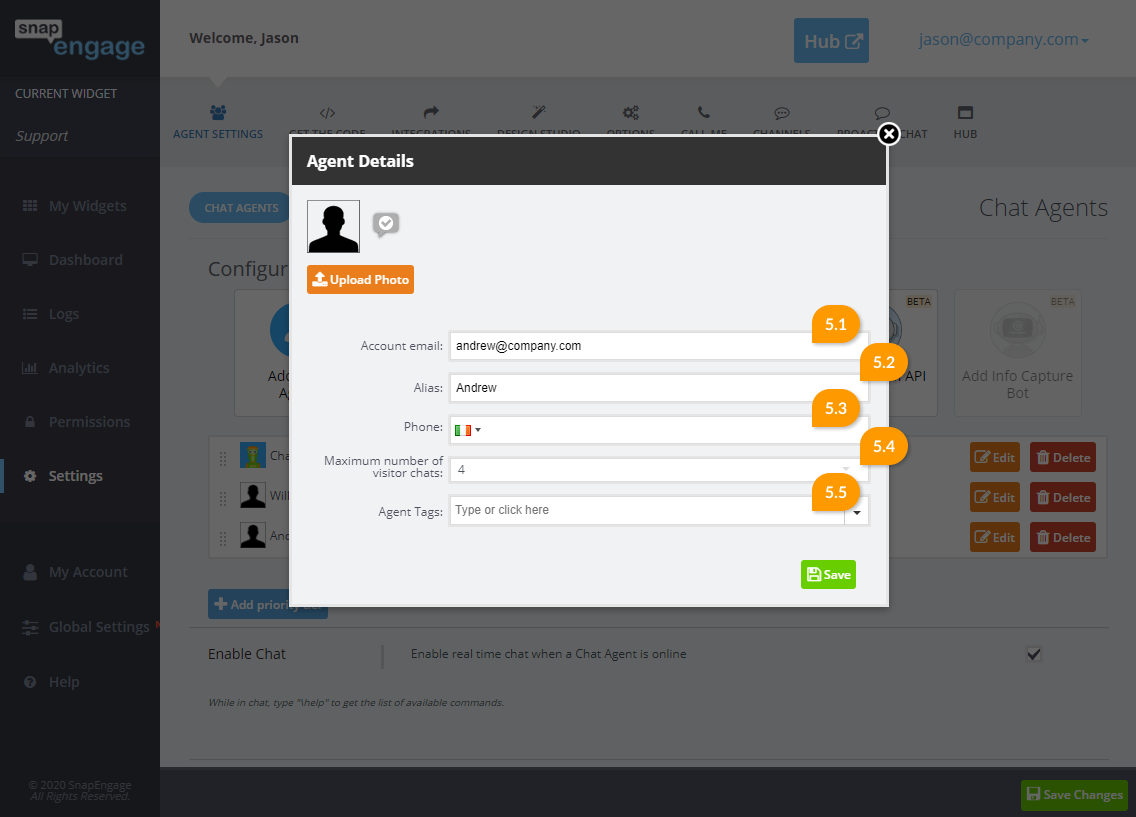
5.1. Enter Agent’s email address
Enter your agent’s email address. This must be a valid email and will be the one used by your Agents to access their SnapEngage account.
5.2. Choose alias
This name will be what your chat visitors will see, and it will also be in the Logs and in the Analytic Reports
Note: Please avoid using the same alias for more than one agent since this is bound to cause assignment inconsistencies. If you have two agents called Sophia, you could set them up using the first letter of their surname; Sophia L. and Sophia B. for example.
5.3. Enter phone number (optional)
If you wish to use our “Call Me” feature, your agents will need to have a phone number configured. This phone number will not be revealed to any Visitors. Calls placed by the “Call Me” feature will come from a system-based phone number with a 303 area code. For more info on this feature click here: Call Me.
CRM account
If you have an integration with a CRM, such as Desk, SalesForce and HubSpot, you can add your agent’s account information in the preset field (you’ll see in Mia’s Agent Profile above that there is a field for her Desk.com. The field is specifically for Desk.com because that is the integration for the widget selected at the time). Once you start typing their name the field will auto populate with their info.
5.4. Maximum Number of Visitor Chats
That is where you set up the number of chats each agent can have at the same time. You can set different numbers per agent, so that agents in training don’t have to handle too many at once. This number overrides the default number of chats per agent that you set in your general Agent Settings.
5.5. Agent Tags
Agent tags (available on Enterprise plans) is an advanced feature which enables routing of chats to the most appropriate agent based on skill-set, language, speciality, etc. You can see how to enable that here: Tags
Send password reset email
If an agent has already authenticated the account, you have the option of manually issuing a password reset link by clicking this button. If an agent hasn’t authenticated their account, you can instead resend the authentication email in place of the password reset email.
Then Save!
When you hit save, your Agents should receive notifications.
Agents will receive an email with instructions on how to log in. (Note: if there is already a SnapEngage account associated with this email address, the Agent will not receive this notification. They can simply log in with the credentials they are already using.)
Note: Deleting an agent from a widget does not delete them automatically from other widgets as well. To completely remove an agent from your account, you will need to manually delete them from all the widgets in which they might be configured.
Did you find this article helpful?

 (3 votes, average: 3.00 out of 5)
Published November 5, 2012