Home > How to integrate SnapEngage with Jira
Categories: Integrations & Plugins
(Last Updated On: )
About This Article
The purpose of this article is to provide a comprehensive overview of how to integrate SnapEngage with Jira.
SnapEngage can automatically send your chat transcripts and offline requests to Jira. These are the steps required to activate our Jira integration.
Step 1: Get your Keys from SnapEngage
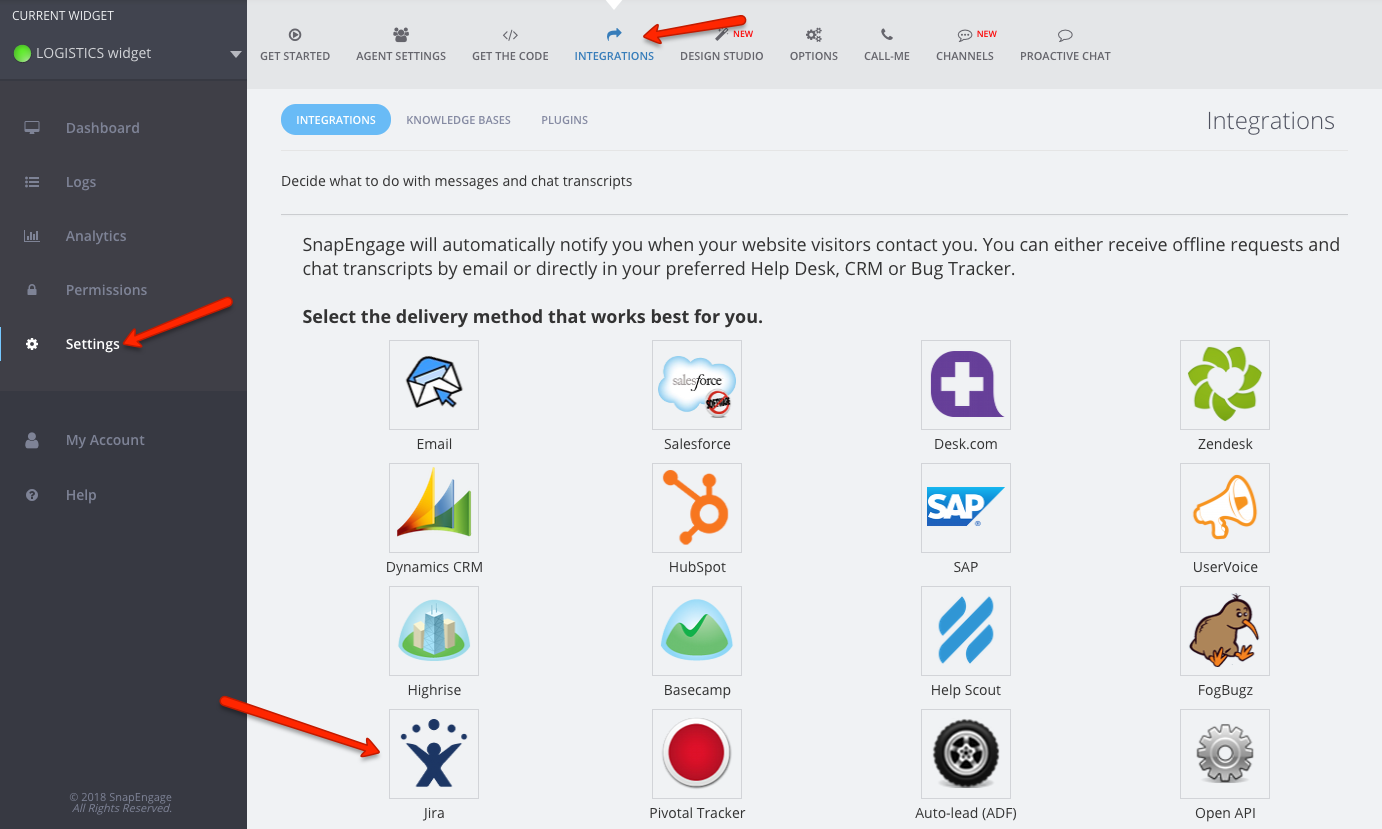
First, log into your SnapEngage Admin Dashboard
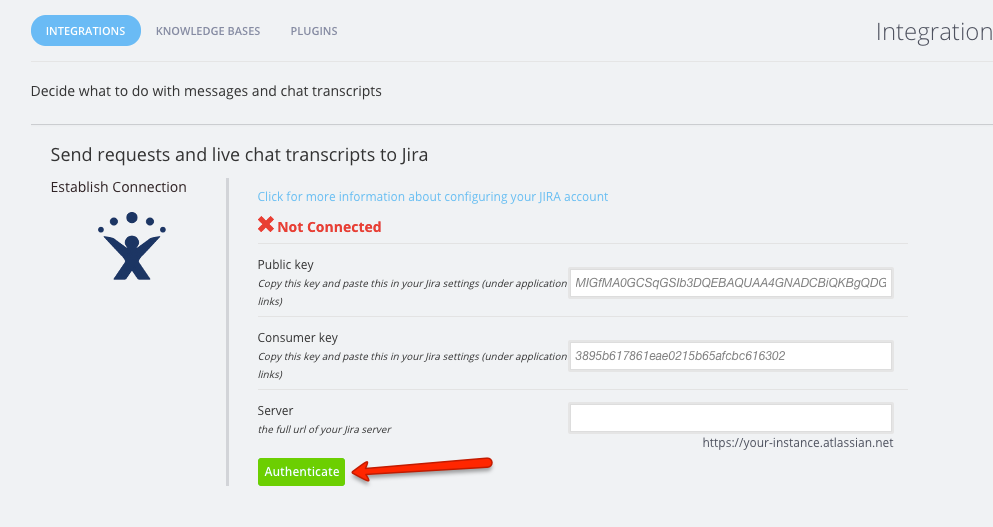
Click into the “Integrations” tab, then click on the Jira icon.
Enter your Public Key, Consumer Key, and Server Address.
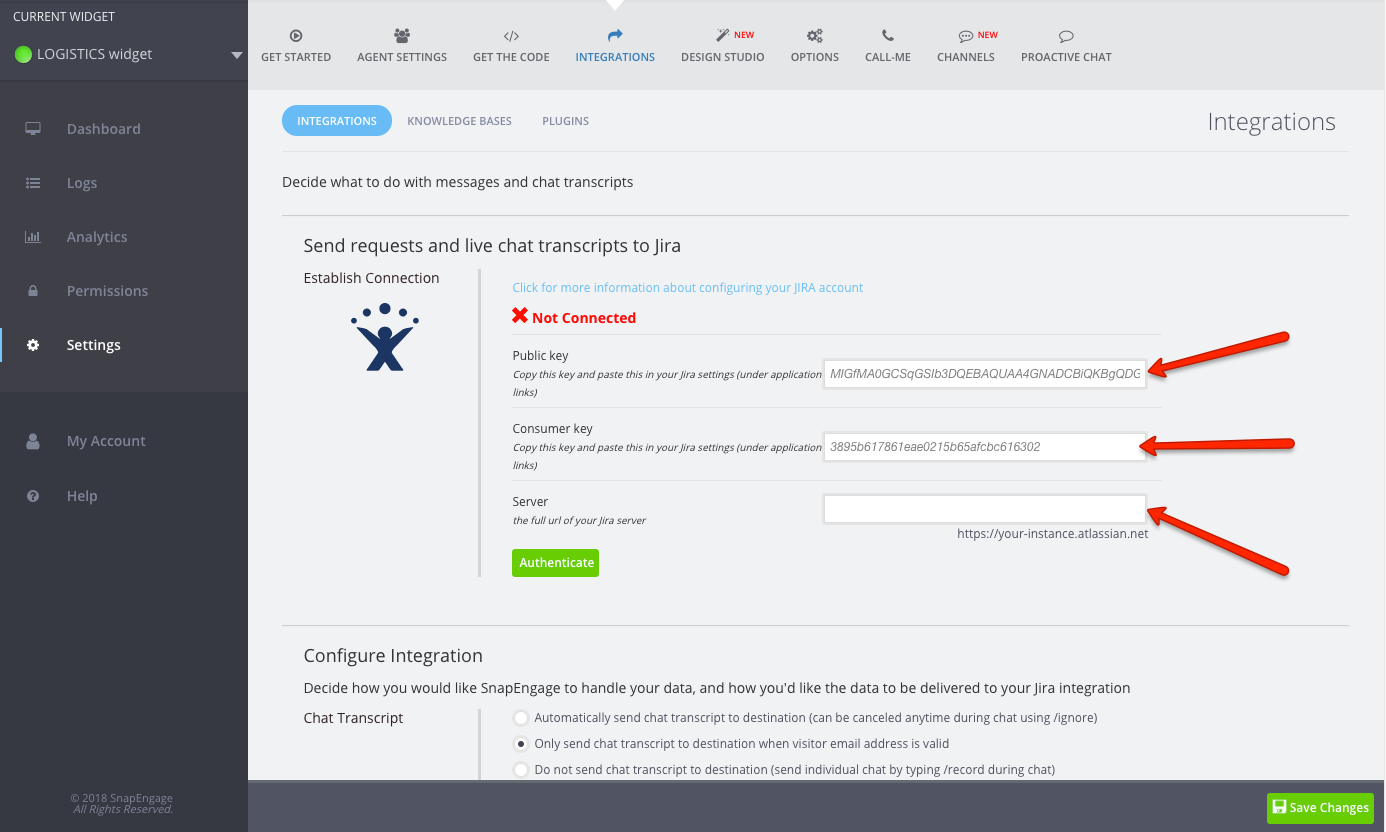
Don’t hit Authenticate just yet. For now, simply leave tab or window open while you proceed to Step 2.
Step 2: Create an Application Link in Jira
*Note: If you can’t find these settings in Jira, you might not have the “rights” to create application links. In that case, please speak to your Jira administrator. S/he can either create the link for you, or provide you the correct permissions.
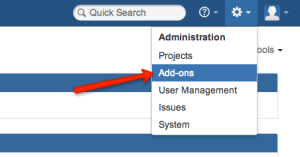
Log in to your Jira account, then click “Add-ons” under the Gear icon.
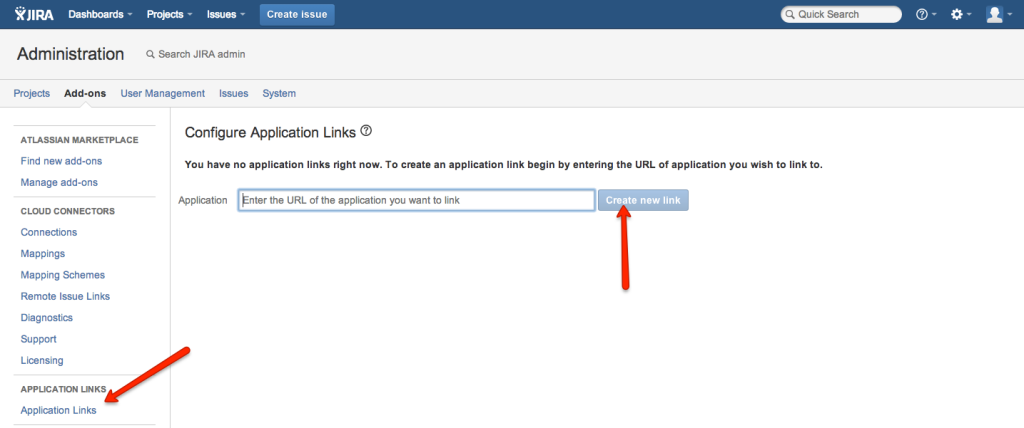
On the left hand side, click on Application Links, enter the URL as: http://www.snapengage.com then on Create new link.
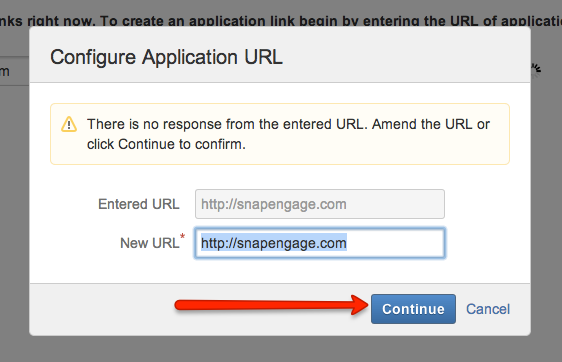
In the dialog, ignore the warning and click on Continue.
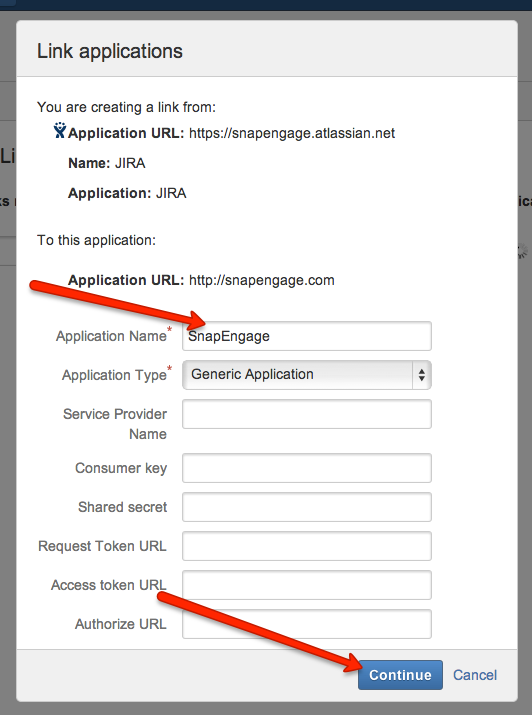
Set the Application Name to SnapEngage. Under the Application Type dropdown, choose Generic Application. Then press create
Step 3: Configure incoming authentication in Jira
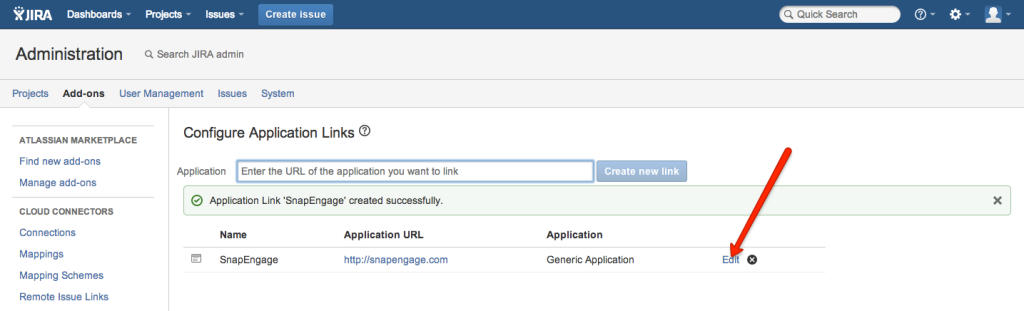
Now your new Application Link should appear on the Application Links page (as in the image below).
On the right side of the SnapEngage link, click Edit.
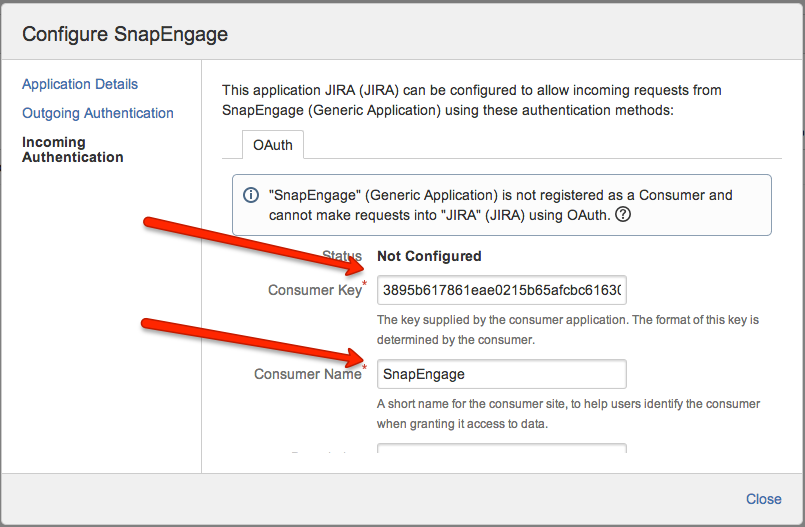
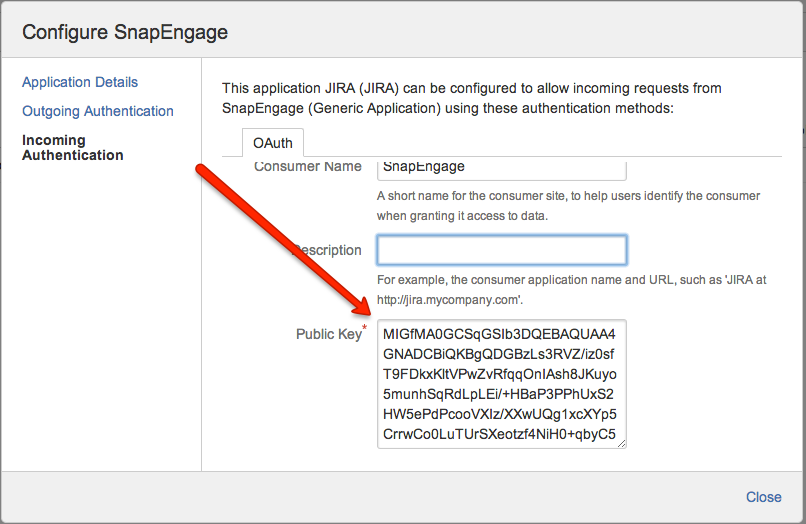
You will then see a popup window like the one below. Click on Incoming Authentication.
Switch back to your SnapEngage Integrations page and copy your Consumer Key. (Clicking on the text field will copy it to your clipboard.) Switch back to your Jira configuration and paste the Consumer Key into the appropriate input. For the Consumer Name, enter SnapEngage.
Scroll down the Incoming Authentication window a bit and you’ll see a Public Key field. Do the same thing with the Public Key that you did with the Consumer Key: Copy the Public Key from SnapEngage and paste it into the appropriate field in Jira.
Step 4: Setup the SnapEngage Jira integration
Now, back on the SnapEngage side: If you haven’t already, enter the address of your Jira server.
Then press Authenticate.
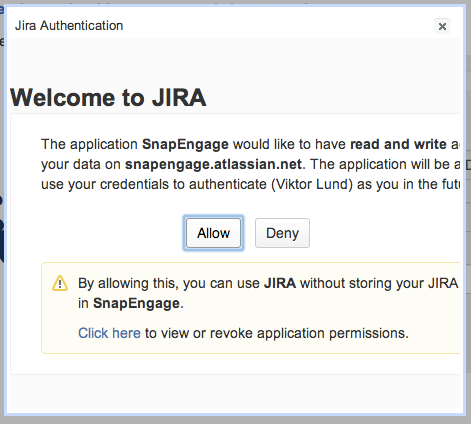
Now you should see a popup dialog. Jira will ask for your permission to give SnapEngage access. (It may ask you to login to your Jira account first.)
Choose Allow.
Step 5: Set up your Integration options
You can stop here or you can go to the Configure Integration section.
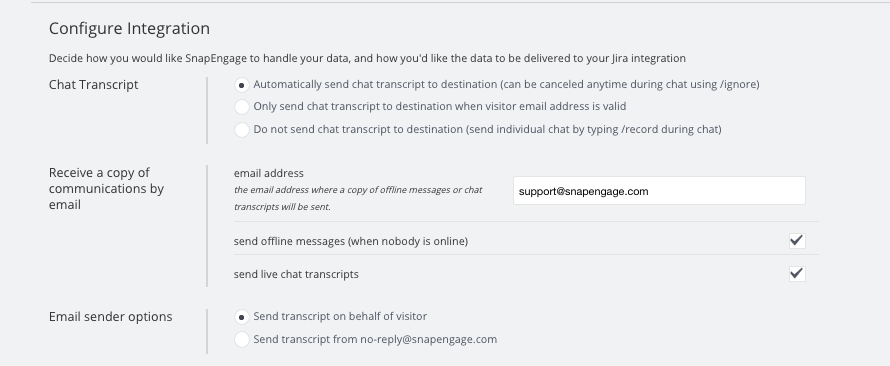
The “Configure Integration” section will let you choose how you would like the data to be sent to your email integrations. You will see “Send chat transcripts to your Agent’s email” which allows each agent to receive their own chat transcripts to their own emails (Conversations Hub agents only).
The Chat Transcript area allows you to choose which transcripts are emailed to you. You can elect to receive all, some (if the visitor provides a valid email), or none of the transcripts.
Don’t forget to click Save.
The next section is where you will do any custom mappings you would like. You can select from the different source types – SnapEngage, JavaScript, Text, or Operator Variables.
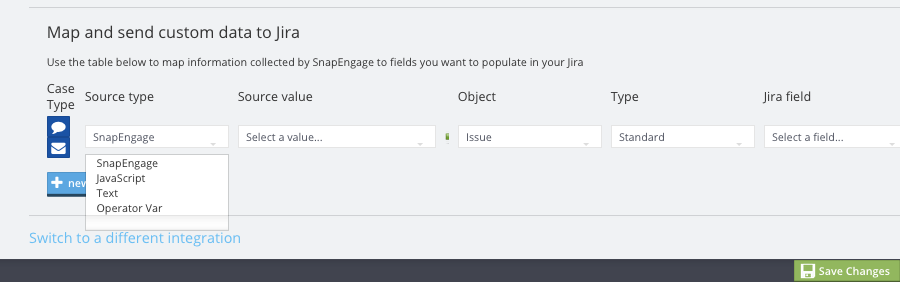
Now, enter the Source Value you want to send to Jira.

The next 3 items will be where they go into your Jira. This will need to be determined by you as to where you want to see the data.

Did you find this article helpful?


 (8 votes, average: 3.63 out of 5)
Published July 1, 2013