Home > Permissions
Categories: Security
(Last Updated On: )
About This Article
The Permissions tab in the Admin Dashboard gives you extensive control over adding sub admins and the type of vewing permissions and abilities allowed by sub admins. This article reviews all the options in this menu.
When you purchase sub-admins, the Permissions tab will appear for you, and you will be able to configure them there. It allows the account owner to create different administrator roles for team members granting for them different levels of access in the account.
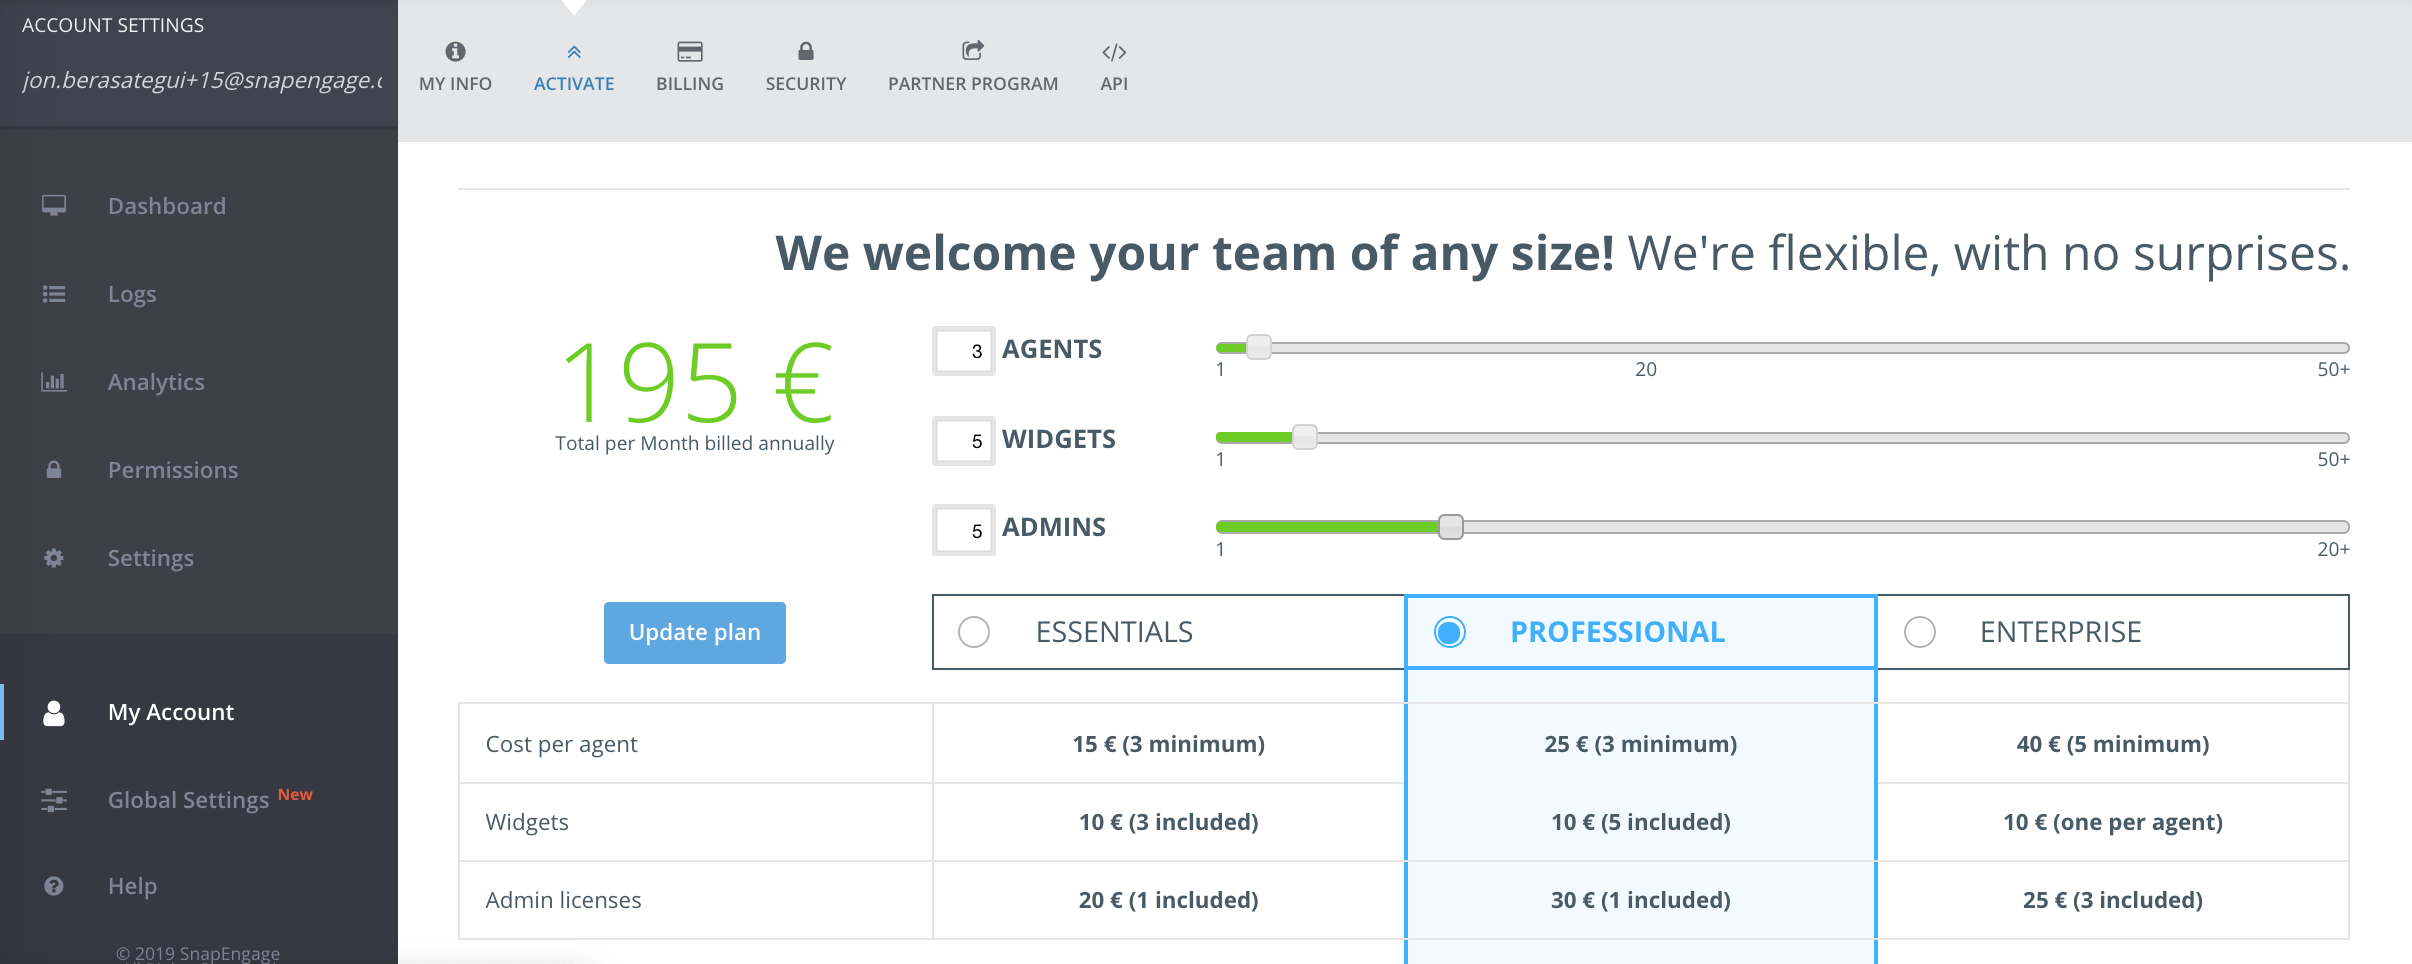
This feature is only available on Professional and Enterprise plans and is accessible when you purchase at least 1 subadmin.
Under My account – Subscription, you will be able to add additional admins :
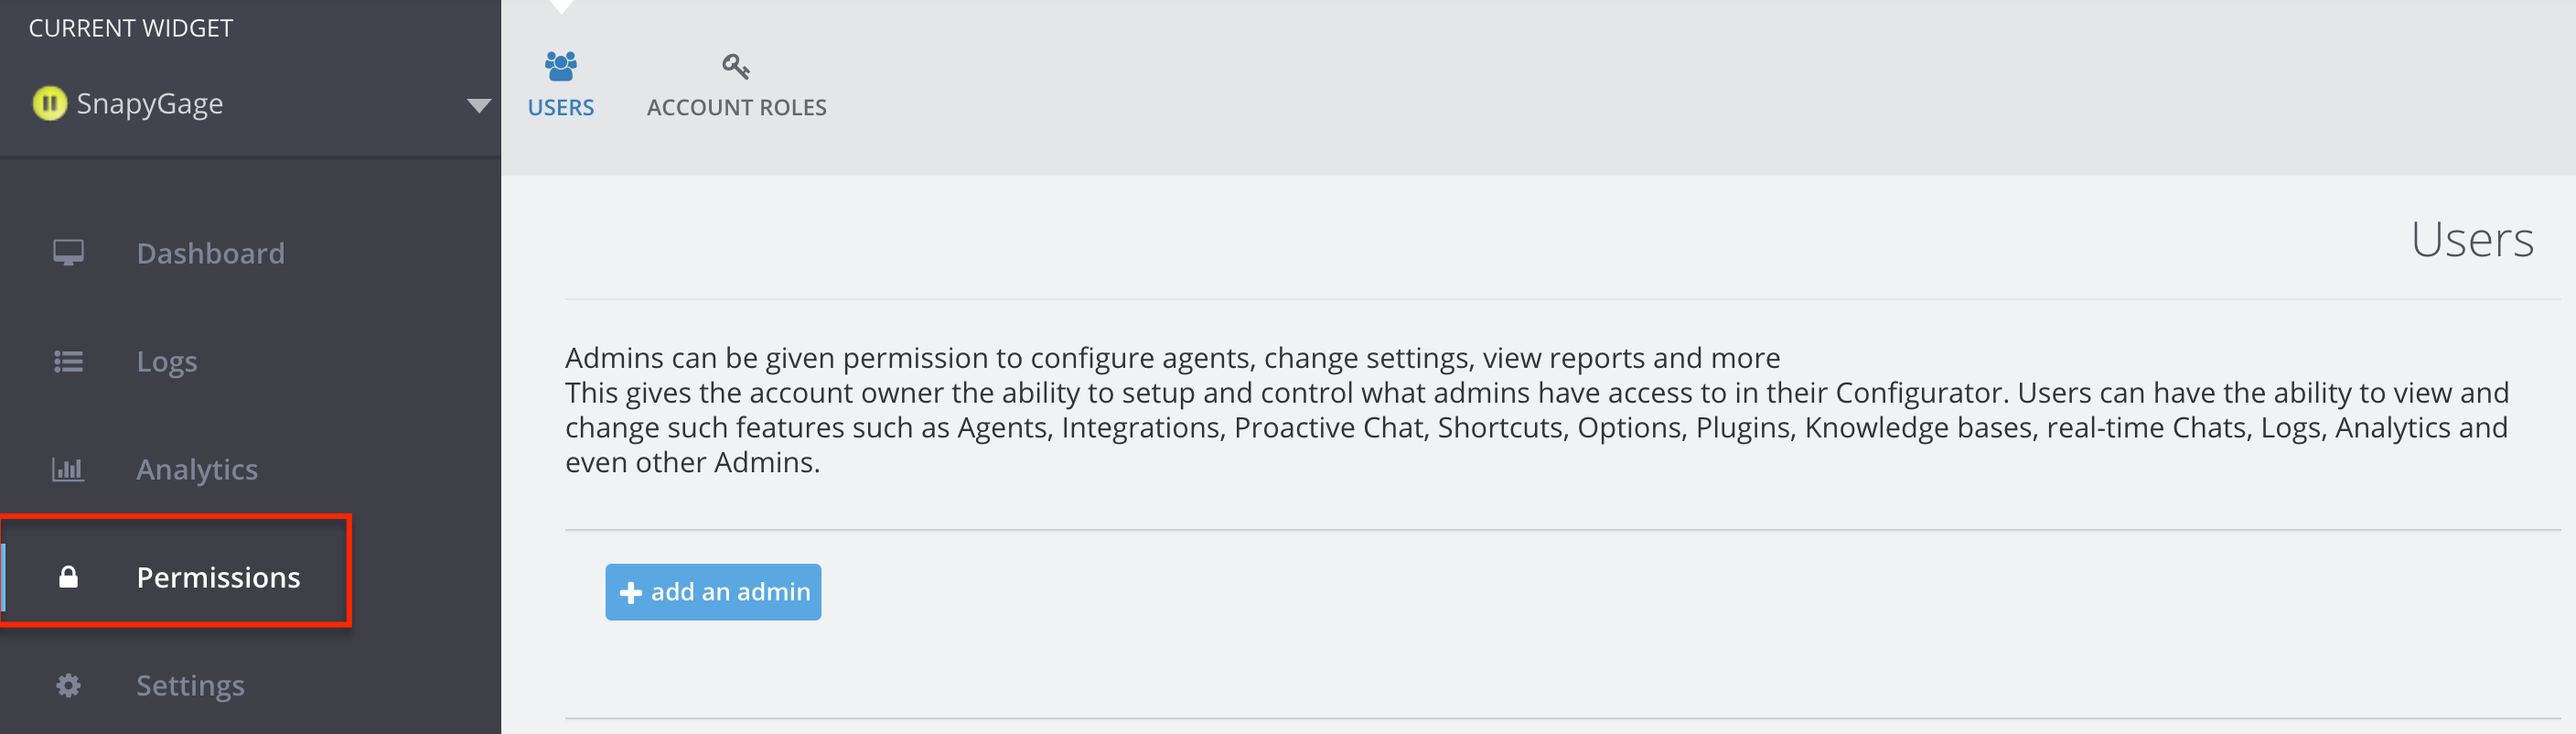
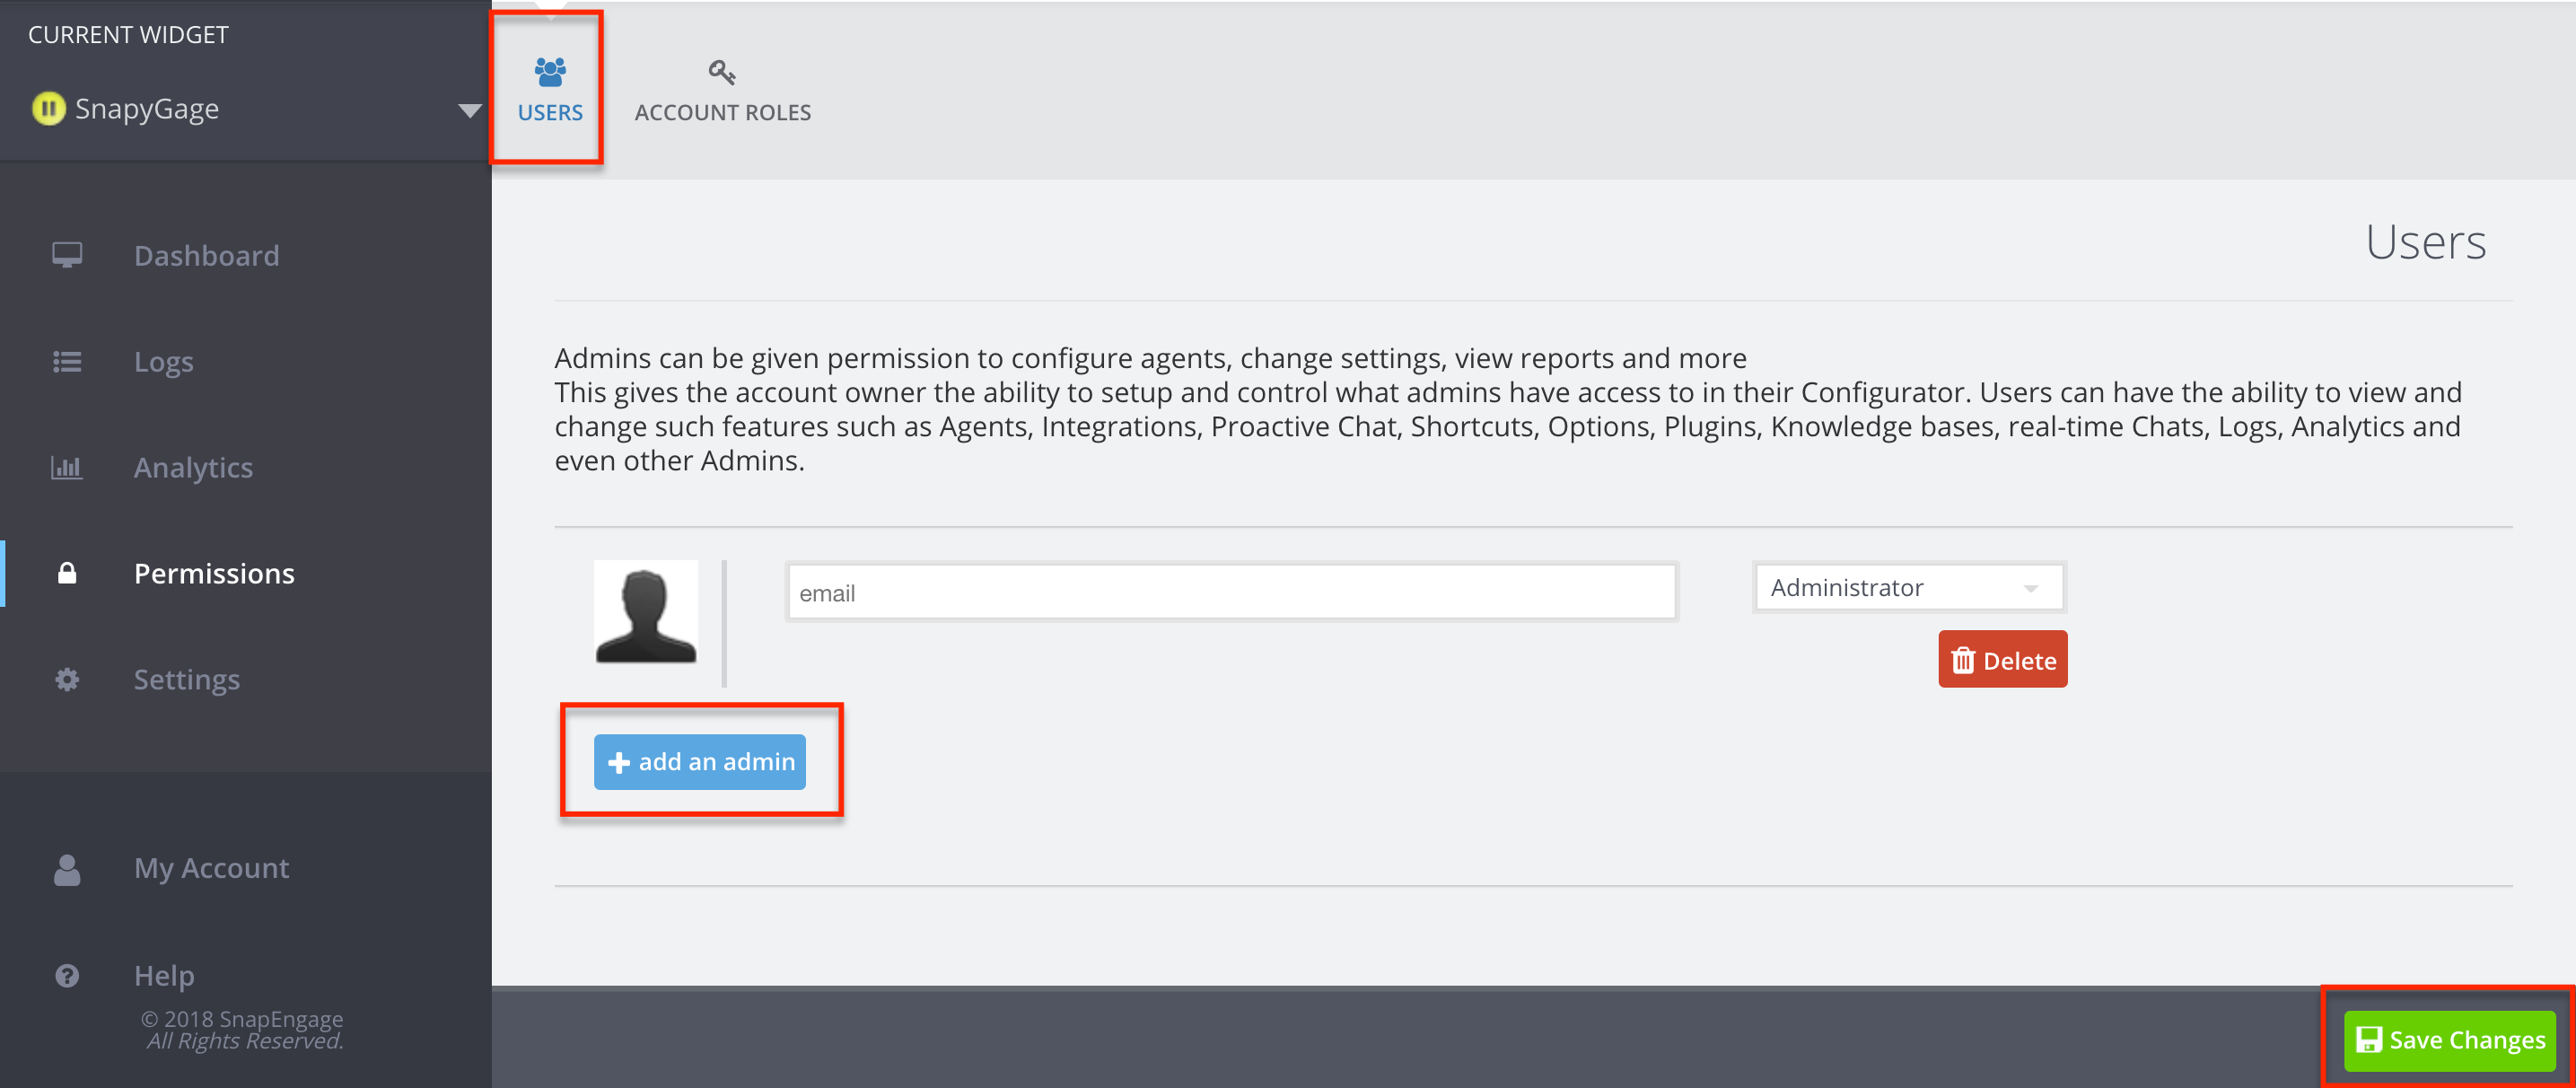
Once you have added sub-admins, you will be able to see the Permissions tab on the left had-side of the admin dashboard.
Account Roles
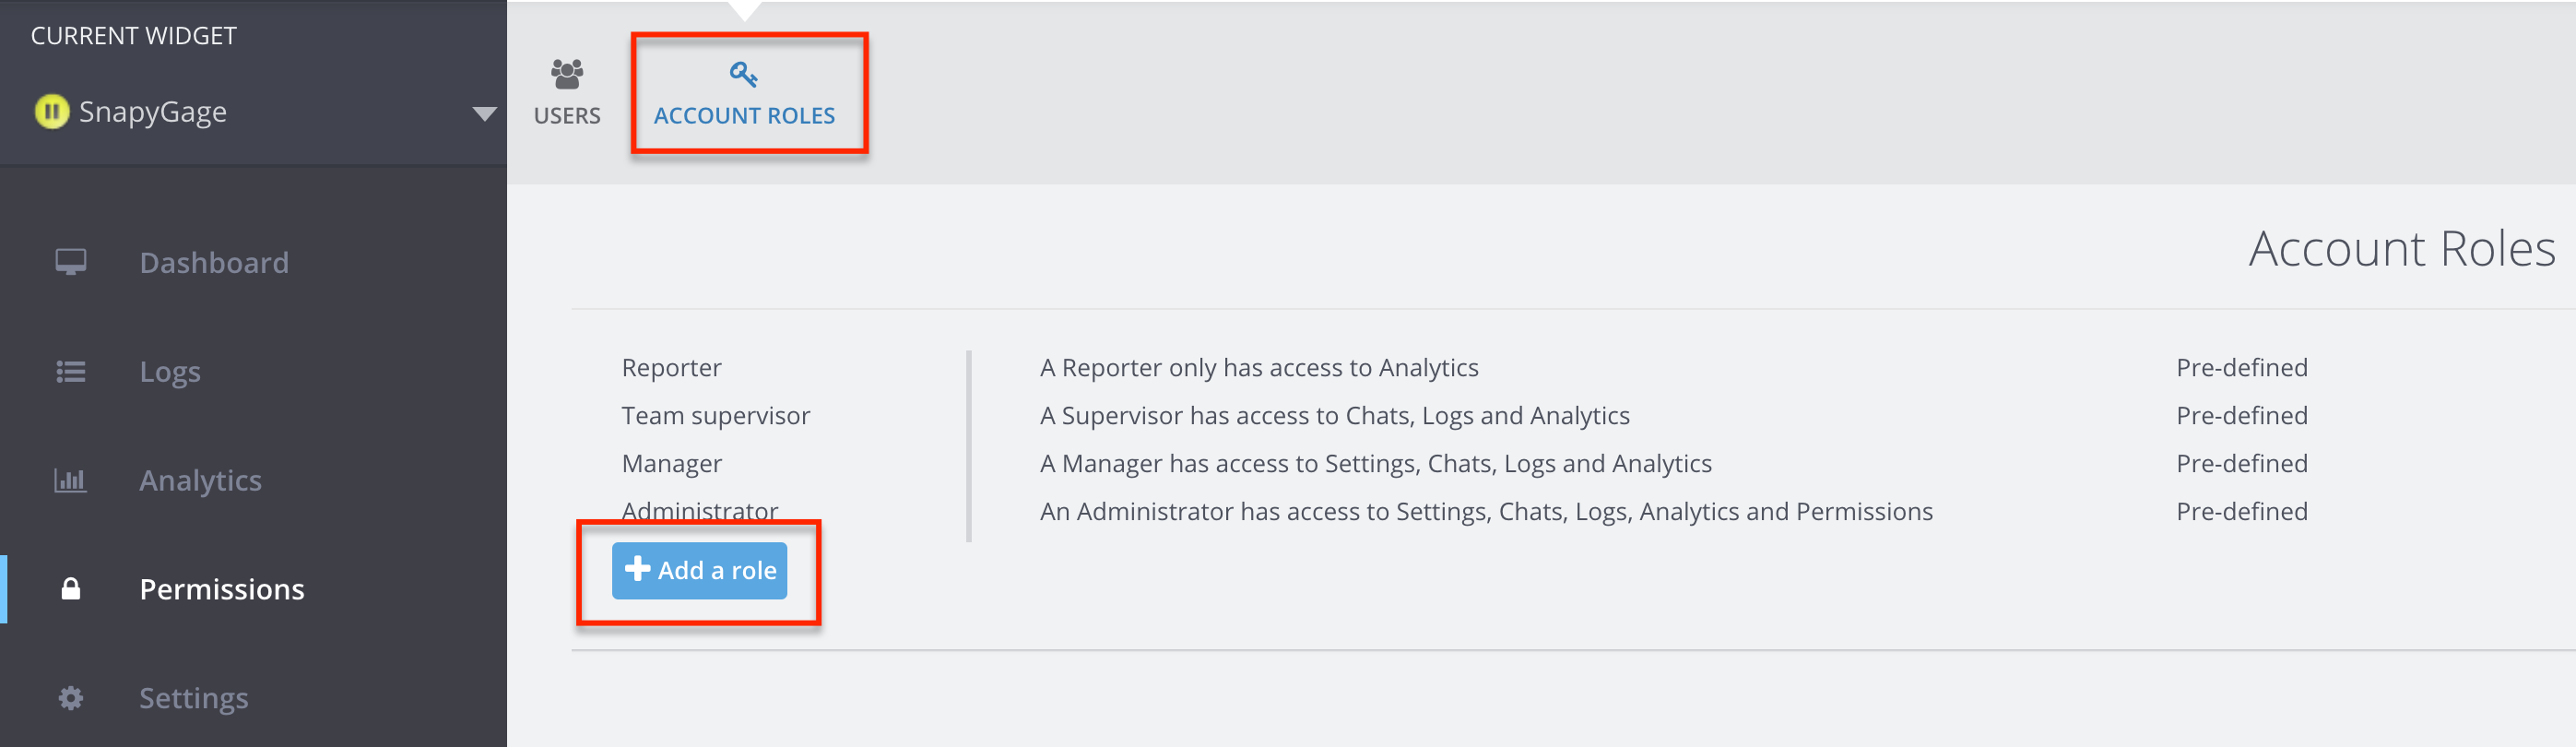
As the account owner you can either choose among 4 pre-defined account roles or you can create new, custom ones. The account roles reference what the assigned user is able to access in your SnapEngage account.
Pre-Defined Roles
The pre-defined roles that you can choose from are:
Administrator: – Settings – Chats – Logs – Analytics – Permissions
Manager: – Settings – Chats – Logs – Analytics
Team Supervisor: – Chats – Logs – Analytics
Reporter: – Analytics
Specific Roles
If you want a specific role that is not among the pre-defined options, you can create this under the “Account Roles” tab by clicking on the “+ Add a role” button. You can then name the role and select exactly which parts of the Admin Dashboard will be accessible for users with this role.
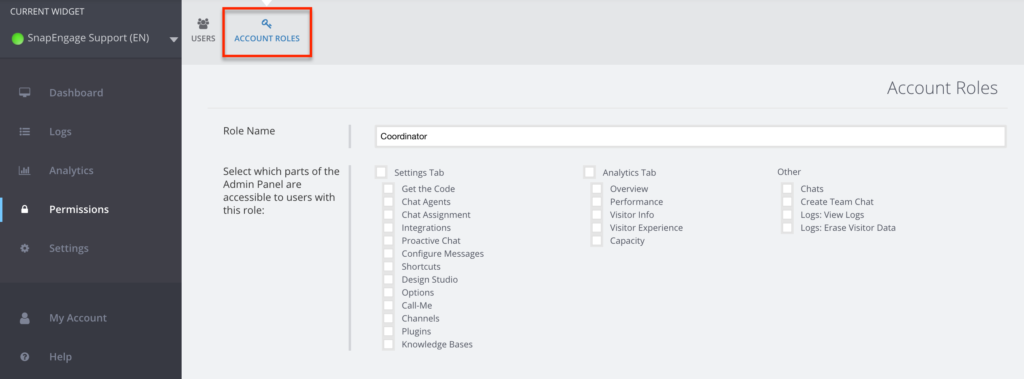
After you have created the new role, please do not forget to click on “Save changes”.
Manage Permissions
To add an administrator click on “+add an admin” and select the permission level you would like to grant them. You will need to input their email address and click the “Save changes” button in the bottom right.
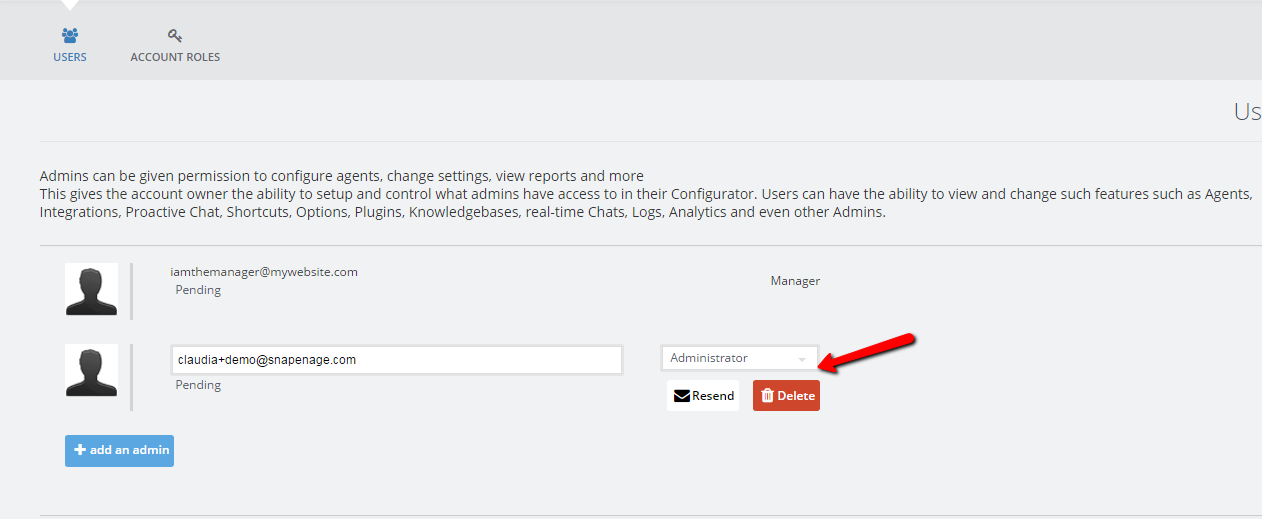
After you add an administrator, you will notice their status mentioned below their email address. The status could be either “Active” or “Pending”.
Active means that the user already has a SnapEngage account and password
A Pending status indicates that the user hasn’t yet created their SnapEngage account. Ask them to check their inbox and follow the directions on how to create a user account. Once that has been done and they log in for the 1st time Pending will change to Active. Sub-admins will see the type of account as “free” at the top-right.
To make changes to the permissions of a user, you simply click on the user role. You will then be displayed with the drop-down menu to change the current permission. You can also remove a user from the list and even resend the email invite if needed. As always, make sure to click “Save changes” when you are done making changes!
Note: We don’t have a way to distinguish between new and old custom roles. Deleting one won’t affect the other and if you try to delete a role that has a user assigned to it the system will warn you. To help determine who is assigned to which role you could rename the roles to something like “Role 1” and “Role 2”.
Did you find this article helpful?

 (10 votes, average: 3.10 out of 5)
Published April 10, 2013