Home > How to integrate SnapEngage with Basecamp
Categories: Integrations & Plugins
(Last Updated On: )
About This Article
The purpose of this article is to provide a comprehensive overview of how to integrate with Basecamp.
SnapEngage can automatically send your chat transcripts and offline requests to Basecamp. These are the steps required to activate our Basecamp integration.
*When SnapEngage sends chat transcripts and offline requests they will be associated with the email address on the account which authorized SnapEngage. To be able to distinguish what was automatically created by SnapEngage and what was manually created by your employees, it might be a good idea to register a new account with Basecamp specifically for use with SnapEngage.
Step 1: Authenticate Basecamp
First, log into your SnapEngage Admin Dashboard
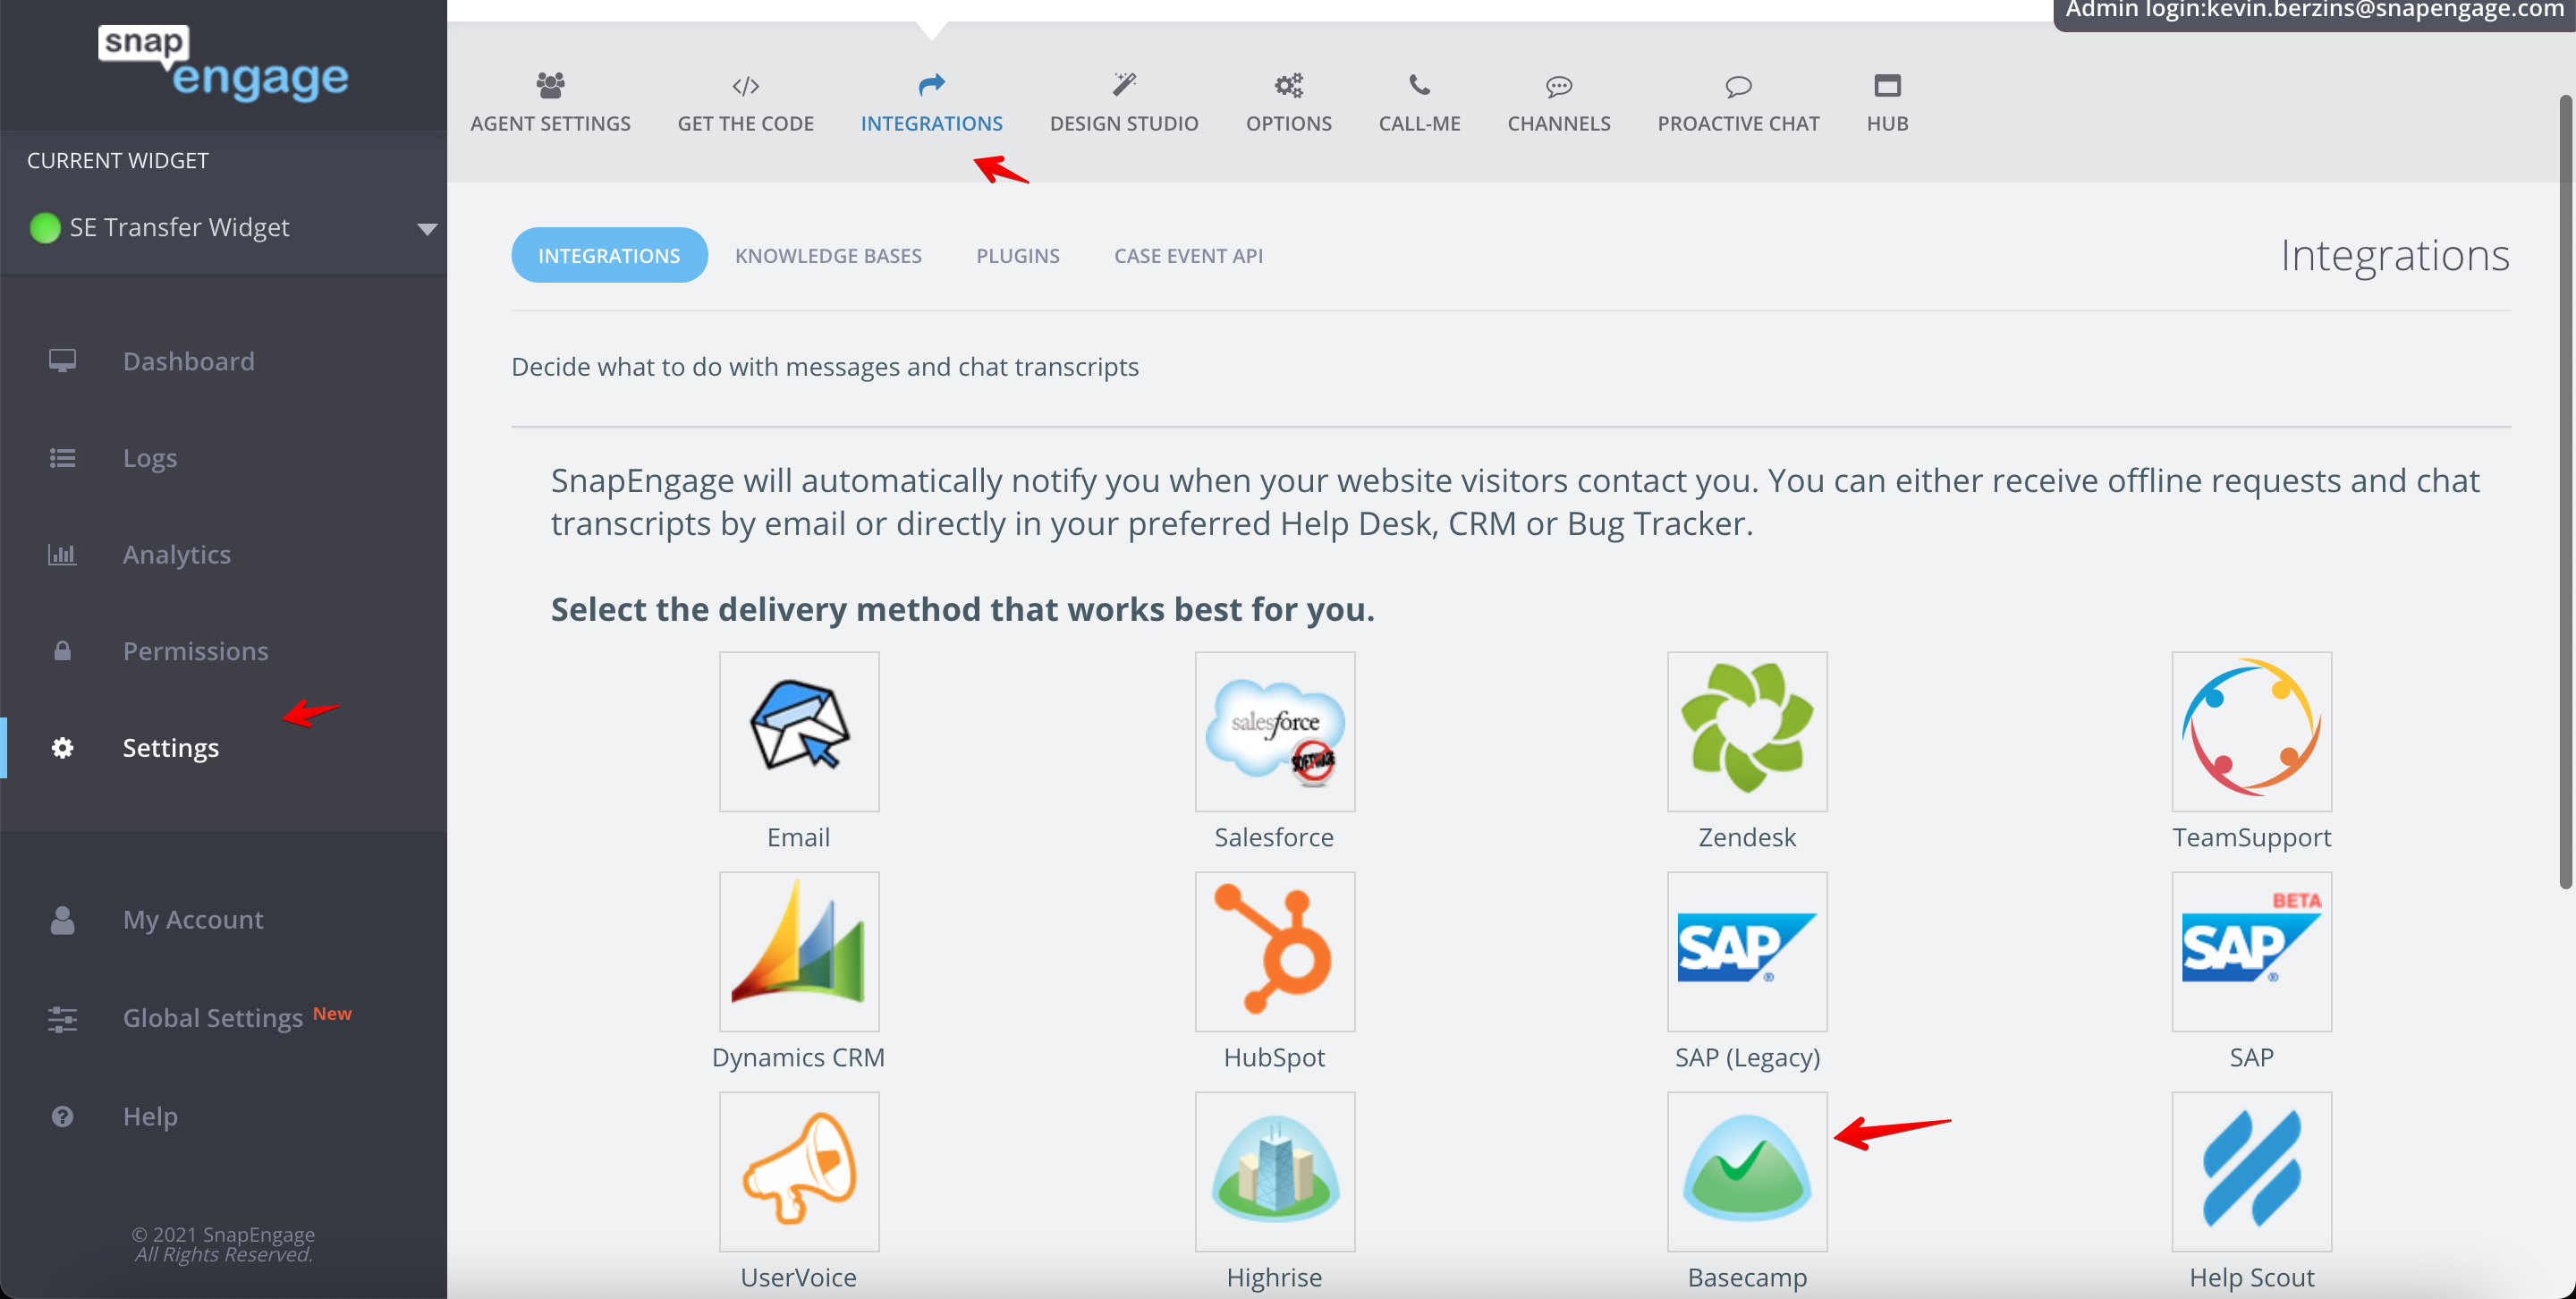
Click into the “Integrations” tab, then click on the Basecamp icon.
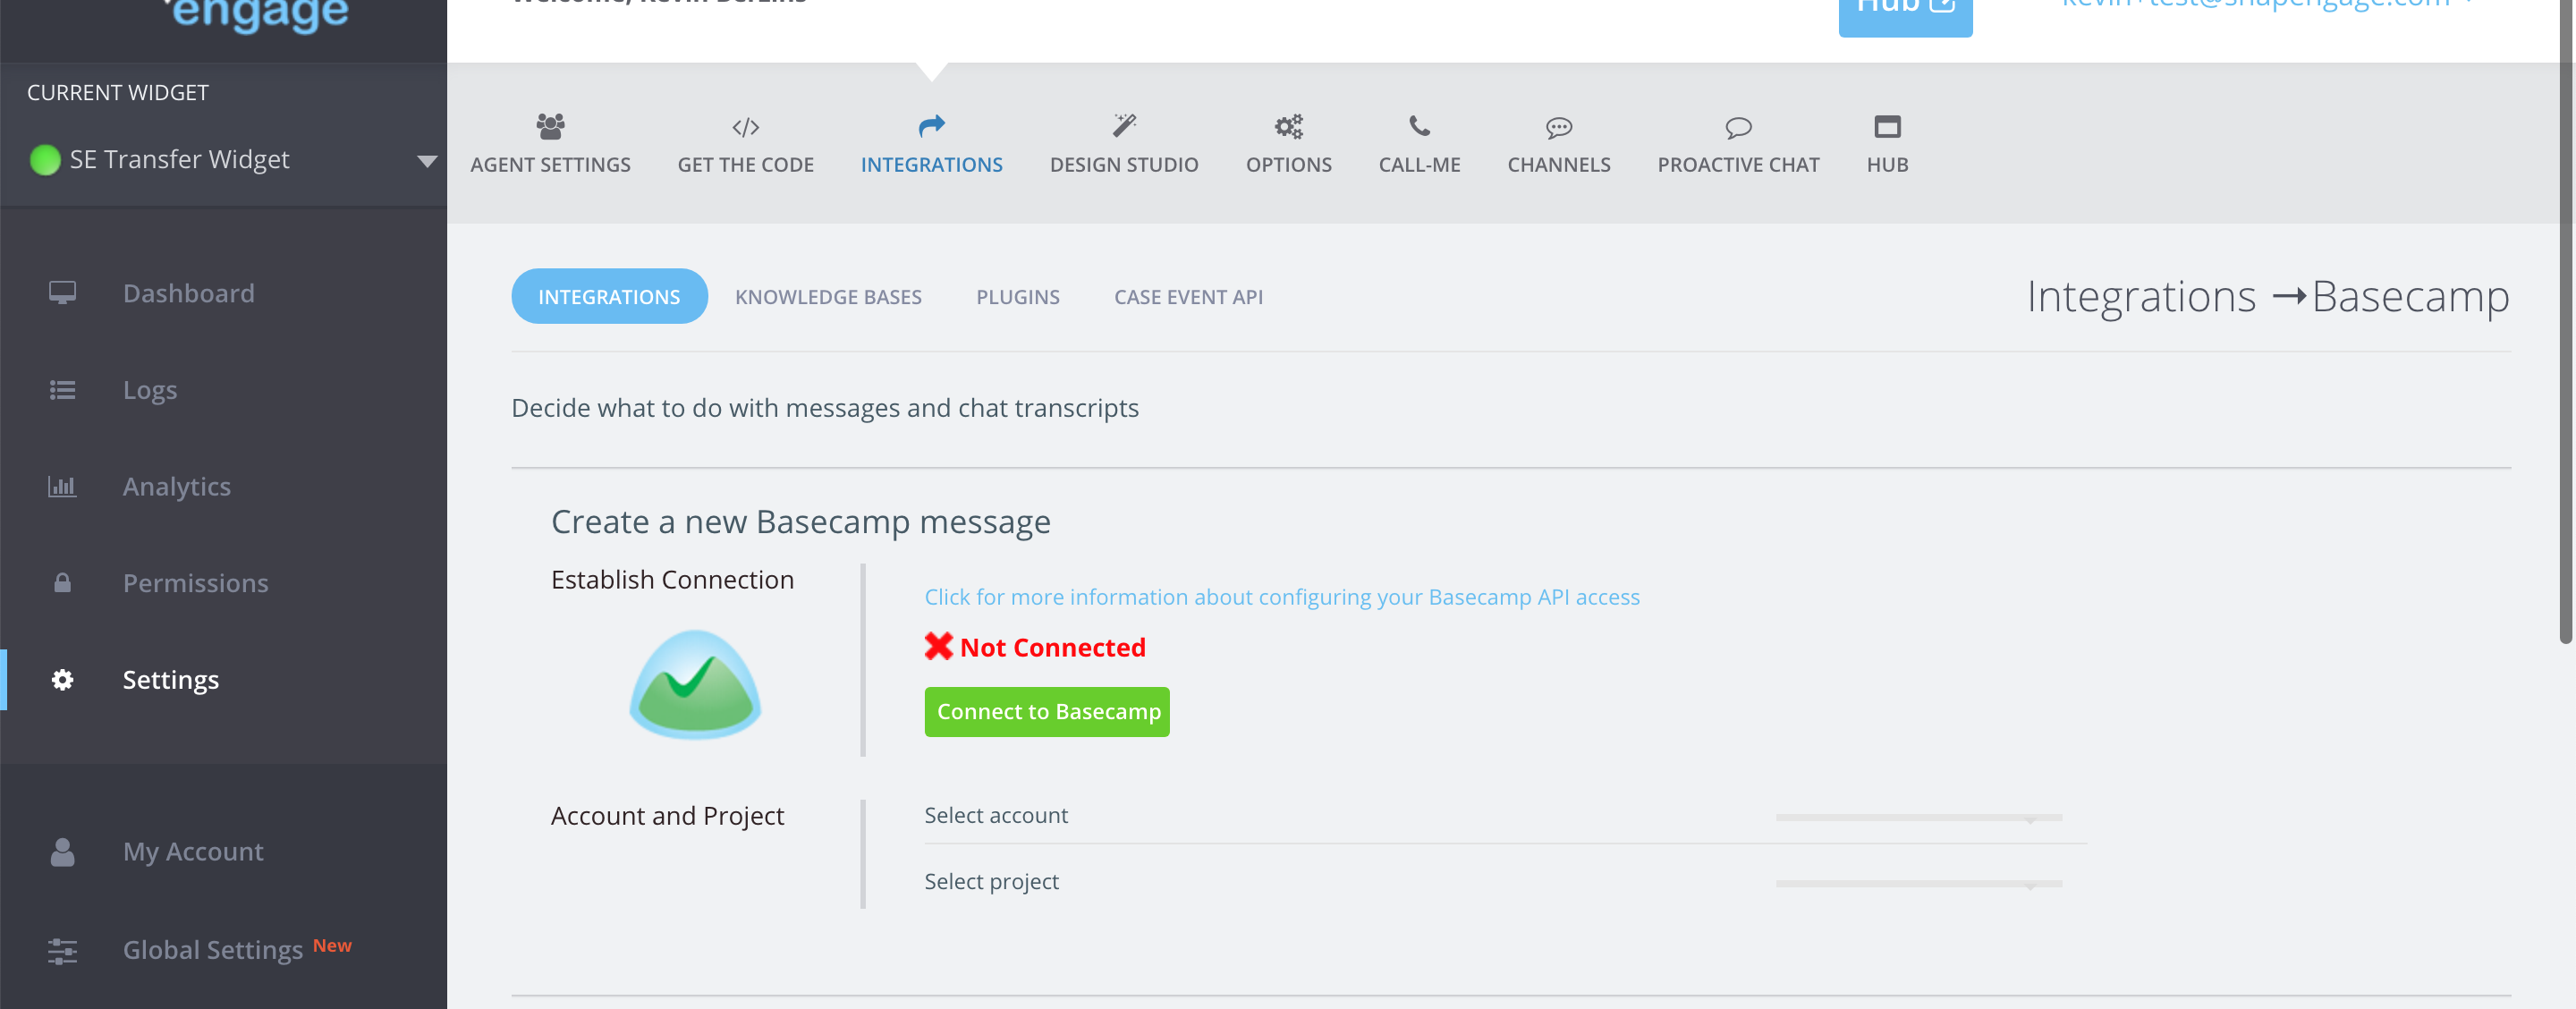
Click on “connect to Basecamp”.
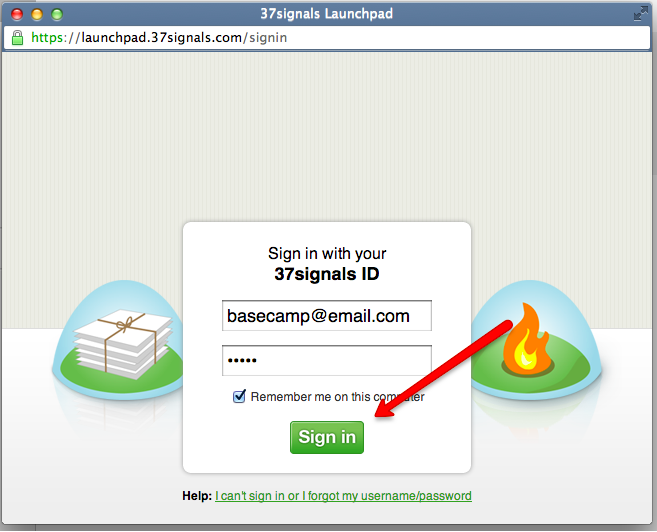
A pop-up window will appear, asking you to log into your Basecamp account.
(If you do not see a pop-up like this, please make sure your browser has not blocked the window. If that is the case, please allow the pop-up to open.)
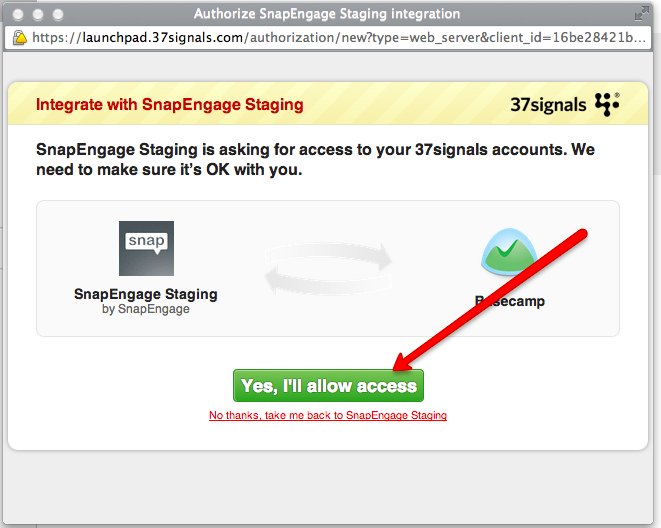
The next screen will ask you to give SnapEngage permission to access your Basecamp account. Please click, “Yes, I’ll allow access.”
Step 2: Choose Basecamp account and project
Now you should see that SnapEngage is connected to your Basecamp account — look for the green check-mark!
Now you need to choose which Basecamp account you want to use. Then choose which Basecamp project you want SnapEngage to use — this project is where SnapEngage will post your chat transcripts or offline requests.

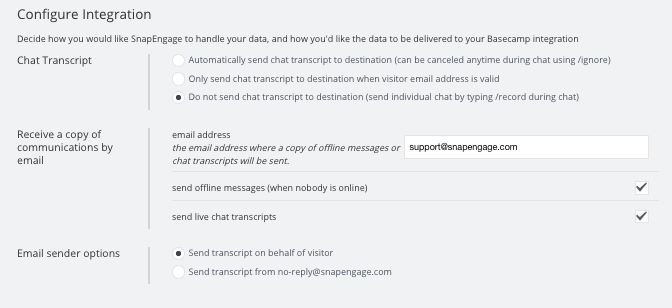
Select how you would like your chat transcripts to be sent (Automatically, only with valid visitor email address, or to not send). Next, you will select if you would like the email to be sent on the visitors behalf or from SnapEngage.
Save!
Published July 24, 2013
