Home > SnapEngage Live Chat WordPress plugin
Categories: Integrations & Plugins
(Last Updated On: )
About This Article
The purpose of this article is to provide a comprehensive overview of how to use the WordPress Plugin to integrate with SnapEngage.
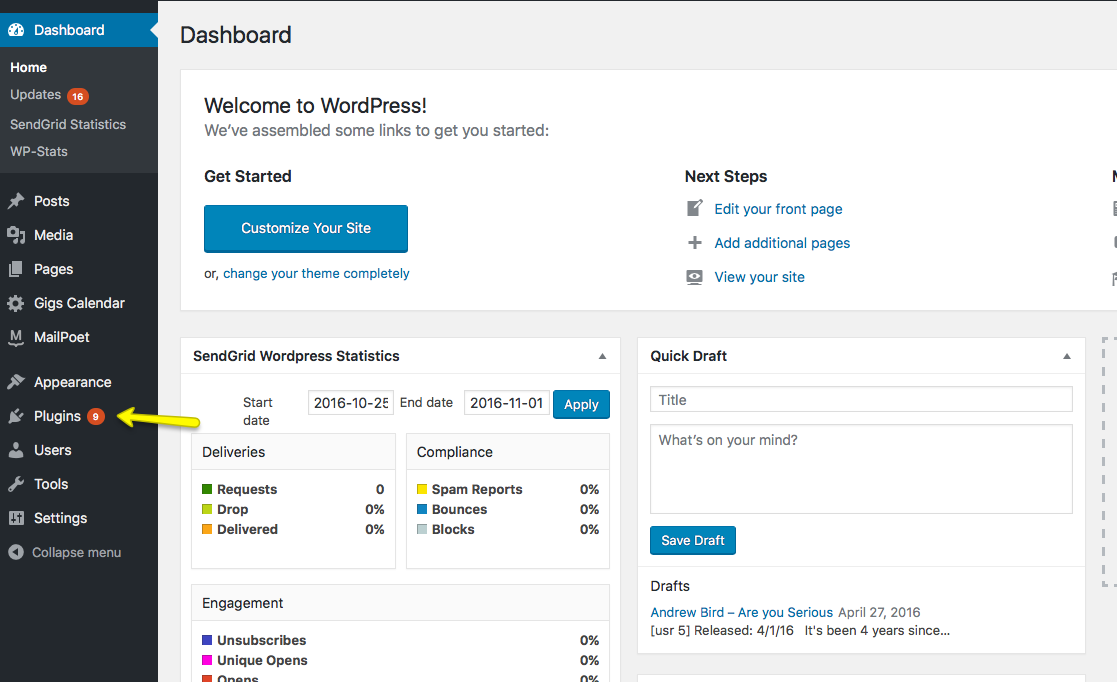
1. Log in to your WordPress admin page. Click on Plugins.
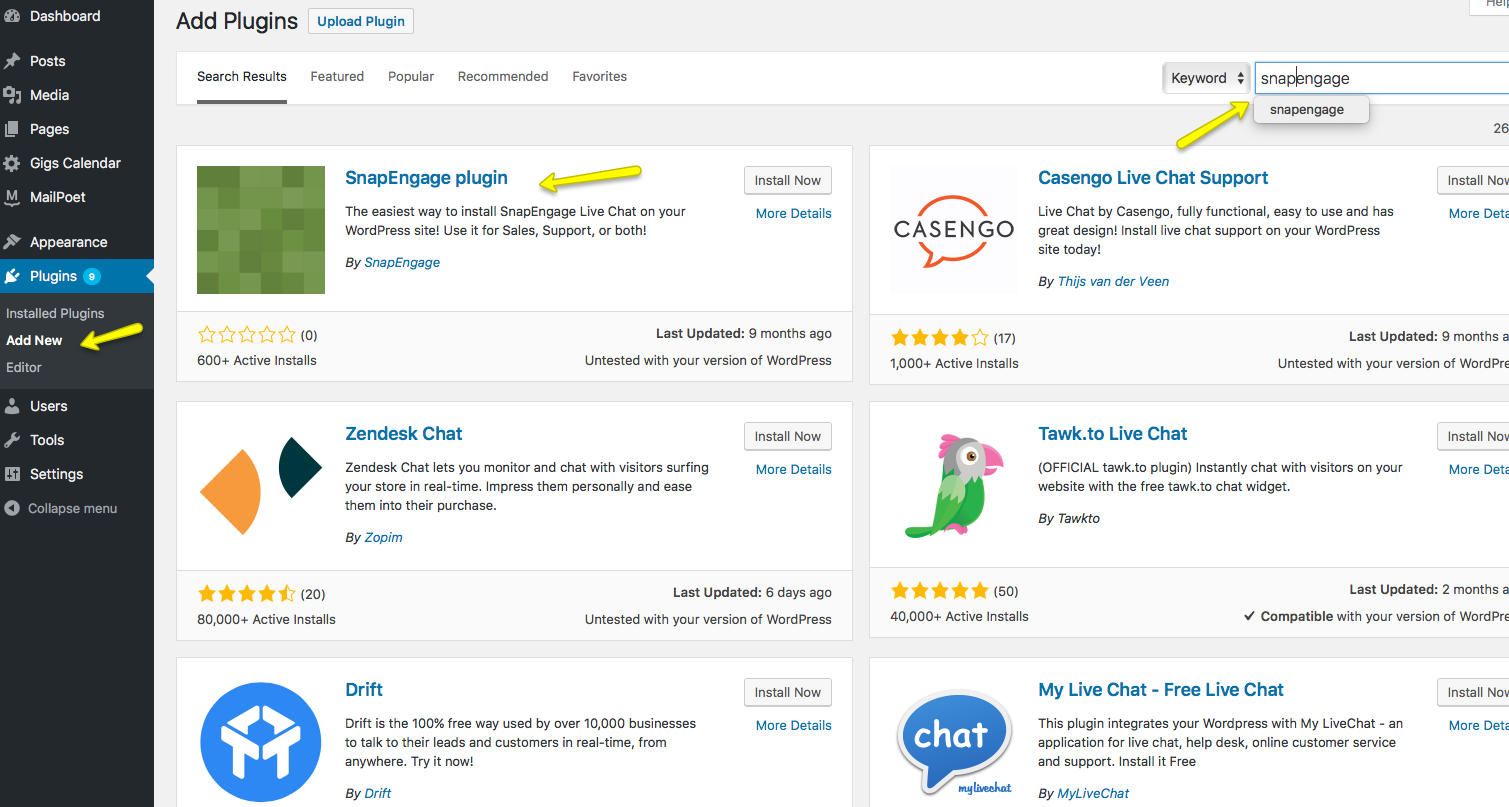
2. Click on add new. Then type in “snapengage” and click on “Search Plugin” and click “Install Now”
3. When you’re taken to the post install page, click on “Activate Plugin”
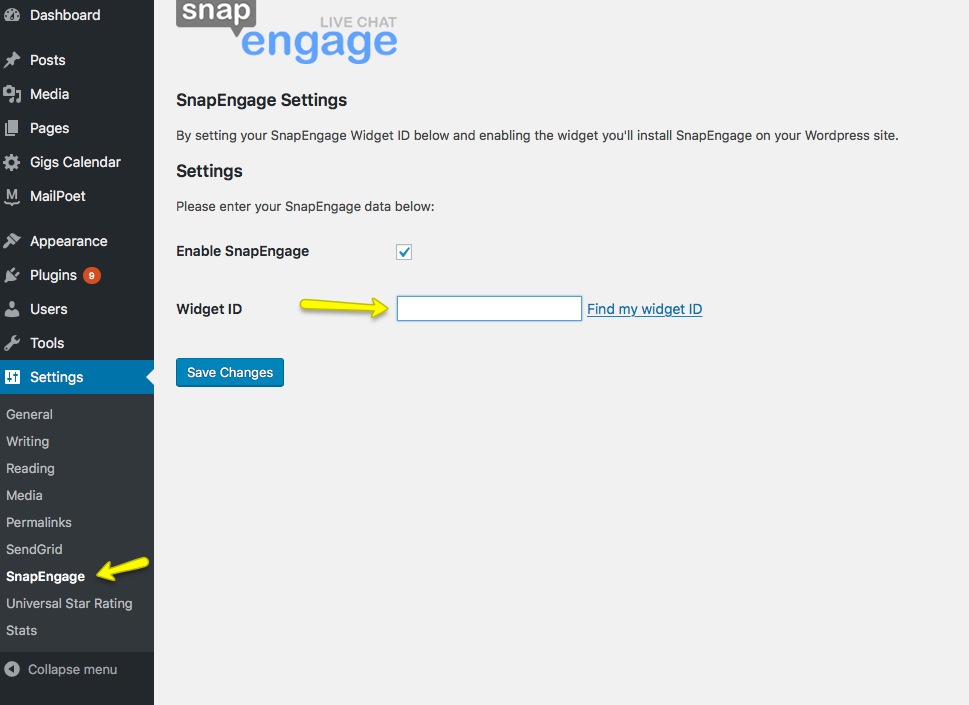
4. Now, under Settings click on SnapEngage
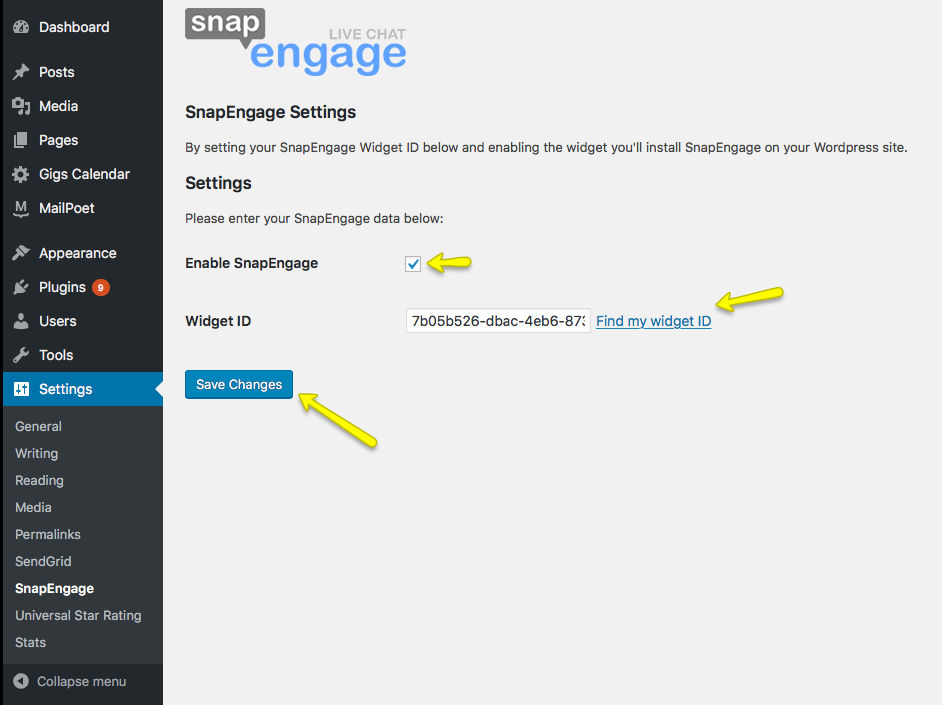
5. Now make sure that you’ve checked “Enable SnapEngage” and that you’ve typed in your widget id.
If you don’t know your widget ID click on “Find my widget ID,” a new window will open, and you should see your widget ID(s), copy and paste the long string of numbers and letters into the “Widget ID” field back in the WordPress plugin page.
And finally, press “Save.”
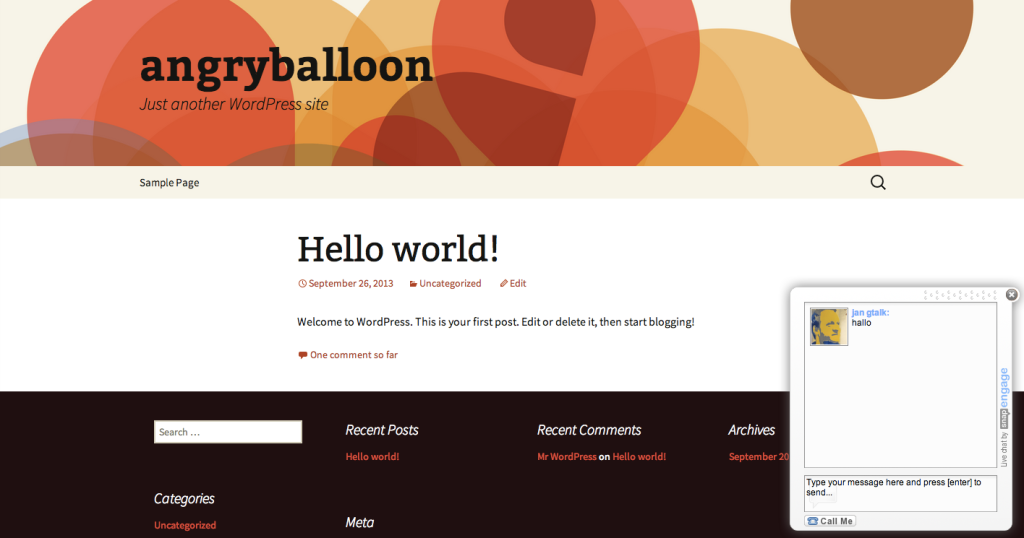
6. Now you should have SnapEngage activated on your WordPress site.
If you run into any problems along the way, please come chat with us.
Published November 28, 2013


 (5 votes, average: 3.60 out of 5)