Home > Setting up and using Knowledgebases
Categories: Integrations & Plugins
(Last Updated On: )
Knowledgebases are an efficient means of equipping your agents and visitors with information. Internally, knowledgebases house information in one place in the hub to help your agents find and relay information to visitors at lightning speed. Externally, knowledgebases, in the form of an Answer Bot, empower your busy visitors to find information independently, either during after-hours or when agents are maxed out. Please note that external or visitor-facing use of the knowledgebase will require an Answerbot as this is what visitors will interact with while querying your website.
Setting up a Knowledge base
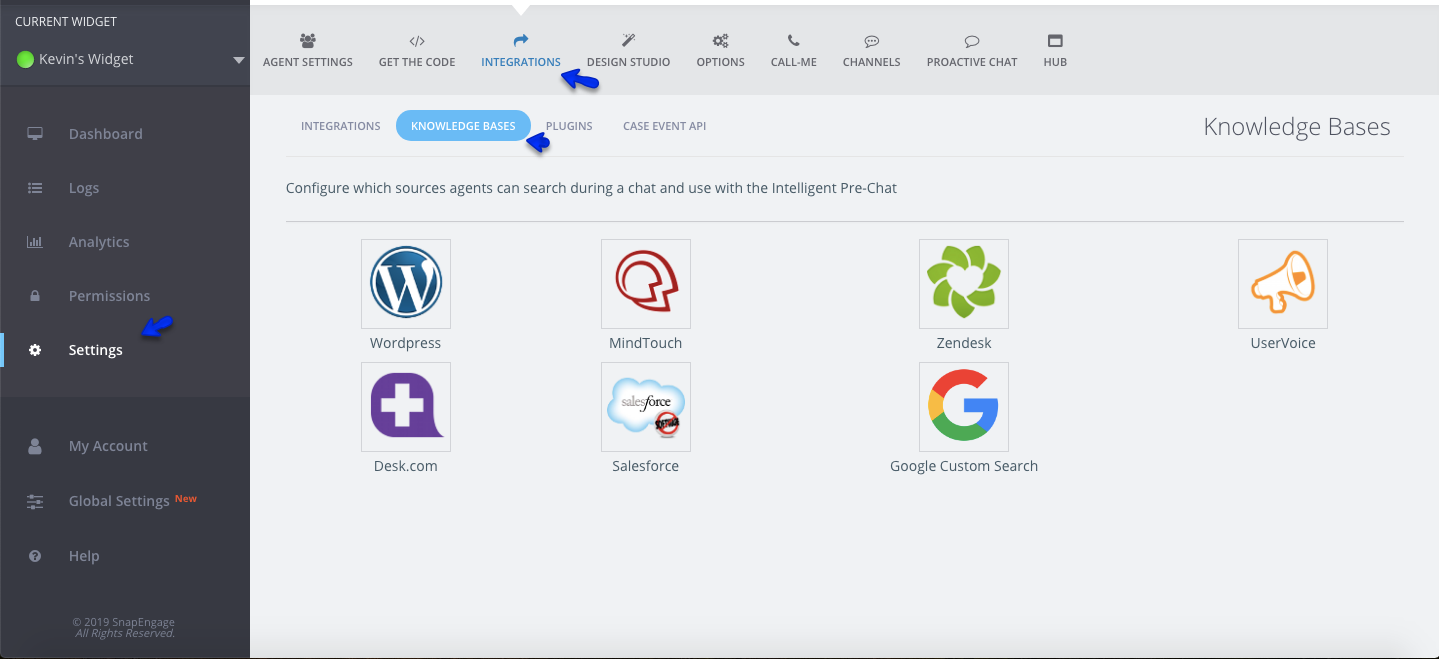
To setup a Knowledge base sign-in to your SnapEngage account and click on the Knowledge base tab under the Integrations tab. We have a few different knowledge bases to choose from:
WordPress
Click on the WordPress icon to add your WordPress site. On the following screen, enter the name and URL of the WordPress site you want visitors to query. Remember to click on the green “Save Changes” button at the bottom right corner.
Please note that the WordPress Knowledgebase search requires that your site is running an RSS feed. To check if your site has an RSS feed open a new browser tab and enter the following http://[yoursite]/rss . If an RSS feed is available, you will see something similar to this. Otherwise, please contact your WordPress administrator about enabling an RSS feed.
Note: We have deprecated the “Intelligent pre-chat feature.” Your visitors can alternatively, interact with either our Answer Bot, You can contact Support anytime you need additional information.
MindTouch
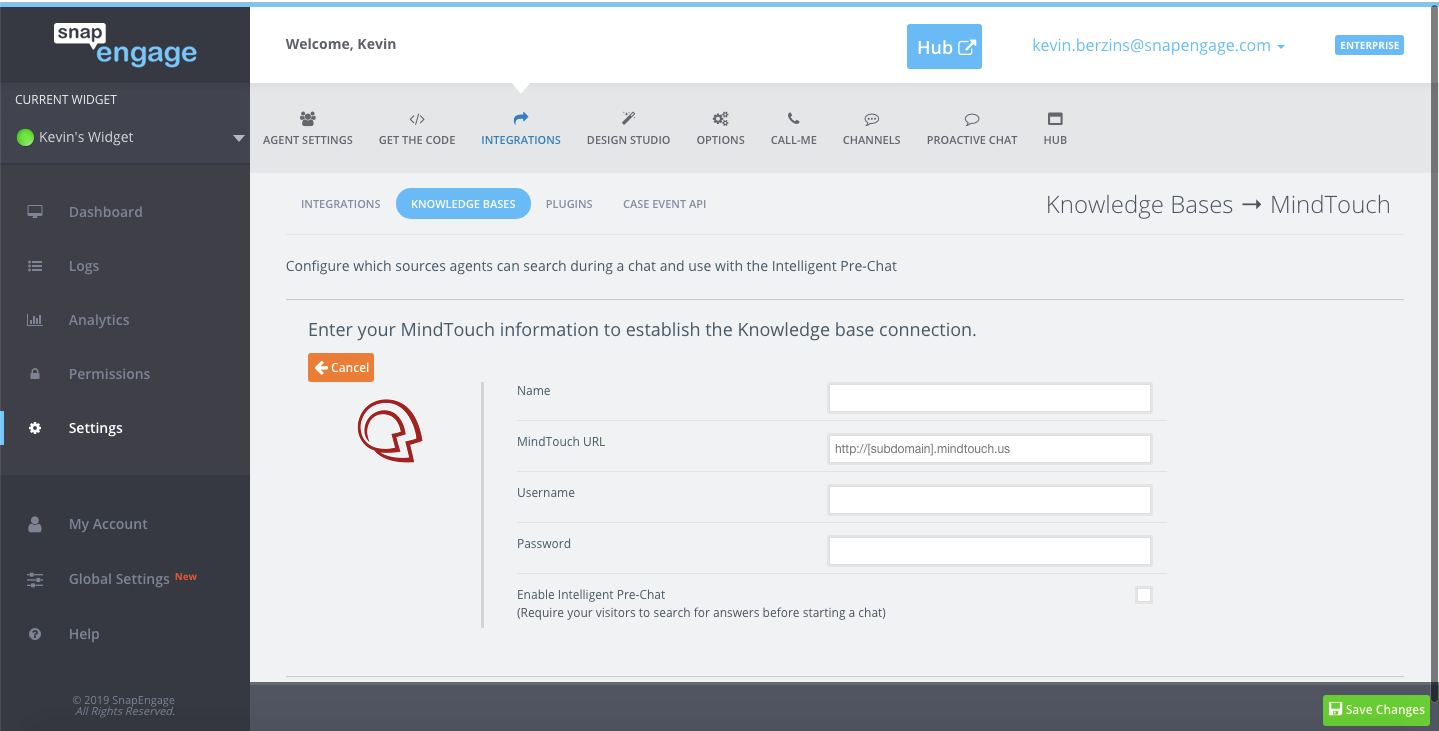
To add your MindTouch site click on the MindTouch icon. On the following screen enter the name and URL of the MindTouch site you want your agents to be able to search; the username and password fields are optional and maybe required if your MindTouch site requires a login. After entering your information click on the green “Save Changes” button in the bottom right hand corner.
Zendesk
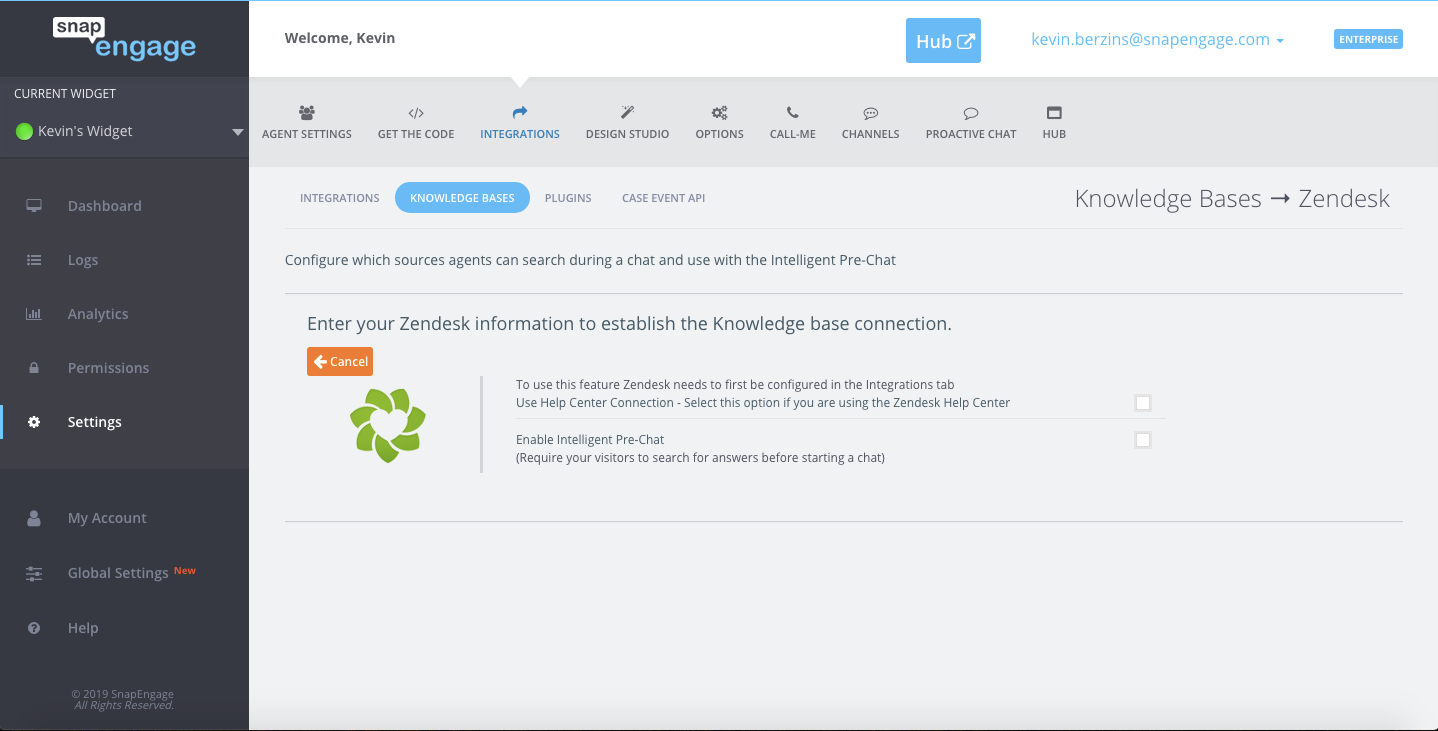
To add your Zendesk site you first must have the Zendesk integration setup. Once the Zendesk integration has been configured click on the Zendesk icon and then click on the green “Save Changes” button in the bottom right hand corner.
Google Programmable Search (Previously Custom Search)
Please click here to read about how to implement this Knowledgebase.

Salesforce
To add your Salesforce as a knowledge base you first must have the Salesforce integration set up.
Once the Salesforce integration has been configured, click on the Salesforce icon under the Knowledge Bases tab and select either” Search Solutions” or “Search Knowledge Articles” as a knowledge base source.
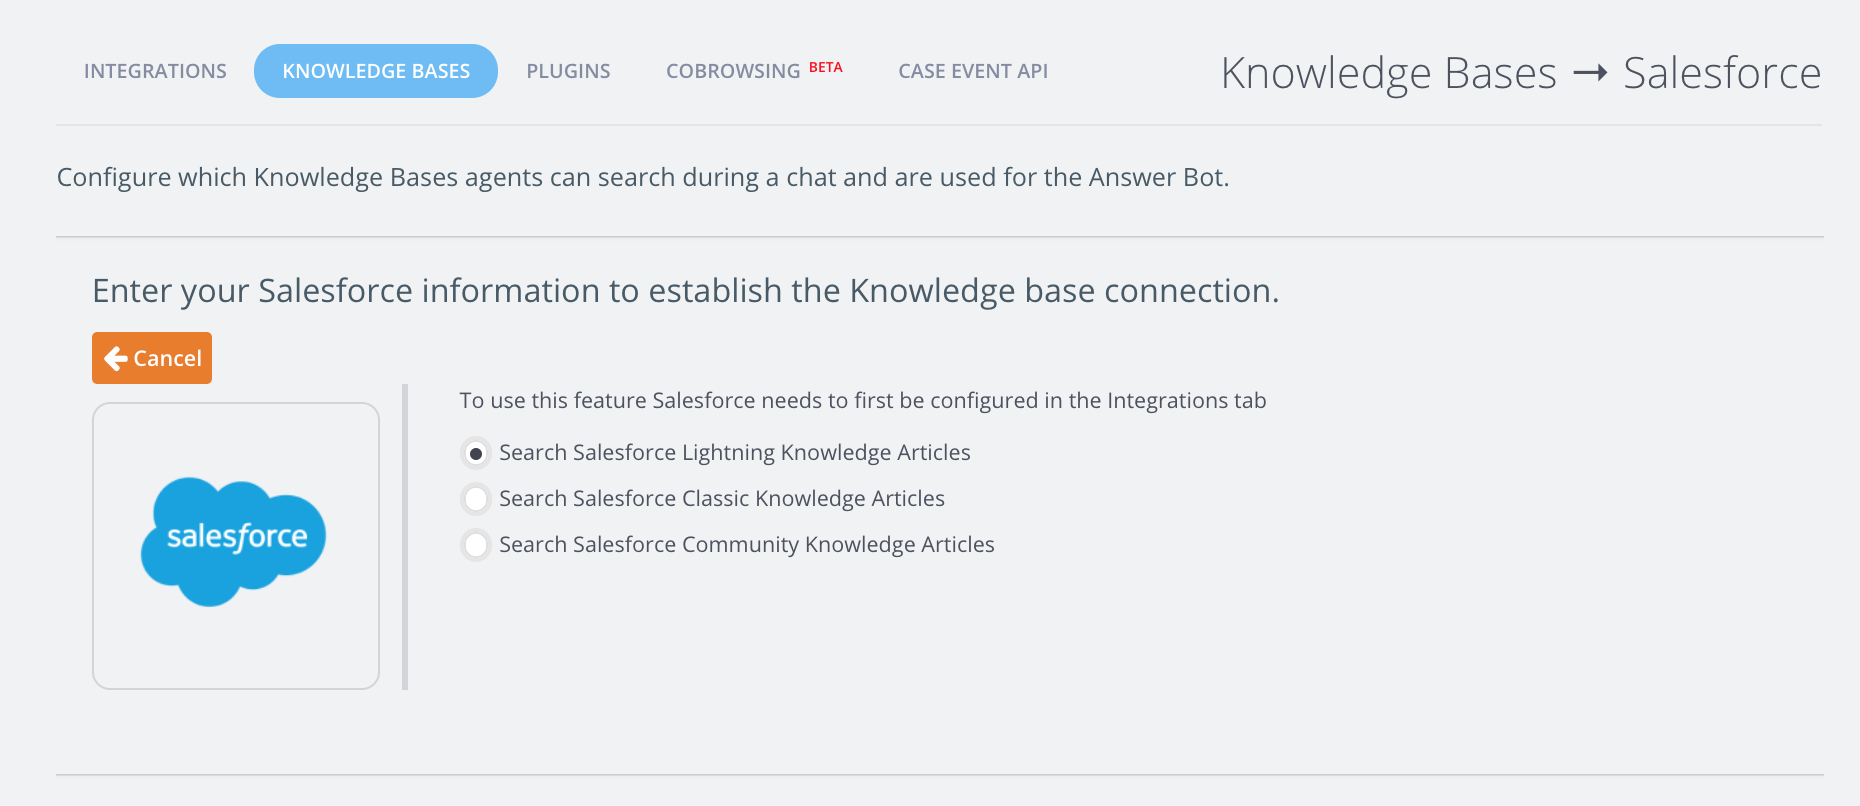
Save the changes by clicking on the green “Save Changes” button in the bottom right hand corner.
You have 3 options to choose from :
- Lightning Knowledge articles which are internal and don’t work with the answer bot. If the agents are logged into Salesforce, they will be able to search internally for answers during a chat.
- Salesforce Classic Knowledge articles, this option is the legacy option, and only works on Salesforce Classic.
- Salesforce Community Knowledge Articles : This is our recommended option.
Salesforce Lightning Knowledge Articles
Please note that Answer bot doesn’t work with the Salesforce Lightning Knowledge articles (solutions) set as a source of Knowledge base since those documents are not publicly available. This is available to agents to search on the Hub if they are also logged into Salesforce.
Also, if you use this option please make sure that any articles that you want to be found when running a search have been flagged as “reviewed” within Salesforce.
Classic Knowledge articles (this is the legacy option which only works on Classic)
Knowledge articles can be made publicly available. To make this happen, the “Public Knowledge for Mobile, Web and Facebook” application should be installed and configured in Salesforce. Please refer to this page for more details and instructions on how to set this up.
After the “Public Knowledge for Mobile, Web and Facebook” application has been installed and configured, Knowledge. Provide “Knowledge Base public URL”. Usually, this will be a domain name at Salesforce’s [www.Force.com] platform.
URL patterns of publicly available articles can differ from one another. Please use the following placeholders to create a Knowledge Article URL pattern which fits best:
- {article_id} – article ID;
- {article_number} – unique article number in Salesforce;
- {article_url_name} – article URL name.
Example 1: full URL to knowledge article consists of base URL and article name.
- Public knowledge base URL looks like http://my-company.force.com/publicknowledge/articles
- Article URL name is ‘how-to-start-chatting’
The value of ‘Knowledge Base public URL’ textbox should be http://my-company.force.com/publicknowledge/articles/{article_url_name}
URL to particular article will look like http://my-company.force.com/publicknowledge/articles/how-to-start-chatting
Example 2: full URL to knowledge article consists of base URL, article ID, and article name.
- Public knowledge base URL looks like http://my-company.force.com/publicknowledge/articles
- Article ID is ka00k000000CekAAAS
- Article URL name is ‘When-will-I-receive-my-order’
The value of ‘Knowledge Base public URL’ textbox should be http://my-company.force.com/publicknowledge/articles/{article_id}/{article_url_name}
URL to particular article will look like http://my-company.force.com/publicknowledge/articles/ka00k000000CekAAAS/When-will-I-receive-my-order
Example 3: full URL to knowledge article consists of base URL and article number.
- Public knowledge base URL looks like http://my-company.force.com/publicknowledge/articles
- Article ID is 000001001
The value of ‘Knowledge Base public URL’ textbox should be http://my-company.force.com/publicknowledge/articles/{article_number}
URL to particular article will look like http://my-company.force.com/publicknowledge/articles/000001001
To restrict agents and visitors from being able to search some specific article categories, enable search articles below categories (as mentioned previously, on the visitor side. And in the text box, specify a category in the format below:
- categoryGroup:categoryName
If you need to filter articles that are in listed in multiple categories simultaneously, list them separated by a comma in the text box.
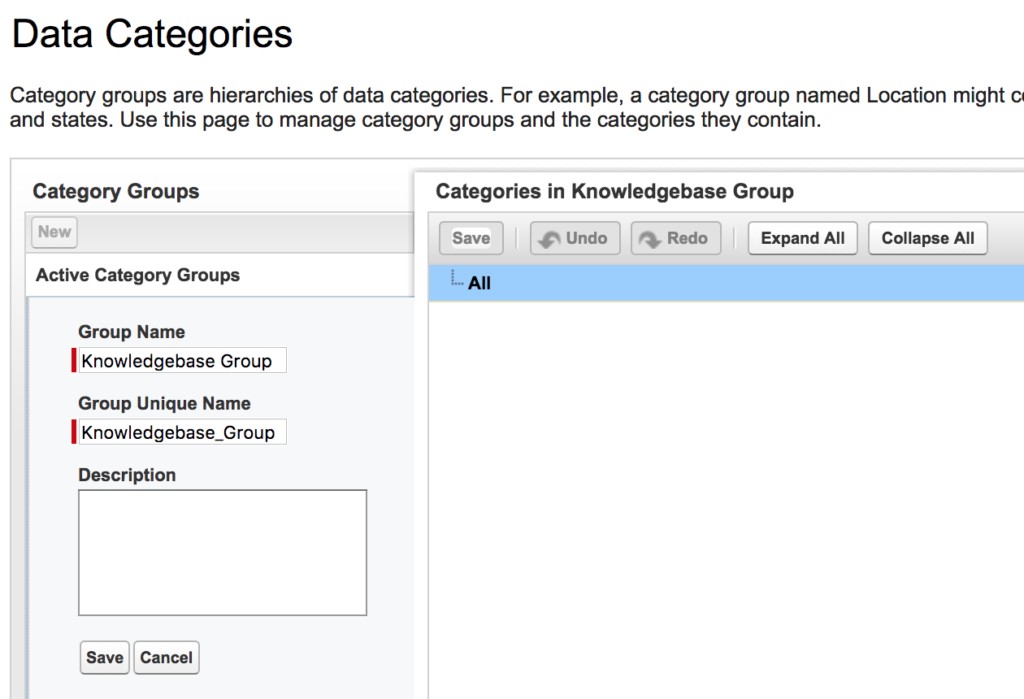
Please note that in order to map the Salesforce Category correctly, you will need to add the Category Group as a value of Group Unique Name. In Salesforce account it is shown and configurable in Data Categories settings:
Community Knowledge articles (recommended)
For the option to search the community knowledge articles, you will need to enter the URL of the Salesforce community knowledge.
This article explains how to get the URL, which is basically YOUR_SUBDOMAIN.force.com+lightning/articles+LABEL_OF_THE_OBJECT_THAT_CONTAINS_THE_ARTICLE
The Container for my article is called FAQ, so for example, my URL is https://mycompany.force.com/lightning/articles/FAQ
Registering the [custom subdomain] is part of the Community setup process that Salesforce guides you through.
Make sure your community pages are accessible to the public as explained here.
After each Knowledgebase is added it will be shown in a list on the Knowledgebase tab:
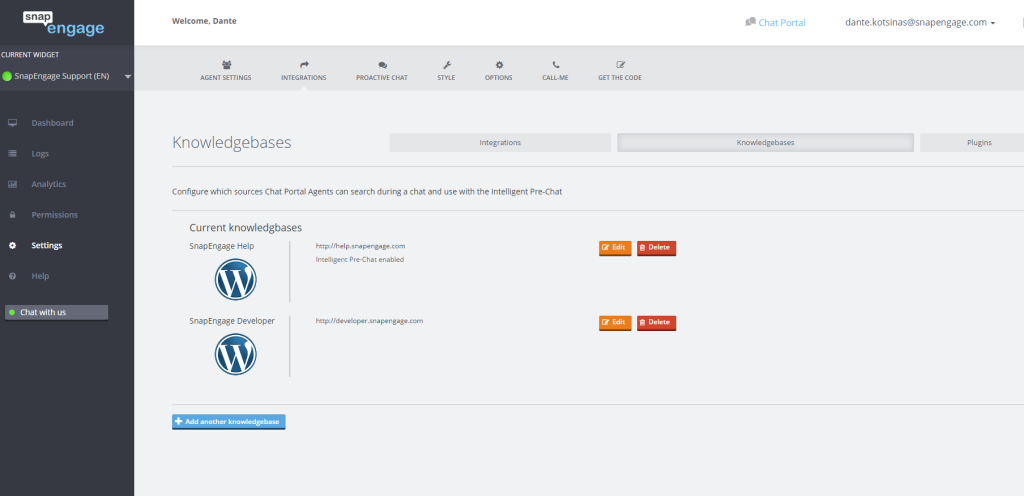
* Please note that you can add one or more of each type of Knowledgebases. This can be extremely useful if you want your agents to be able search both a WordPress blog and Zendesk support articles.
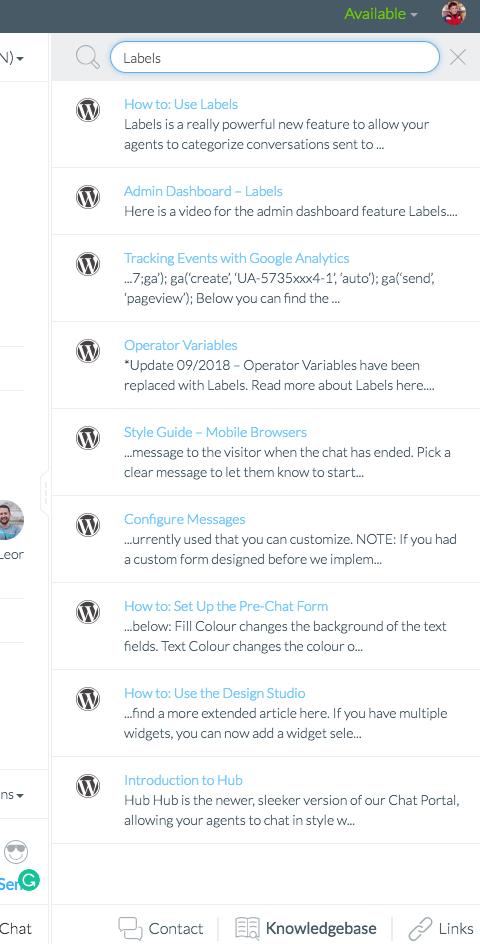
How the Knowledgebase appears in Hub
Once a knowledgebase has been configured for each chat that an agent receives in Hub they will see a knowledgebase section on the right hand side of the screen:
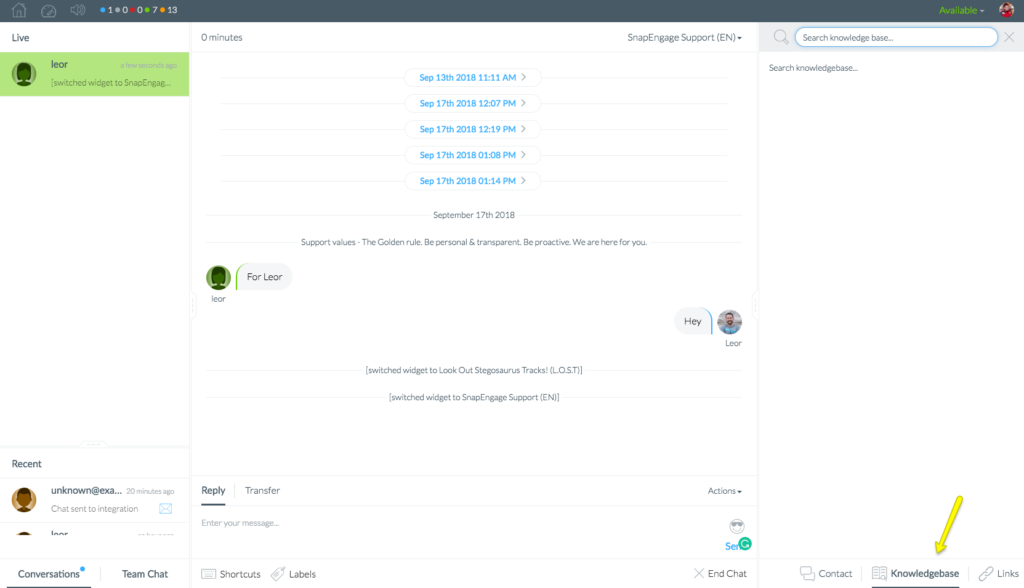
Using the text box on the top part of the knowledgebase section agents can enter in key words they want to search on. After hitting the “enter” key the search results will be displayed above. When the agent selects the title of each search result they will be shown a summary of the search result along with option to send the visitor to that page, you can then insert the link to the guide into the text input area or view the article in a new window.
Did you find this article helpful?

 (8 votes, average: 4.13 out of 5)
Published December 12, 2013