Home > Add Live Chat code to your WordPress page
Categories: Getting Started
(Last Updated On: )
About This Article
The purpose of this article is to provide a comprehensive overview of how to install the code on a wordpress page.
If you prefer to install SnapEngage by using a plugin please have a look here.
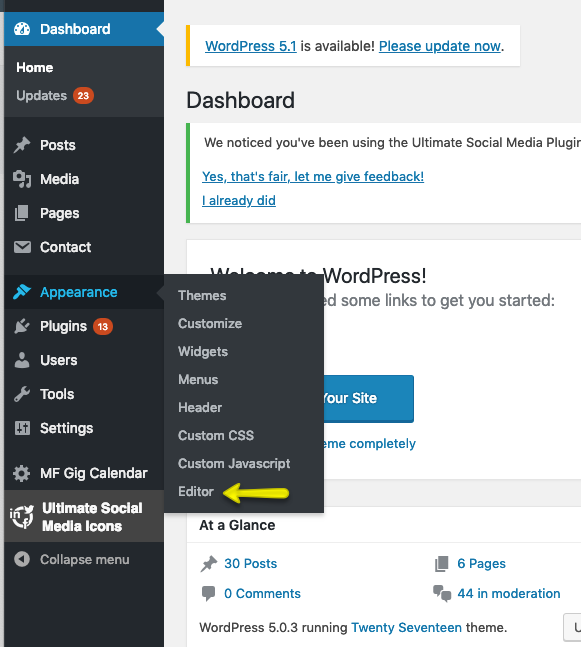
1. In your WordPress Dashboard, go to Appearance > Editor.

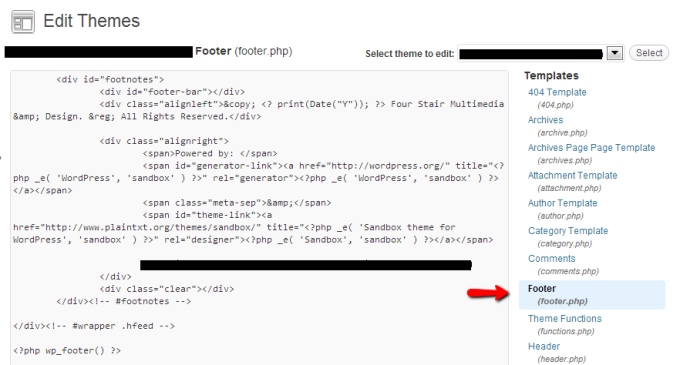
2. Edit the footer.php template file in your WordPress Theme.
Note: In certain versions of WordPress the footer has been renamed.

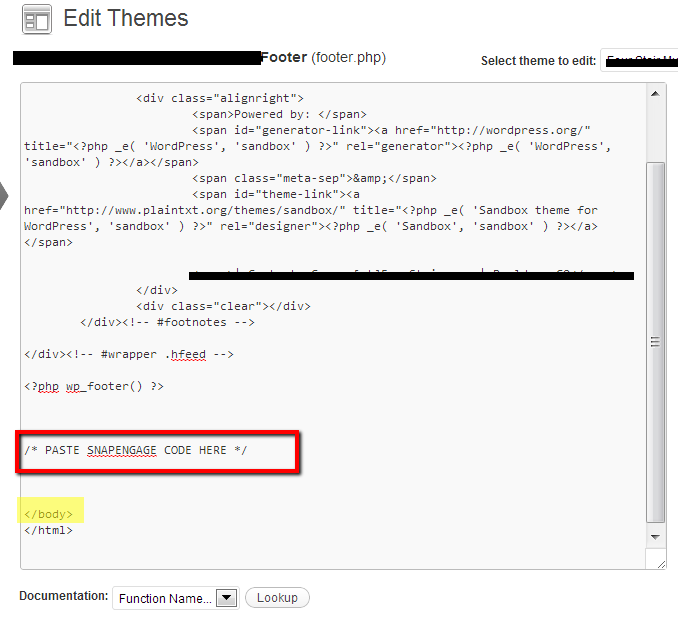
3. Scroll to the bottom of the file and paste the SnapEngage JavaScript code from the SnapEngage Admin Dashboard in the “Get The Code” section before the closing </body> HTML tag.

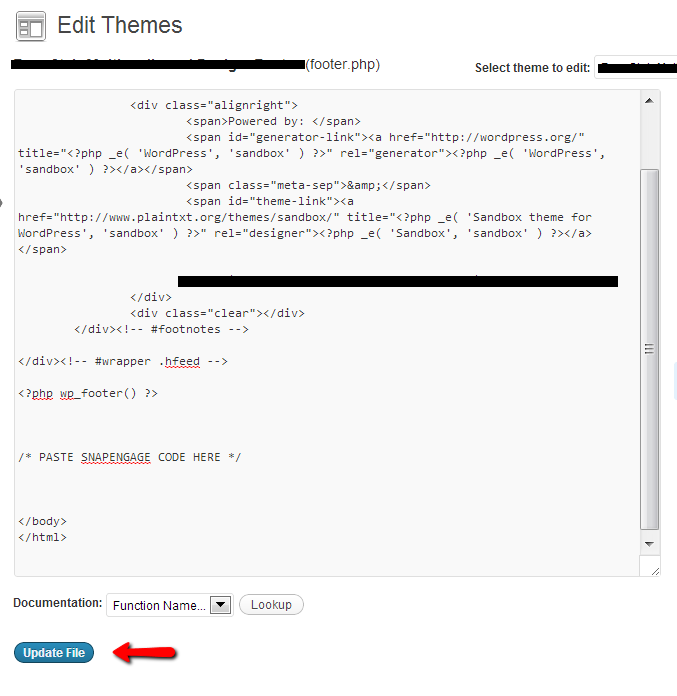
4. Save the file by clicking Update File on the bottom of that page.

Presto! You have successfully installed the SnapEngage chat tool onto your WordPress site. Happy Chatting!
Published January 20, 2012
Reader Feedback
No comments yet


 (15 votes, average: 3.67 out of 5)