Home > How to setup an agent assignment list for your Proactive Chat rules
Categories: Proactive Chat
(Last Updated On: )
About This Article
The purpose of this article is to provide a comprehensive overview of how to setup an agent assignment list for your Proactive Chat rules.
If you have a message that you only want to associate with a group of agents within your organisation you can set up agent assignments for this rule. This means that if the rule has all conditions fulfilled the rule will only be executed if an agent from this list is available (online and not maxed out on chats). Keep in mind that the agent routing will bypass your agent priority tiers.
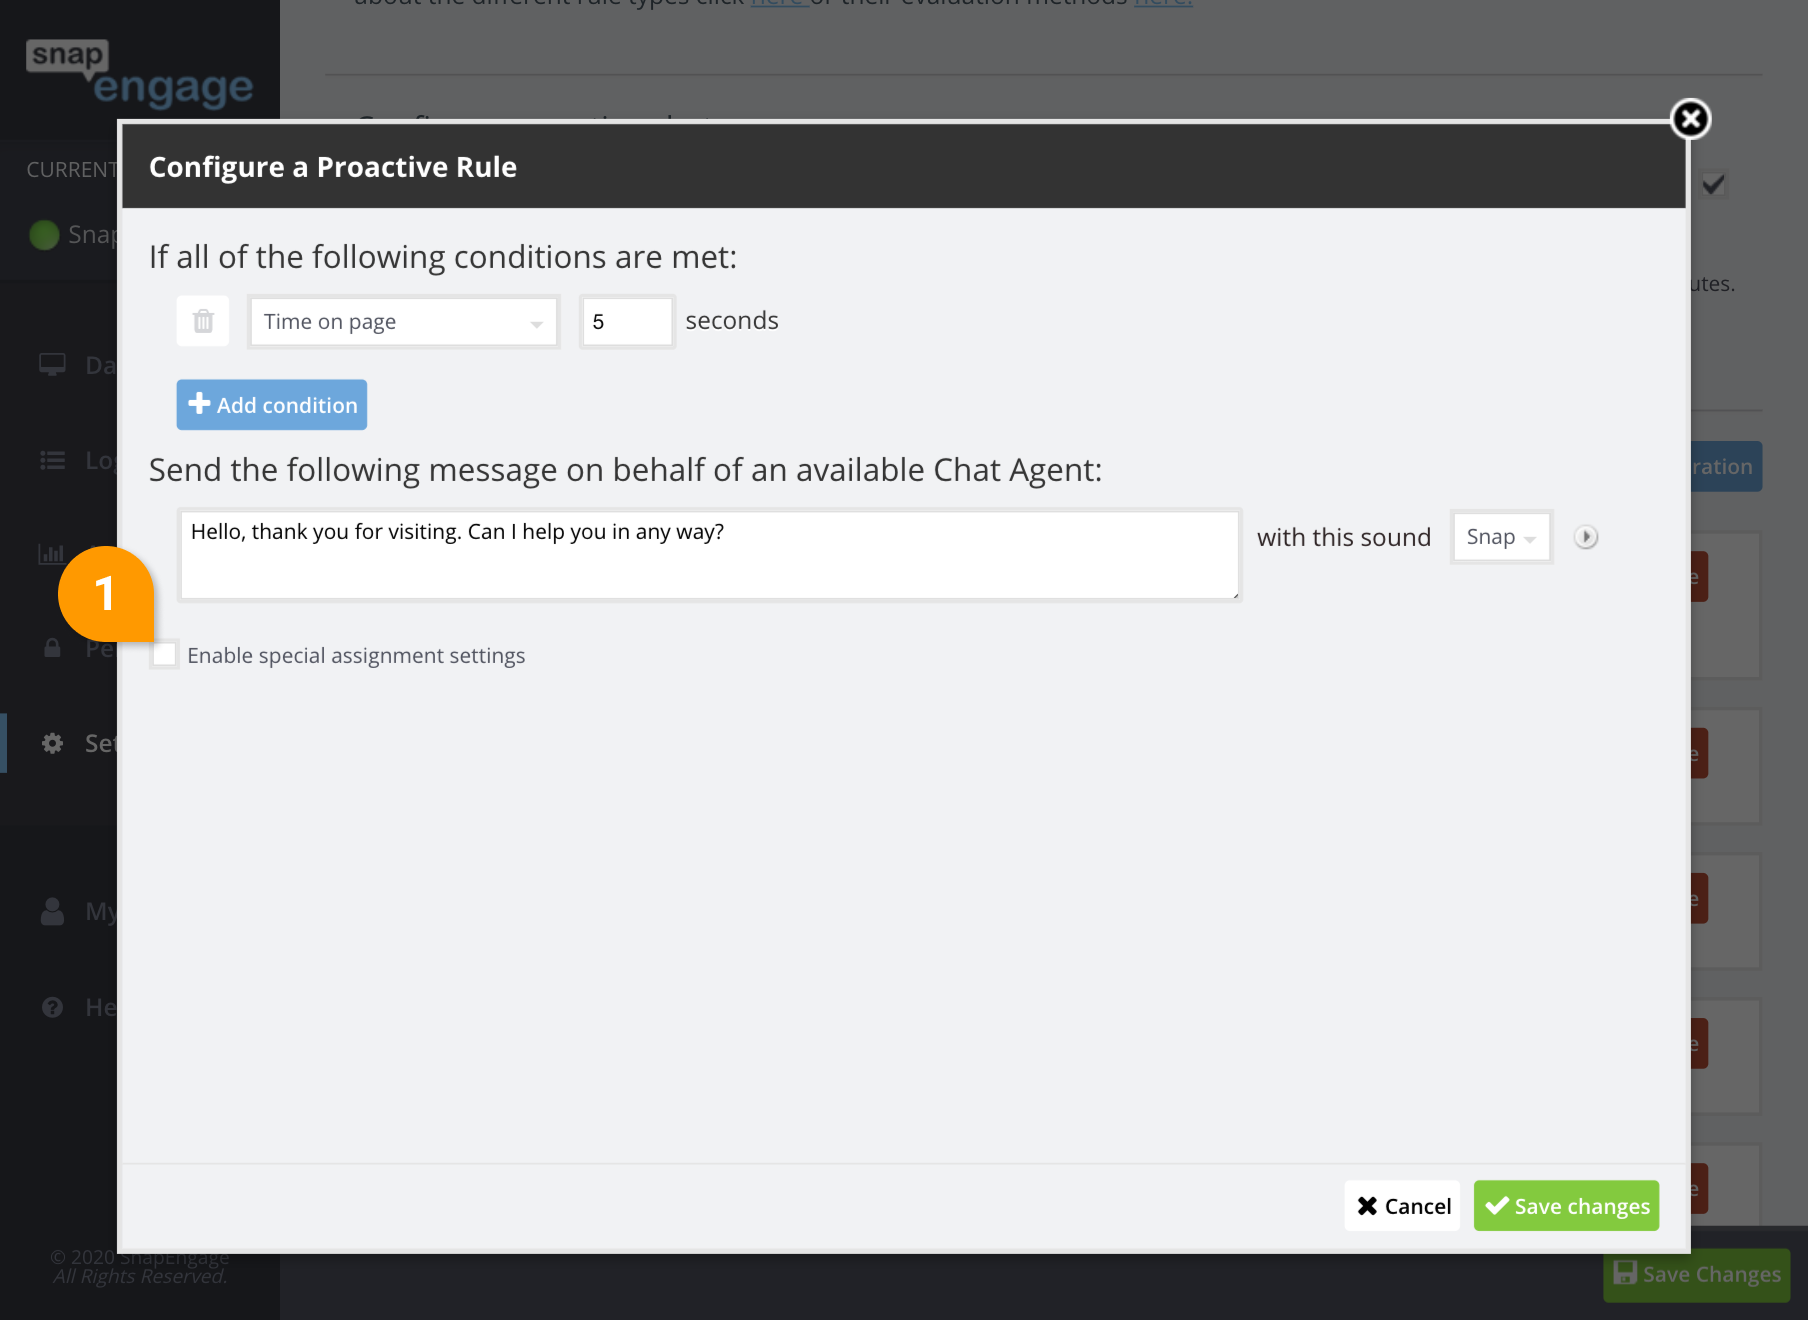
1. When editing a rule set, check “Enable special assignment settings” (1).
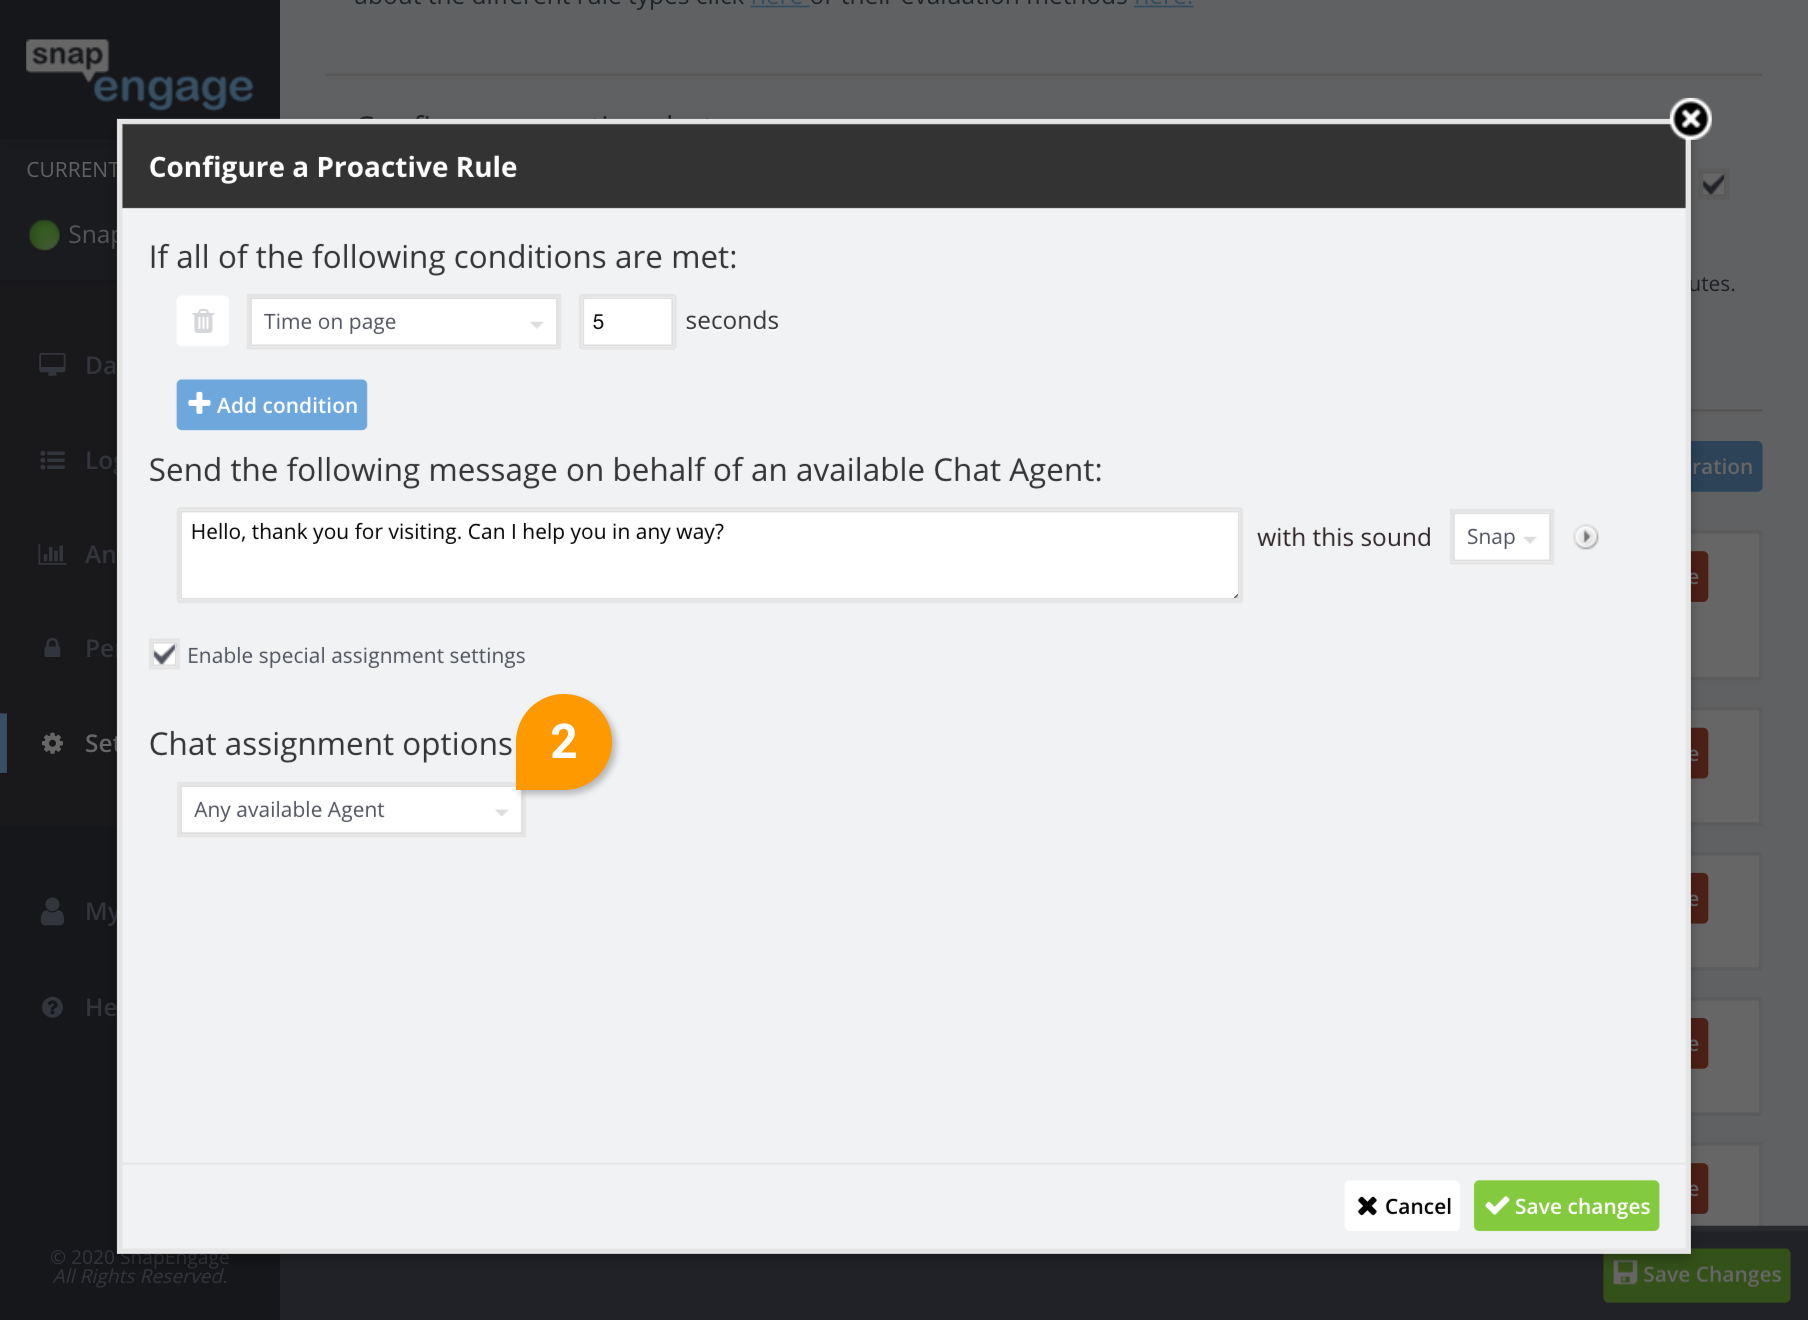
2. Select the agent you want to route the message to (2).
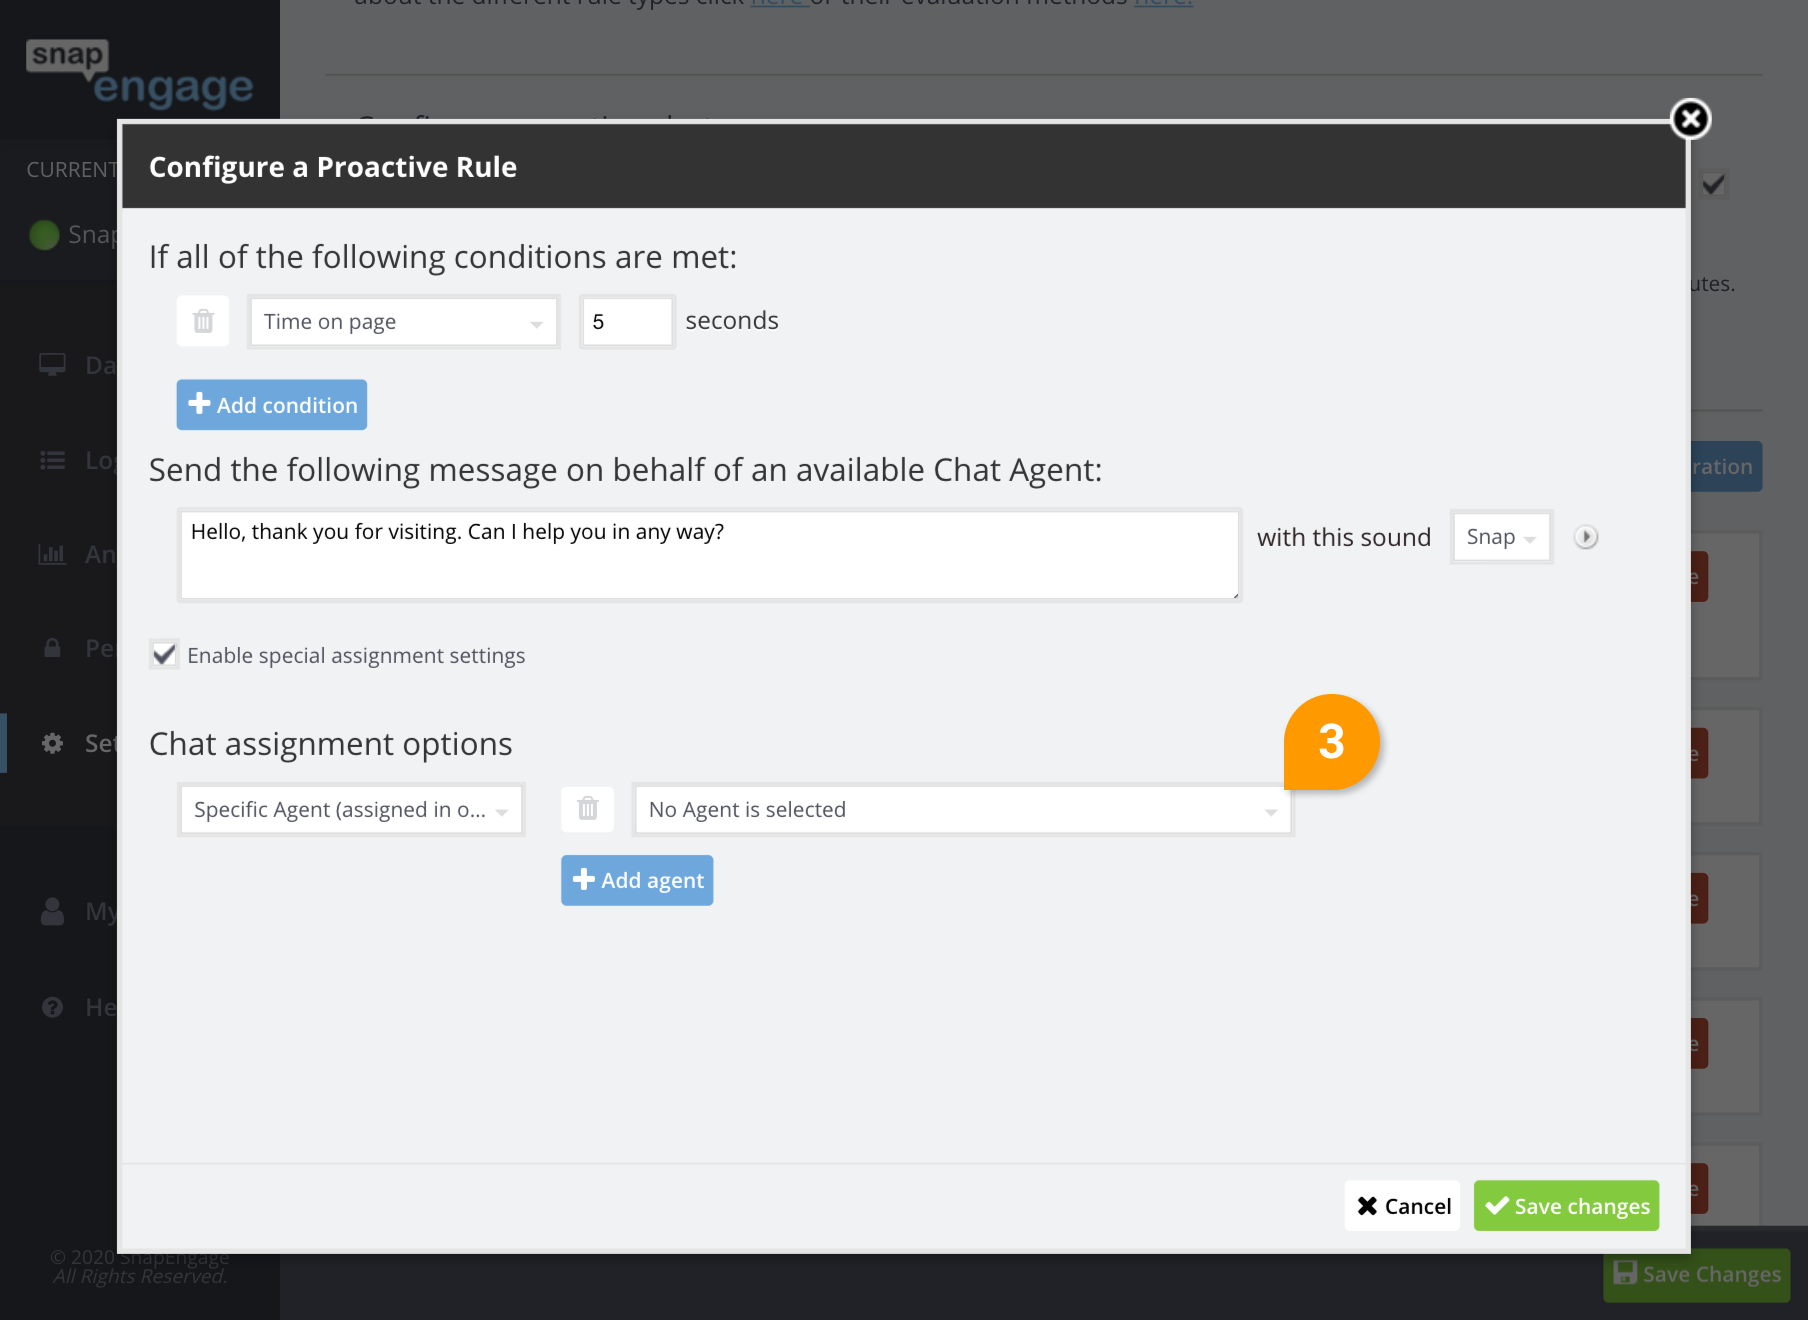
3. Optional: If you want to add more agents to this list, click on add agent and repeat the previous step (3). In case the first agent is not available we will check if the second agent is available an assign the proactive chat to them and so on.
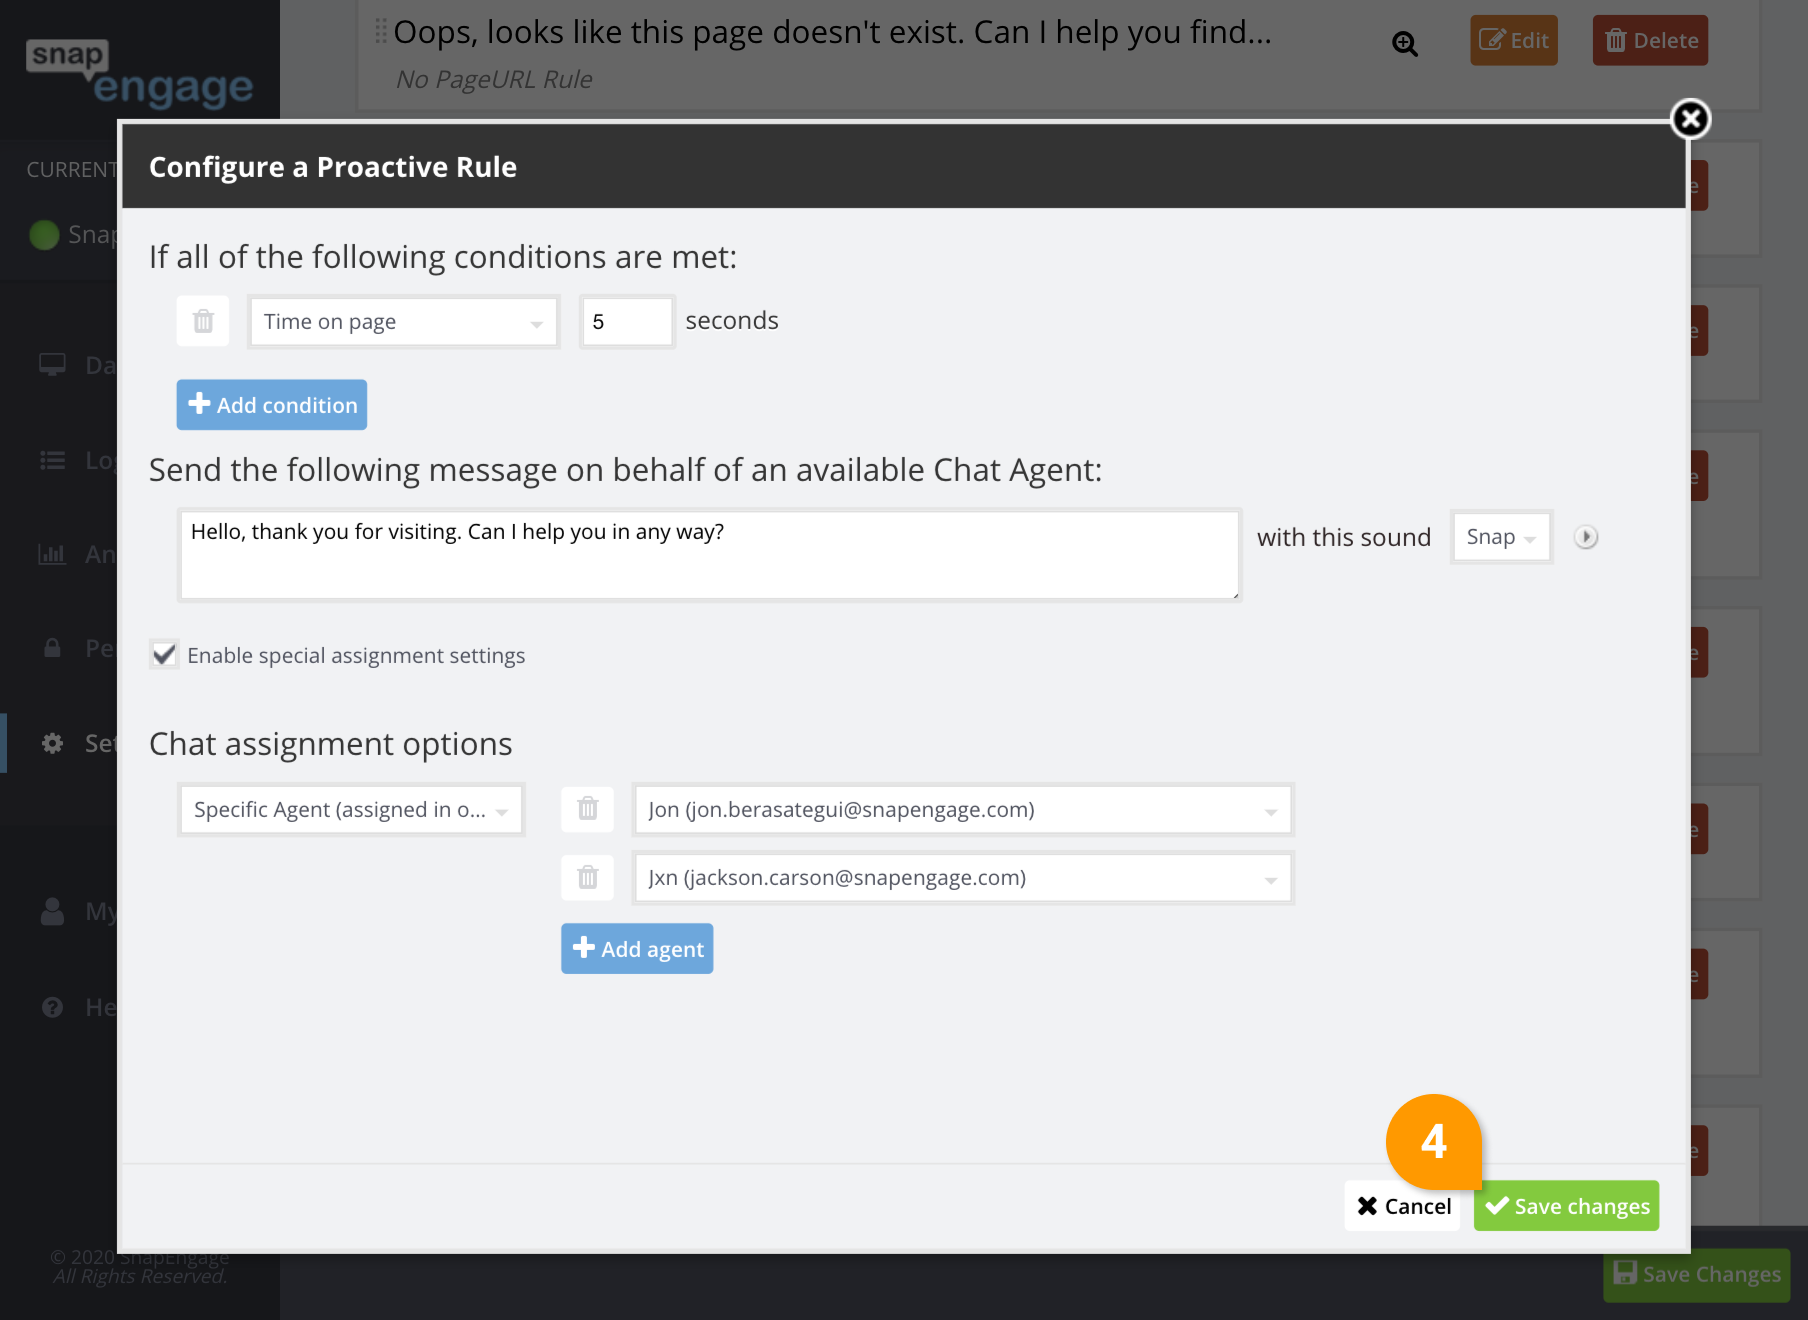
4. Click save (4) and your rule settings with the advanced section will appear on the main Proactive chat settings.
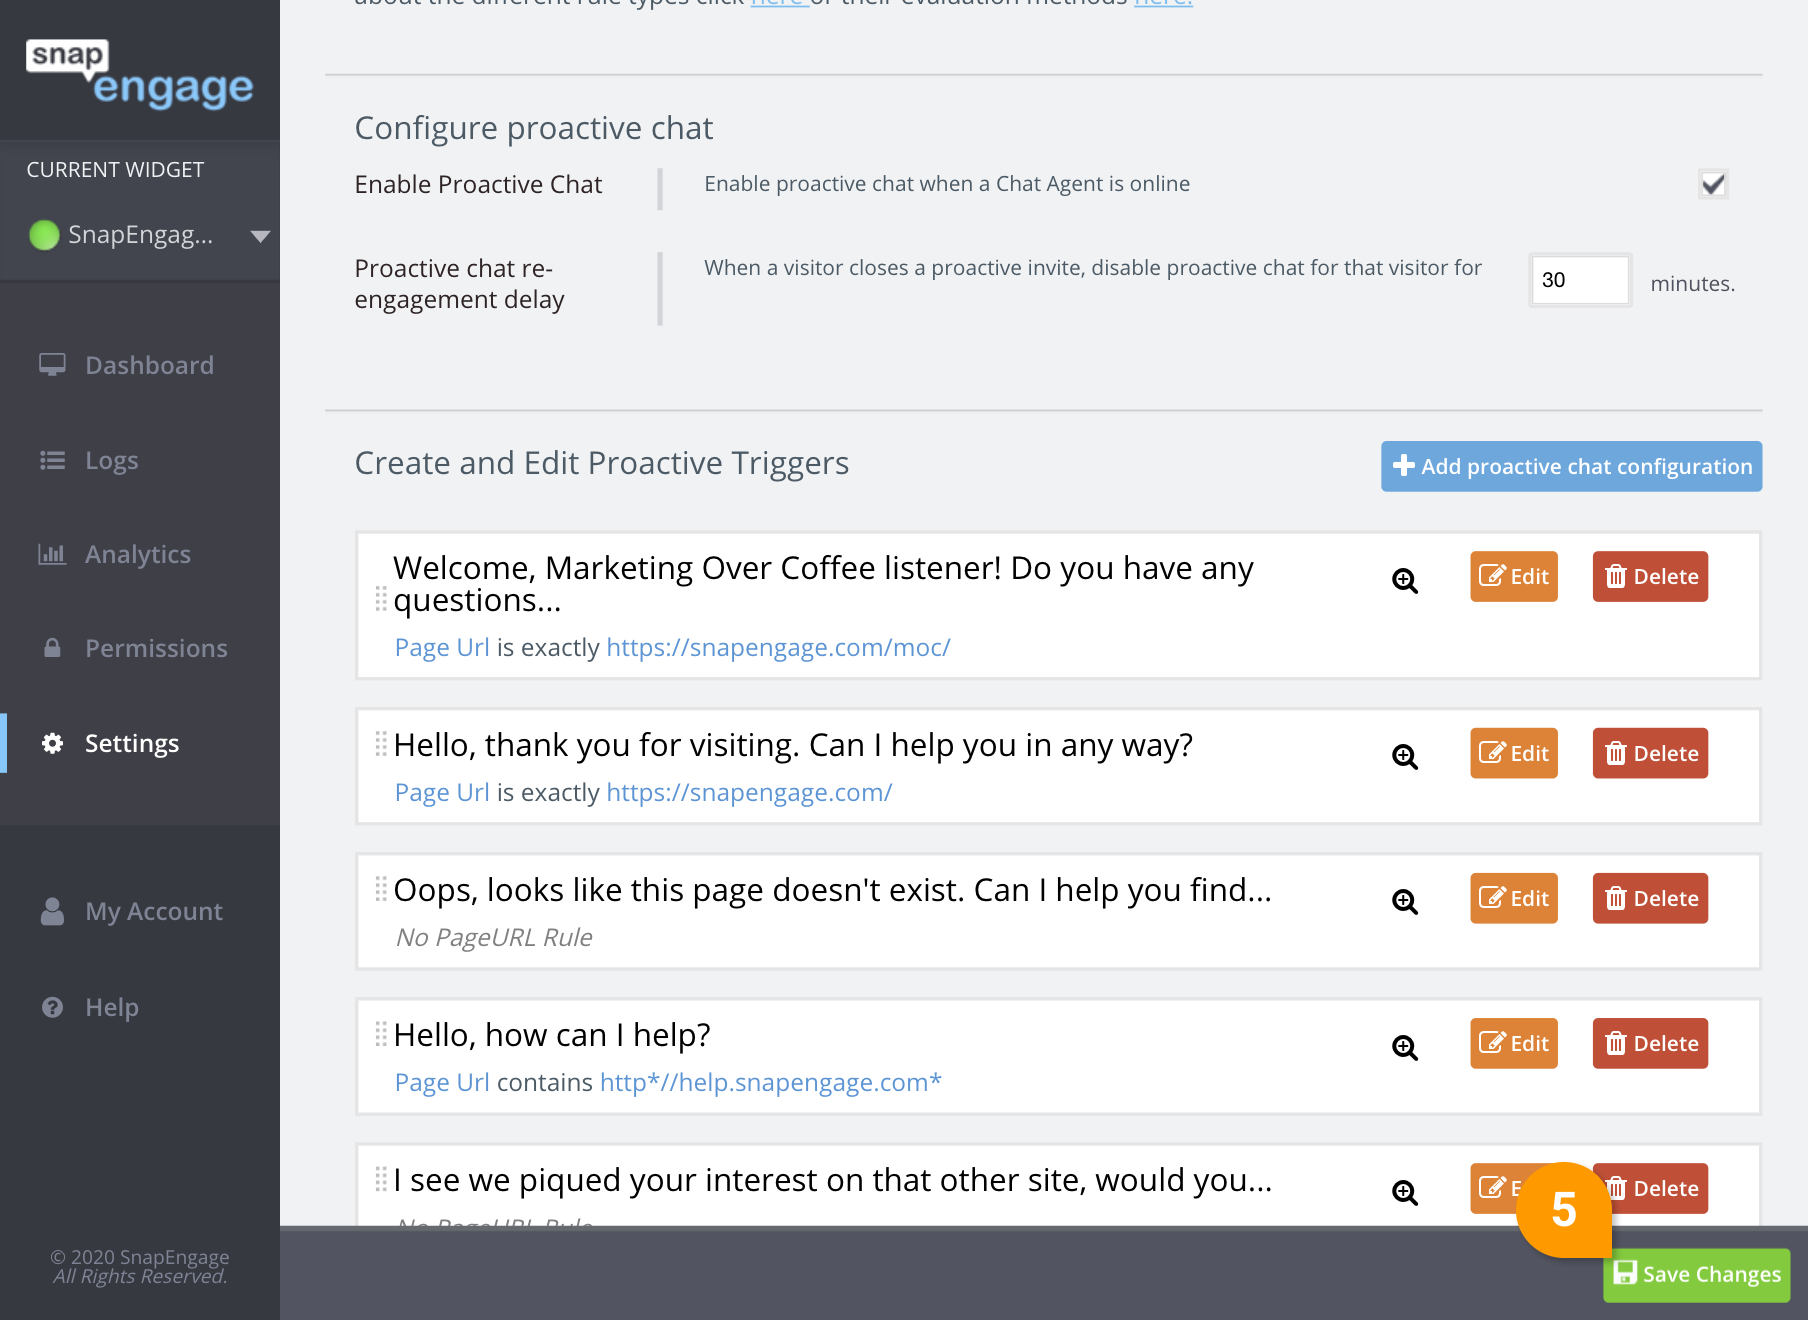
5. Don’t forget to click ‘Save’ (5) on the main Proactive chat settings!
Did you find this article helpful?
 (2 votes, average: 5.00 out of 5)
Published November 4, 2013