Home > How to Setup Salesforce to Create New Cases without attaching the contact to the case
Categories: Integrations & Plugins
(Last Updated On: )
About This Article
The purpose of this article is to provide a comprehensive overview of how to setup Salesforce to Create New Cases without attaching the contact to the case
If your team uses Salesforce Cases, but doesn’t use Salesforce Contacts (at least not in conjunction with Cases), there is a way to bypass the default update/creation of Contacts associated with the Cases that get created when you close a chat!
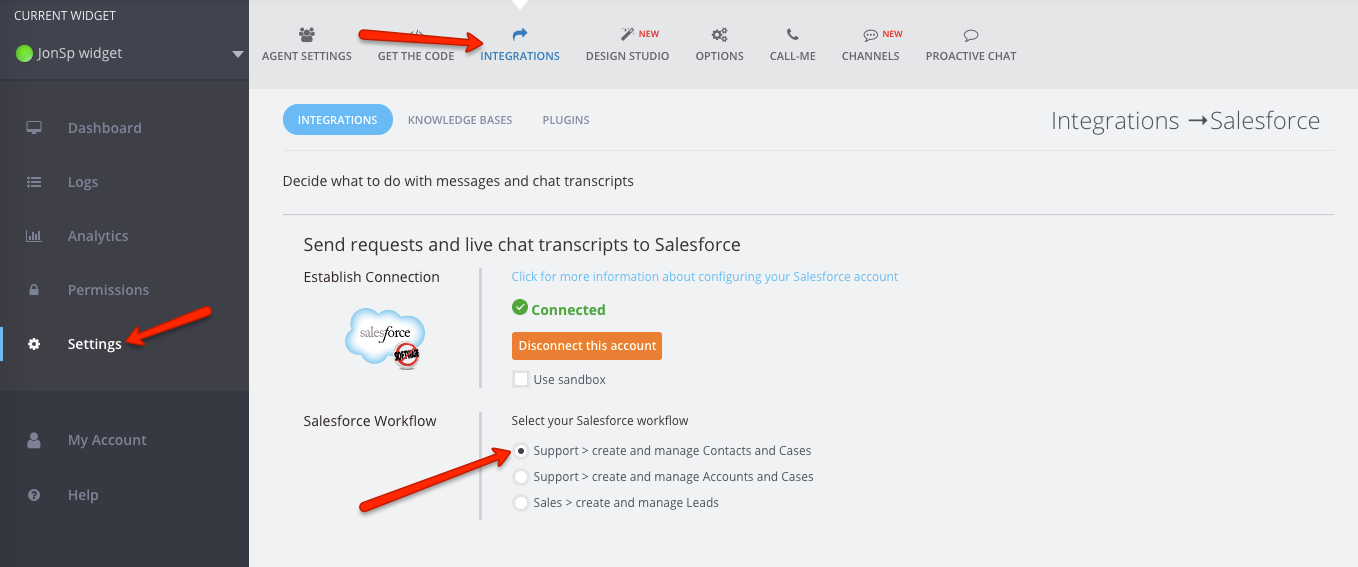
You’ll notice, if you go into your Settings in the Admin Dashboard and go to “Integrations”, that there are a few different ways that you can itegrate SnapEngage with Salesforce. In order to update Salesforce Cases with Transcript information, you’ll need to select the first Salesforce Workflow option: “Support> create and manage Contacts and Cases”, as seen below.
If you wish to create and manage Cases, but not Contacts, scroll down a little further, to the Mappings Section. Here, you can create a custom mapping that will disable the linking of Cases and Contacts and will, therefore, not create or update Contacts. To do this, create a mapping with the “Source Type” of “Text” and enter “none” for the “Source Value”. For the “Object”, select “Case” and you can leave the “Type” as “Standard” and select “Contact ID” as the “Salesforce Field”.
To make these instructions a little clearer, we have a screenshot of what your mapping should look like below:

Please make sure you click the green “Save Changes” button in the lower right corner of your Admin Dashboard after setting this up!
We will no longer create or update Contacts with this mapping active 🙂
Did you find this article helpful?


 (5 votes, average: 2.40 out of 5)
Published August 21, 2013