Home > How to add an inline button to your website (for Design Studio users)
Categories: Design Studio
(Last Updated On: )
About This Article
This article explains how to add an inline button. Inline buttons can be used to be placed anywhere on the page unlike a floating button which is limited to the edges of a page.
This guide is for Design Studio users.
Here is a way to add a custom inline button to your website which will update on page load based on whether your agents are available to chat, or if they are offline or unavailable. Before you proceed, make sure that you are comfortable working inside your website’s HTML and Javascript code, or please enlist the help of your web developer.
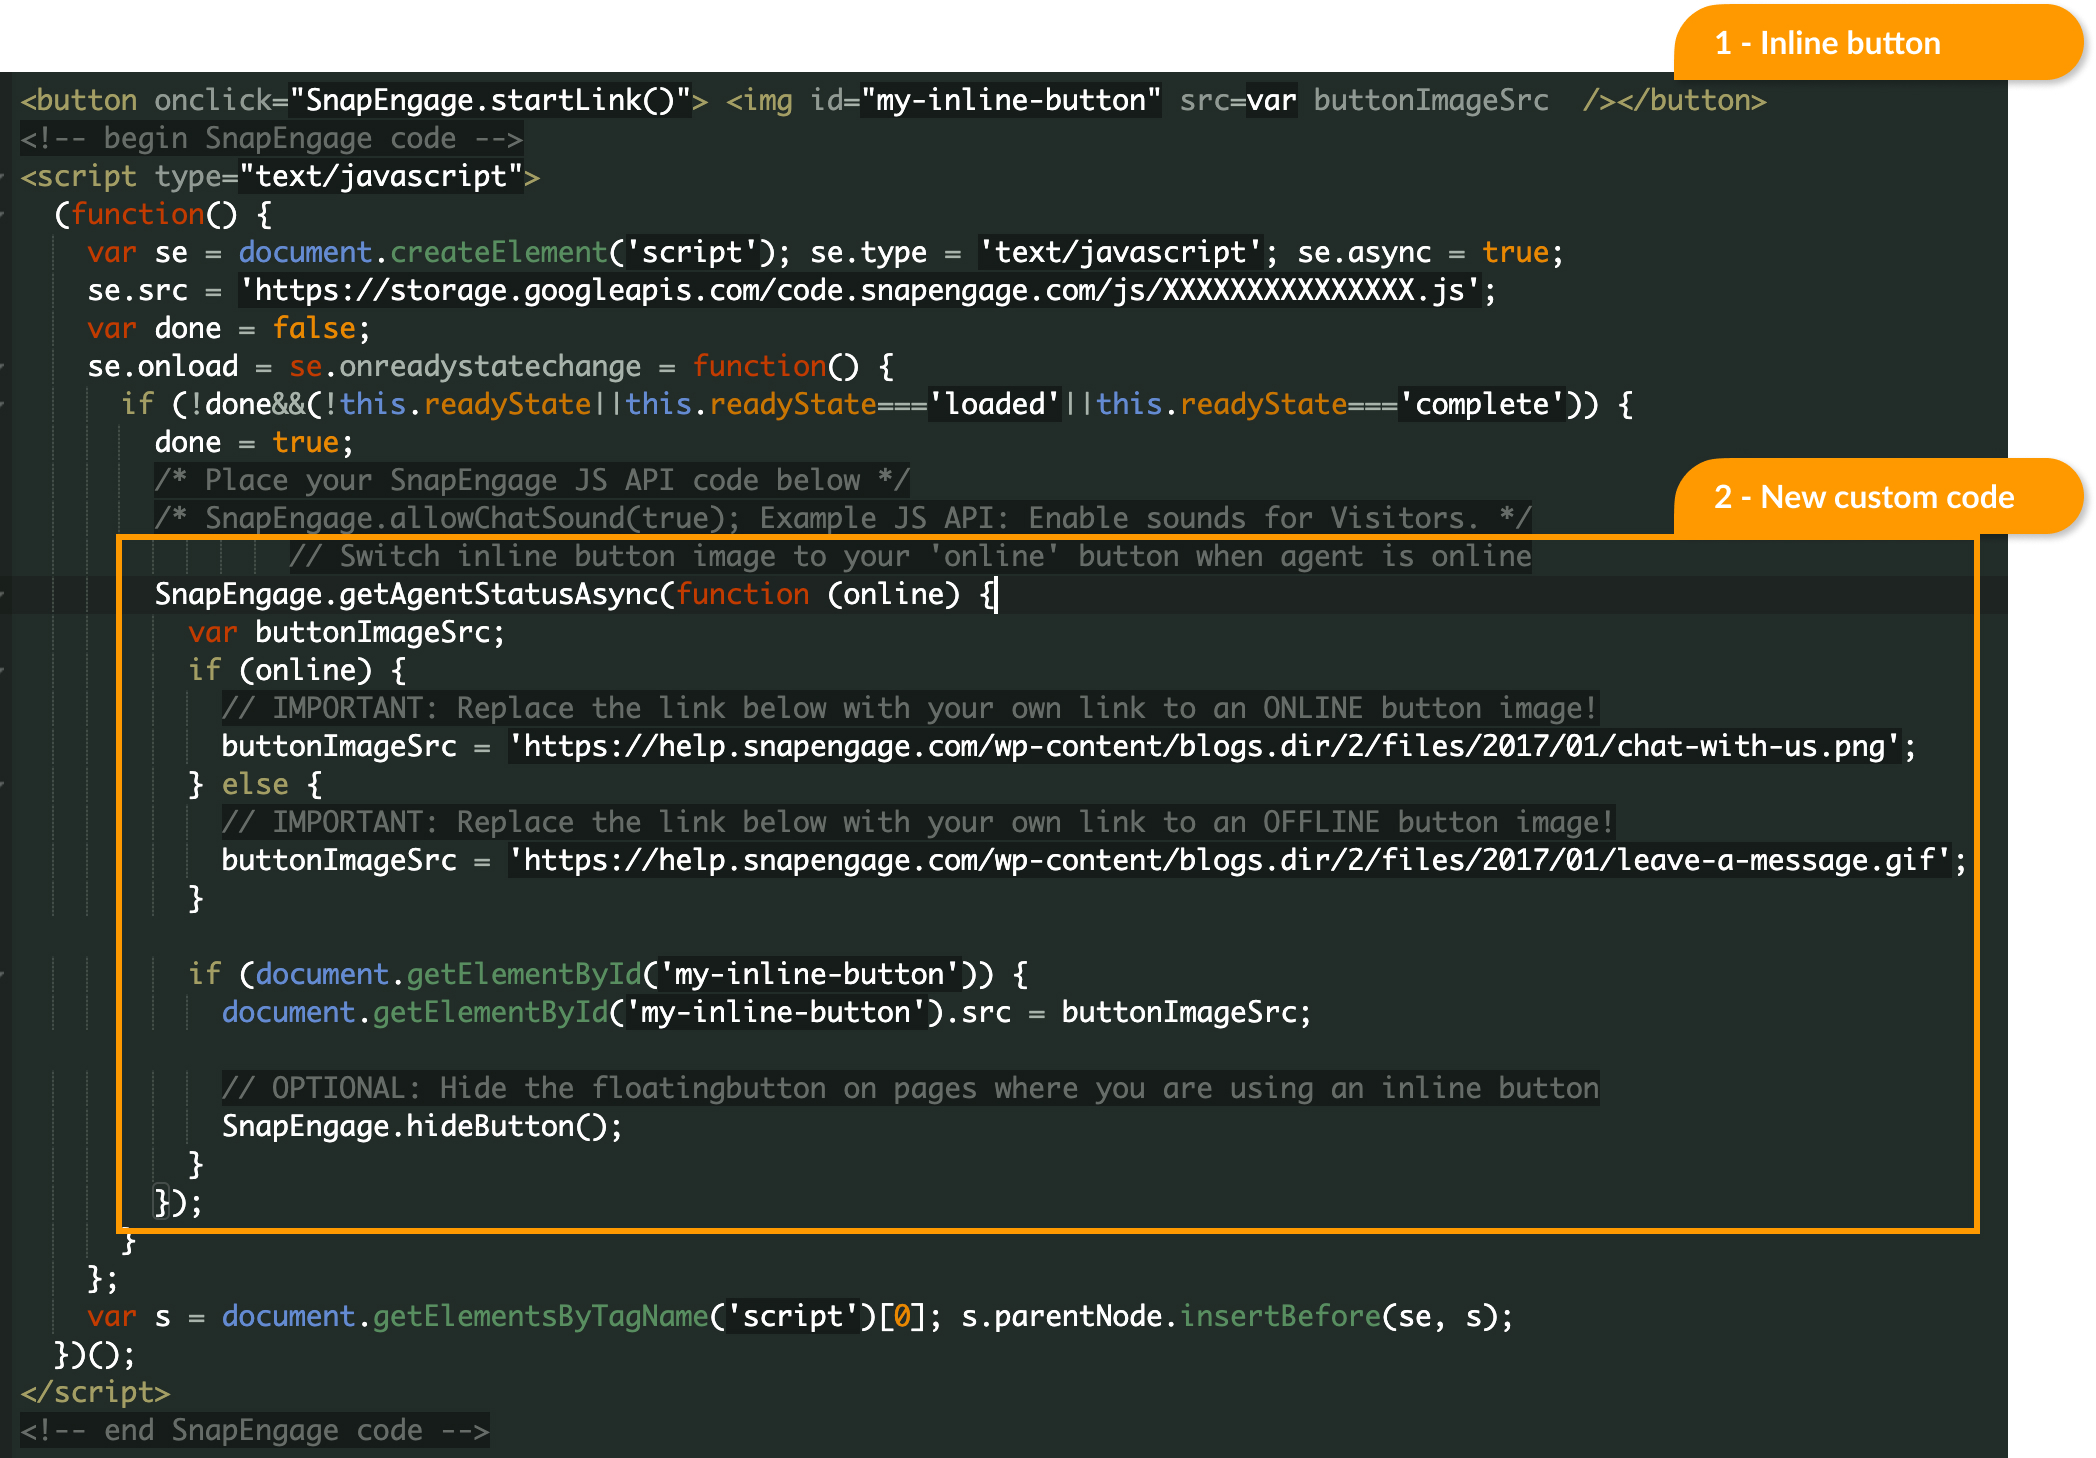
1) Place your button in your HTML page
-
- Visit the webpage where you want to place your inline button.
- Paste the following snippet of code inside your HTML code where you want the button to appear.
- OPTIONAL: You can remove the “src=”…” from the code below if you do not want the image to display at all until the status has been returned via Javascript.
<button onclick="SnapEngage.startLink()"> <img id="my-inline-button" src=var buttonImageSrc /></button>
2) Use Javascript to dynamically change the button from online to offline
- Head to the area of your website where you installed the SnapEngage code snippet.
- Copy the following custom code and paste it into your code snippet beneath where it says
/* Place your SnapEngage JS API code below */ - Make sure to use your own image source links where it says “IMPORTANT” inside the below snippet!
// Switch inline button image to your 'online' button when agent is online
SnapEngage.getAgentStatusAsync(function (online) {
var buttonImageSrc;
if (online) {
// IMPORTANT: Replace the link below with your own link to an ONLINE button image!
buttonImageSrc = 'https://help.snapengage.com/wp-content/blogs.dir/2/files/2017/01/chat-with-us.png';
} else {
// IMPORTANT: Replace the link below with your own link to an OFFLINE button image!
buttonImageSrc = 'https://help.snapengage.com/wp-content/blogs.dir/2/files/2017/01/leave-a-message.gif';
}

if (document.getElementById('my-inline-button')) {
document.getElementById('my-inline-button').src = buttonImageSrc;

// OPTIONAL: Hide the floatingbutton on pages where you are using an inline button
SnapEngage.hideButton();
}
});
The final product:
Here is what the custom code should look like inside your existing SnapEngage code snippet:
Did you find this article helpful?
 (4 votes, average: 5.00 out of 5)
Published January 27, 2017