Home > How to Add Google Business Messages as a New Channel
Categories: Featured Article
(Last Updated On: )
About Google Business Messages
Help your customers reach you with the scale of Google Business Messages. Customers can now reach out to you via Google Business Messages. Integrate your TeamSupport account with Google Business Messages and bring all your conversations from Google Business Messages directly into TeamSupport Messaging and Live Chat. You can then have customers interact with either chatbots or live agents.
Click here to learn more about other channels available for TeamSupport Messaging and Live Chat.
Note: This channel will only work for a visitor inside of the google maps app on a phone or tablet. This channel is not available on maps thru a normal desktop nor on the google page.
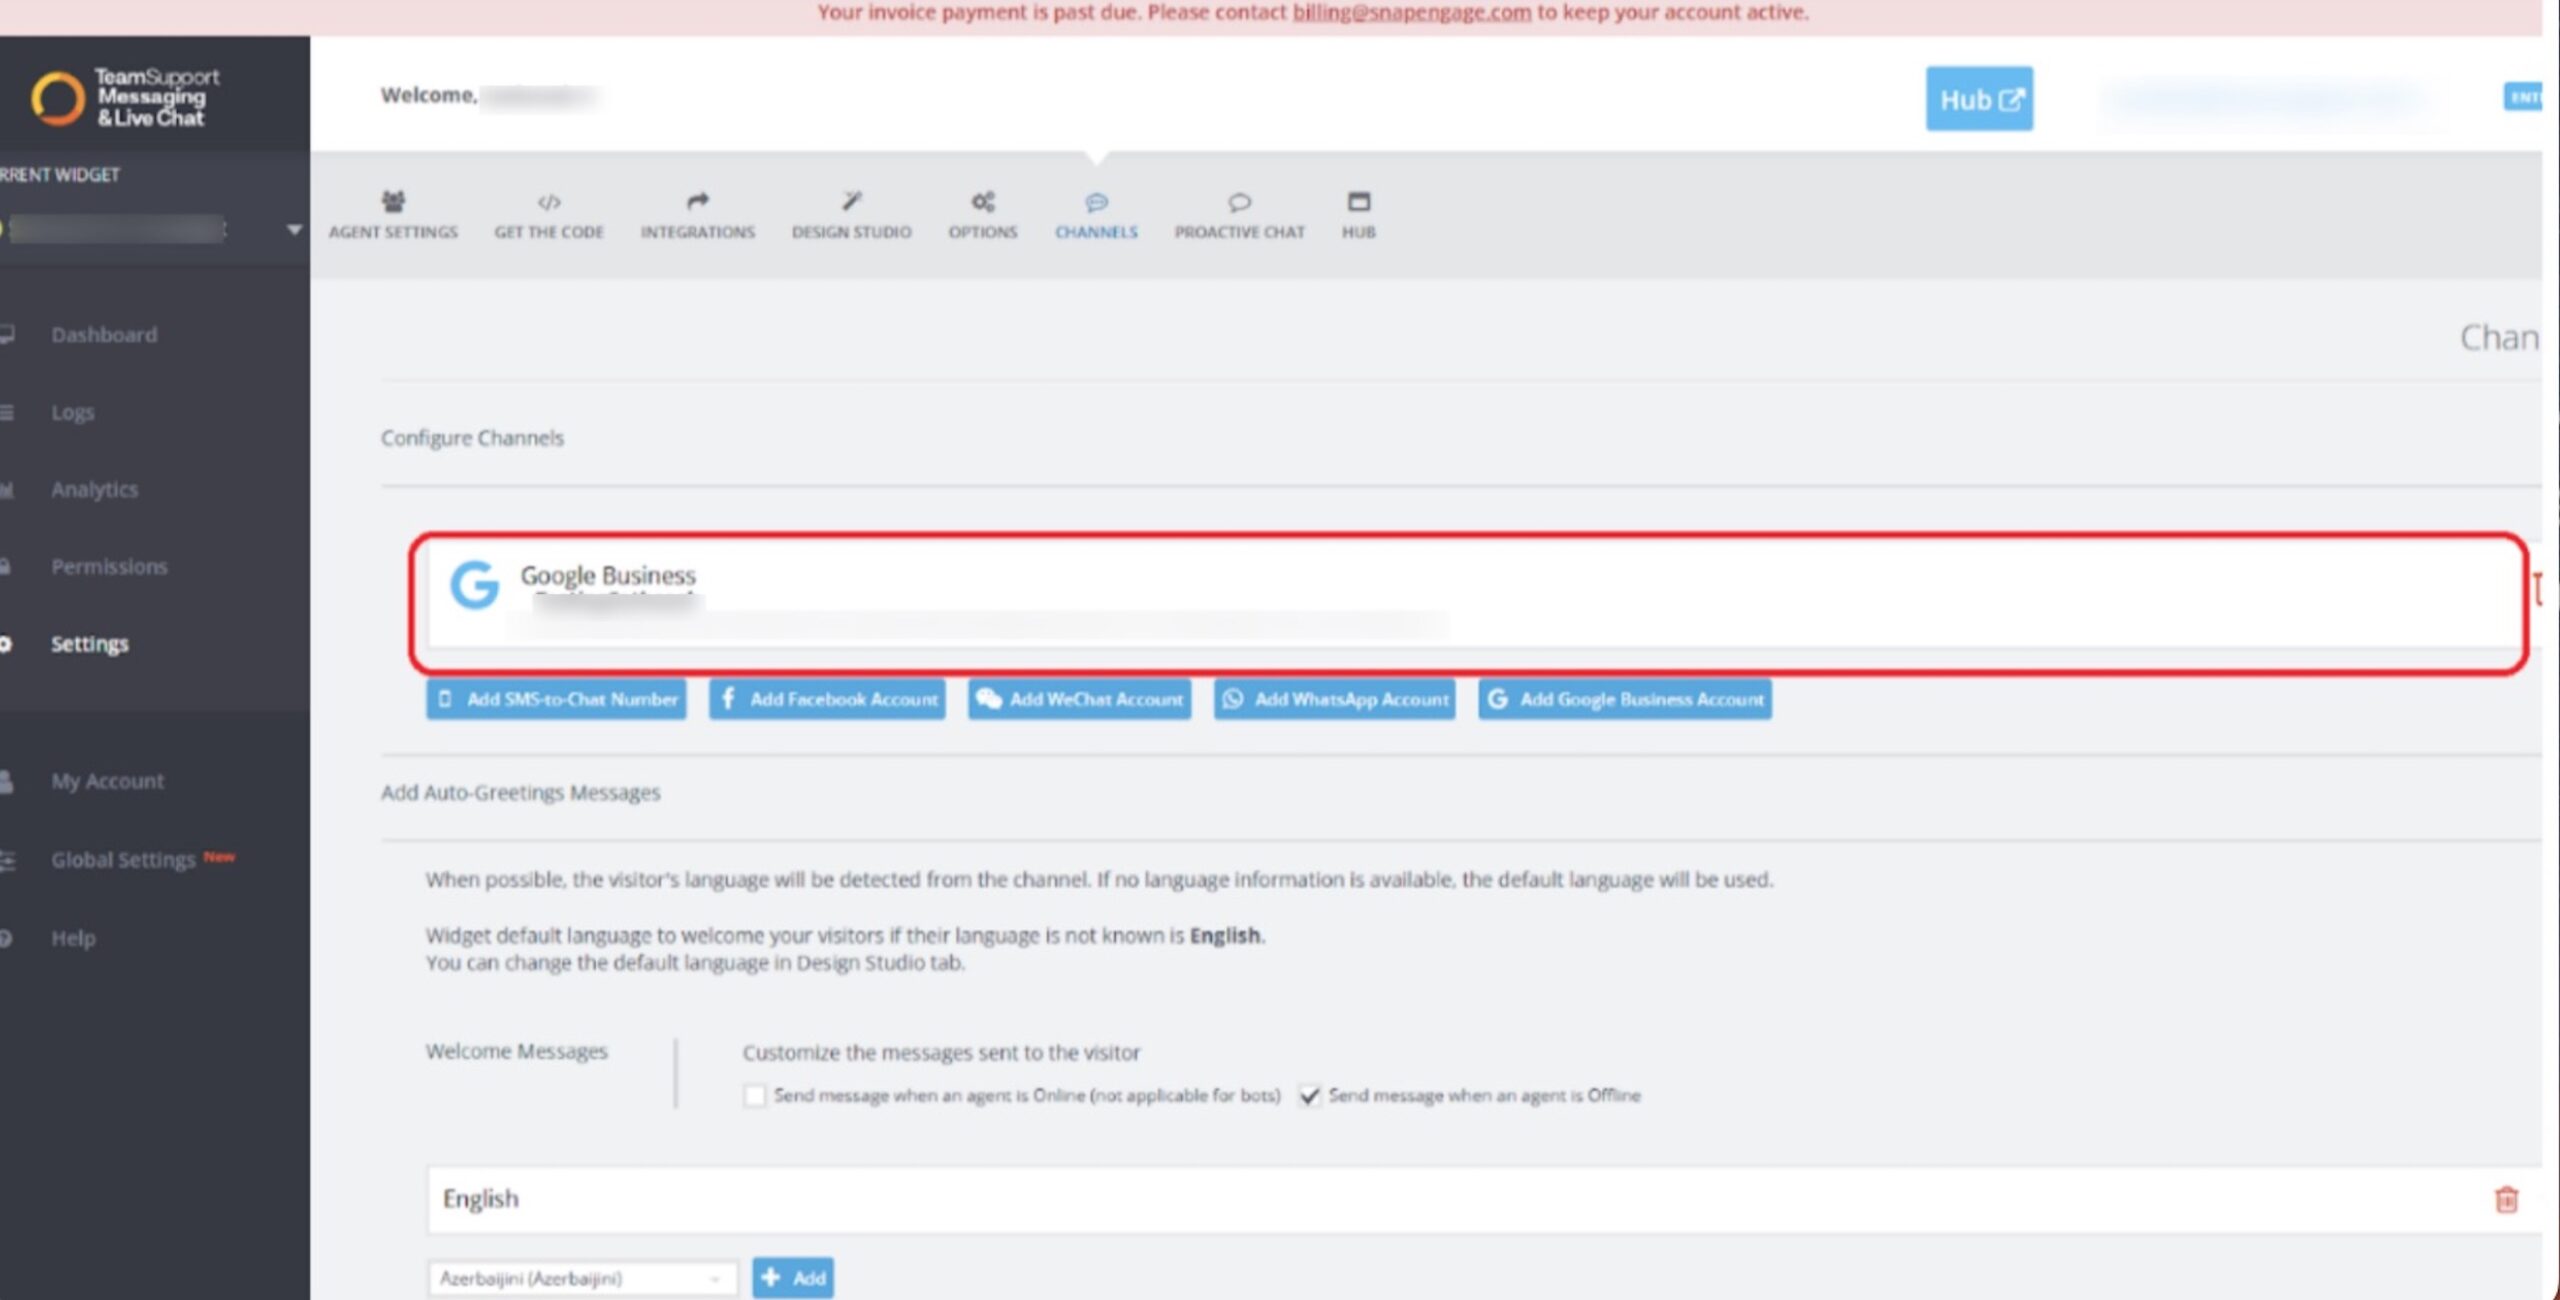
How to add Google Business Messages to Your TeamSupport Messaging Channels
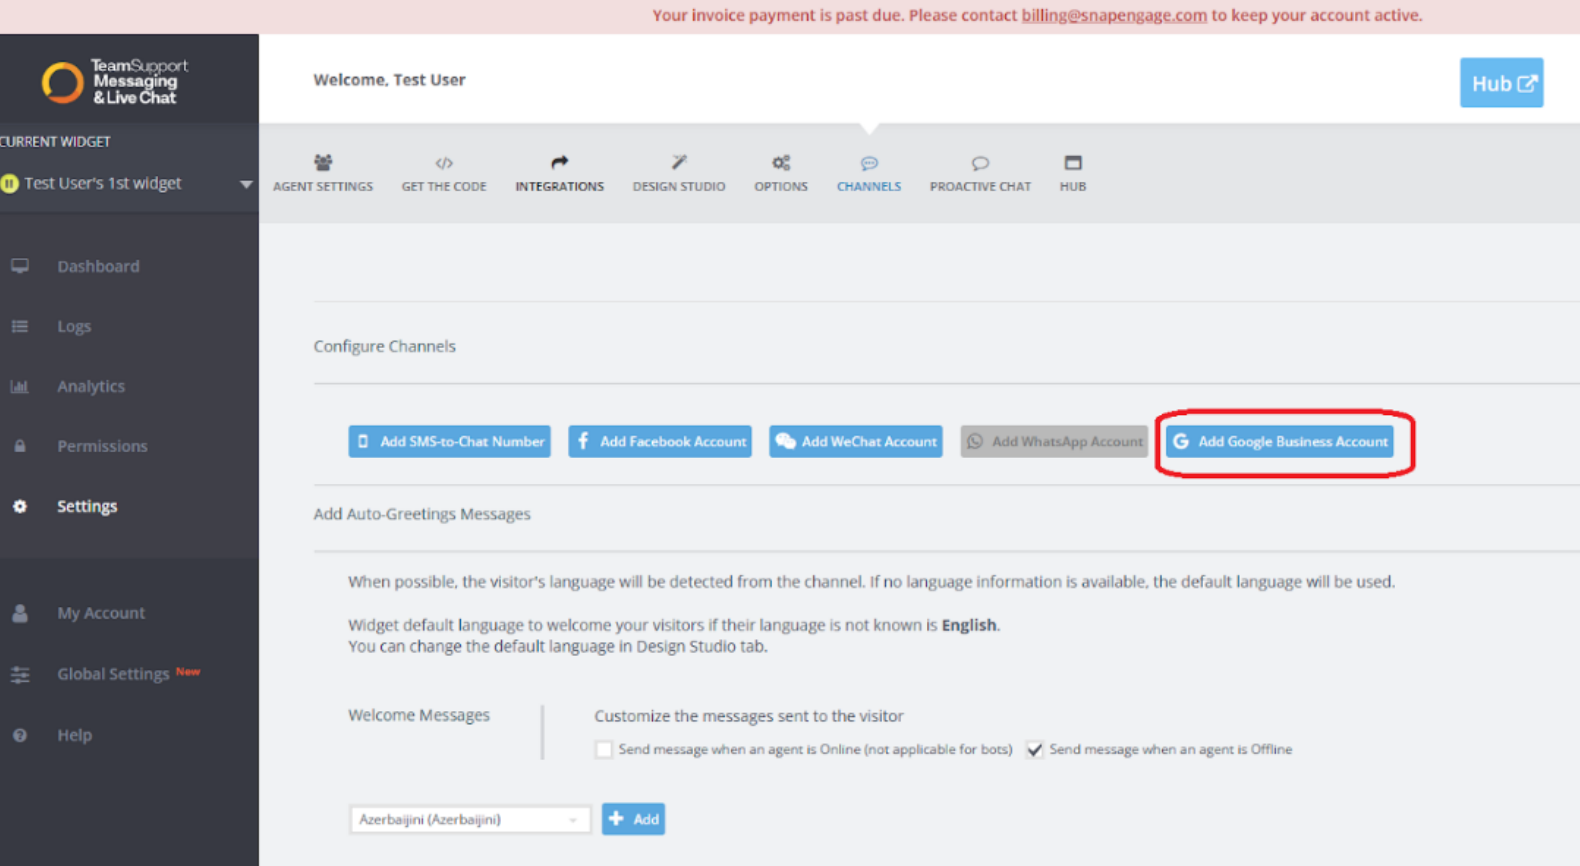
Navigate to Admin Dashboard -> Channels tab and click on the “Add Google Business Account” button.
Next you will see this prompt –
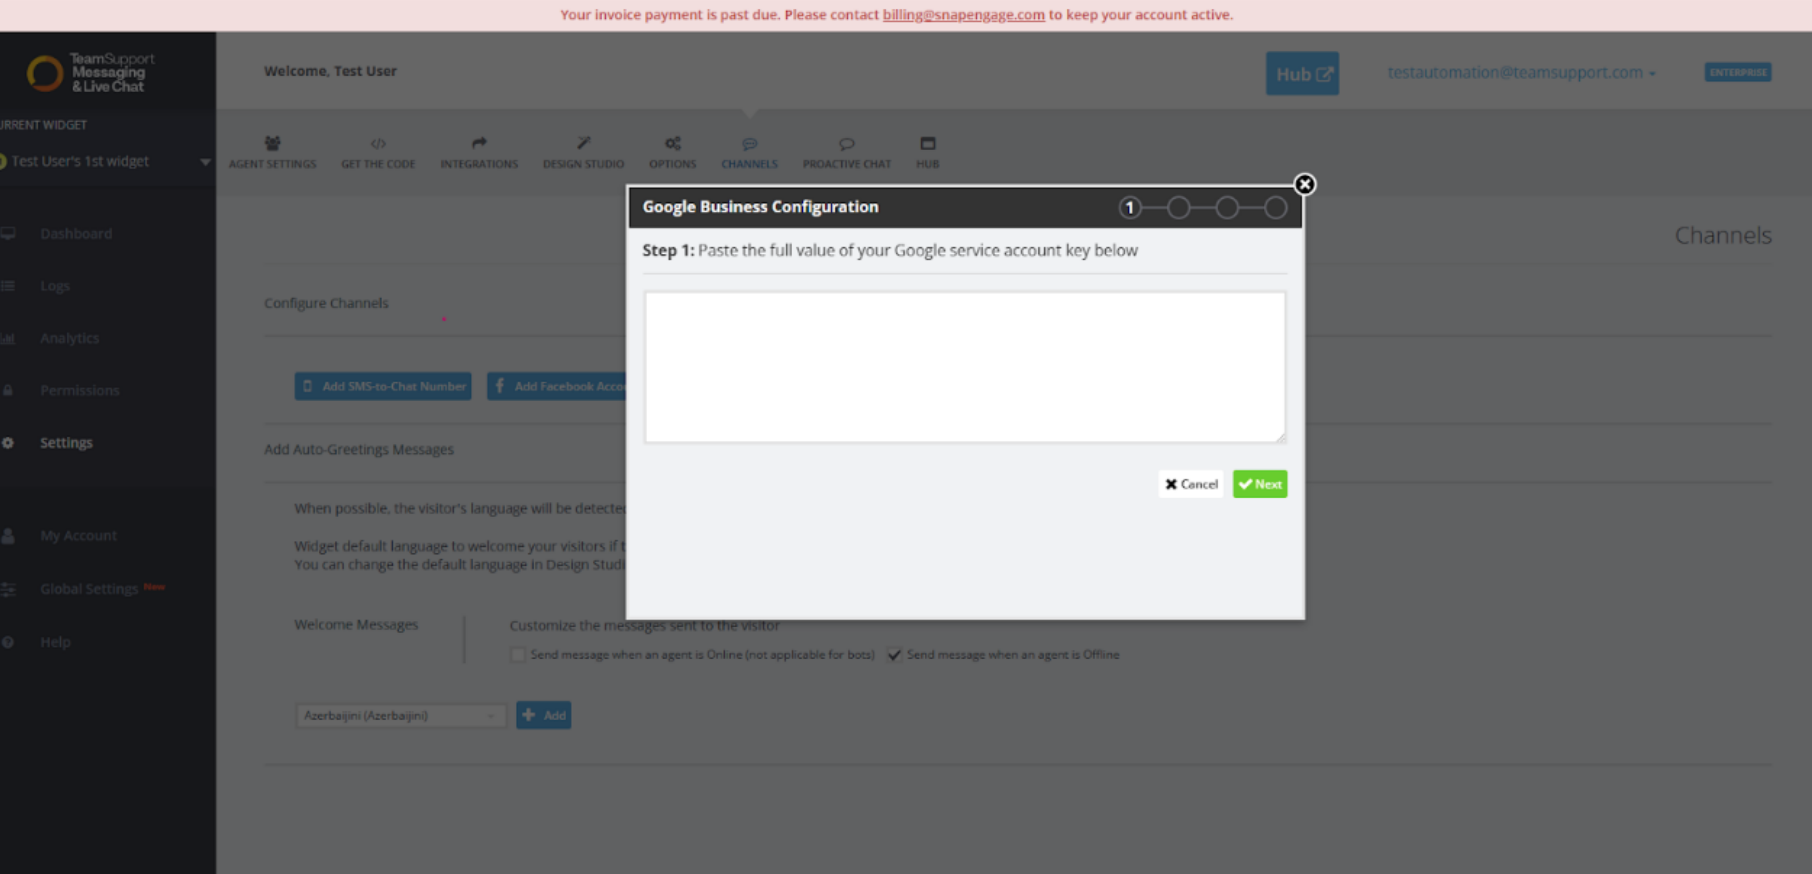
Sign into the following url and select the agent that you want to configure:
https://business-communications.cloud.google.com/console/partner-console
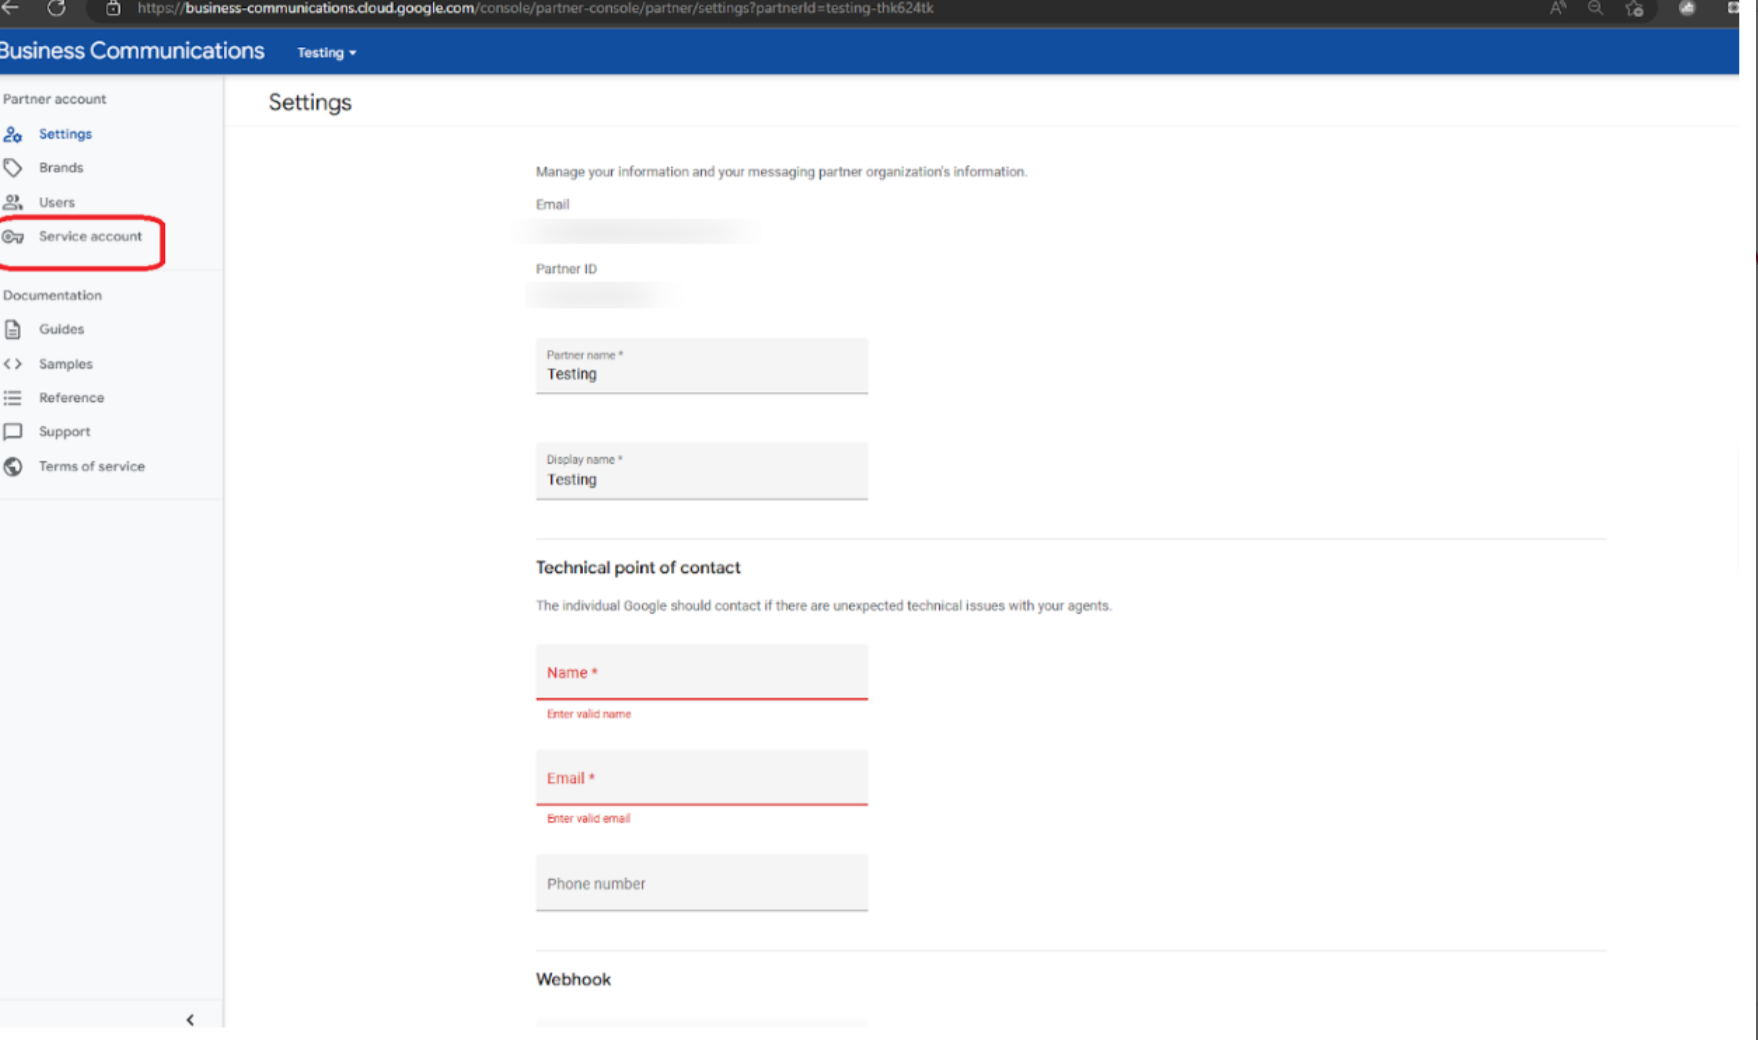
Go to Welcome to Business Communications page and click on the Partner account settings

Next click on the Service account menu on the left hand side.
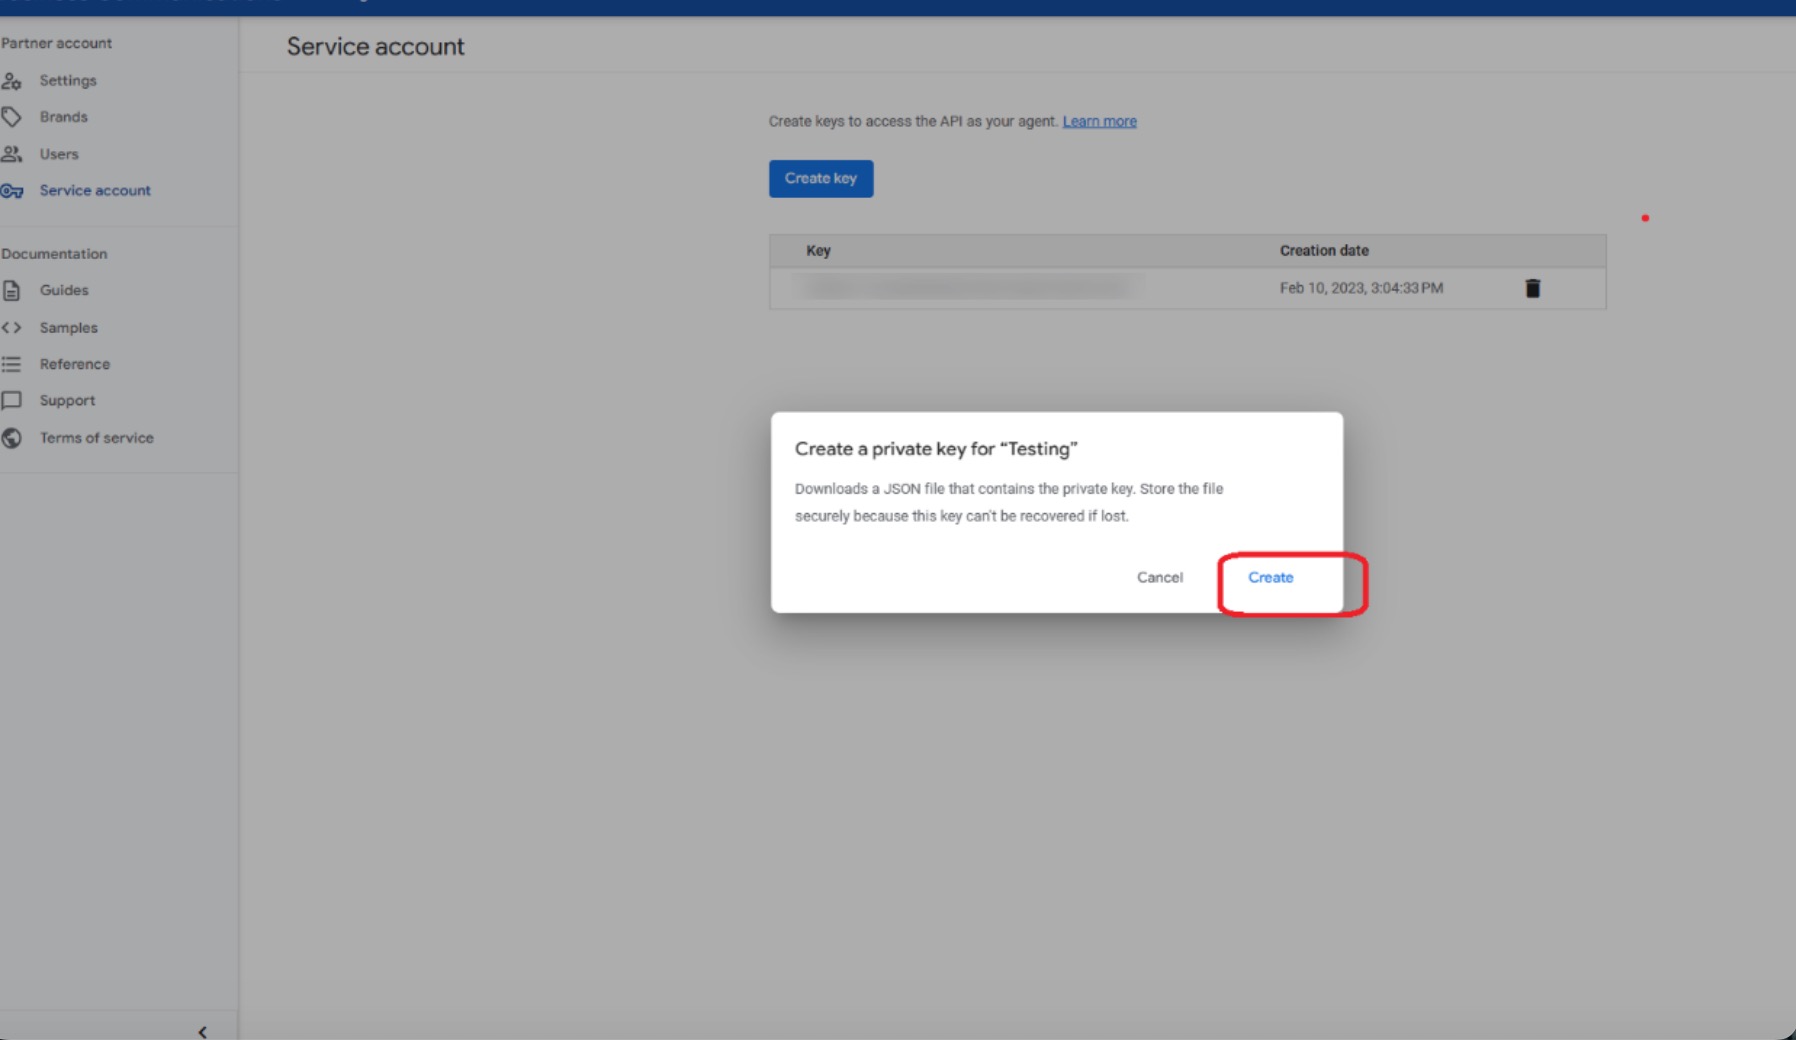
Next click on the “Create Key” and click “Create”
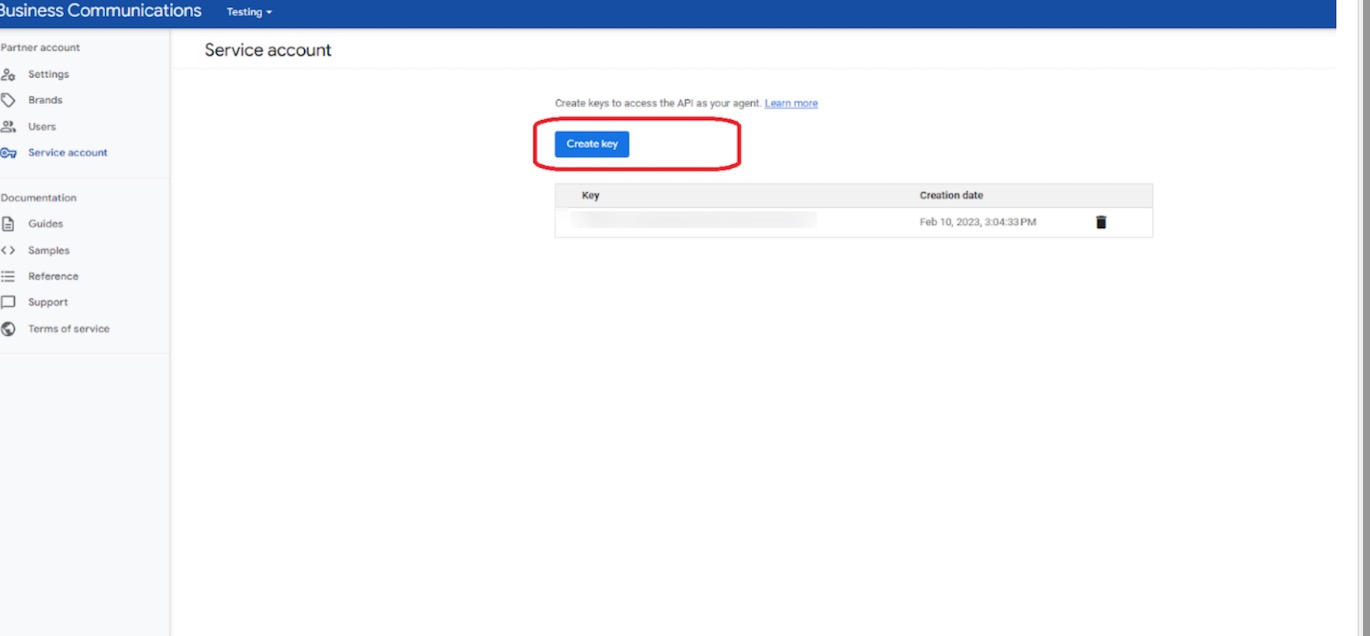
See below and click Create
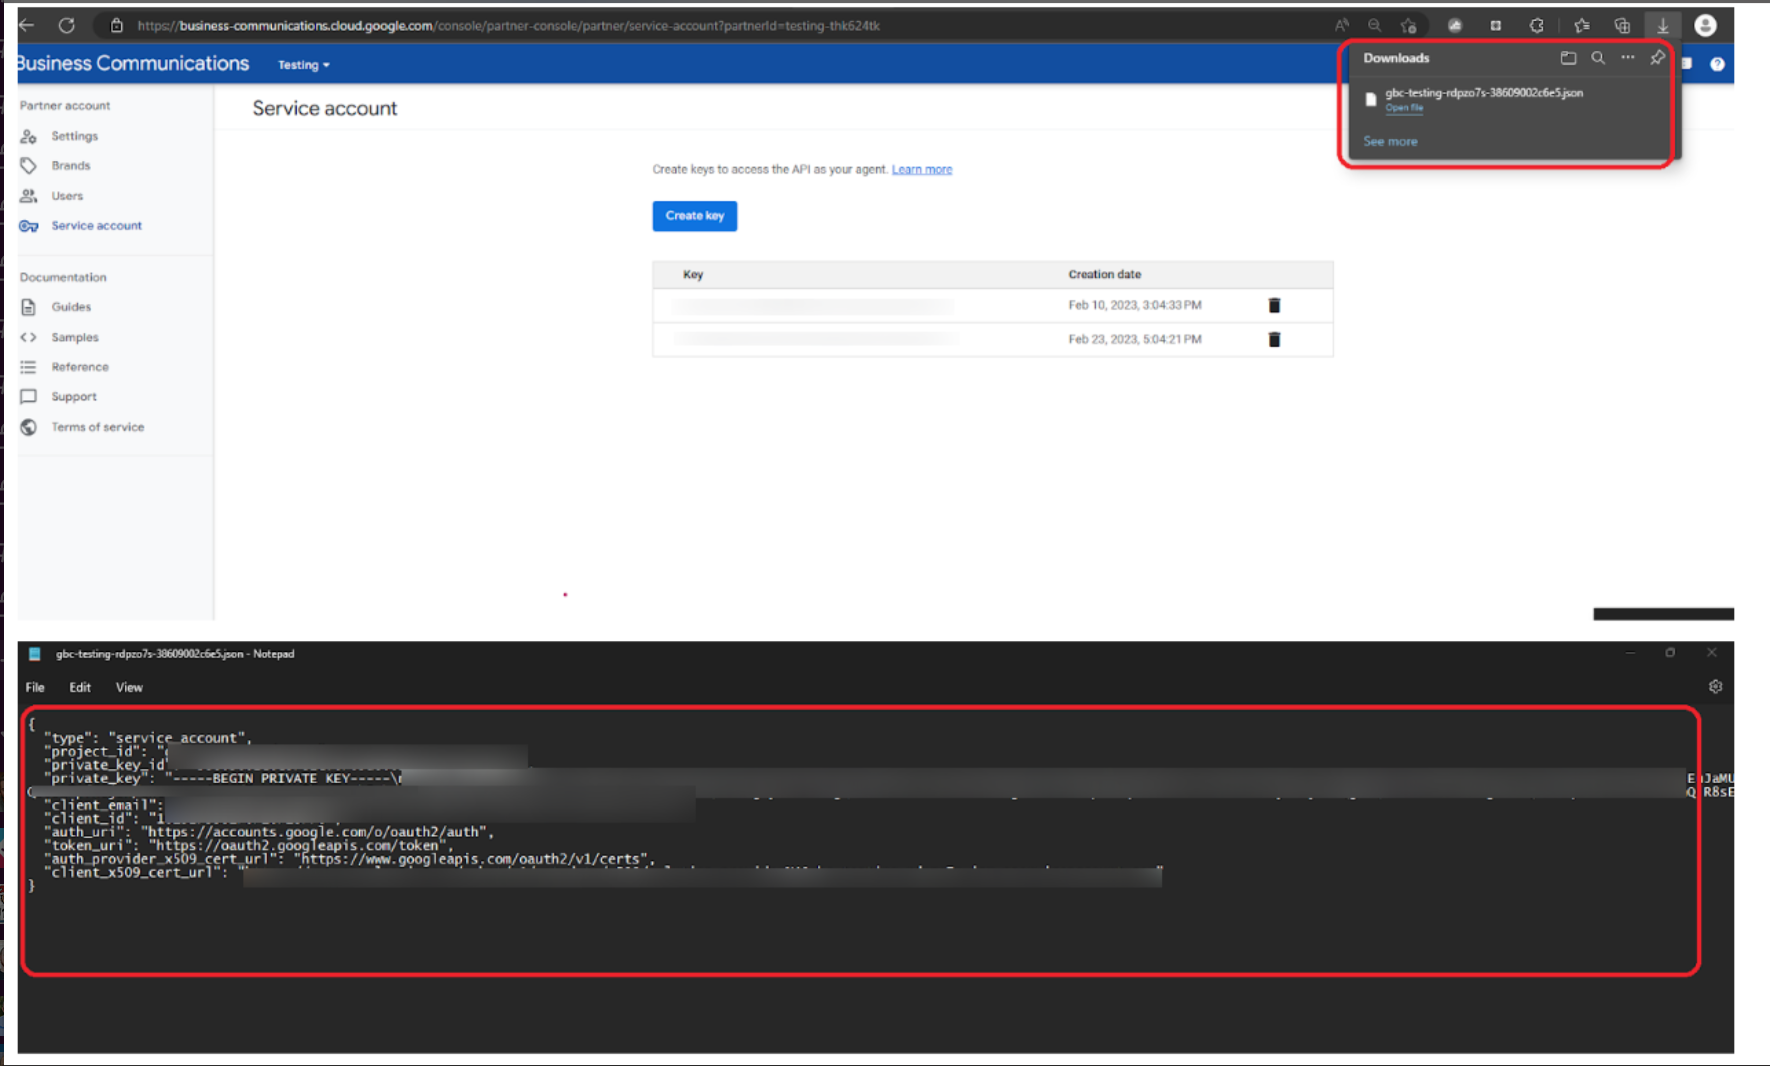
Next click on the downloads Open file and open in Notepad and copy the data into a note. You will need this in a later step in the admin dashboard.
Navigate back to the Admin Dashboard to paste into the Admin dashboard > Google service account key as seen below and click “Next”.
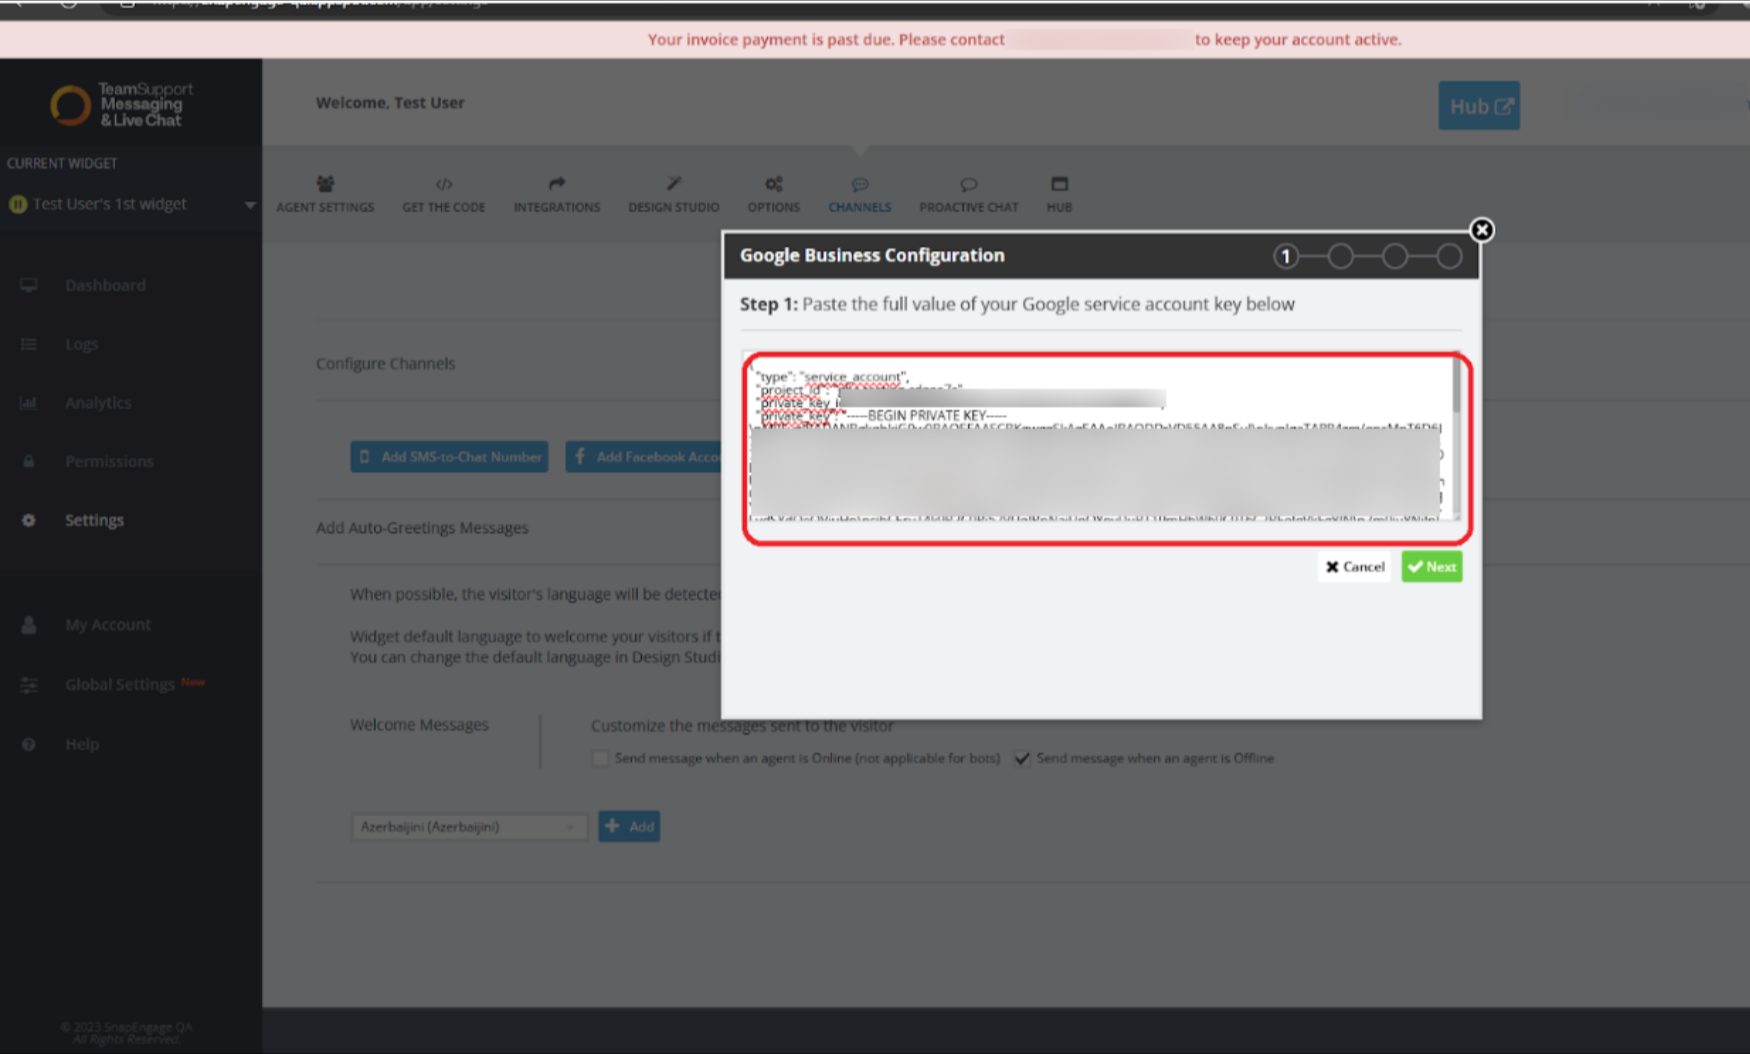
Once you click on next you will see the following.

Sign back into the following url and select the agent that you want to configure:
https://business-communications.cloud.google.com/console/partner-console
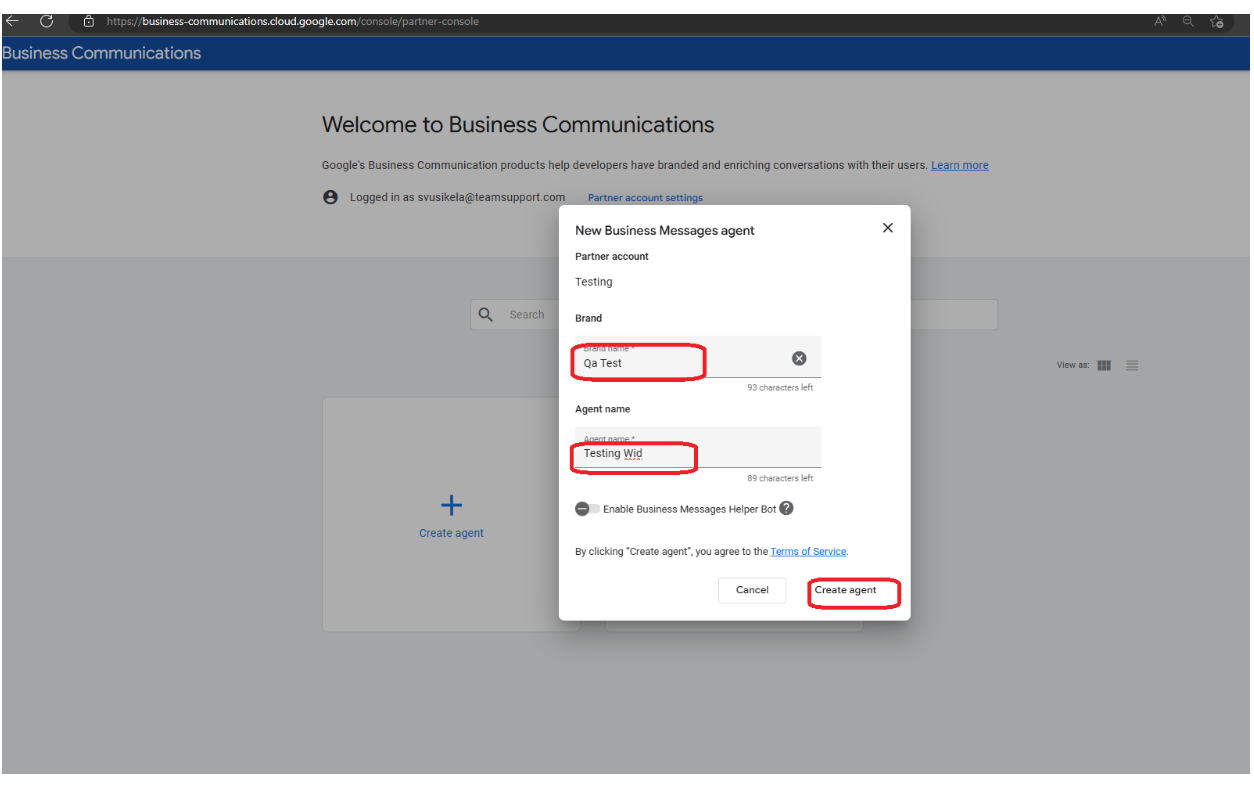
Go to Welcome to Business Communications page and click on Create agent as seen below.
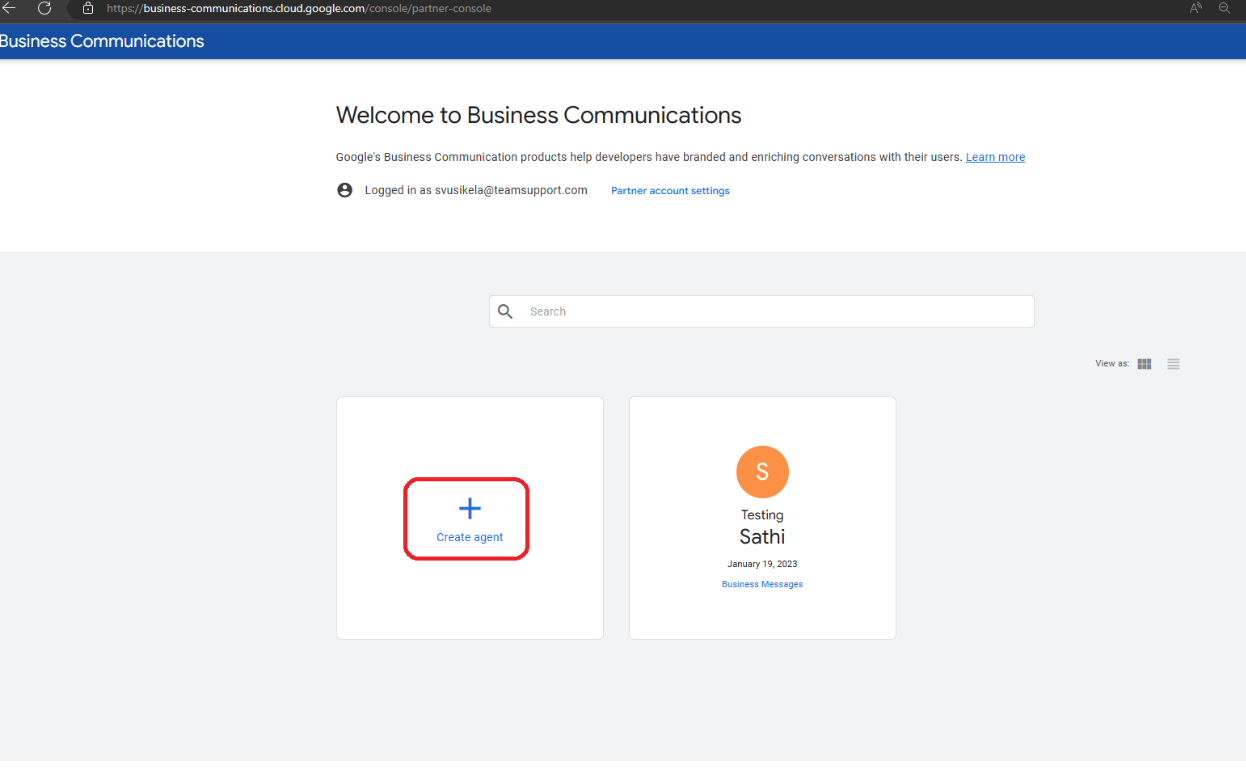
Give a Brand name and an Agent name and Click on Create agent and agent should be created
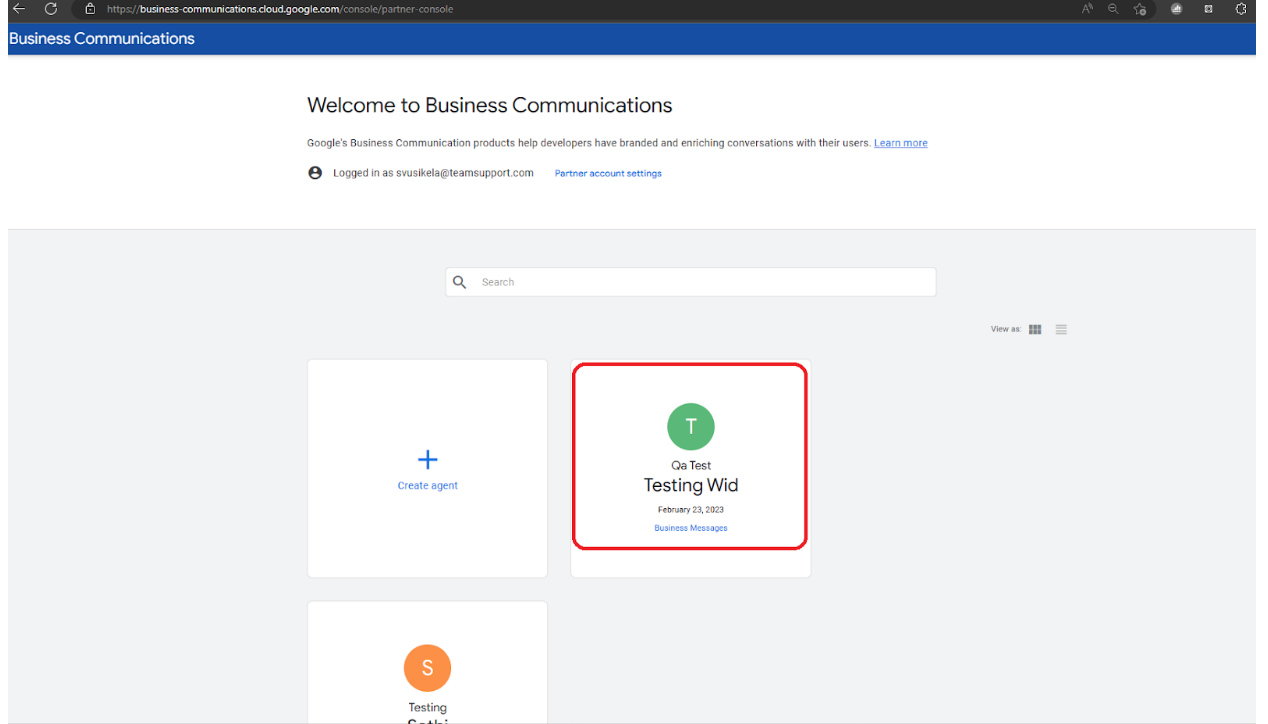
You will then see this screen.
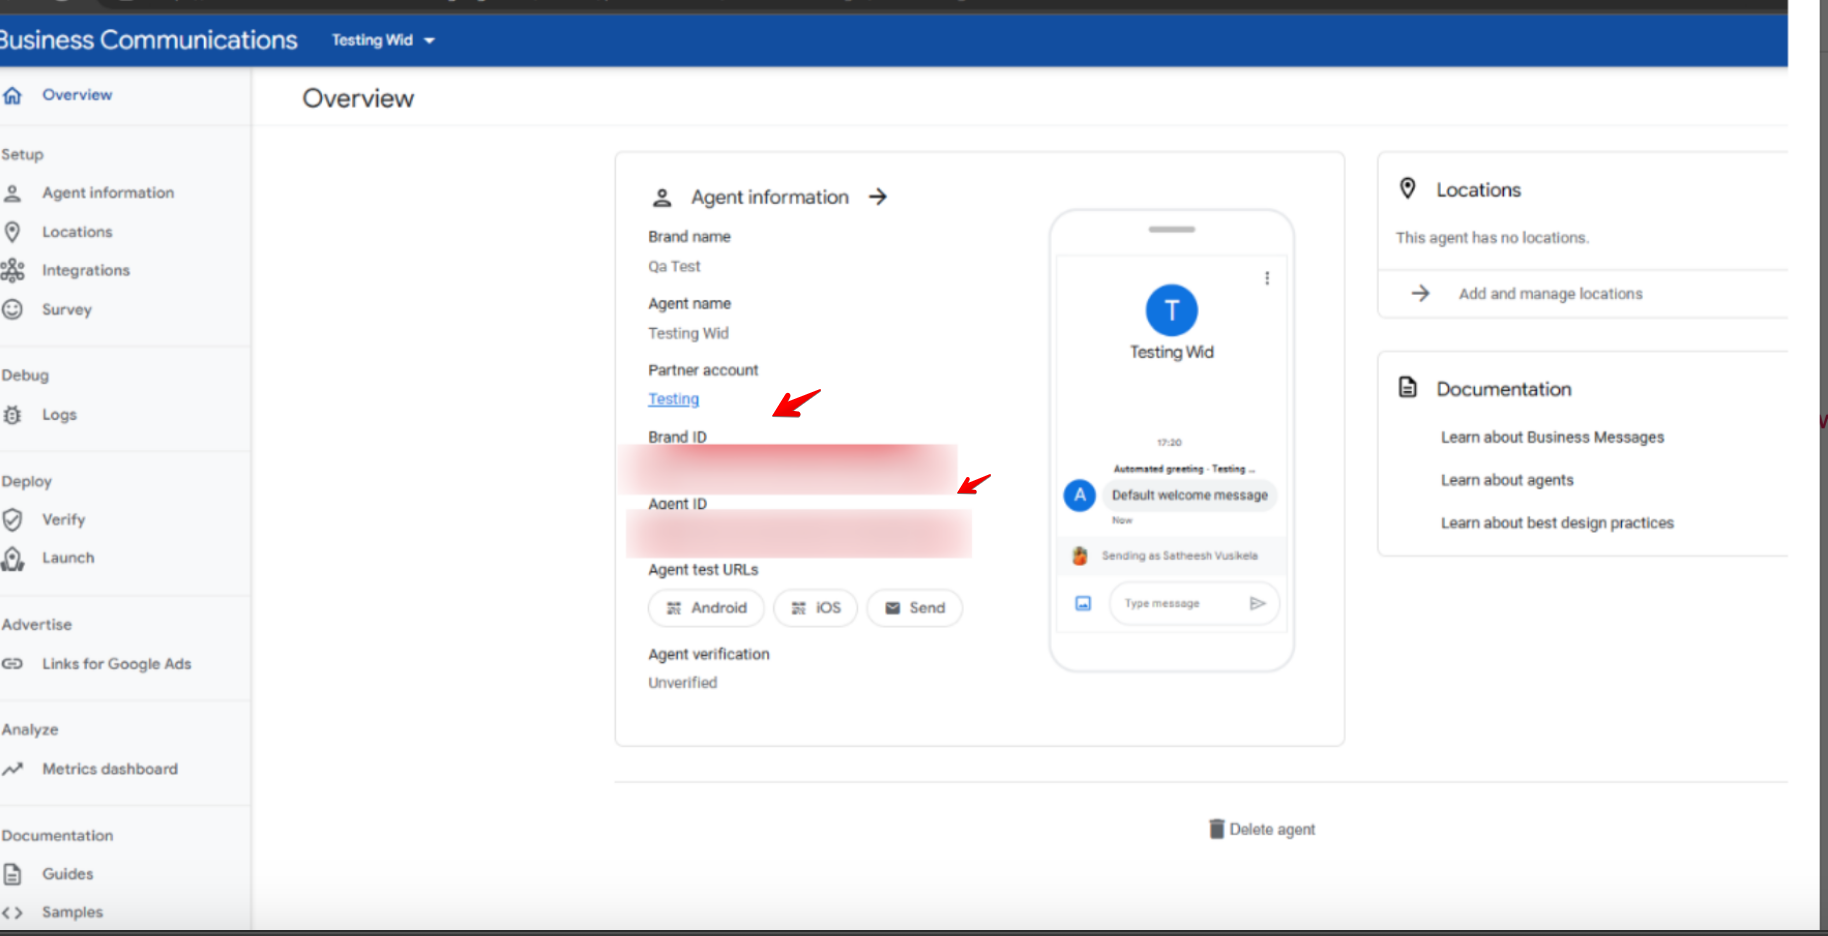
Next click on the Overview page and locate the Brand ID and Agent ID.
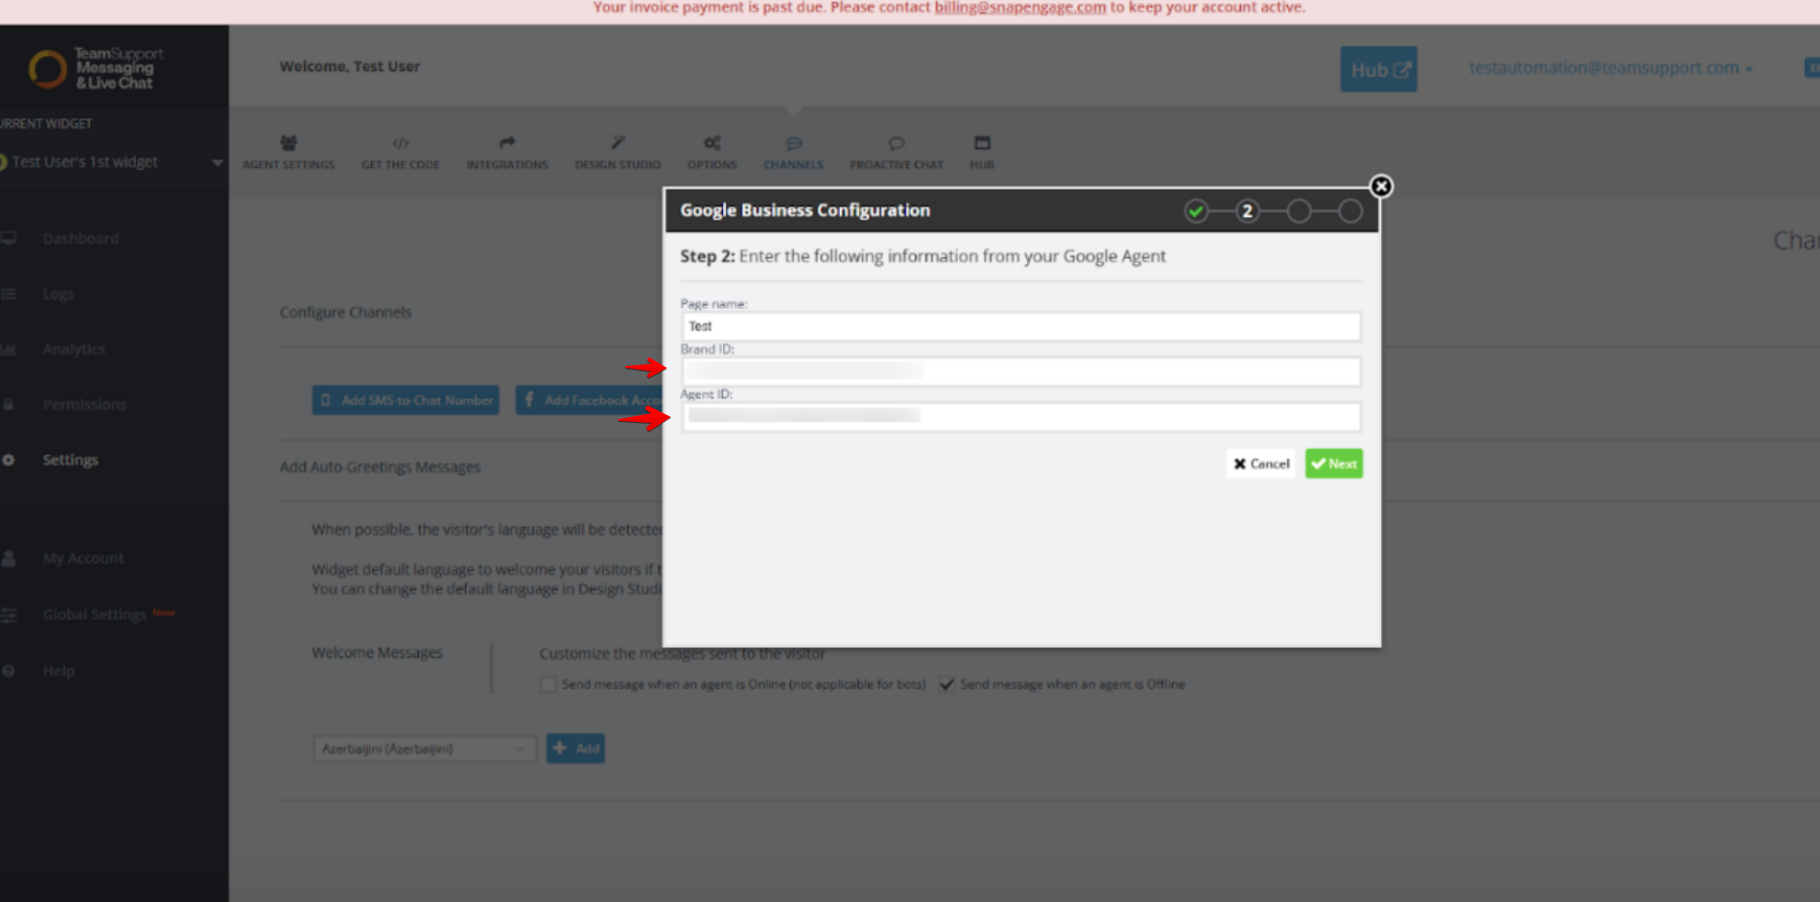
Copy and paste the Brand ID and Agent ID into the Google Business Configuration Dialog box in the admin dashboard like below and then click on “Next”.
Now, return to the Google Business Configuration and click on Integrations.
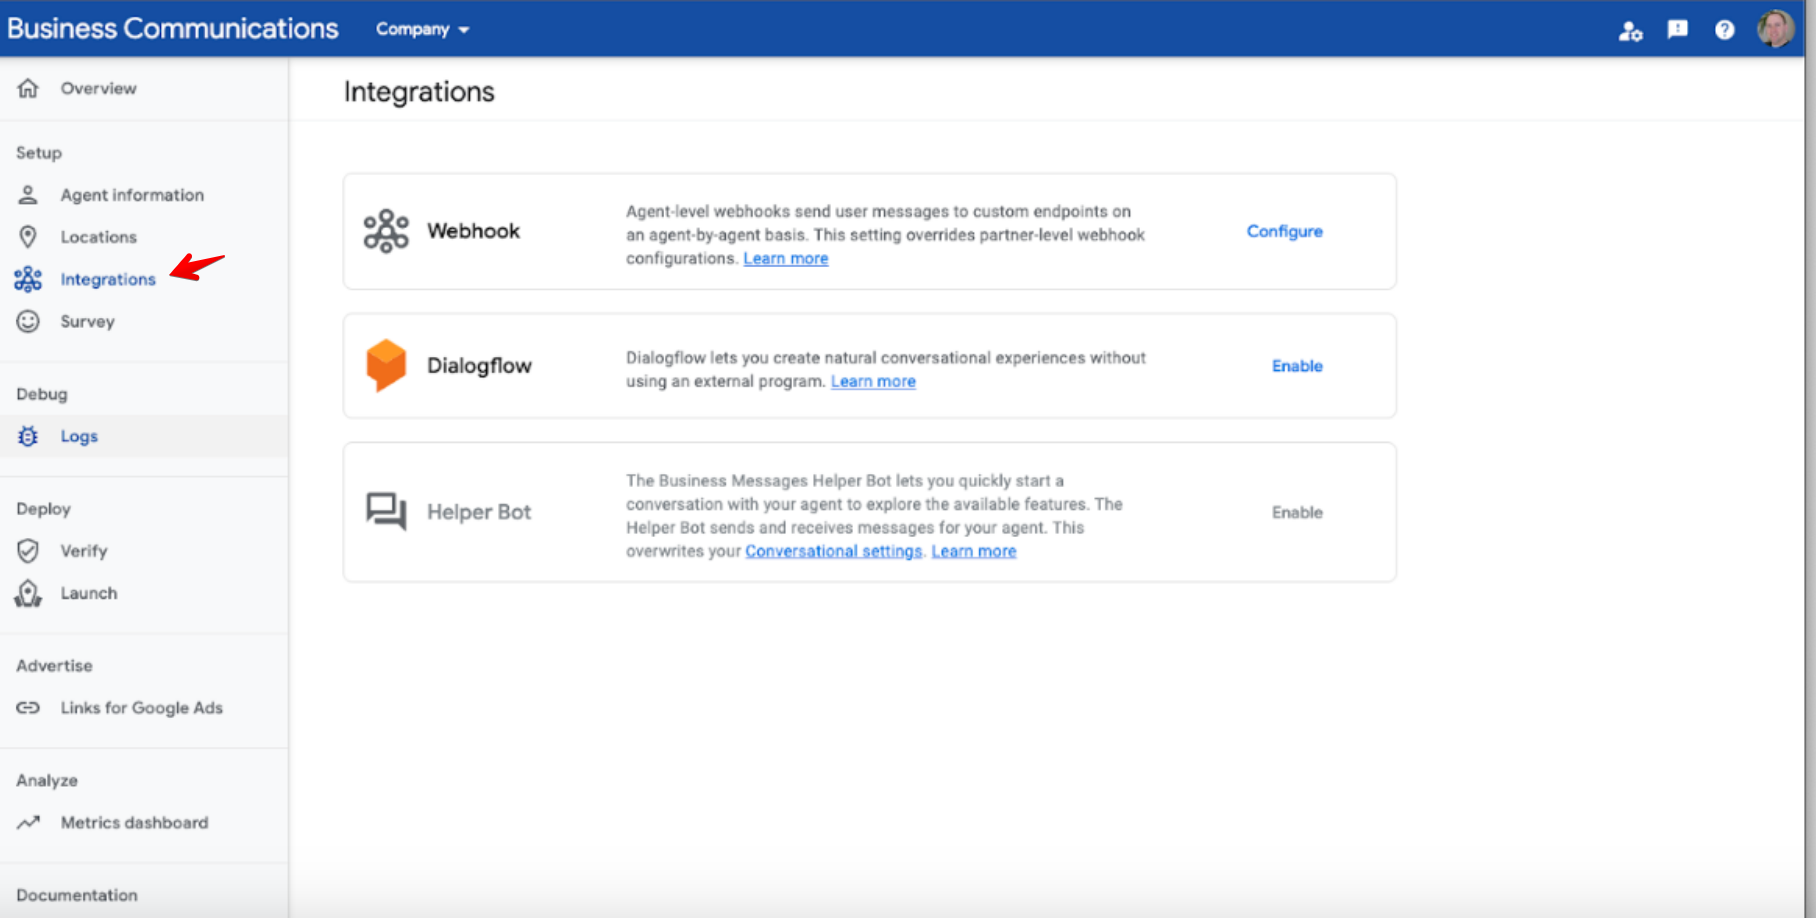
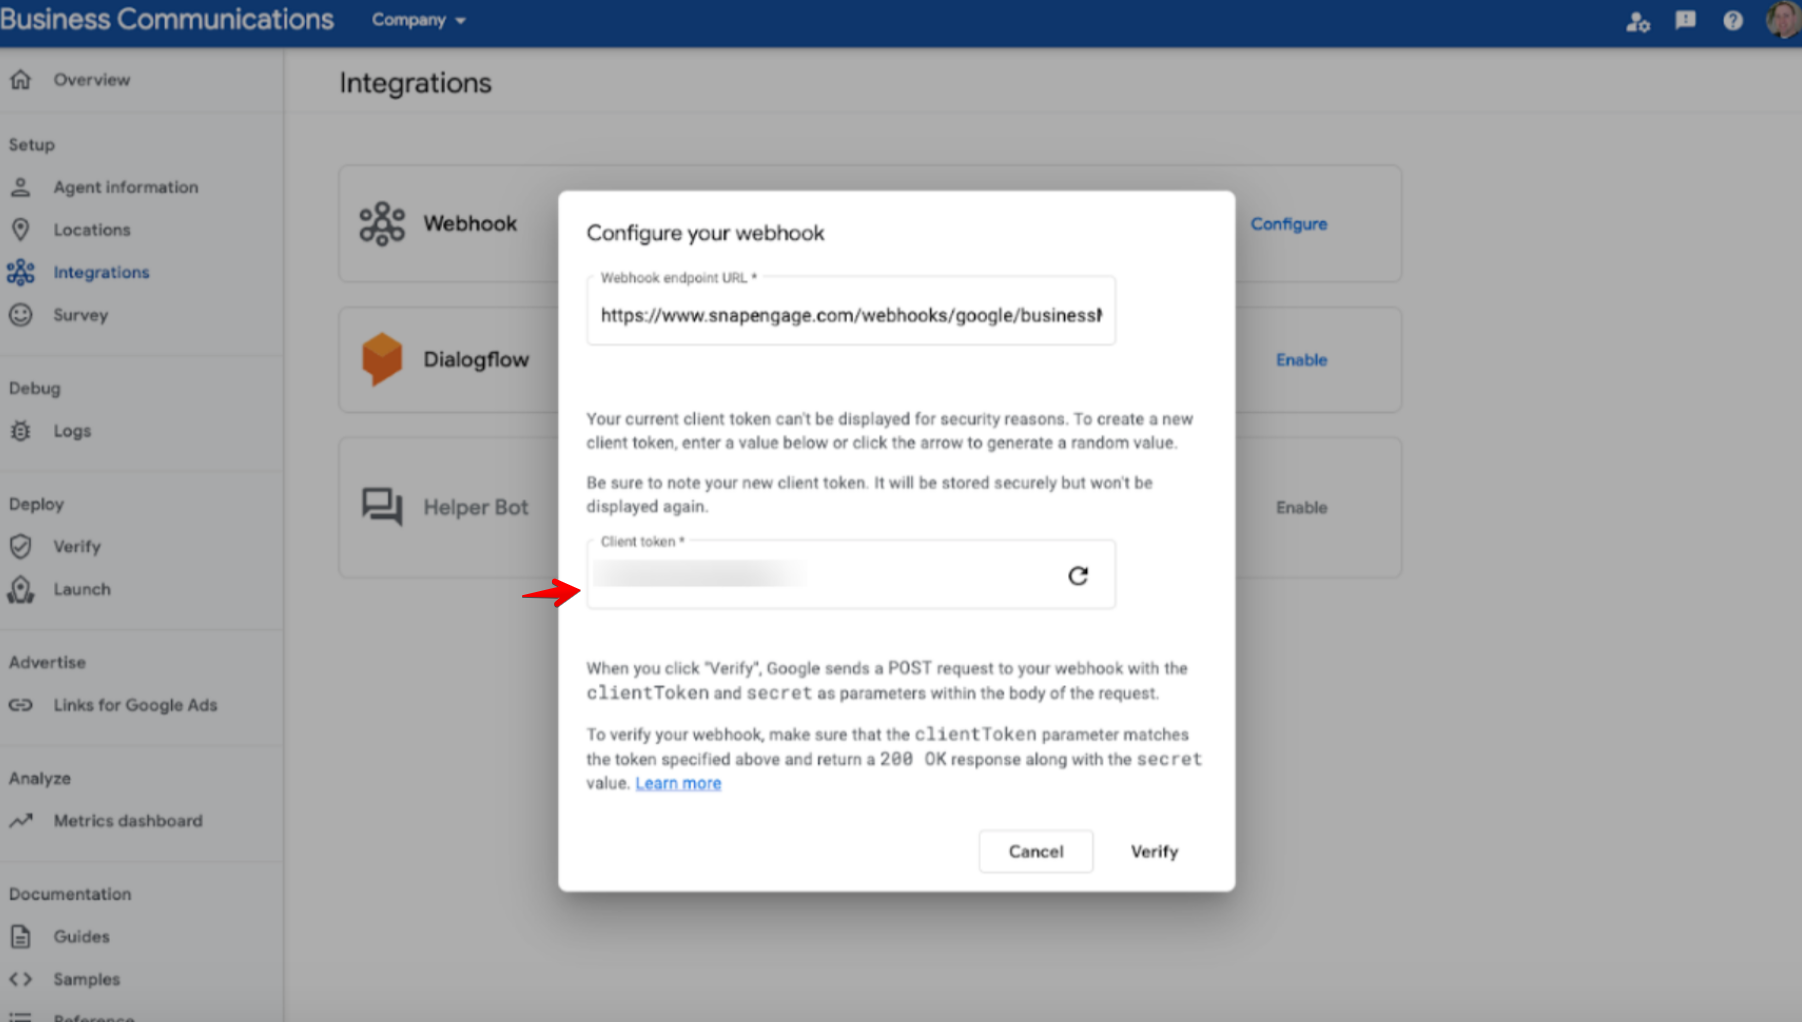
Next click on the “Configure” link in the Webhook section to see this screen below.
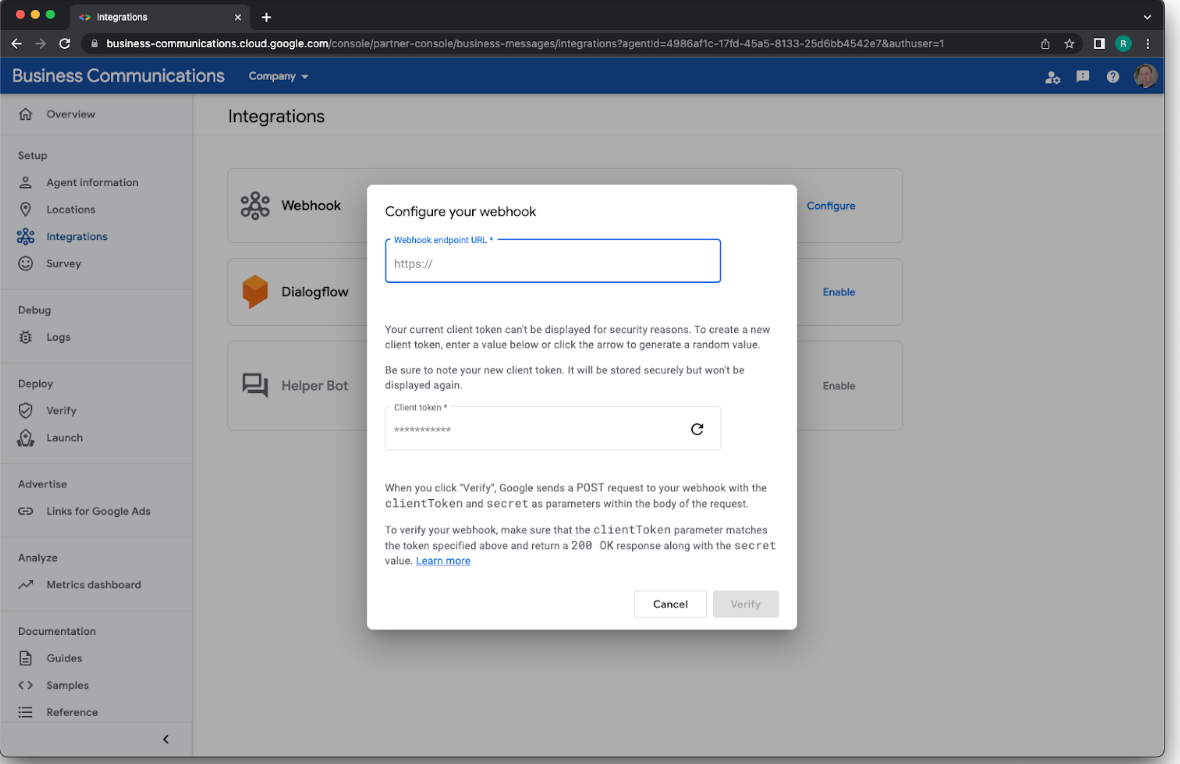
Go back to the admin dashboard to get a Webhook endpoint URL.
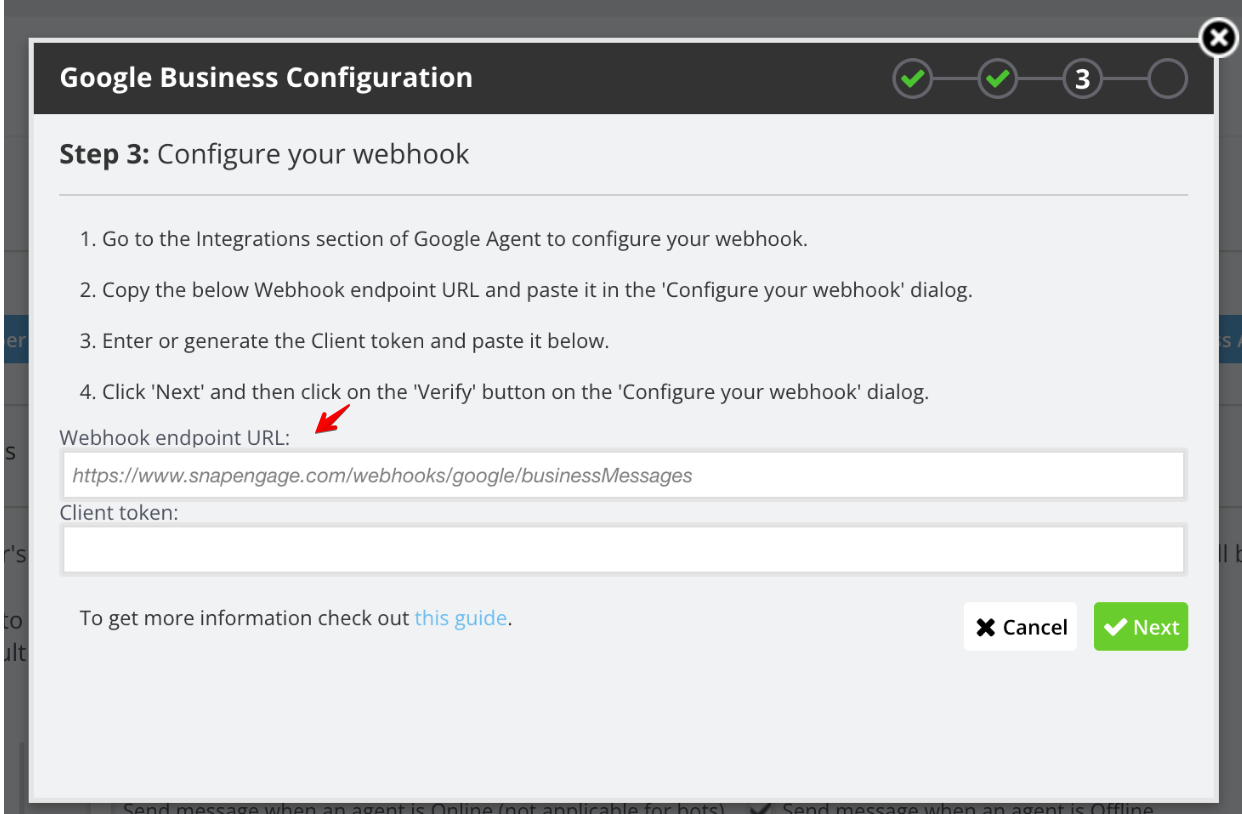
Next go back to Google to copy & paste the Webhook endpoint URL from admin dashboard (the above image) into the Business Communications dialog:
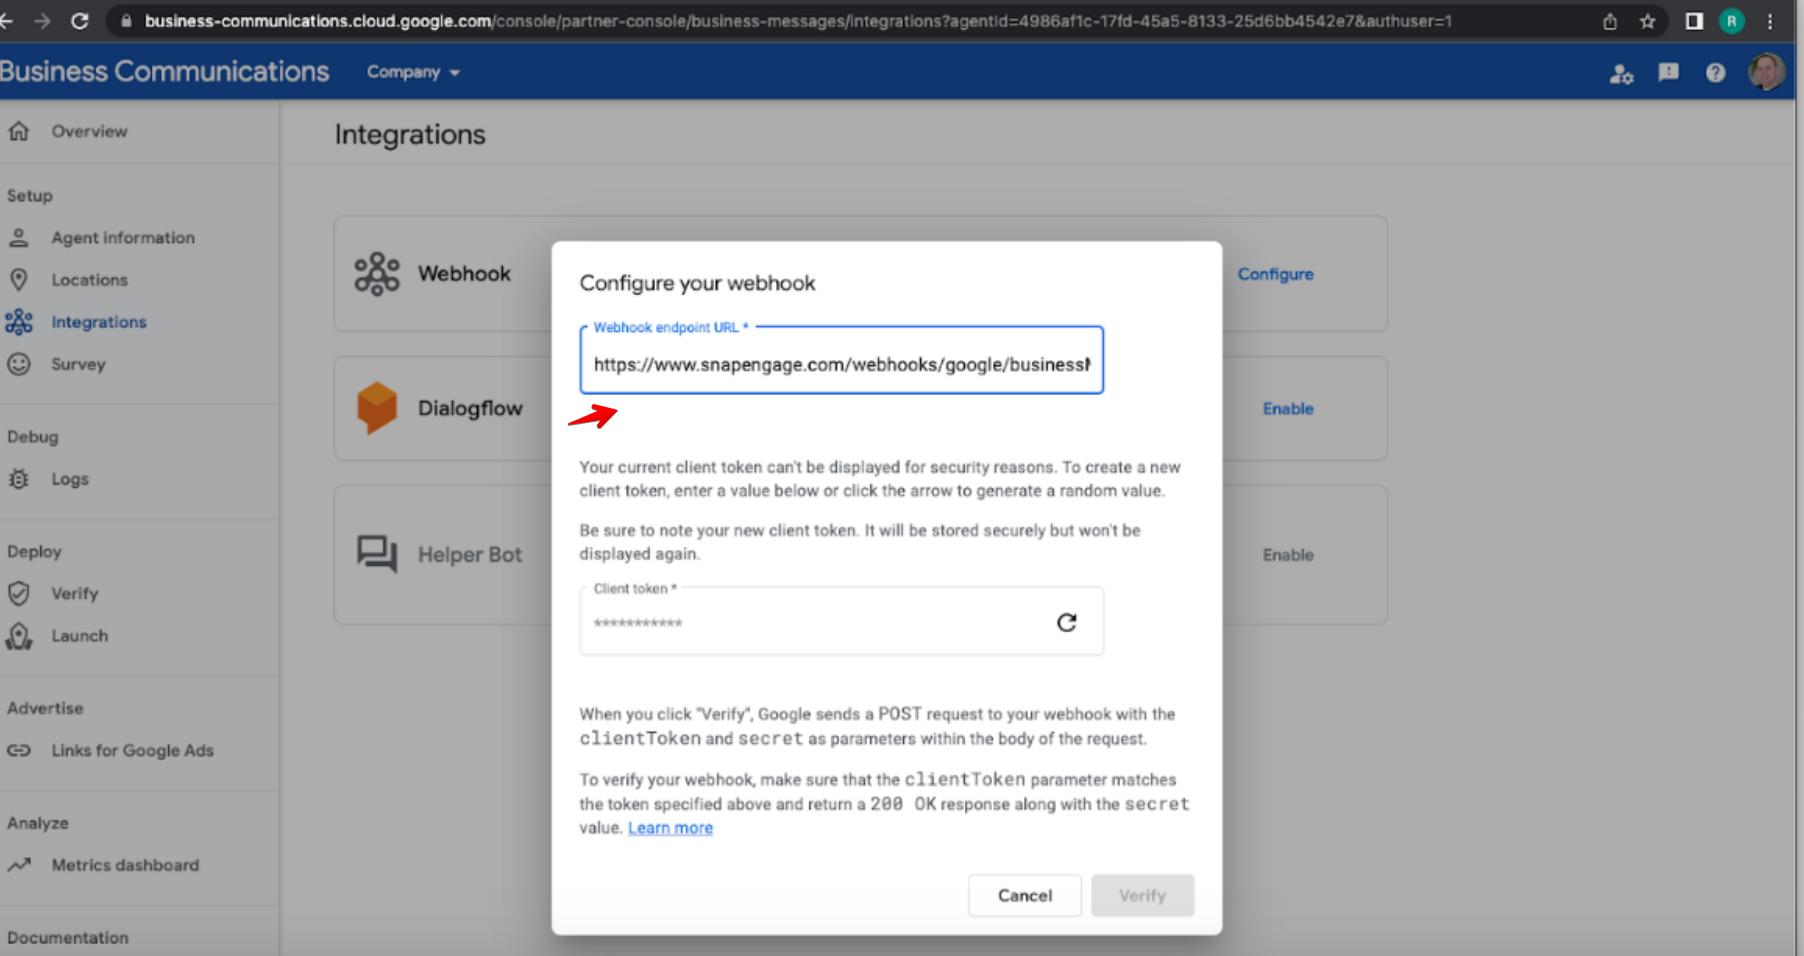
And then copy the Client token from the Business Communications dialog into the Admin dashboard dialog. (Note: It may be necessary to click on the regenerate icon ![]() to get the Client token to display.)
to get the Client token to display.)
Go back to the admin dashboard to add the token into the dialogue box.

After adding the token click on the “Next” button in the admin dashboard dialog (the green button in the screen shot above). The dialog will update to show that it’s waiting for the ‘Verify’ button on the Google side. (Note: In the background there’s an “Google Business” entry visible with the name of “Pending”. If you click on the Cancel button at this point the entry will be deleted.)
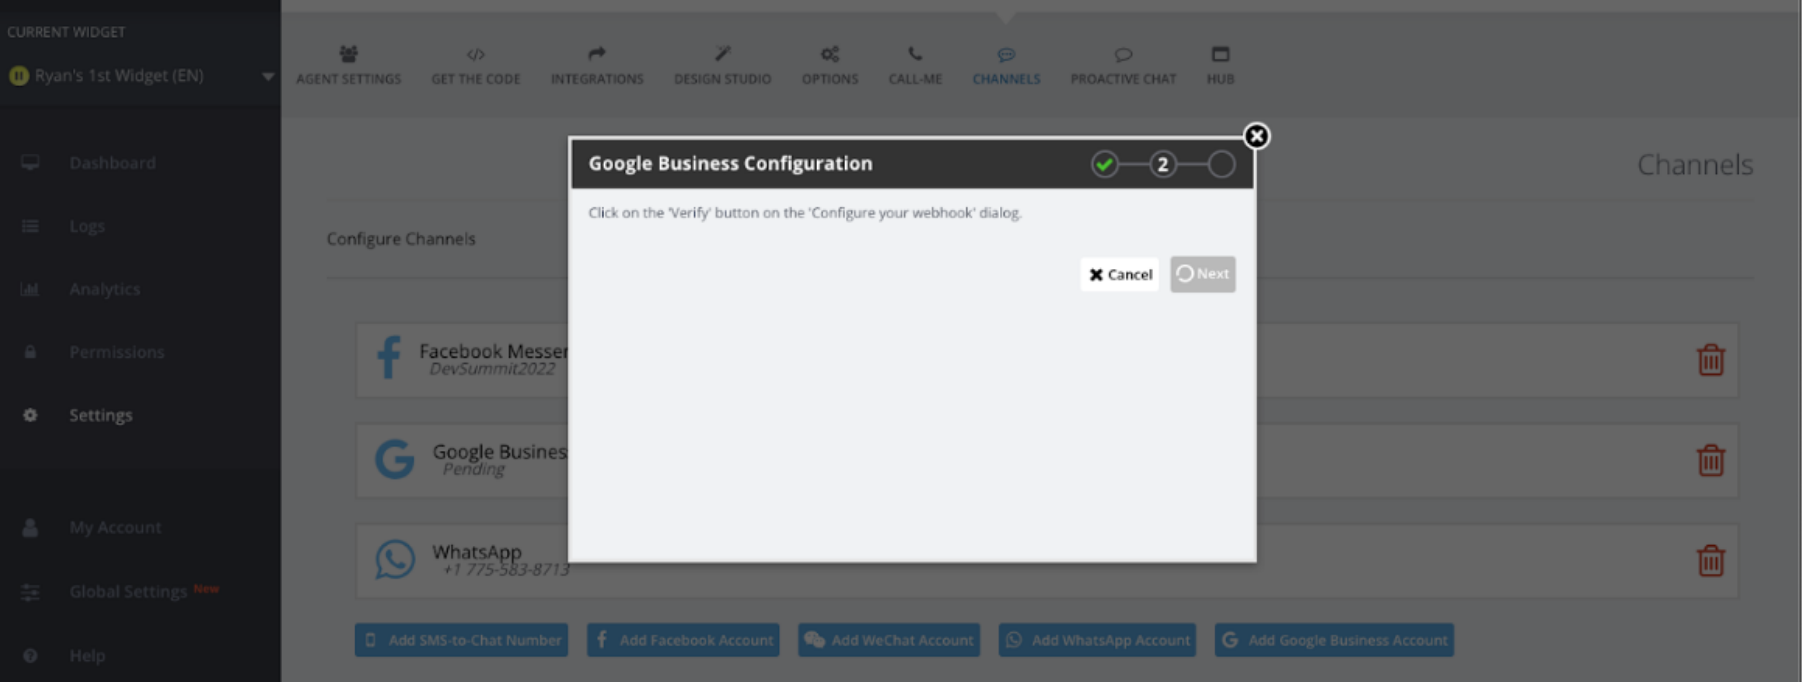
Go back to the Google side to click “verify”.
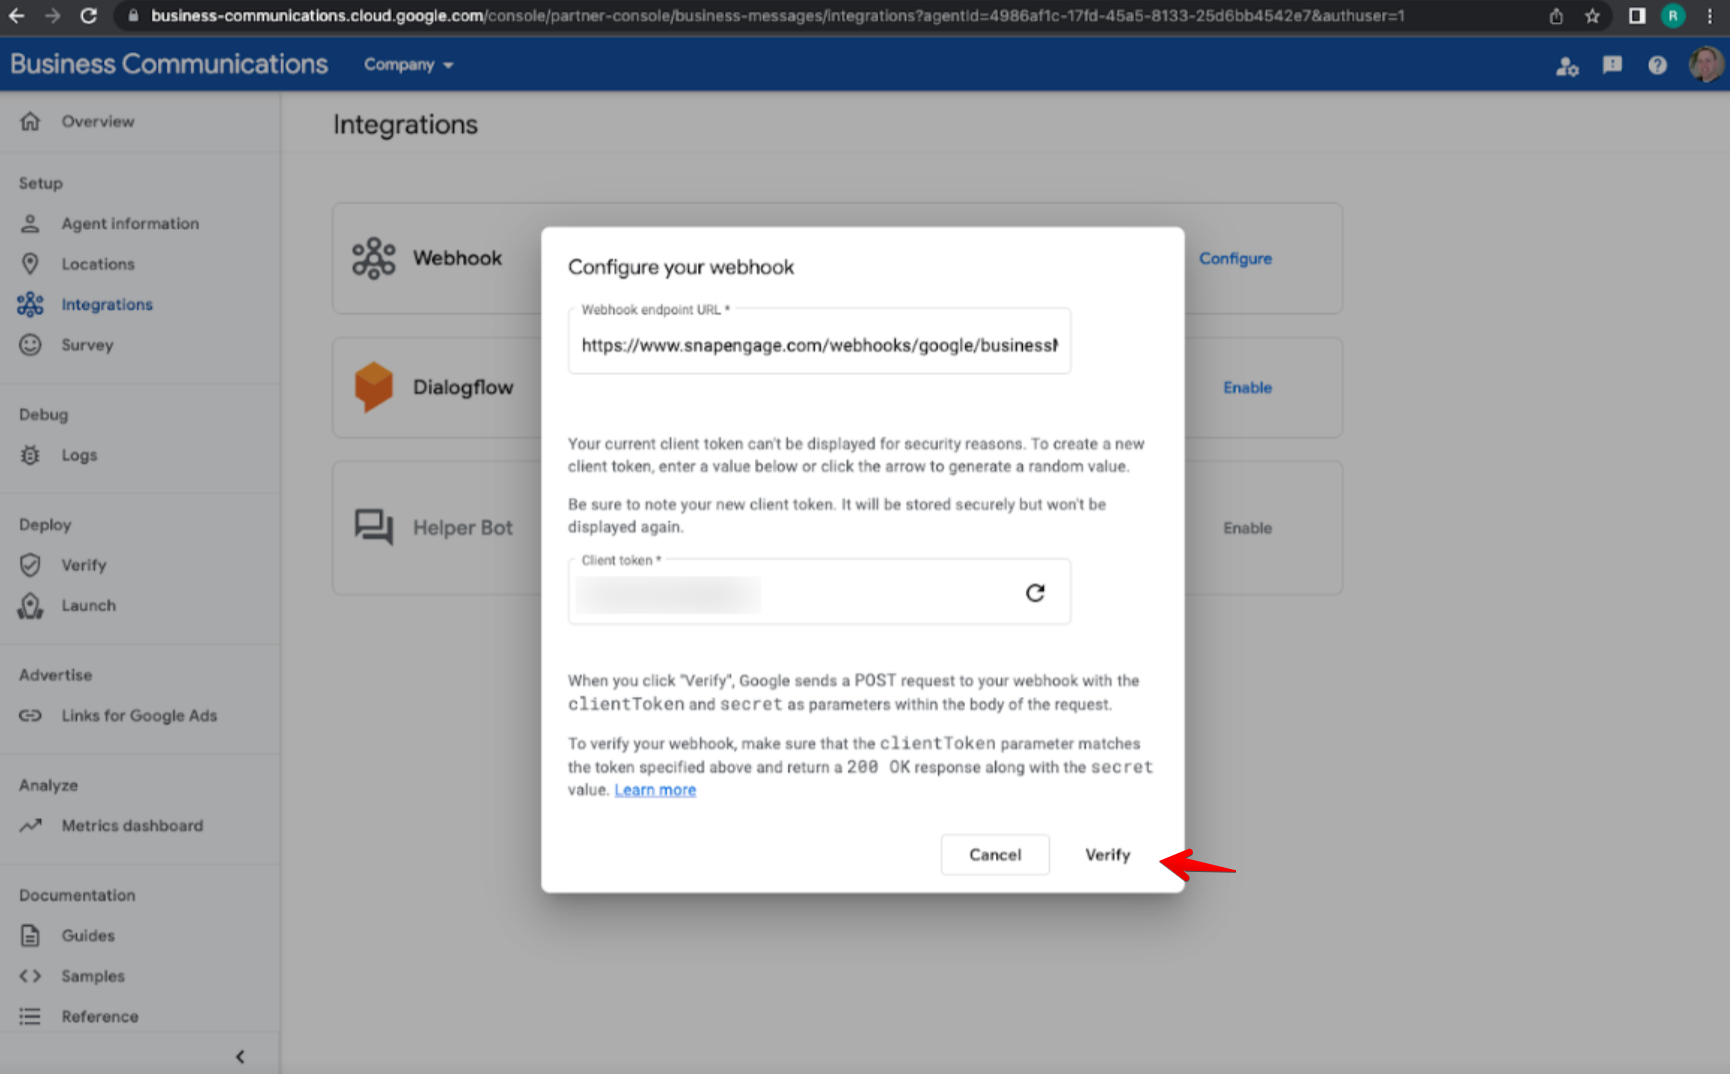
Once the “Verify” button is clicked in Google the dialog will be updated to show the agent is verified as seen below. (Note: It might take a few seconds for the update to occur.)
And on the Google side there will be a pop up that shows the “Webhook updated” and the Webhook entry will show the url along with a Remove and Gear (edit) buttons:

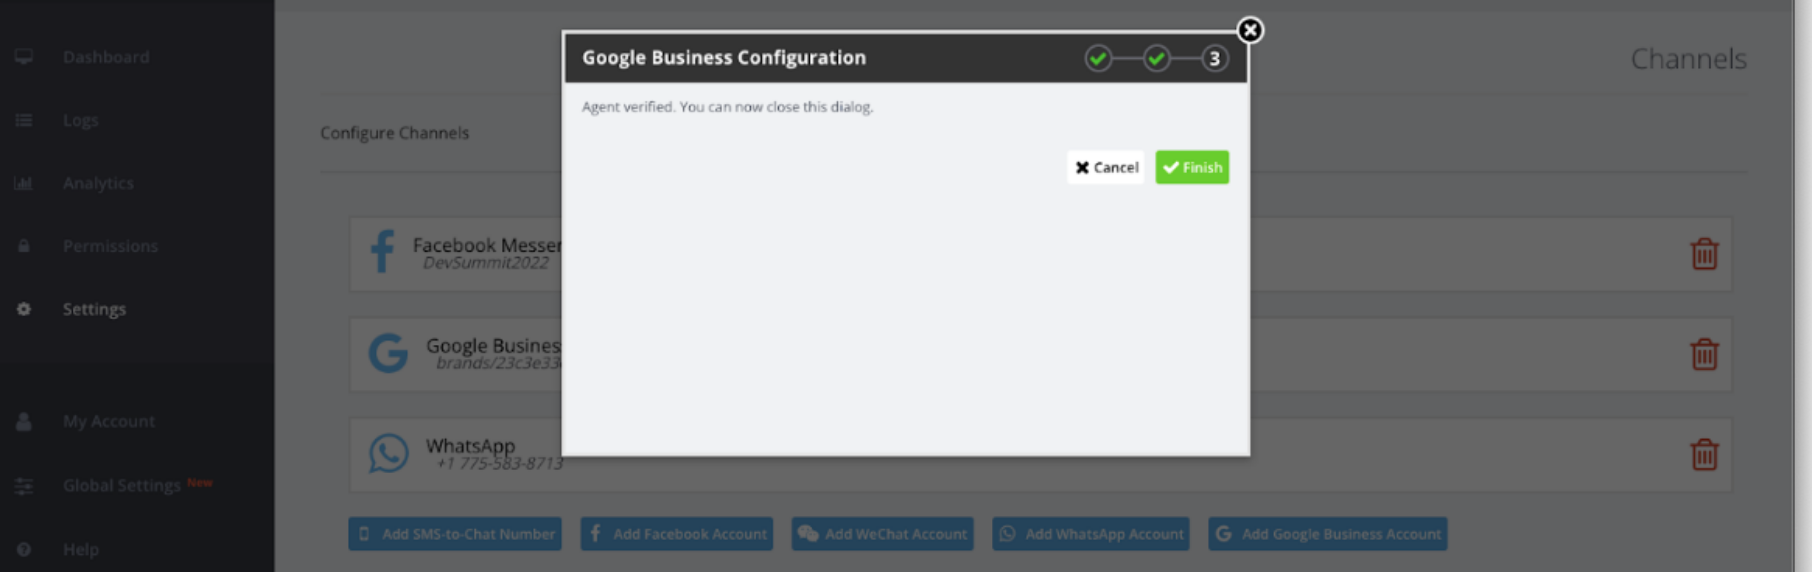
Back in the admin dashboard you will see this dialogue box –

Once the green “Finish” button is clicked like in the above screen shot, the Channels tab will be updated to display your newly created Google Business entry.
Note: The feature is only available upon request, you should contact your Customer Success Manager or Sales Account Executive for more details.
Did you find this article helpful?
 (1 votes, average: 5.00 out of 5)
Published March 10, 2023