Home > How to set up your Communication Channels
Categories: Integrations & Plugins | Featured Article
(Last Updated On: )
About This Article
The purpose of this article is to provide a comprehensive overview of how to set up your Communication Channels. Under Settings > Channels you can set your Facebook Messenger, SMS text-to-chat, WhatsApp and Google Business Messaging.
Your SnapEngage account allows you to use various communication channels to connect with your clients. Besides live chat installed on your website, you can now talk to your customers via your Facebook page and the Facebook Messenger, SMS text-to-chat, WhatsApp and Google Business Messaging.
While your clients can reach out to you through all those channels, your agents still need to only use their Conversations Hub. Every chat from any of the above channels will be received and handled on the agent’s Conversations Hub as if it was a chat from your website. Messages received while your team was offline can be replied to from our special offline response page (in the future those will be available in the Conversations Hub as well). You will find the link in every offline case email or ticket. Please be aware that for Facebook messenger, messages will need to be responded to within 24 hours of being sent.
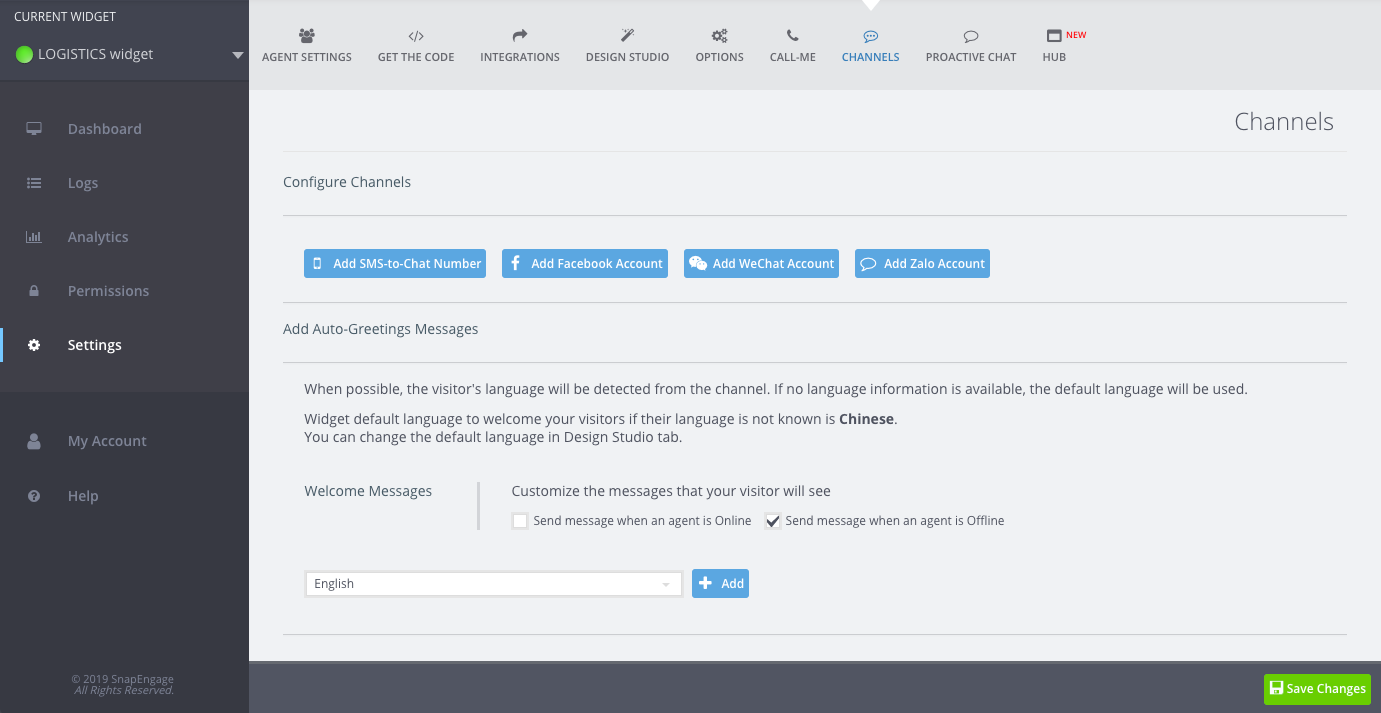
You can set up and configure the above channels under the “Channels” tab of your Settings in your admin dashboard.
You are able to use as many of the available channels for a widget as you want. However, although you can connect more than one Facebook pages to one widget, you can only use one SMS number.
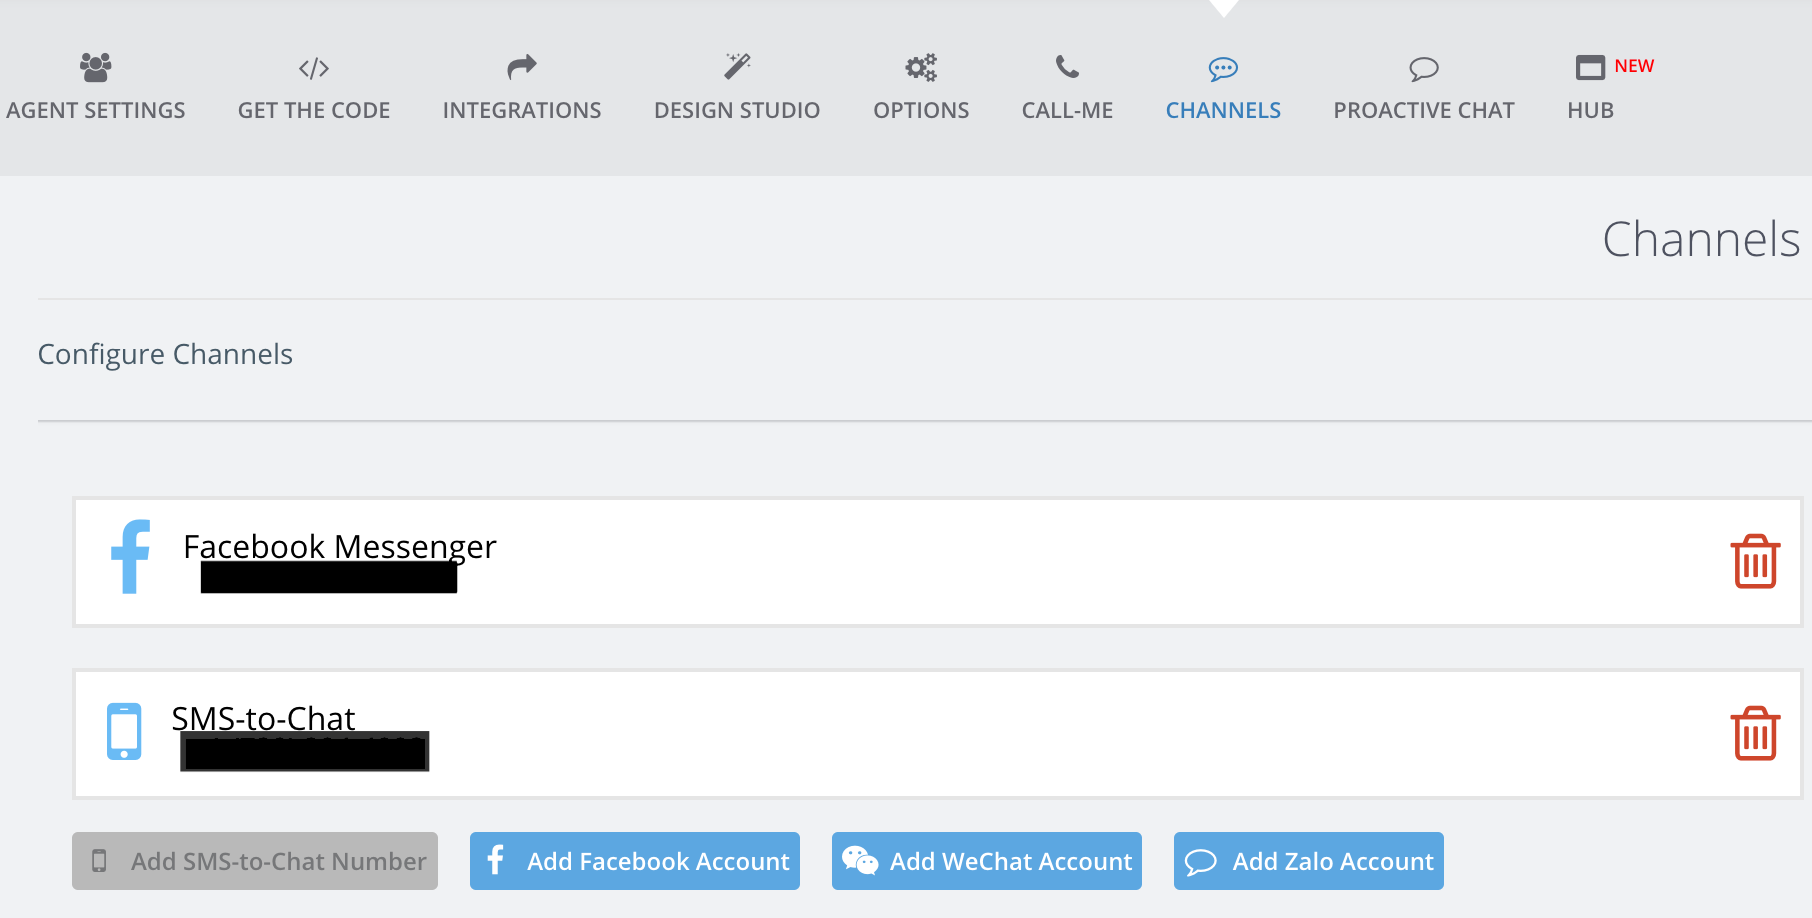
You will find different set up guides for SMS, WhatsApp, Google Business Messaging and Facebook messenger but here is how your dashboard will look after you have enabled some of your channels:
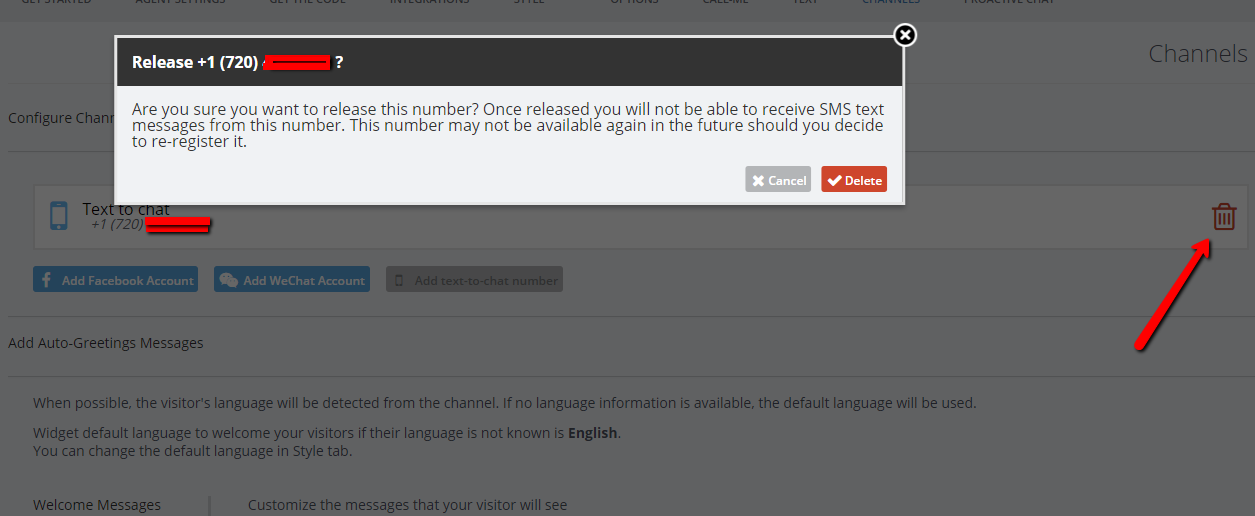
To deactivate any of the channels you would need to click on the trashcan icon next to it and follow the steps from there:
Auto-Greetings Messages
Note: When setting up Auto-Greeting messages for Facebook Messenger you will need to select a language first in order to bring up settings for auto-greeting messages . When no agents are online & available in Conversations Hub, it’s a good idea to setup an auto greeting message to visitors attempting to chat.
Communication Channels allow you to set up auto-greeting messages which will be displayed to your clients when they initiate a contact with you via SMS. You can differentiate between Online and Offline cases.
When initiating a contact using SMS or another Channel, the client has no way of knowing if chat is actually available at this moment (on your website they would see the “Online” or “Offline” button). Thus, you would want to let them know if no agent is available to receive their chat and set the correct expectations for them.
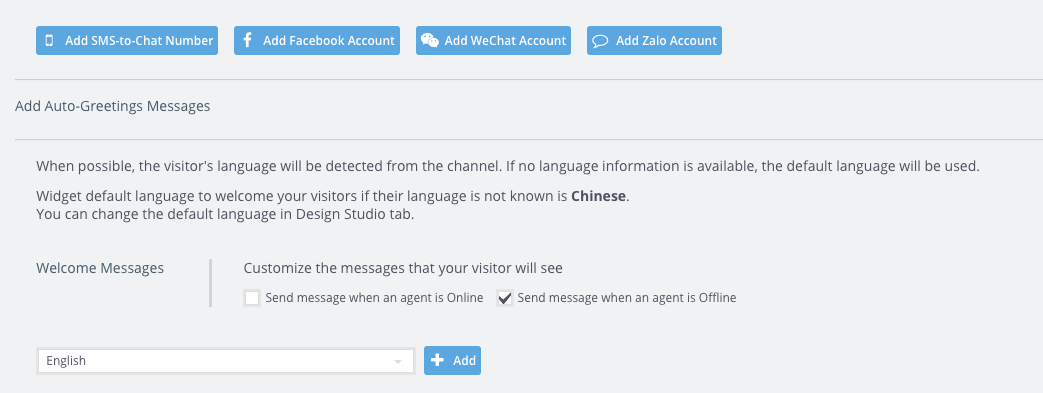
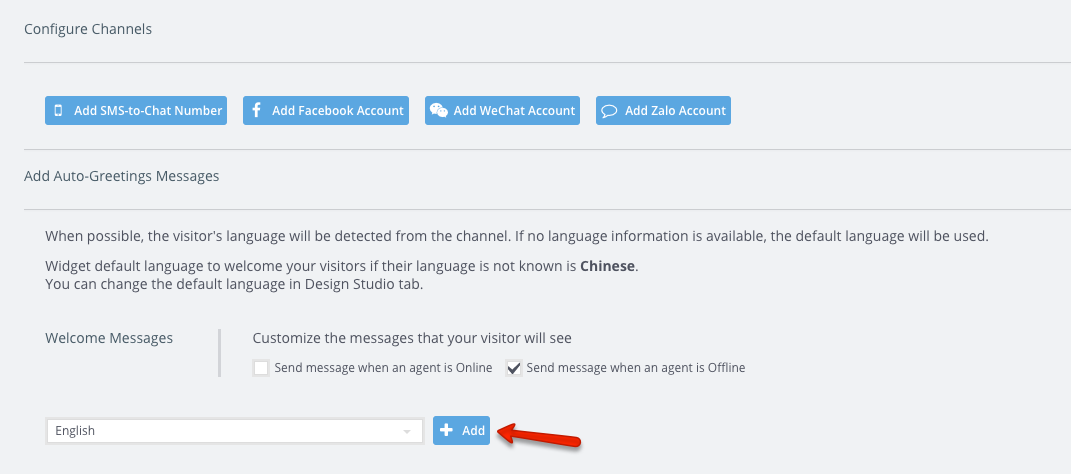
You can decide if you want to enable both online and offline options by clicking on the boxes next to each option and then configure the messages:
Configuring and Localizing your Auto-Greeting Messages
Configuration
If you simply enable the two options by clicking the two boxes, we will send an auto-greeting email using the default language of your widget which is the one you have set up under Design Studio > Select your language (the default language of a newly created widget is English).
If you want to customize the default message of your widget’s language, you would need to click on “Add” at the bottom of the page and after you have selected the respective language (in the examples following below, German is the widget’s language):
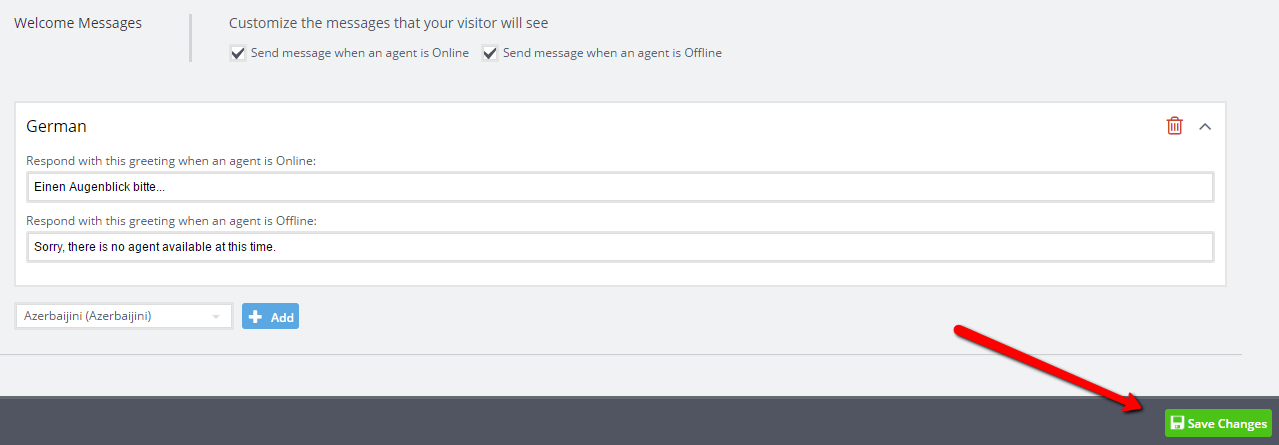
You will then be able to customize the messages by clicking on the down facing arrow:

Please configure the messages to what you would like them to read and make sure you “Save Changes”:
Localization
For the SMS and Facebook Messenger channels, the language that will be used will always be the one you have set up for the widget under the Design Studio tab. When the user’s language will be detected, the auto-greeting message can be in this language as long as you have configured the option for it.
To do so, you would need to select the languages you want to use and click again on “Add”:

In the above example, a visitor who has been detected with Dutch as their language will receive the messages in Dutch. If the visitor’s language is detected as German, they will receive it in German. If no language is being detected, the visitor will receive the message in the widget’s language. Thus, in our example it would be a German message since that is the default language for this widget.
Responding to offline messages
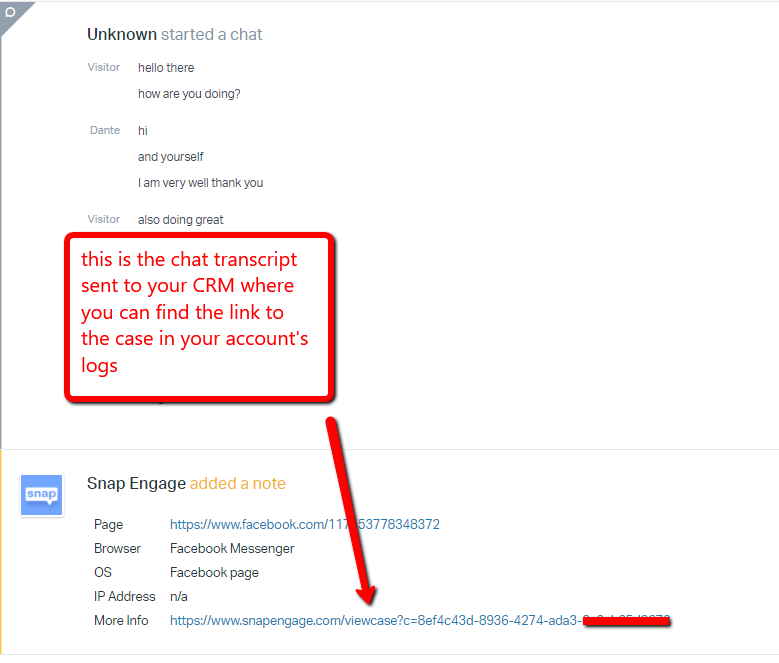
When a visitor contacts your widget during your offline hours through one of the Communication Channels, the message will be delivered to your Email and / or CRM based on your Admin Dashboard Integration settings. The message you will receive, will include the link to the case log which as an administrator you could also find under Settings > Logs:
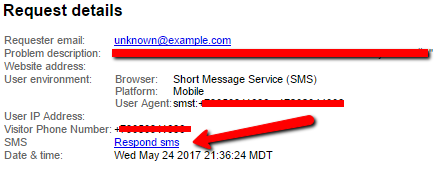
Following the link you will open the case as found in the logs where you will see the option to “Respond sms”, “Reply to offline Facebook message” or similar:
Clicking on this option will take you to the “Offline response message” page where you can respond to the message received. Your visitor will receive your response to the same Communication Channel they used to send you this message:
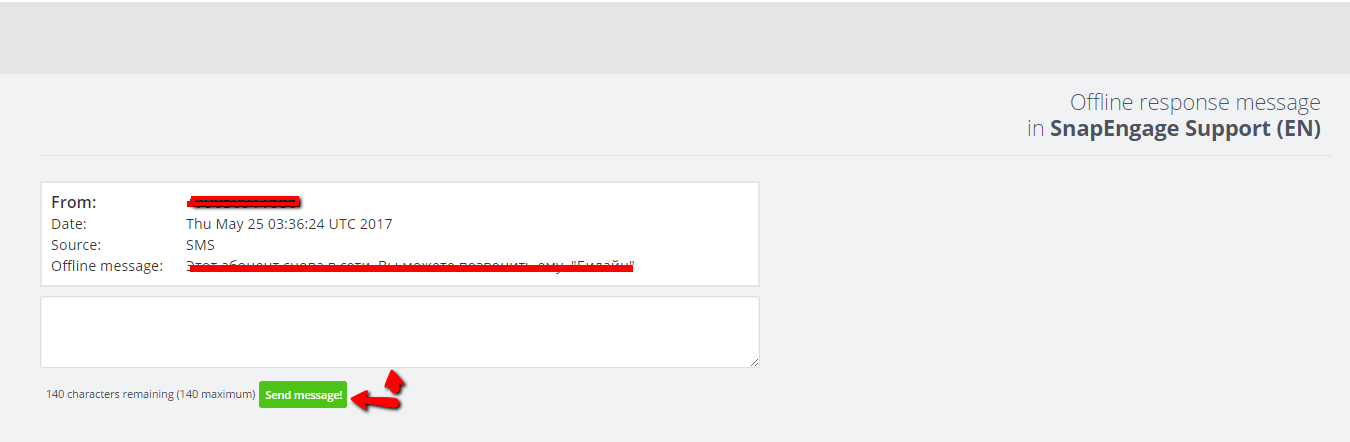
Please note that your response to an SMS is limited to 140 characters while for Facebook Messenger to 320. However, you can follow up with more than one response. Once you have sent one, you will also see it below your visitor’s initial message, basically seeing the whole thread of responses from your company’s side for this case. That way, you will also know if any of your colleagues has already responded to this case.
Please note that any new response from your visitor will create a new case (either chat if it is available or a new offline case).
Did you find this article helpful?

 (2 votes, average: 3.00 out of 5)
Published May 18, 2017