Home > How to Automatically Trigger HubSpot Workflows and Tasks from SnapEngage Chat Conversations
Categories: Integrations & Plugins
(Last Updated On: )About This Article
The purpose of this article is to provide a comprehensive overview of how to Automatically Trigger HubSpot Workflows and Tasks from SnapEngage Chat Conversations.
Cut down on manual agent work, streamline operations, and increase automation capabilities by setting up automatic HubSpot workflows and tasks. Best of all, this automation improves your customer satisfaction by ensuring swift follow-up.
Note: In order to set this via the SnapEngage Admin Dashboard, you will need to make use of our Labels option. Labels are available on Professional and Enterprise plans.
Here’s how you can trigger HubSpot custom workflows and tasks after a chat conversation ends:
Step 1: Make sure that the SnapEngage widget you would like to integrate with HubSpot is already fully connected to your HubSpot account. You can view integration instructions
here to ensure that you’re fully connected.
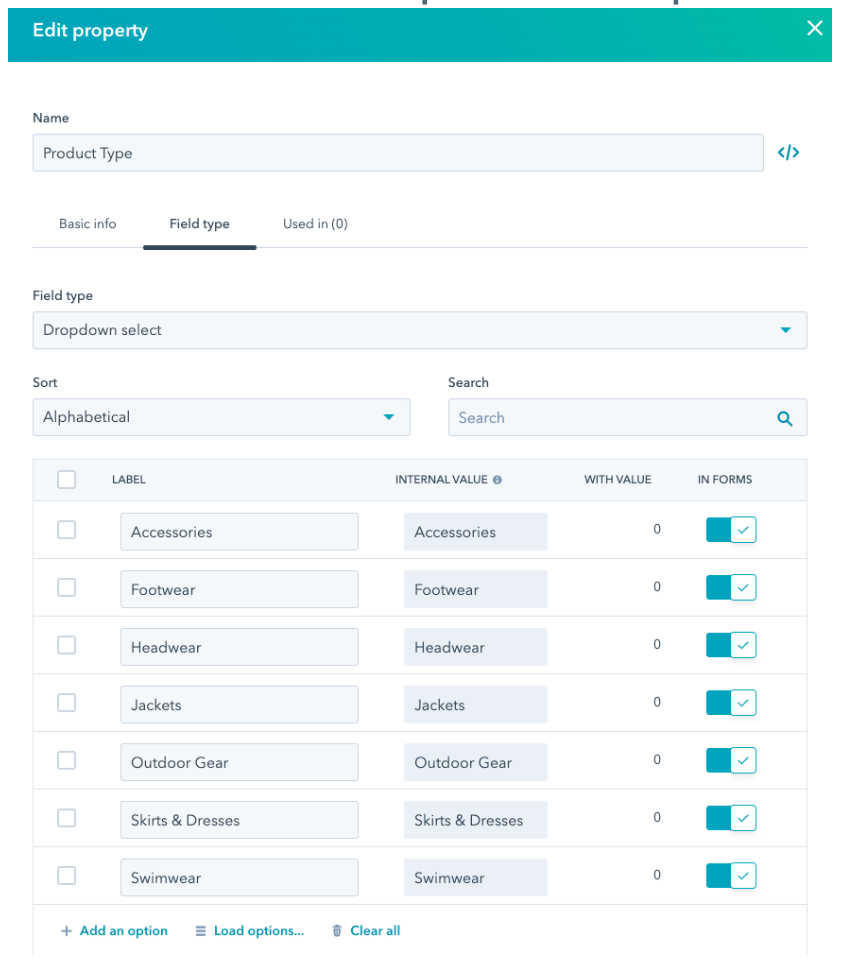
Step 2: Determine what you would like to accomplish with this automation and which property you’d like to trigger HubSpot workflows off of (i.e. a SnapEngage Hub chat Label or something else). Create a new custom HubSpot property (HubSpot Settings > Properties > Create Property). This example uses a Dropdown select field type. Add all corresponding property options.
Note: You must be a HubSpot Admin with permissions to edit/create properties.
Step 3: Next, via your SnapEngage Admin Dashboard, navigate to Settings > Hub > Configure Labels. Create a new chat Label using the same title as the custom HubSpot property you just created in Step 2. Add all corresponding property options. It’s important that the spelling/capitalization/etc matches exactly across the options listed in both systems.
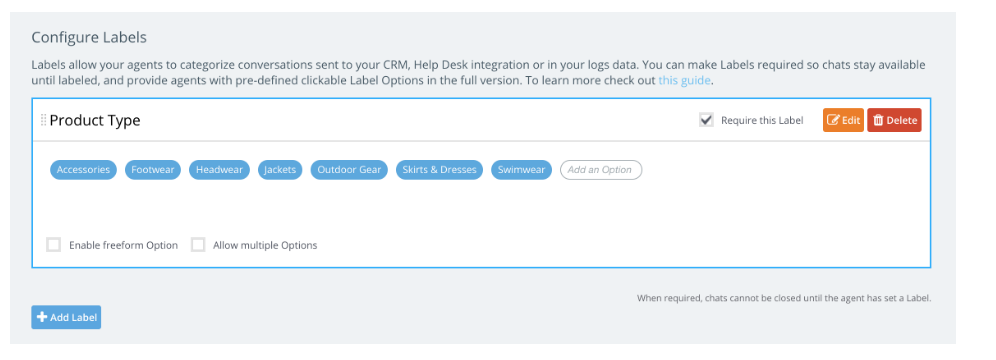
In this example, agents that handle chats for an outdoor retail store’s website are required to set the Product Type chat label before the SnapEngage chat data flows to the integrated HubSpot account.
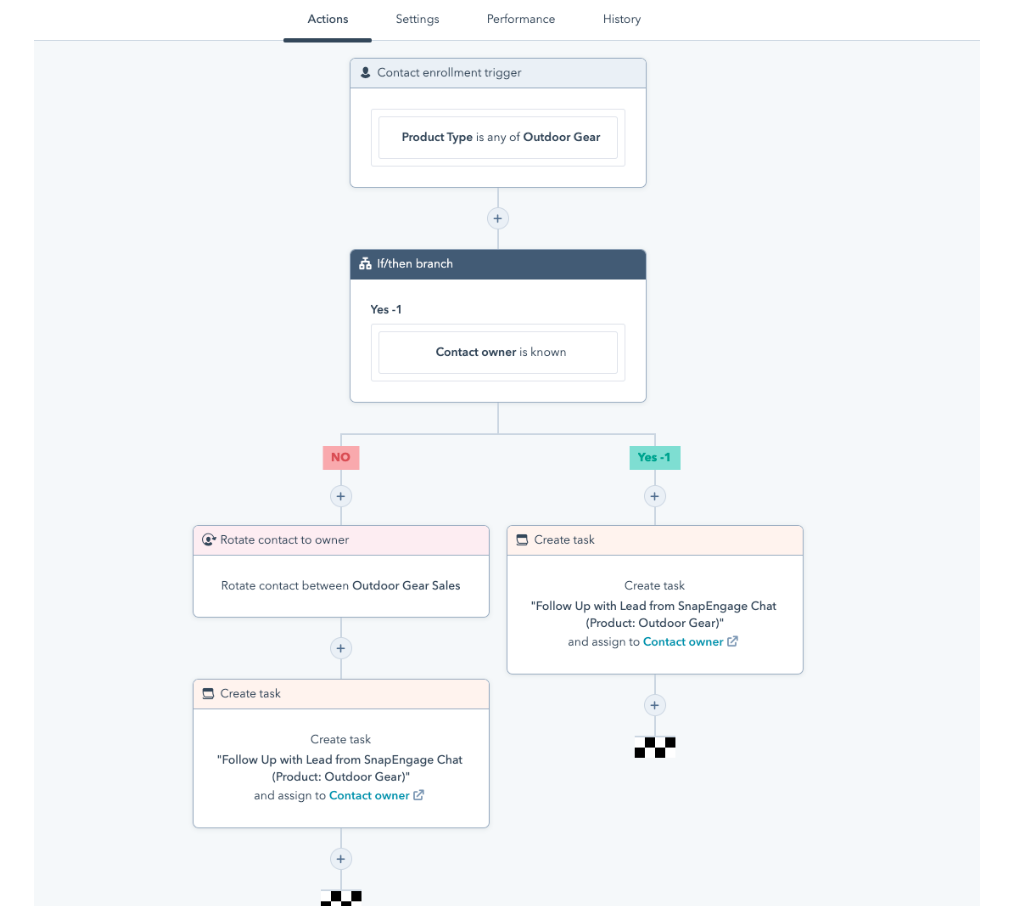
Step 4: Complete the remaining automation setup in HubSpot (user must have edit access to Workflows). Go to Automation > Workflows > Create workflow. This example uses a Contact-based workflow. The Enrollment trigger is the Chat Label that you created in Step 3. When a contact created from SnapEngage meets these criteria, they will be entered into this workflow. Finish setting up the desired workflow steps based on your existing marketing/sales or customer support processes (i.e. set additional lead attribution, assign to a specific sales rep or team, trigger an internal follow-up task, trigger an automated marketing email, add to a list, etc).
Based on the above HubSpot workflow example, any chat lead who is interested in Outdoor Gear will be automatically entered into a workflow that checks to see if they already have a sales contact owner assigned (and if so, a HubSpot task is automatically created and assigned to the existing contact owner). If the chat lead has no assigned owner, they automatically rotate among the Outdoor Gear Sales team. After the contact owner is assigned, a HubSpot task is automatically created for prompt follow-up.
With this powerful integration between SnapEngage and HubSpot, it’s easier than ever to create flexible, custom workflows to streamline operations and increase automation capabilities throughout the customer lifecycle.
Did you find this article helpful?

(
1 votes, average:
5.00 out of 5)

Loading ...
Published July 24, 2020