Home > How to: Use Labels
Categories: Chat Agent Docs | Tips & Tricks | Chat Settings
(Last Updated On: )
About This Article
This article will cover labels under the Settings > Hub tab.
Labels is a really powerful new feature to allow your agents to categorize conversations sent to your CRM, Help Desk integration or in your CSV logs exports. In this article, you will find some of the common uses for labels, as well as some tips and tricks for getting the most out of your labels.
Note: If you are looking to run a report on those labels, check our Labels report.
Setting up your Labels
For the purposes of this article, I will be using a label called “ProductCategory” to differentiate between chats for some different products.
Keep in mind that the following explains the process of adding labels in an Enterprise or Professional account. If you are on an Essentials plan, you will need to upgrade in order to use Labels.
You will find a new tab in the Admin Dashboard -> Settings called Hub (1).
Clicking on this tab will open up all of the Hub tab, where you will be able to set up your labels. Let’s create a new Label called ProductCategory by clicking on “+ Add Label” (2). Then click on “Edit” (4) to edit the preset fields.
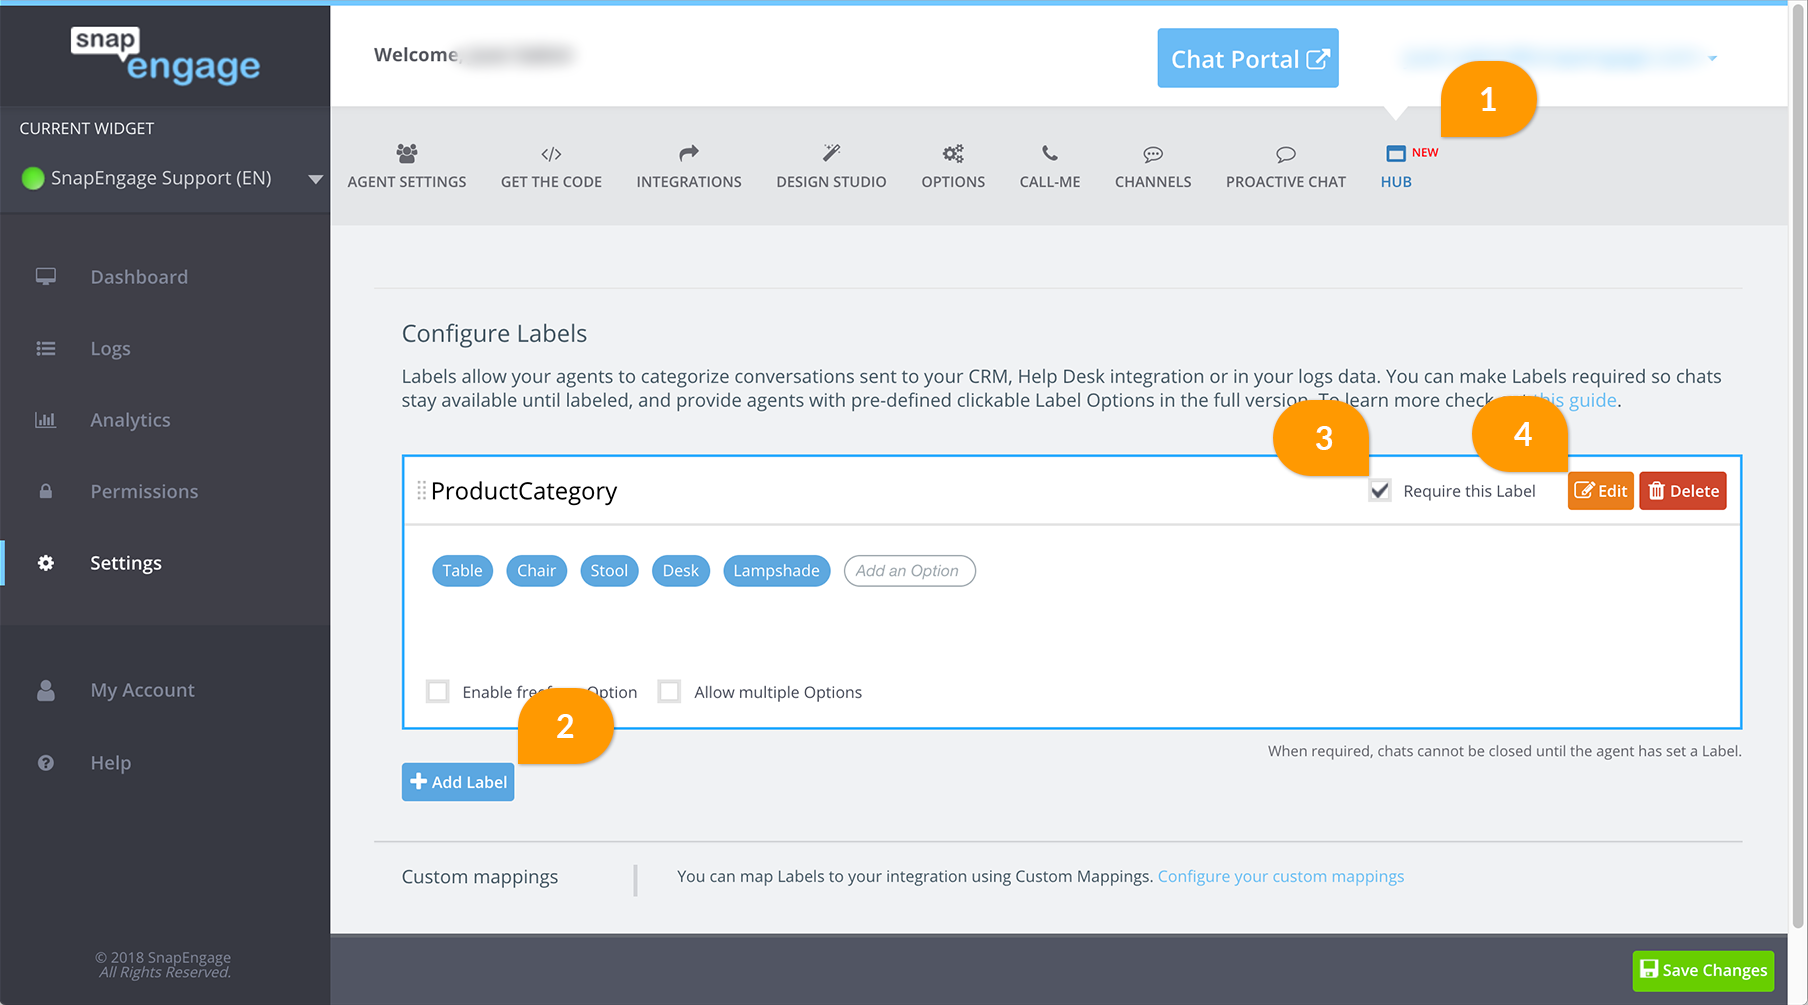
So now we’ve added our preset fields, hit Save at the bottom of the Admin Dashboard to ensure the settings are retained. We selected “Require this Label” (3) at the top of the setting. Making a Label required means that a chat will not close until this Label has been saved. If a chat ends before the label has been added, you will see the following system message as an agent in the Hub:
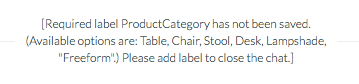
This means that labels can be added after the chat ends! A chat will not close until any mandatory labels are added. This means that the chat will take up one of the agent chat slots until all required Labels are filled in. If an agent has a maximum of 3 chats, but all 3 chats are pending to be closed and awaiting the required fields to be added, the agent will not be able to receive other incoming chats until the required fields are filled in. Agents will receive a reminder every five of any pending closed chats that are waiting to be labeled.
Setting Your Labels in the SnapEngage Hub
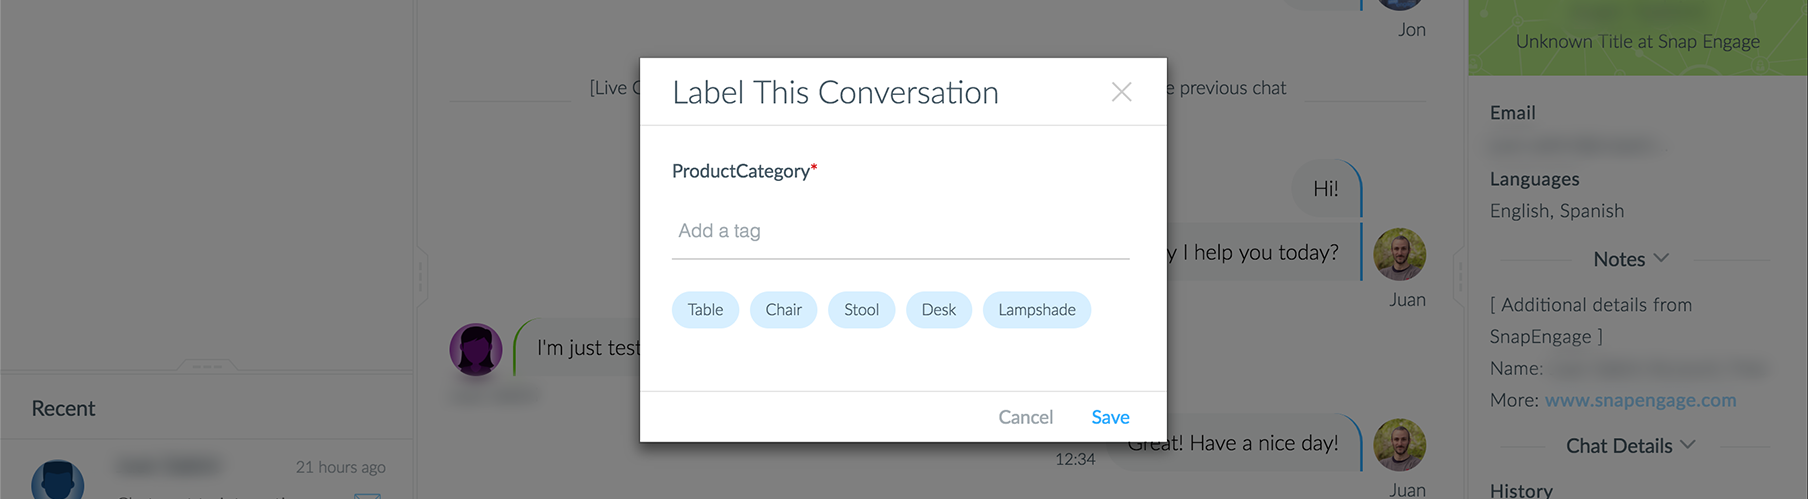
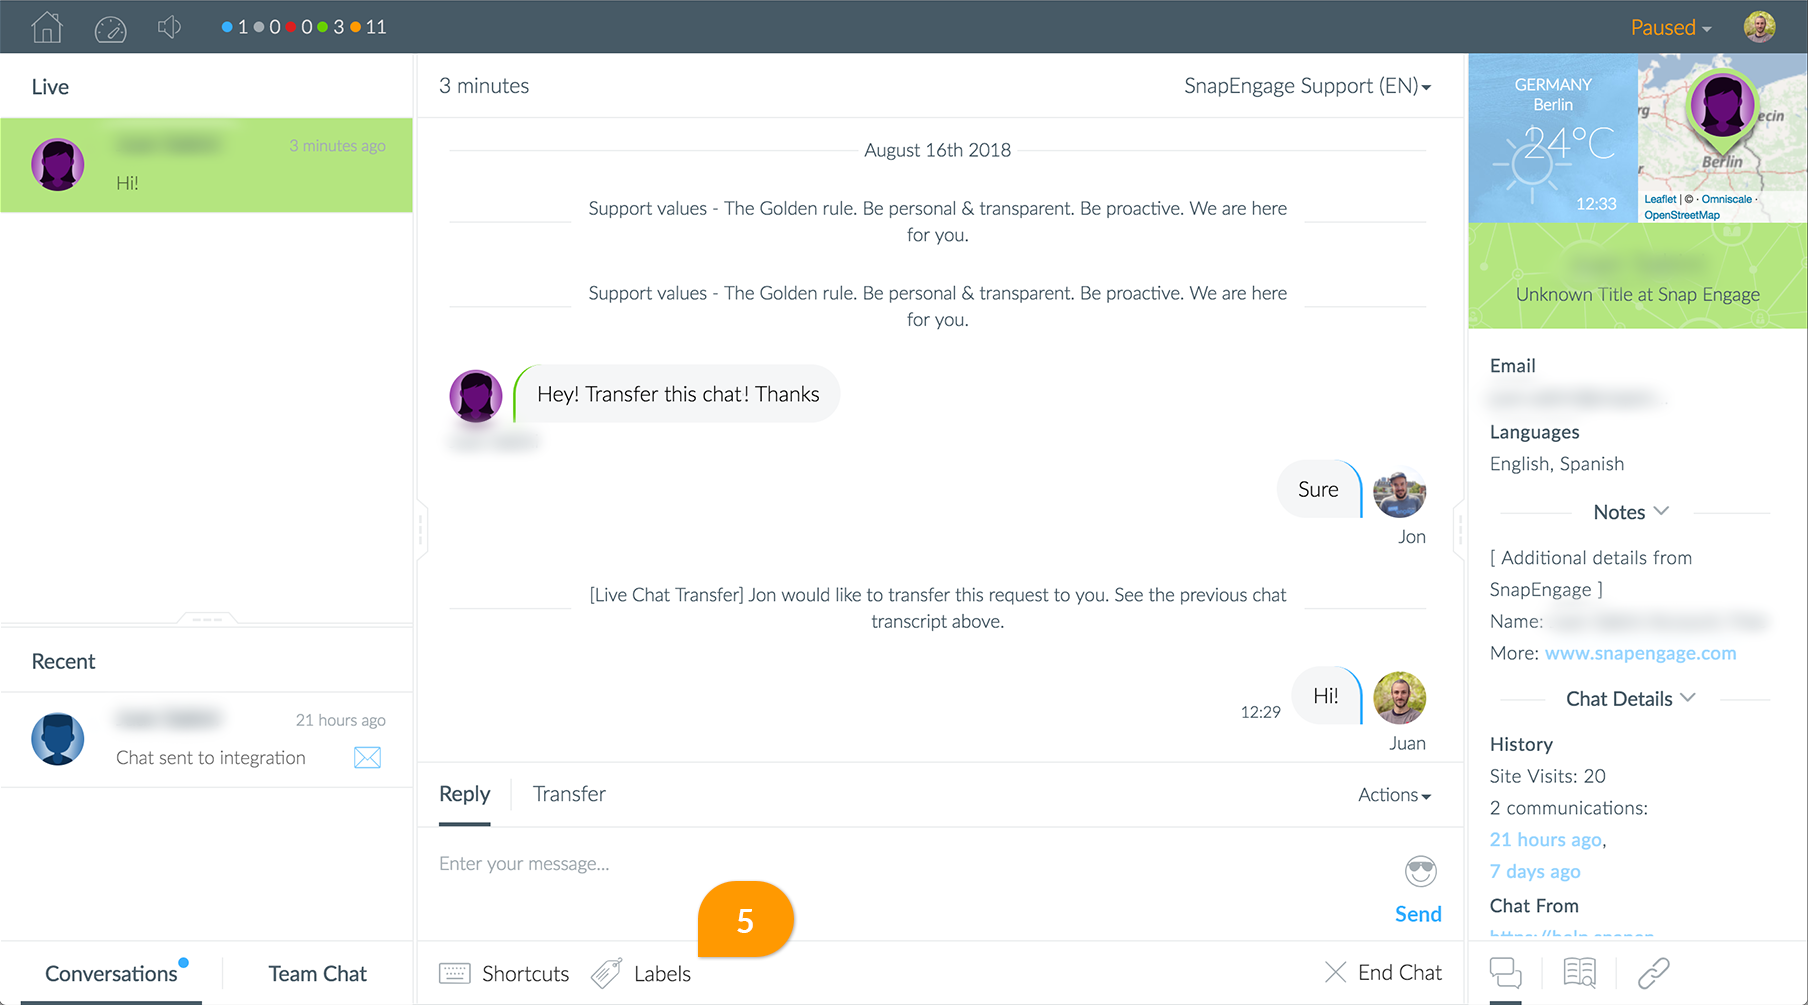
As an agent, the Labels tab can be accessed via the new Labels button (5) at the bottom of the active chat window.
This will prompt the Labels window to modal, and the agent can then click on the relevant fields. They can click the Label option most relevant for the chat, or add their own Label (6). This allows agents to add additional fields and easily send these as the Label value. You will also notice the red asterisk * (7) next to the ProductCategory name. This tells me that this field is a required field. Essentials accounts, labels is not available you will need to ask about upgrading in order to use Labels.
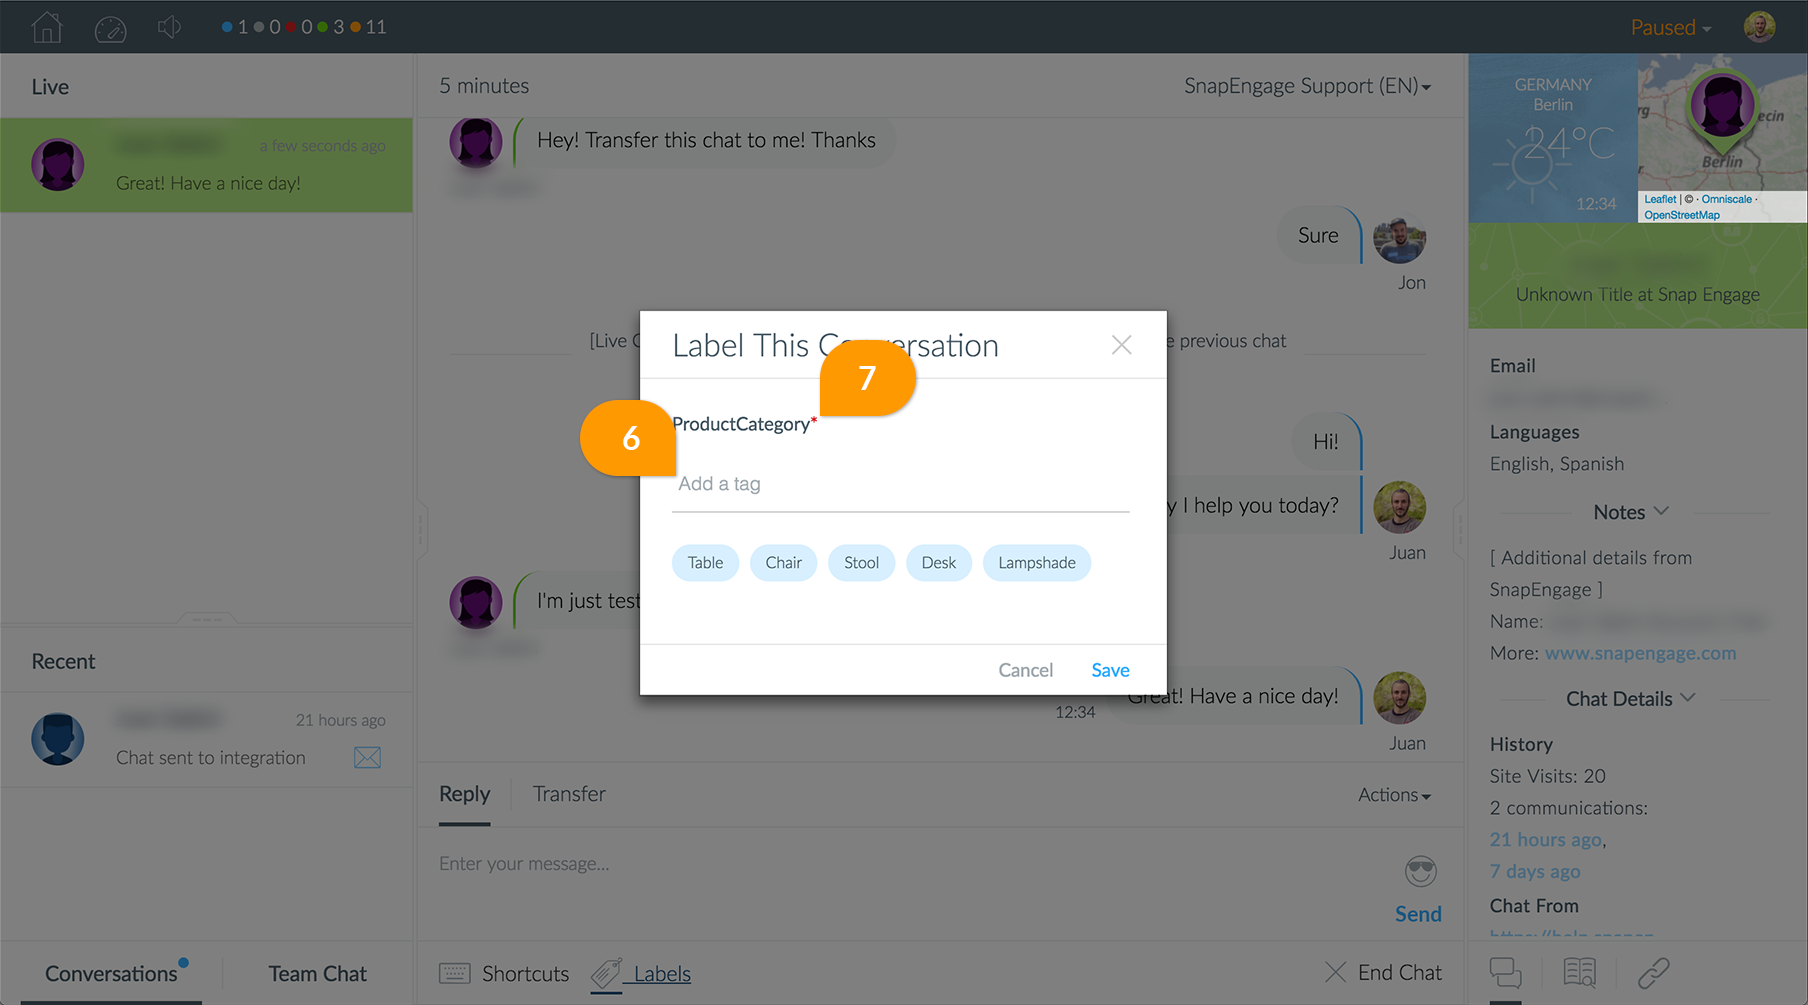
They can click the Label option most relevant for the chat, or type their own Freeform Option. The Freeform Option allows agents to add additional fields and easily send these as the Label value. You will also notice the red asterisk * () next to the ProductCategory name. This tells me that this field is a required field. Essentials accounts, labels is not available you will need to ask about upgrading in order to use Labels.
Once the agent is satisfied that they have entered the information correctly, he will need to click on “Add” at the bottom of this window to save the Labels. These are then passed as part of the chat transcript.
Labels in the Chat Transcript
The Labels will be displayed under the Operator Variables (8) section of the Chat Transcript, as shown here:
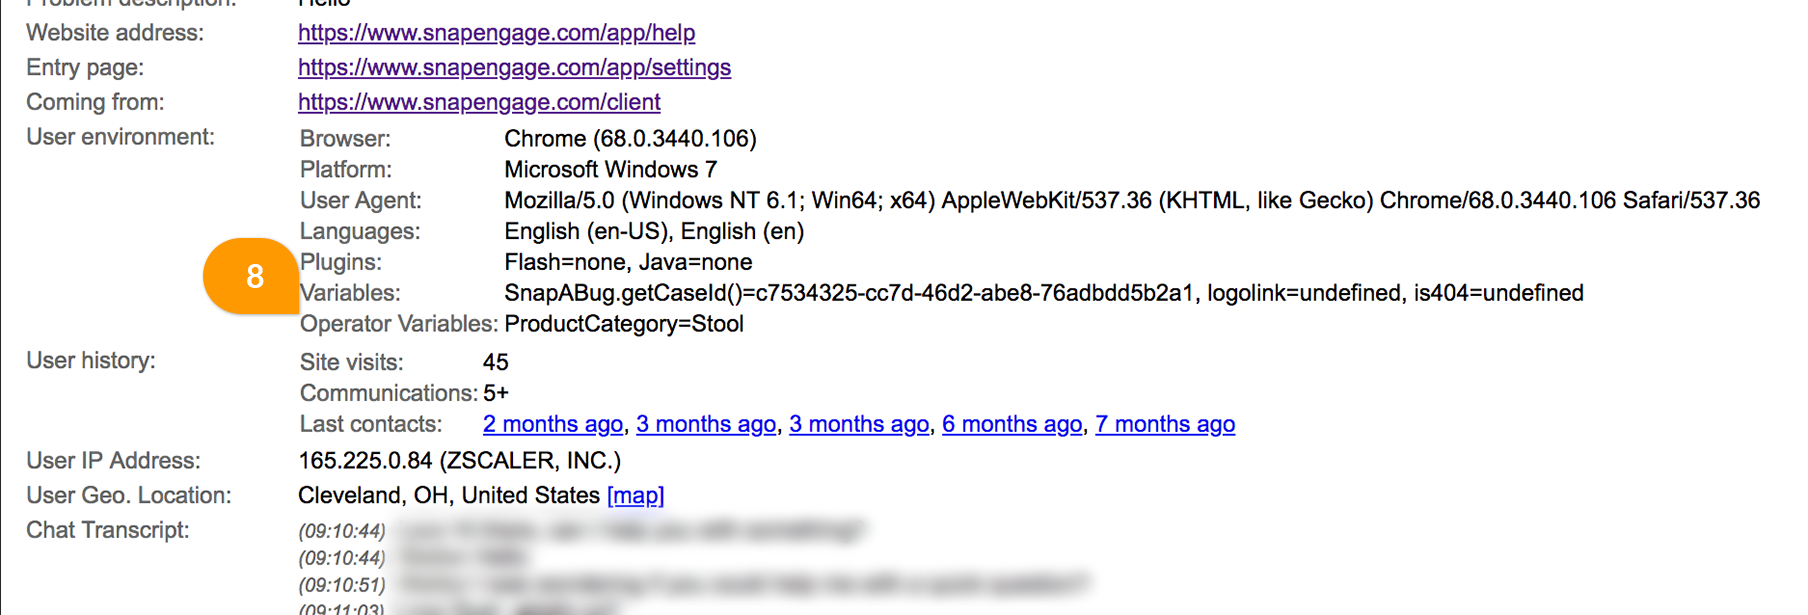
This allows the information to be easily viewable to reporters and administrators. Also, you can go one step further and automatically send this information to your Helpdesk using Custom Mappings.
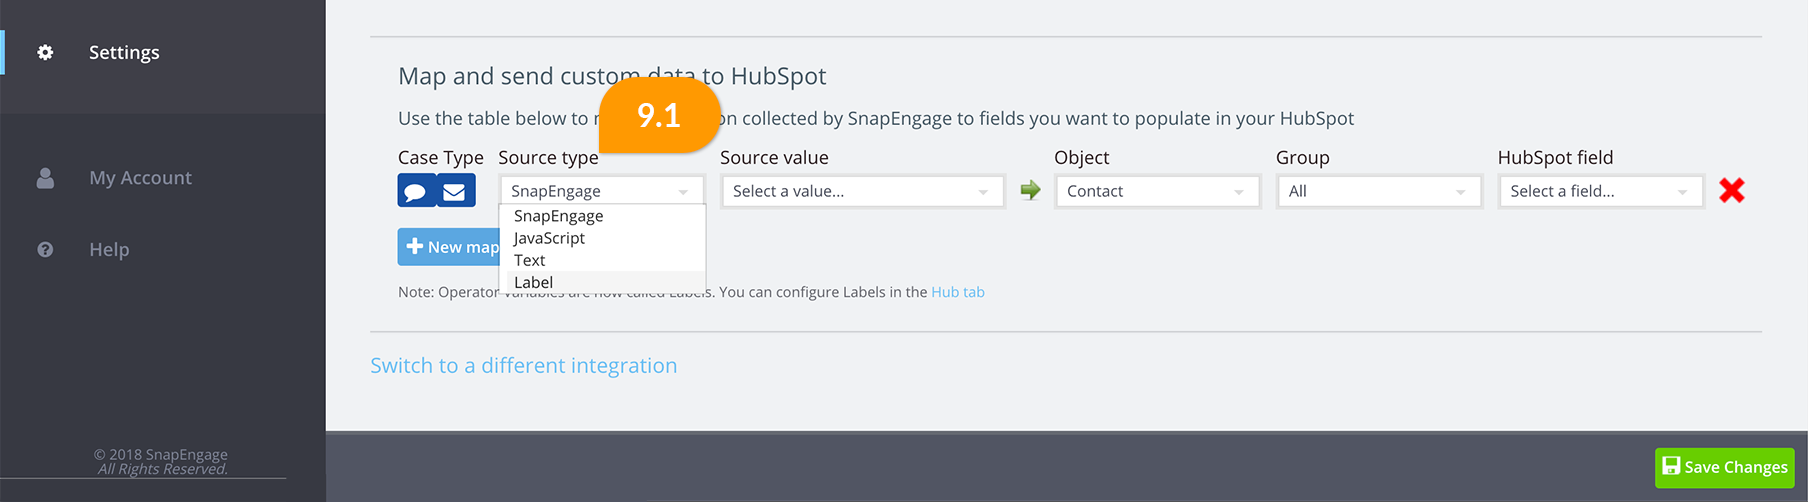
Using Labels with Custom Mappings
In the Settings -> Integrations tab, you will now have the option to map the Labels to your chosen integration. You will see a new Source Type (9.1):
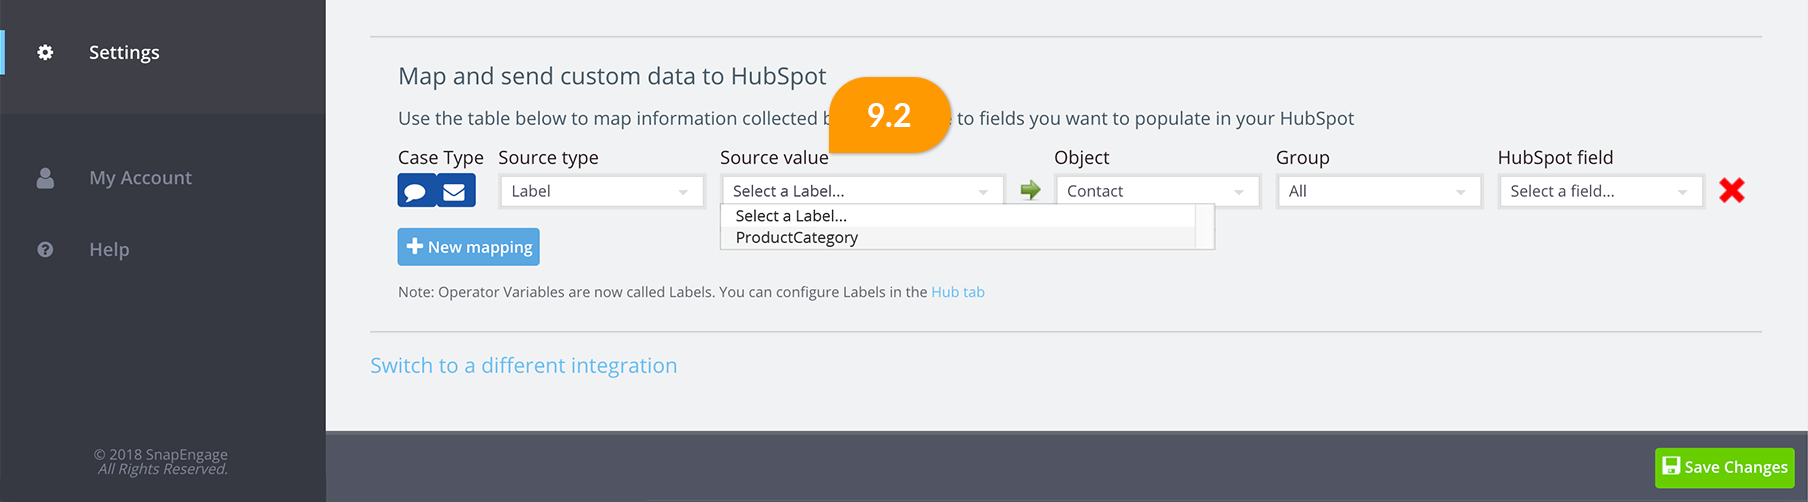
This will allow you to easily access all of your Labels in the Source value (9.2) and route them to the relevant fields in your integration.
If you have any questions regarding setting up or using Labels, please chat with our friendly support team.
Did you find this article helpful?

 (14 votes, average: 3.07 out of 5)
Published March 20, 2018