Home > How To Enable and Use Screen Sharing
Categories: Featured Article
(Last Updated On: )
About Screen Sharing
The Screen Sharing feature will allow your agents to view the screen of your visitor’s website during an ongoing chat. This will improve the quality of the overall chat experience, and increase the resolution of cases by your team. When agents and customers aren’t able to view what is being referenced together in a chat, it can be difficult to provide instructions or provide context causing frustration.
Once screen sharing has been enabled for you by your sales Account Executive, you will be able to activate it on a per widget basis.
How to Enable Screen Sharing
In the admin dashboard navigate to the Settings > Hub > Screen sharing tab.
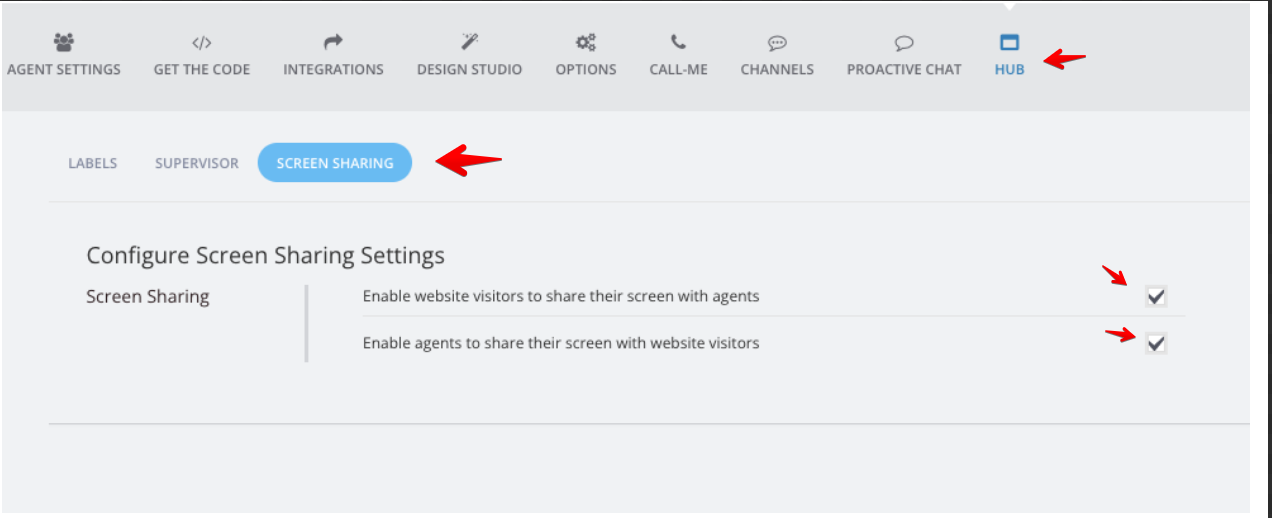
Here you will find two options:
The top option – allow visitors to share their screen”
and the bottom option for – agents to share their screen with visitors.
Once you have enabled either option or both options, please make sure you hit the green “Save Changes” button. Then also be sure to go to the Settings > Design Studio tab, and hit the green “Save Changes” button there as well.
Note: This is a crucial step, as it will make Screen share available for visitors.
On widgets where the screen sharing is enabled, during a chat, agents will see the option available in their Hub under the actions button as seen here:
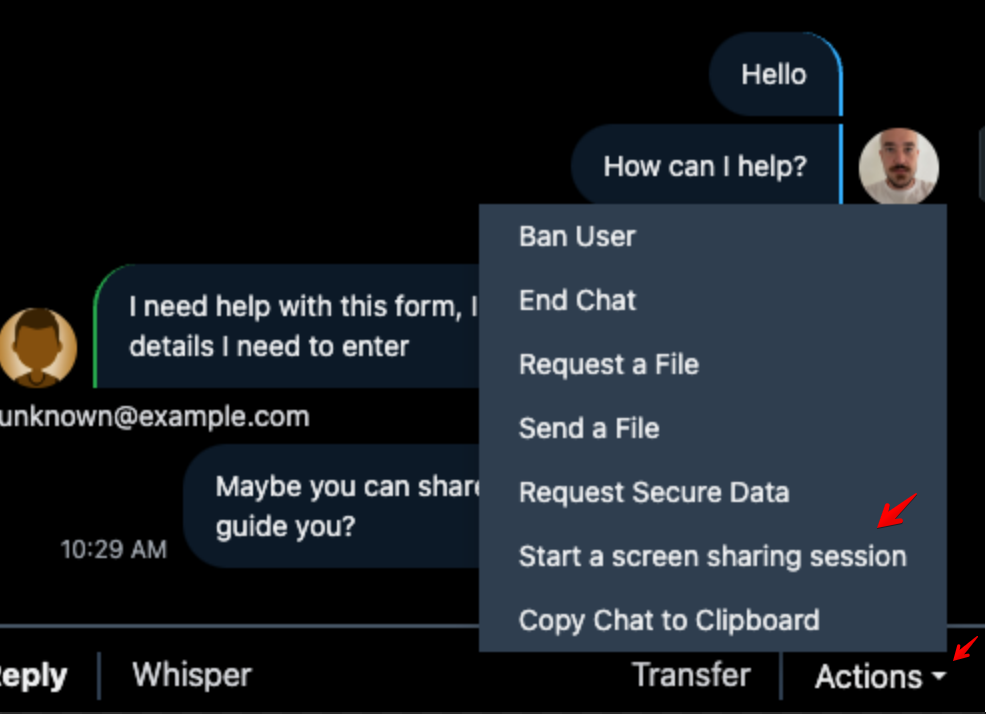
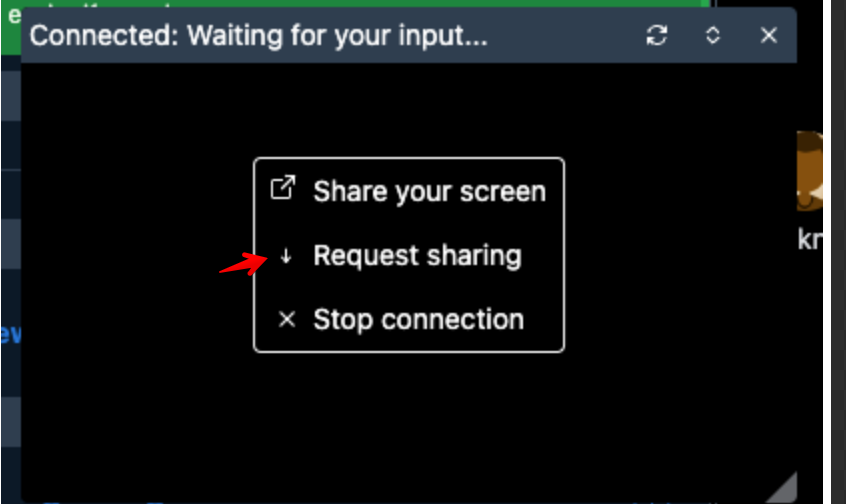
Once the agent clicks on “Start a screen sharing session” a little pop up screen will appear with different options. The agent will be able to:
- Share their screen with the visitor
- Request the visitor to share their screen
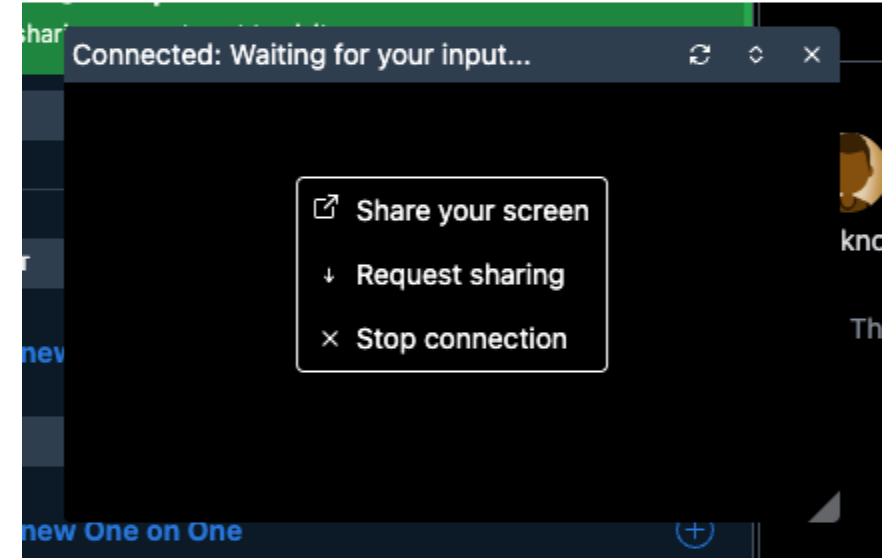
If the agent clicks on “Share your screen” as seen below –
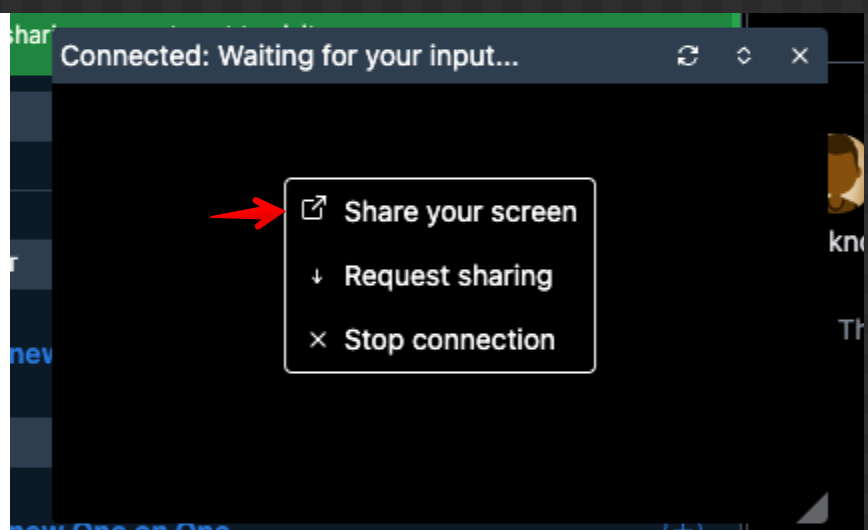
The visitor will get a banner asking for permission:
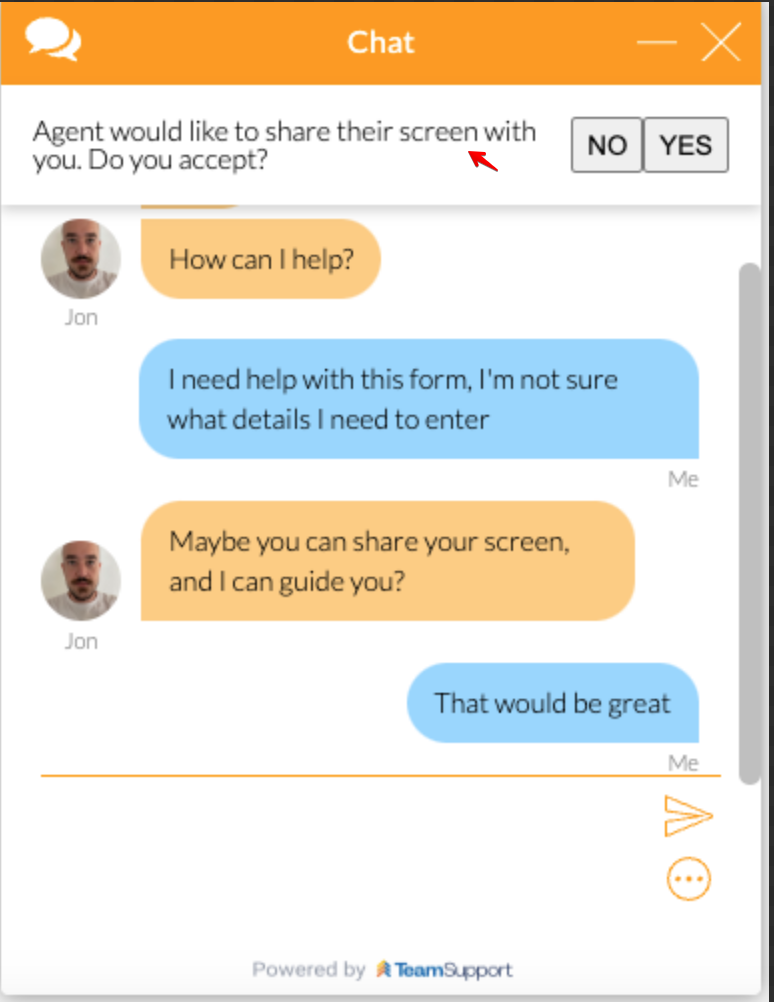
The visitor can reject it and the connection will be closed, or accept. If the visitor accepts, when the agent is ready to share their screen they will need to click on “Start sharing” in their Hub.
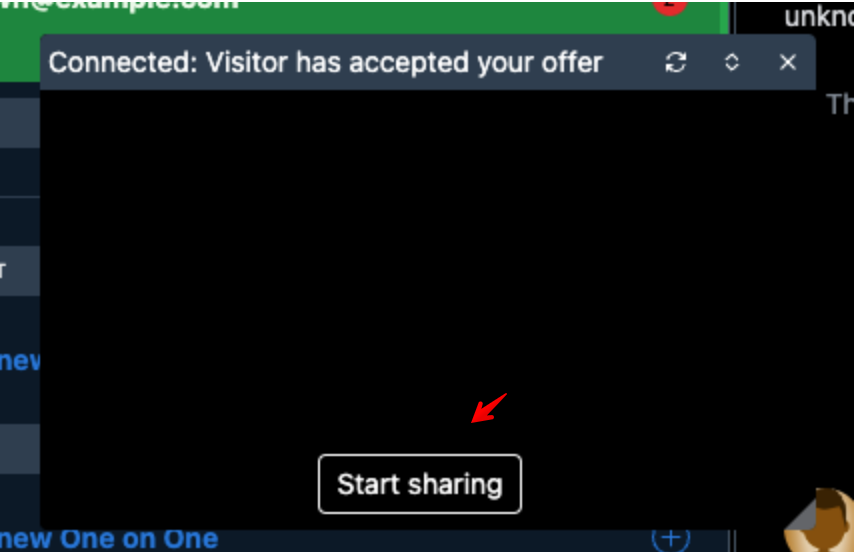
Once they do that, the agent will need to choose what to share, a tab, a window, or a full screen. The visitor will then see a new screen with what the agent is sharing within the website they’re on. For Example :
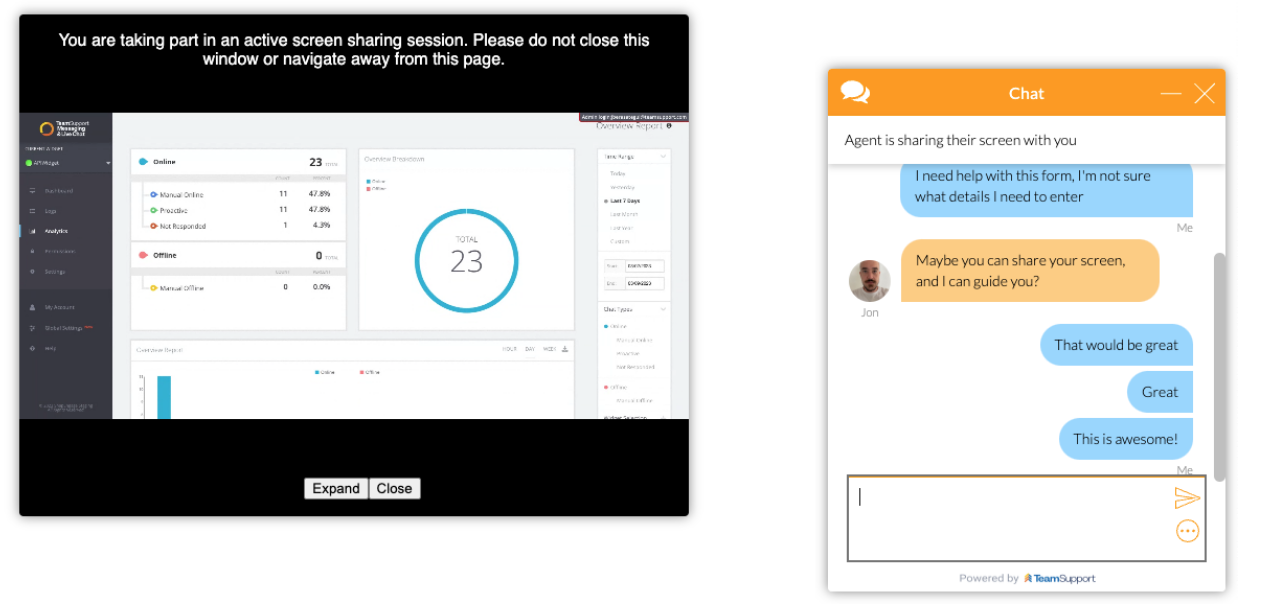
The visitor will be able to move their screen, expand it, or close it. The agent can also stop the screen sharing session, and restart it without closing the pop up. They can simply click on start sharing.
2. Visitor sharing their screen with agent
Agent clicks on “Request sharing” in their Hub:
Once the visitor accepts, they will see an option to “Select “what they want to share as seen here:
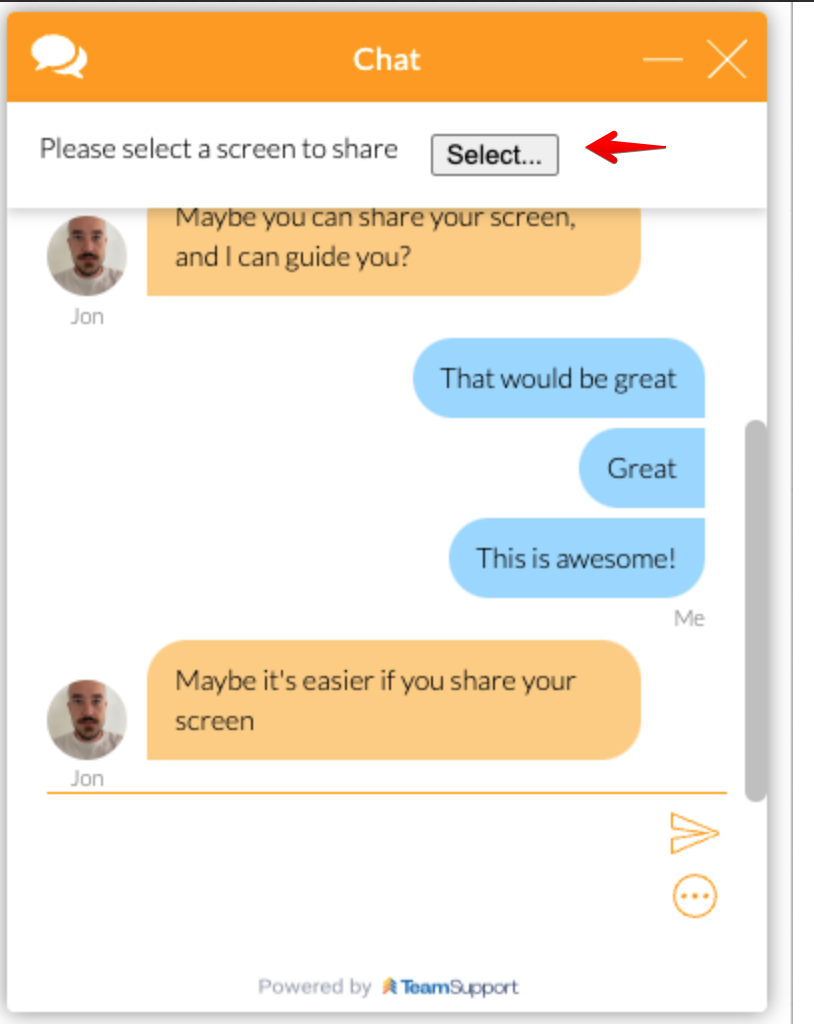
The visitor will then get a prompt to allow their screen to be shared, once they accept, they will need to choose whether they want to share a tab, a window or a desktop. Next, the agent will see what the visitor is sharing in their Hub as seen here below:
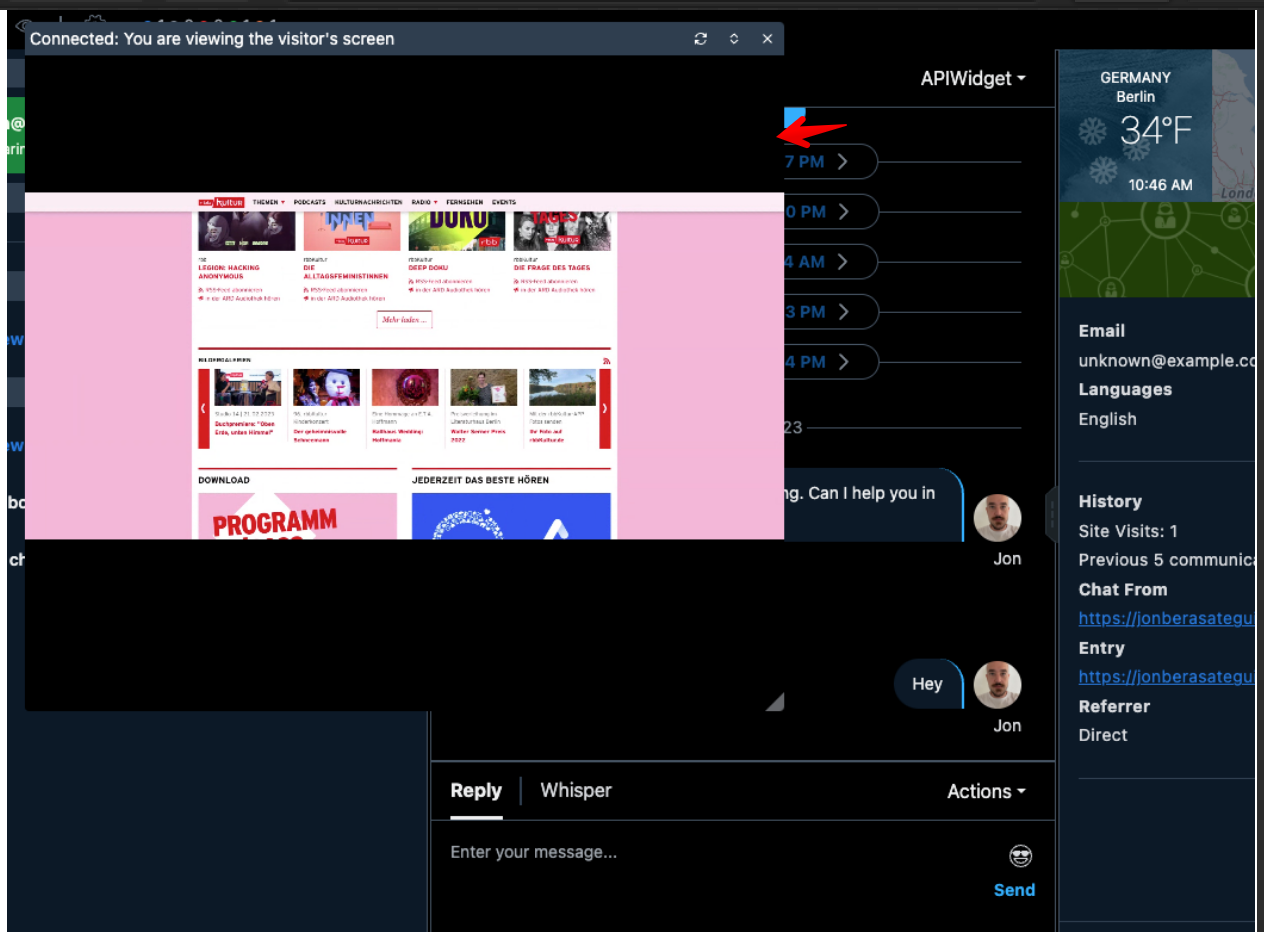
The agent will be able to expand the screen, move it or close it in their Hub.
Note : It’s currently , only possible for one screen-sharing session at a time per agent.
Interested in screen sharing? Please contact your Account Executive or Customer Success Manager.
Note: Screen sharing is NOT available for mobile browsers.
Note: The feature is only available upon request, you should contact your Customer Success Manager or Sales Account Executive for more details.
Published March 27, 2023
