Home > How to Integrate SnapEngage with SAP
Categories: Integrations & Plugins
(Last Updated On: )
*There is an improved version of this integration, to see how to switch over, please go here*
SnapEngage can be integrated with SAP Sales and Service cloud so that, once finished, your chat transcripts can be sent to SAP, and leads can be assigned to an Account ID or Employee ID.
If you would like to receive transcripts and messages in SAP then follow the steps below.
In order to connect SnapEngage to SAP, you will need to be an administrator on SAP, and have access to the Settings tab on SnapEngage (or be an administrator)
Communication system and arrangement
On SAP, head over to Administrator –> General Settings.
Click on Communication systems
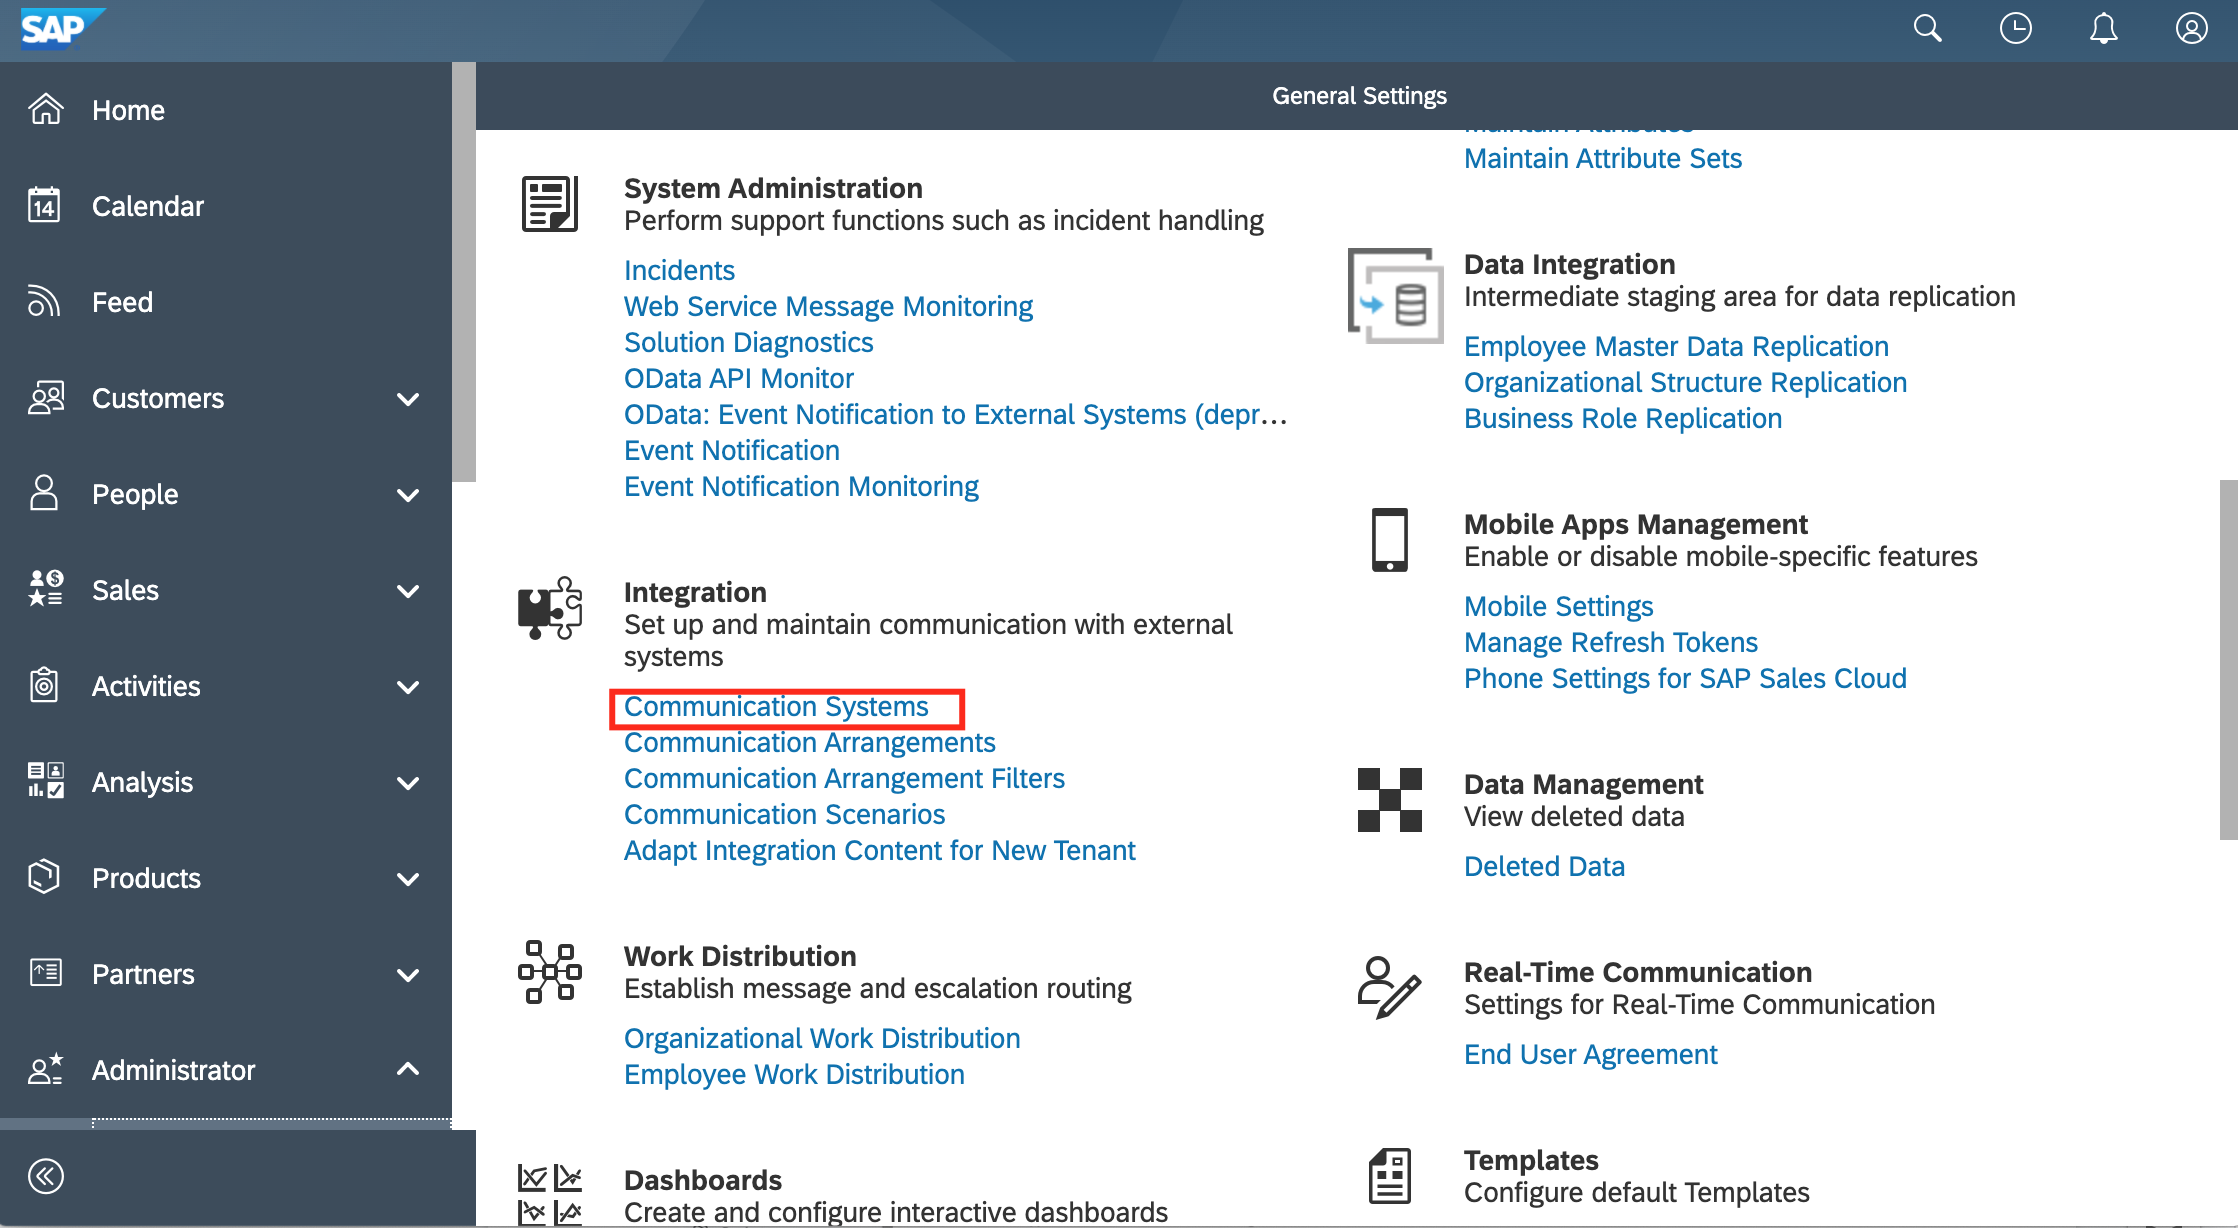
The next step is to create a communication system by clicking on New, and enter all the information needed.
The System access type needs to be Internet, and add a new system instance ID with a Preferred application protocol of XI.
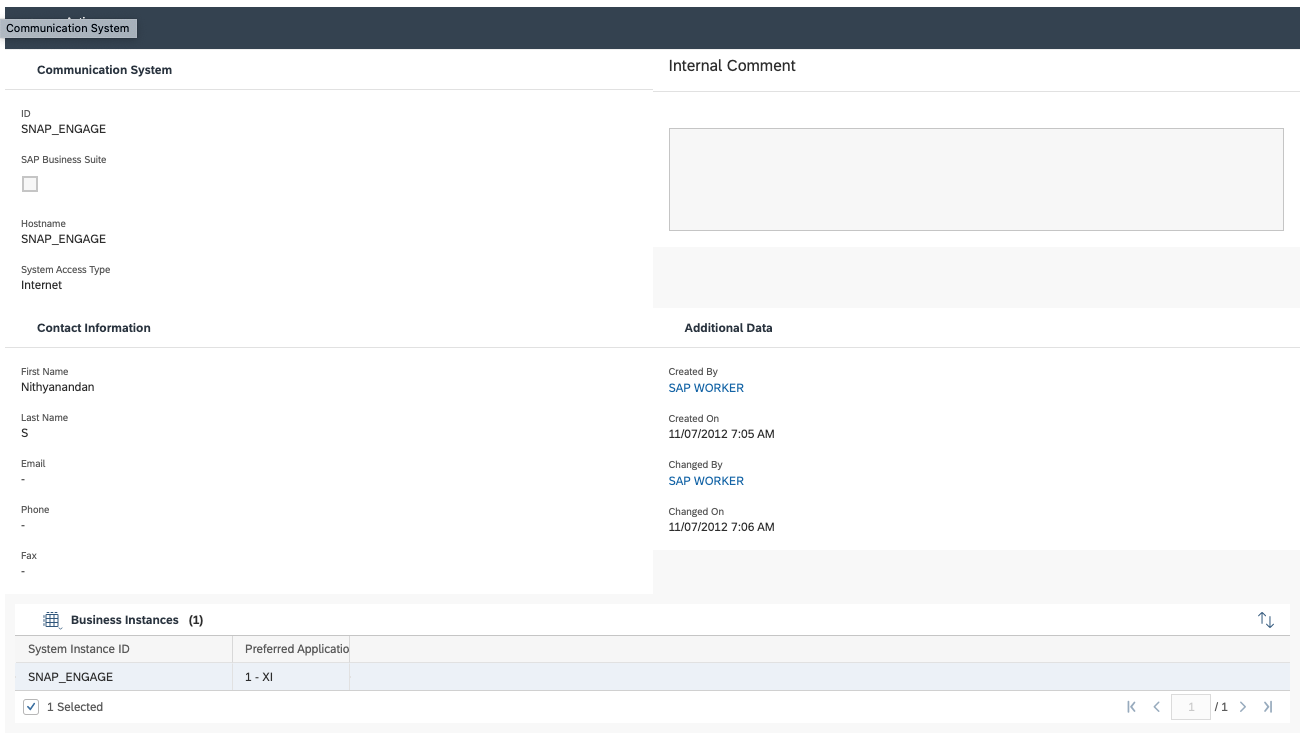
Then save and close. If this is already set up, leave it as it is.
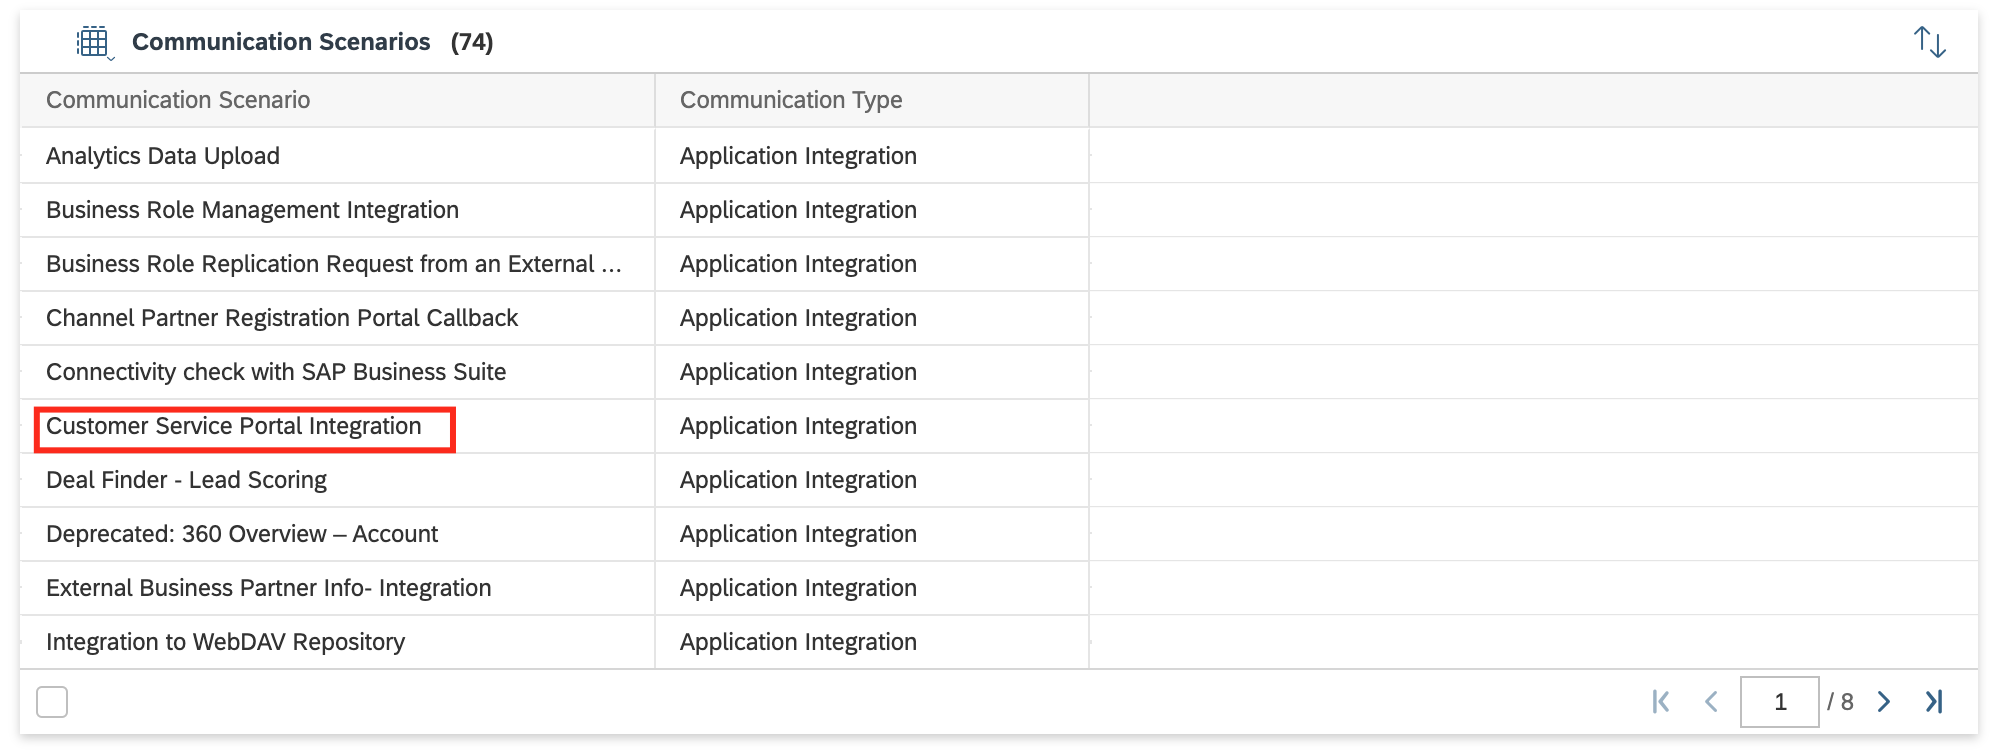
Then under General settings, go to Communication arrangements and click on New. Select Customer service portal integration.
Click on next.
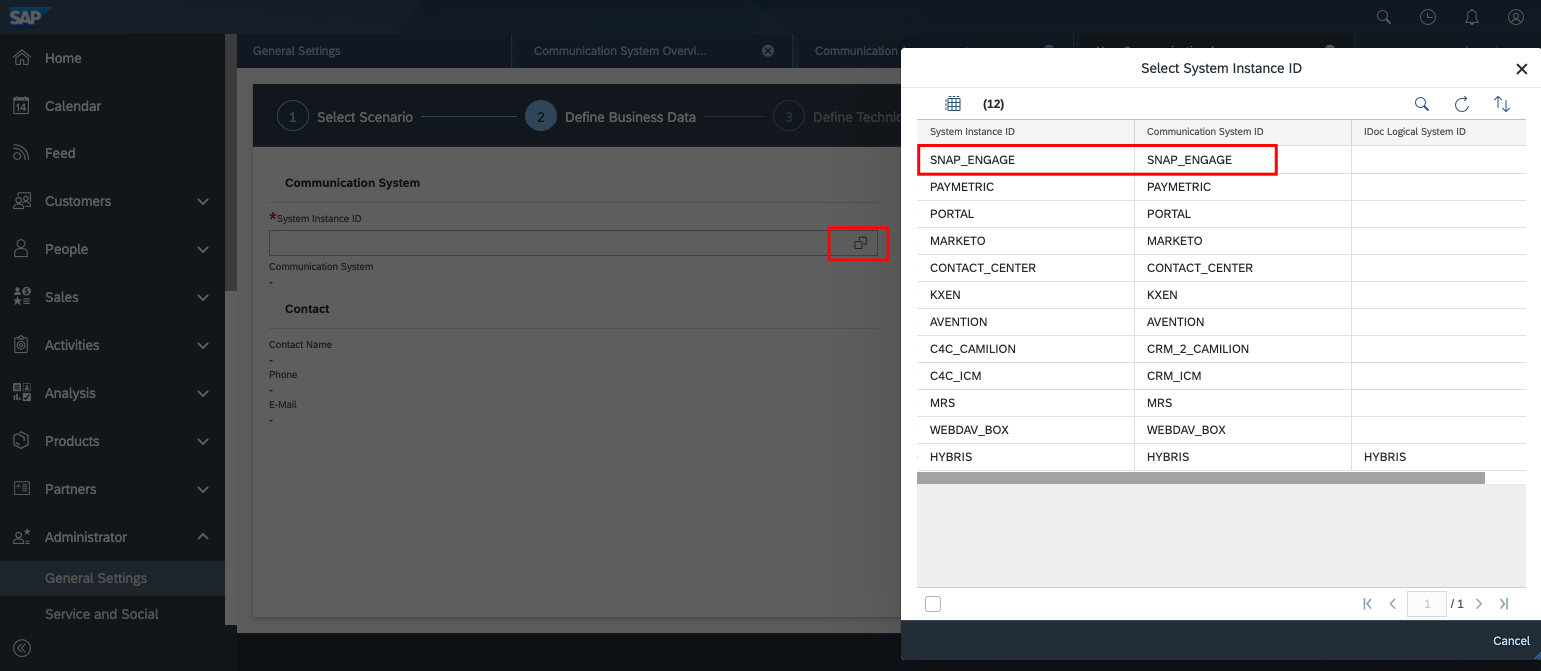
When defining the business data, select the system instance id that you have just created when setting up a new communication system.
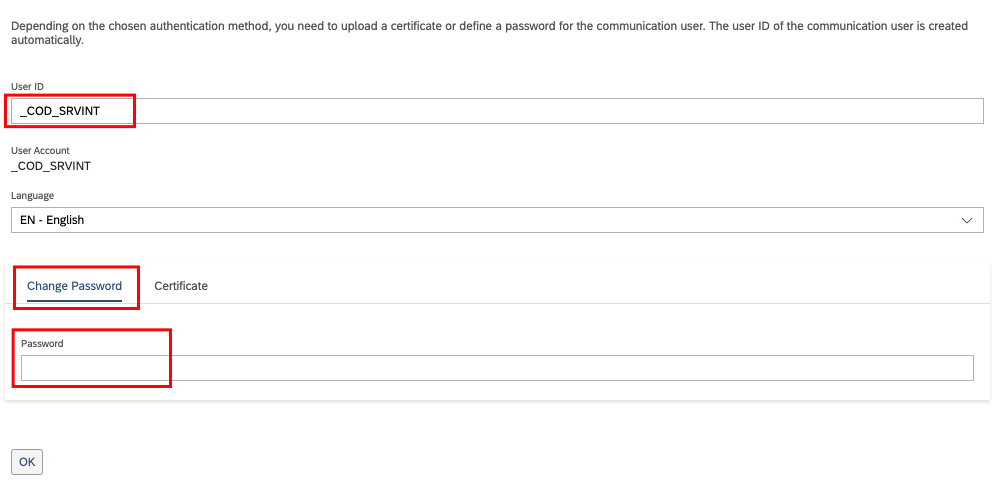
The next step is to define technical data where you need to check if the correct settings regarding the communication method and inbound communication are applied. It’s important to note that the user id is automatically generated by SAP, and it will be used in a later stage to set up the SnapEngage widget. Therefore, it is crucial to edit the credentials, and add a new password, as well as copying the user id. You will be using this ID and password to connect your SnapEngage account.
Review and finish your communication arrangement.
Connecting the SnapEngage integration
The next step is to connect SnapEngage to SAP, so head over to SnapEngage’s admin dashboard, click on Settings, Integrations and select SAP.
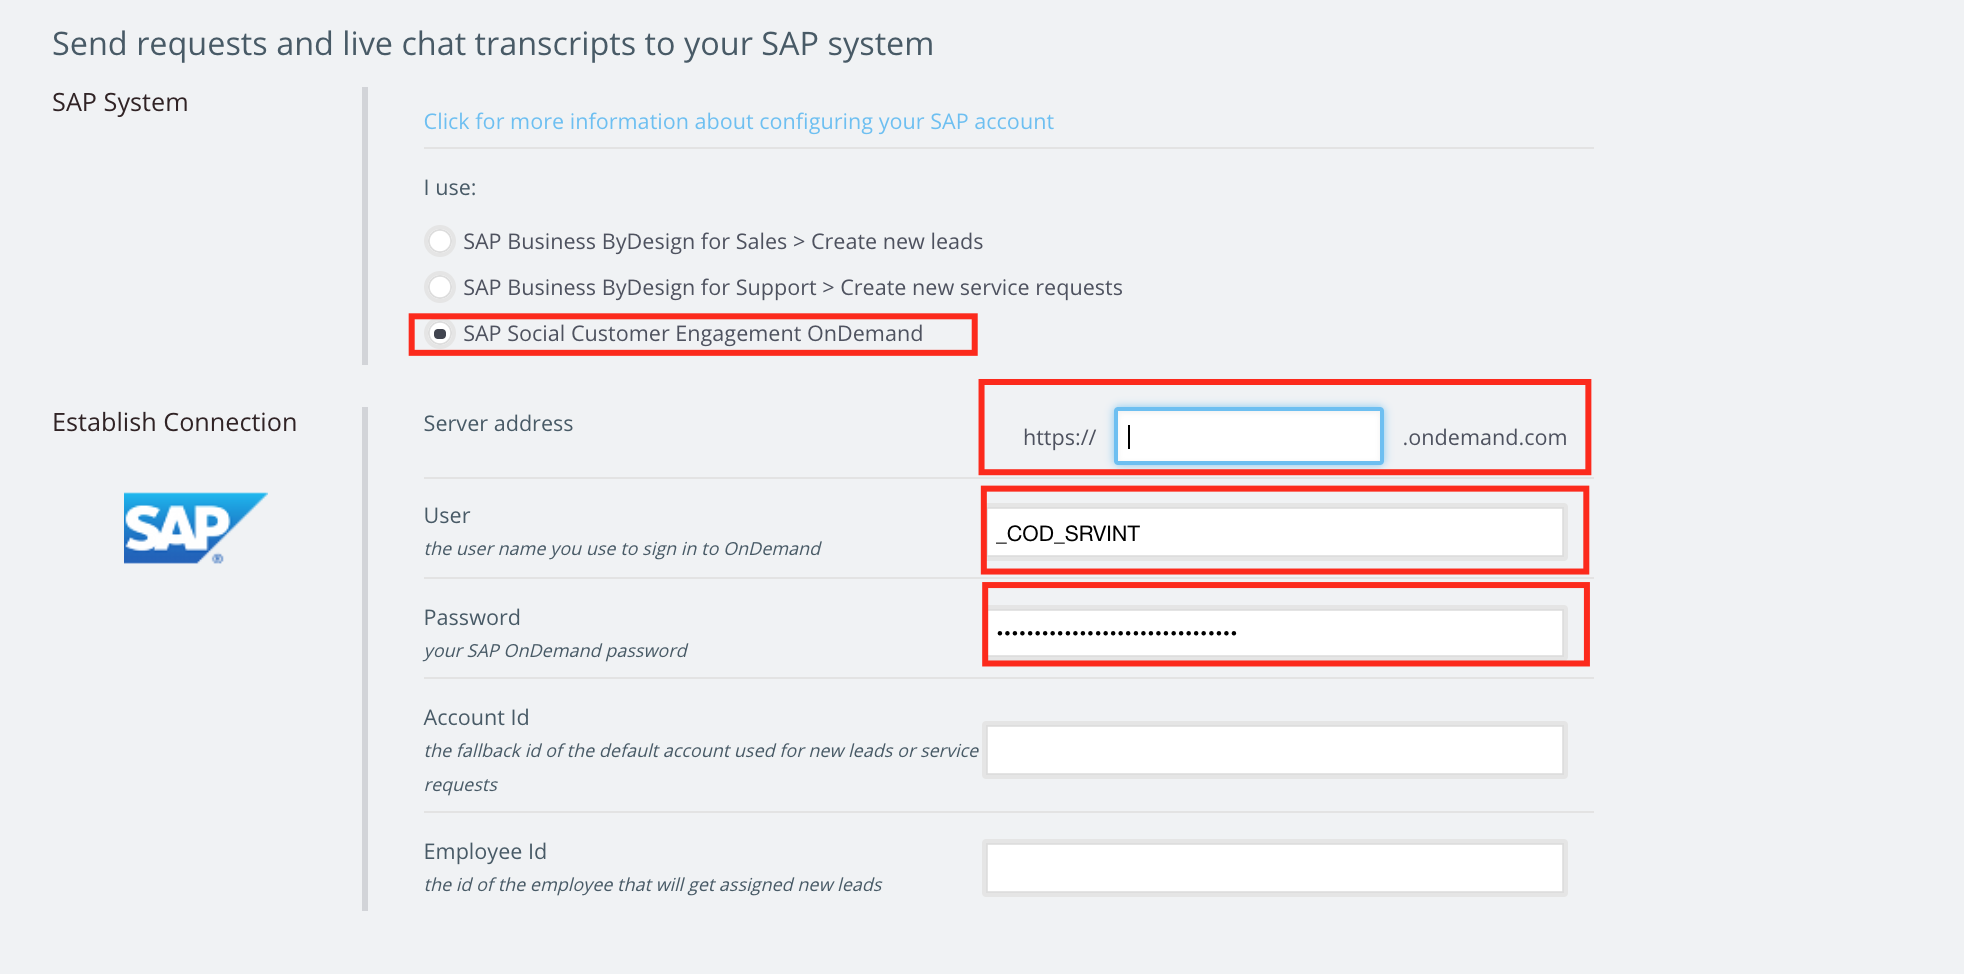
Select SAP Social Customer Engagement OnDemand, add the server address, user and password (from the previous step on SAP). You may also add an account ID and Employee ID, but these are not required.
You can also customise whether you are using individual customers or corporate accounts and contacts, and when you want to send the chat transcript, as well as other email recipients.
Hit save. Your integration should now be working.
Connecting the Mashup service
This step is optional, but setting the mashup service will allow you the agents on SAP to respond to a ticket by sending a chat link to the customer.
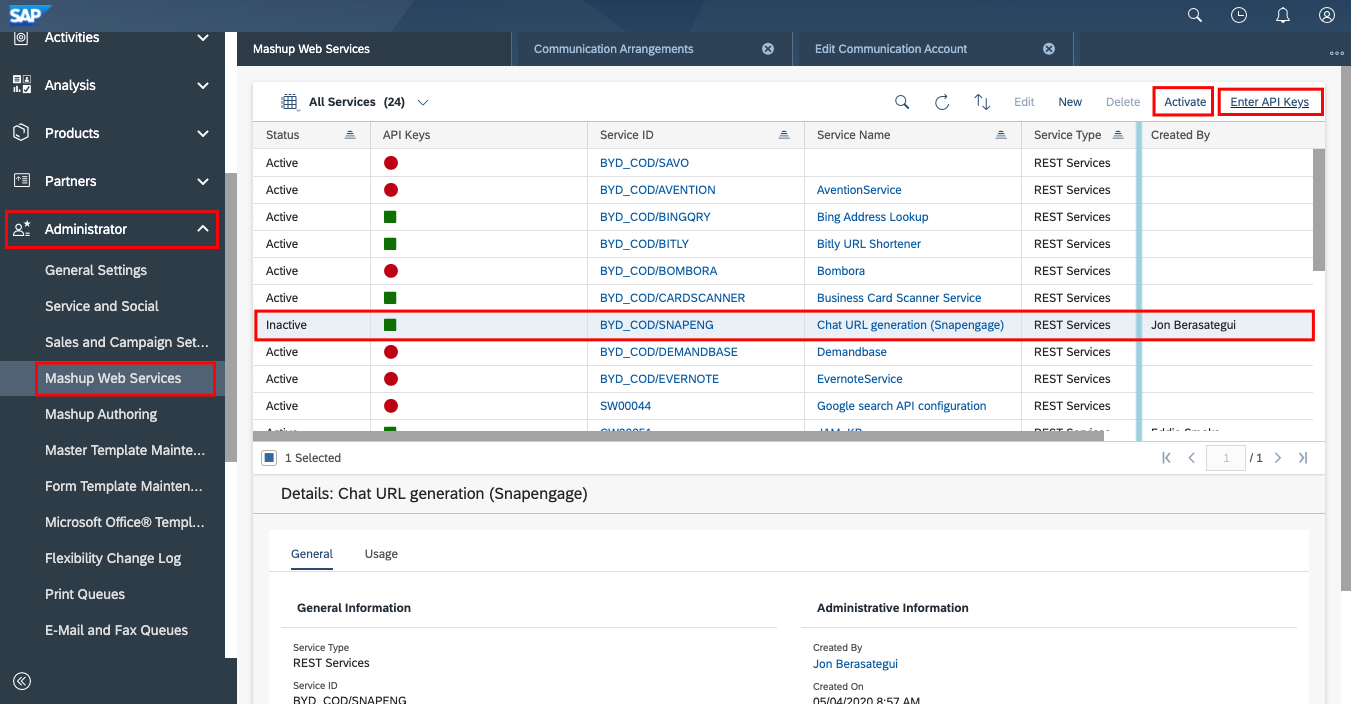
In order to do so, on SAP, navigate to Administrator –> Mashup Web Services.
Click on the SnapEngage service, and click on Enter API keys.
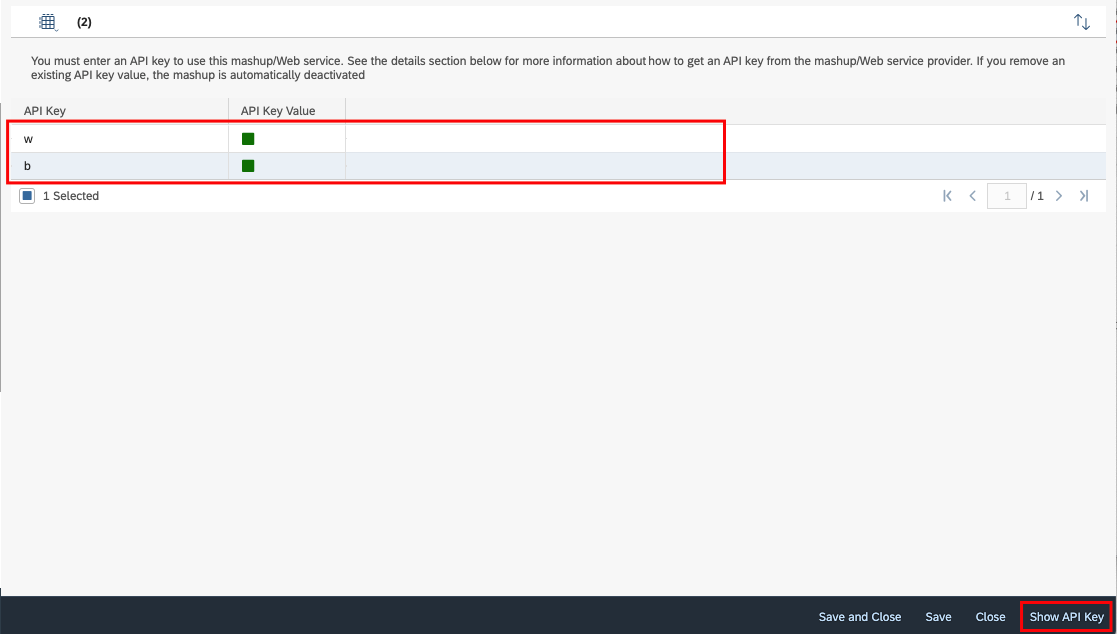
On SnapEngage’s Admin dashboard, go to Settings, get the code, scroll down to (Advanced) Widget ID, click on OK, and copy the ID.
On SAP, on the W field, enter the widget ID you’ve just copied, and on the B field, enter the URL where visitors will start a chat. (You will need to click on Show API key to enter them)
Close the screen and activate the service.
That way, when responding to a ticket, the agent can send a URL to the visitor from SAP to start a chat. This will be found under “New interactions”, there will be a button called chat link.
Did you find this article helpful?

 (2 votes, average: 4.00 out of 5)
Published October 3, 2012
Reader Feedback
No comments yet