Home > How to Integrate SnapEngage with Salesforce
Categories: Integrations & Plugins
(Last Updated On: )
About This Article
The purpose of this article is to provide a comprehensive overview of how to integrate SnapEngage with Salesforce.
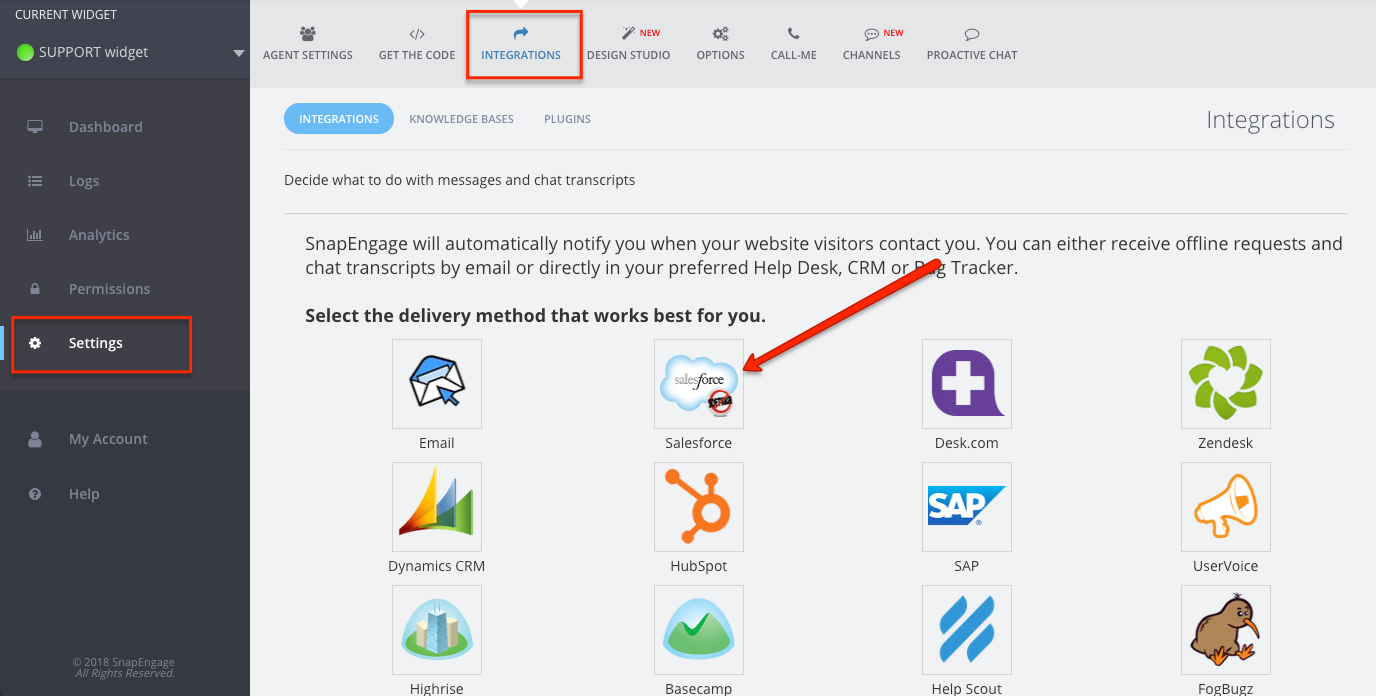
SnapEngage will automatically notify you when your website visitors contact you. You can either receive offline requests and chat transcripts by email or directly in your preferred Help Desk, CRM or Bug Tracker.
If you would like to receive transcripts and messages in Salesforce then follow the steps below. Please make sure that you have pop-ups enabled on your computer.
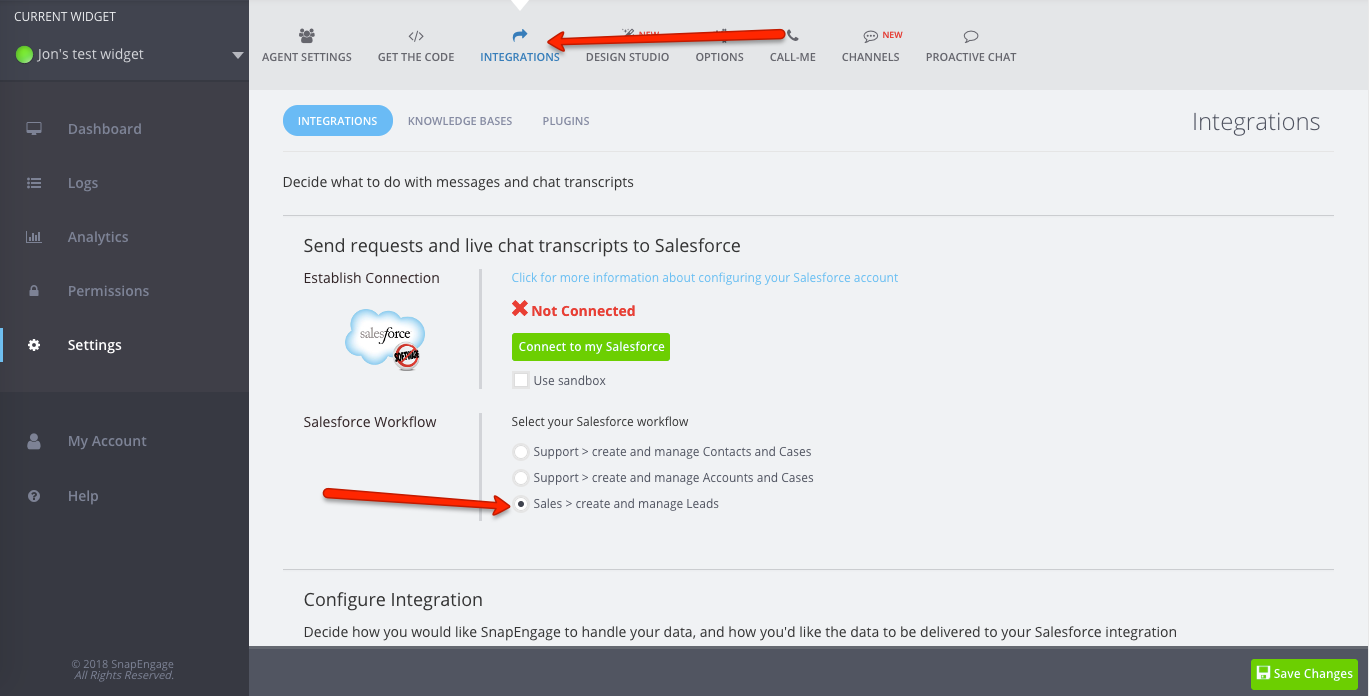
1. Log into your Admin Dashboard, go to your Settings.
2. Select the Intergrations tab.
3. Click on the Salesforce Icon.
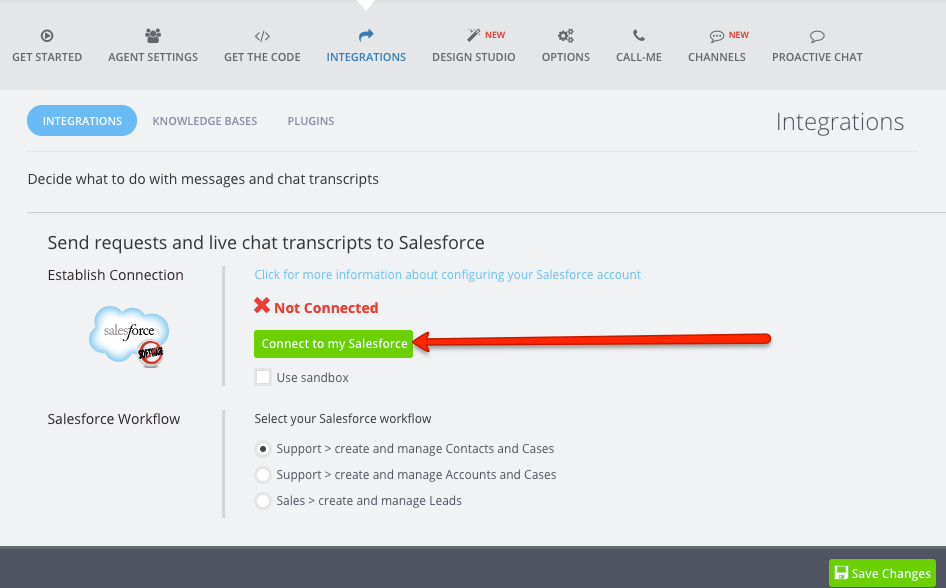
4. Click “Connect to my Salesforce”
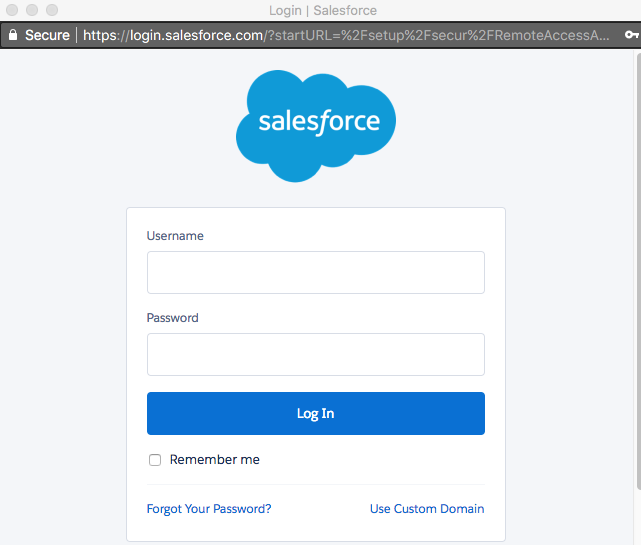
5. A pop-up will appear for you to login to the Salesforce account you would like to connect with. (This step is skipped if you are already logged in). If the pop up doesn’t appear, please make sure that your browser is not blocking pop-ups.
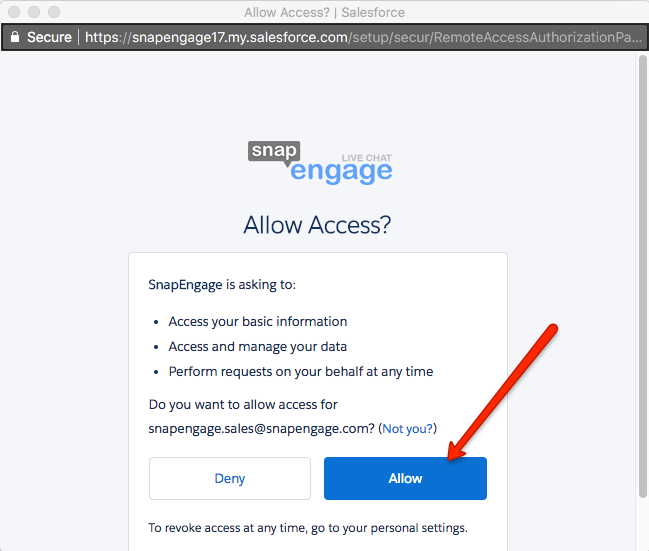
6. Click to Allow the SnapEngage application.
7. You will now see the Connected message, continue by selecting your Salesforce workflow.

8. Be sure to Click Save!
9. You can now add your custom configurations.
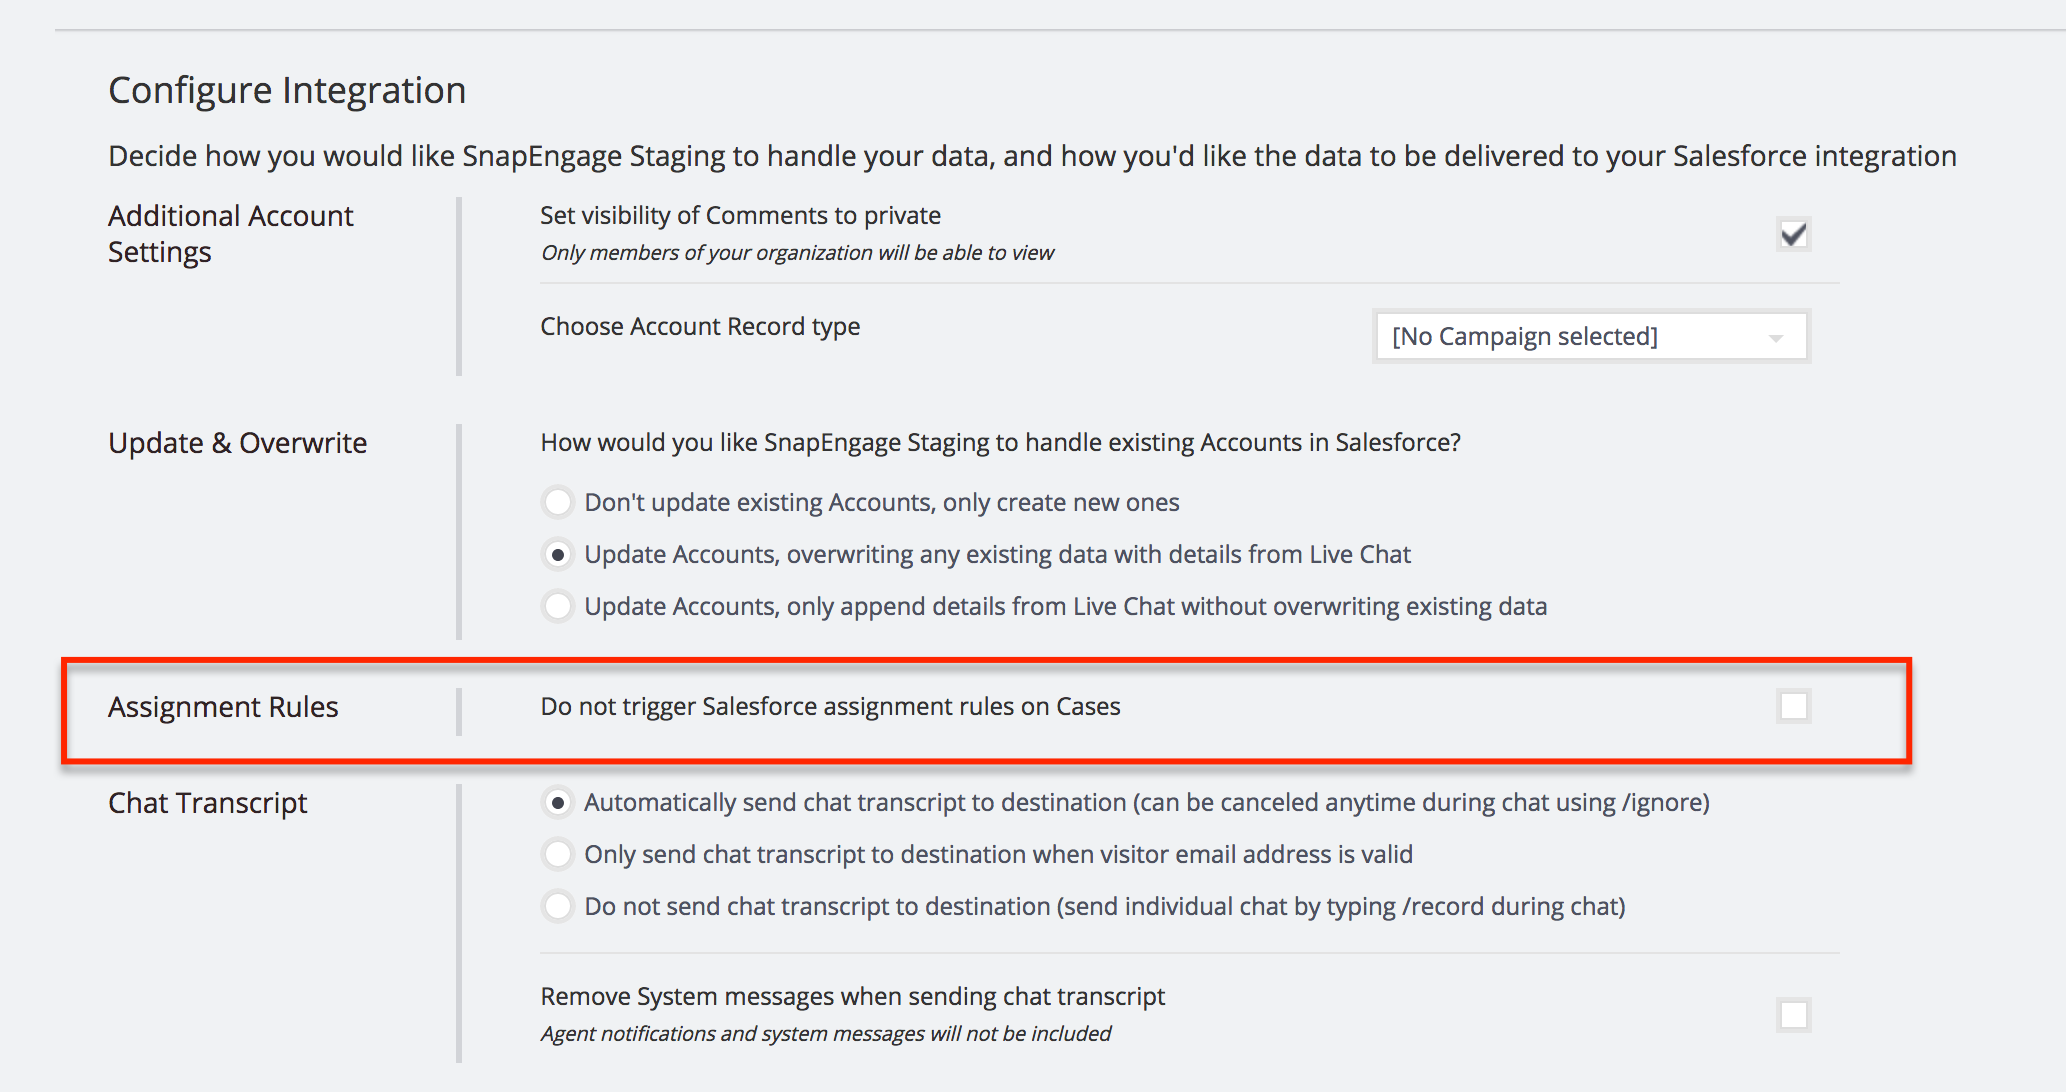
10. Now that you have your workflow setup, you can now choose additional settings for those cases.
- Set visibility – permit or decline members outside of your organization from viewing the data
- Remove system messages from the chat transcript (page reloads, transfer notifications, etc)
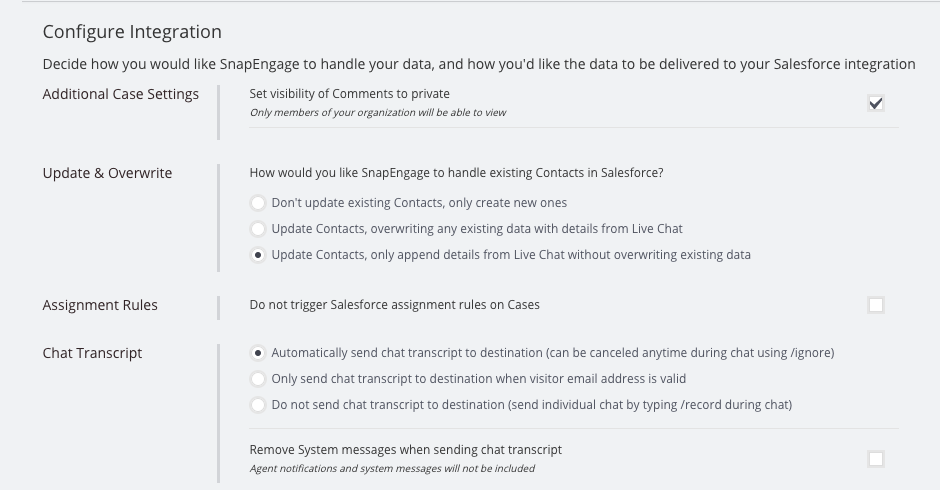
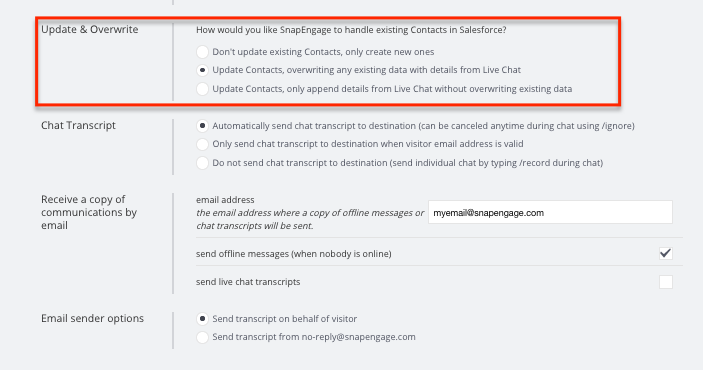
11. Next, select how you want the contacts updated in the system
- Create a new contact for each chat (In most cases we query for a lead with the provided email address (for Salesforce we query for phone/FB id as well). If we find the lead, we are going to create a task that will be attached to this lead. If we didn’t find the lead we are going to create a new lead.)
- Update and overwrite existing contact, will create new cases for new visitors
- Update and append details without overwriting existing data
12. Salesforce assignment rules configuration
Salesforce allows you to disable assignment rules for Cases, or Leads. Enable this option if you don’t want to apply assignment rules.
- Support workflow behavior: if enabled, the active assignment rules are not applied for Cases.
- Sales workflow behavior: if enabled, the active assignment rules are not applied for existing Leads. Please note: assignment rules will always be applied for new Leads regardless the state of this configuration.
13. Select how you want the transcripts sent – Automatically, only with a valid visitor email, or do not send
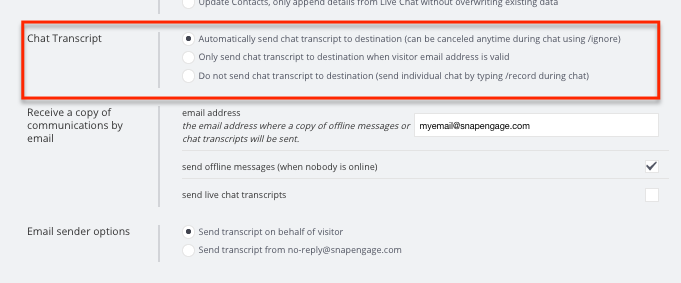
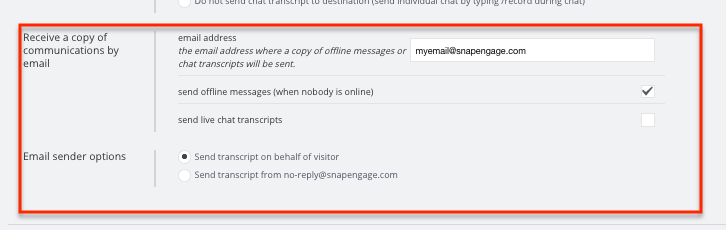
14. Pick where you want additional copies of the transcript to send as well as offline messages. Also, pick how it is sent to your integration.
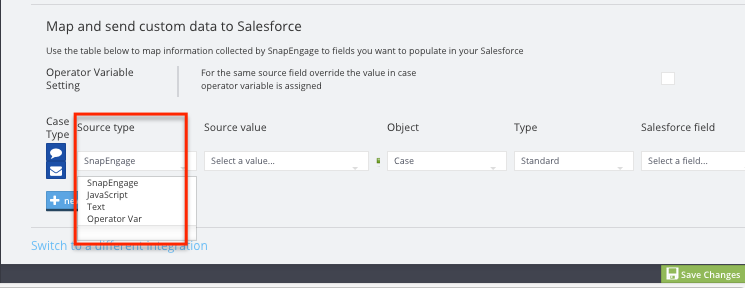
15.The next section is where you will do any custom mappings you would like. You can select from the different source types – SnapEngage, JavaScript, Text, or Operator Variables.
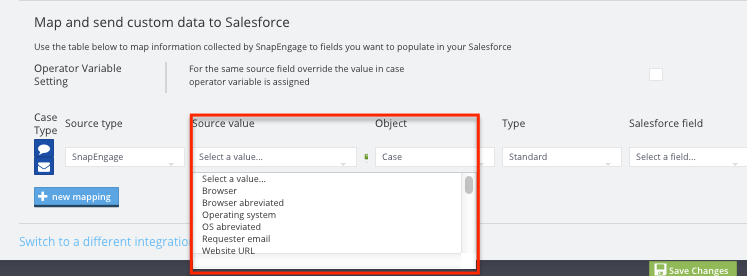
16. Now, enter the Source Value you want to send to Salesforce
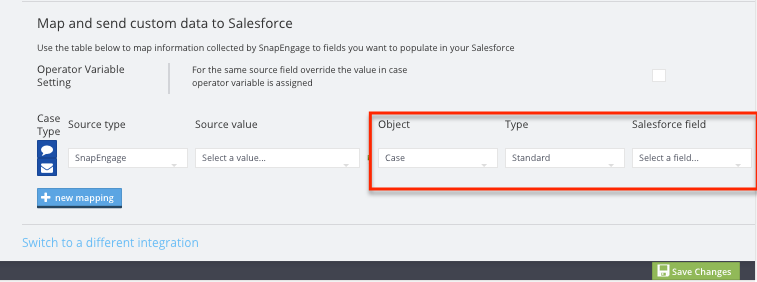
17. The next 3 items will be where they go into your Salesforce. This will need to be determined by you as to where you want to see the data.
While the ability to automatically map any SnapEngage data to a Salesforce standard or custom field is very useful, sometimes the information is not available before starting the chat. In this case, while on the phone (using the “Call Me” button) or in a chat, you can directly record important information provided by your visitor, to their profile by using one of the commands bellow.
Simply provide the data you want to record after the ‘=’ (equal) sign and SnapEngage will assign it to the Lead or Contact it will create for you in Salesforce CRM.
| Command | Available in | |
| Sales mode (Leads) | Support mode (Contacts) | |
| /name = | X | X |
| /phone = | X | X |
| /fax = | X | X |
| /mobilephone = | X | X |
| /description = | X | X |
| /title = | X | X |
| /company = | X | |
| /website = | X | |
| /department = | X | |
example:
/phone = (555) 444-6666
/name = first last
It is possible to group cases in Salesforce under the same Account, Contact or Lead record when a visitor uses one of the communication channels (for example: Facebook Messenger) to chat and his/her email is not known.
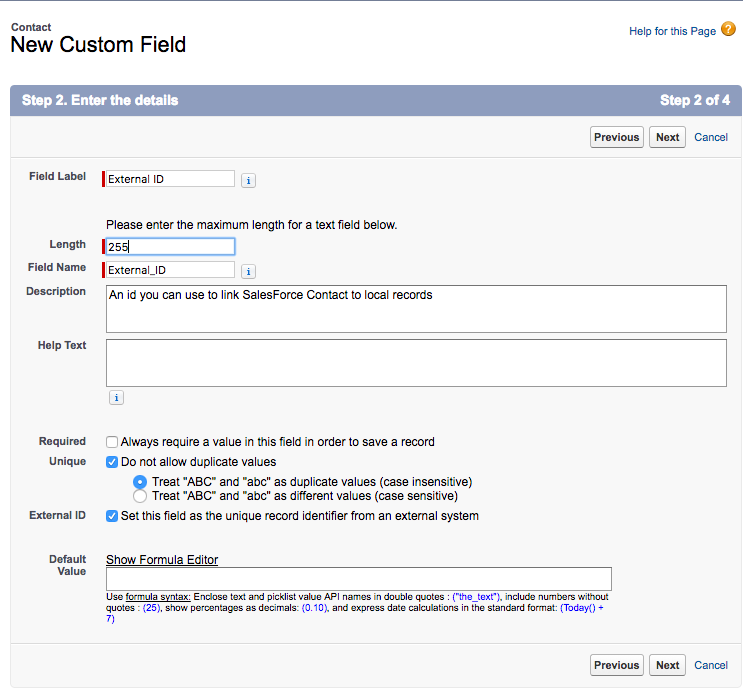
In order to use this feature with the Salesforce integration, an ‘External ID’ custom field should be added to Salesforce entity (Account, Contact or Lead).
External id field configuration:
- Field type: String.
- Field Label: External ID (or any other relevant field label).
- Length: 255.
- Field Name: External_ID. Field name cannot change.
- Required: NO.
- Unique: YES.
- Case insensitive: YES
- Set this field as the unique record identifier from an external system: YES
After ‘External ID’ field is added to Salesforce entity, all new cases from the same visitor using the same communication channel will be linked to one record in Salesforce (Account, Contact or Lead).
Note: email has a priority over external ID. If during the chat agent enters an email Account/Contact/Lead record in Salesforce will be created with provided email and without External ID.
Furthermore, should you want to add a comment on that case you can do it during the chat by adding a “note” operator variable : /note=your comment.
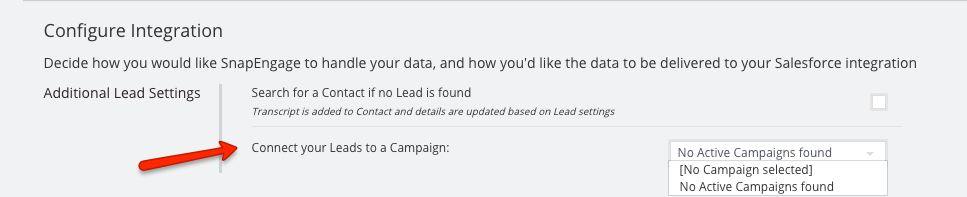
Set up Salesforce with the campaign ID
The SnapEngage / Salesforce Integration allows you to link a Campaign to Leads created from Live Chats and Offline messages.
To enable this feature:
1. Navigate to your SnapEngage Integration Settings
2. Check that you are using Sales / Lead workflow
3. Under Additional Lead Settings, select an available Campaign and click Save (Campaigns are automatically loaded from your Salesforce account)
For Advanced users:
If you would like to setup multiple Campaigns depending on the page where the chat starts, it is possible to set the Campaign Id from a javascript variable defined on your HTML page. You’ll want to use the Salesforce 15-character Id for the javascript variable.
For more information on how to setup javascript variables, check out this article.
Mapping agents
It is also possible to map agents on SnapEngage with their salesforce account :
1. Click on the Chat Agents tab in your SnapEngage Admin Dashboard.
2. Select the Edit button for the Agent.

3. In the box labeled “Agent Salesforce account”, begin typing the Agent’s name in the box. After a second or so you will see matching users from Salesforce.
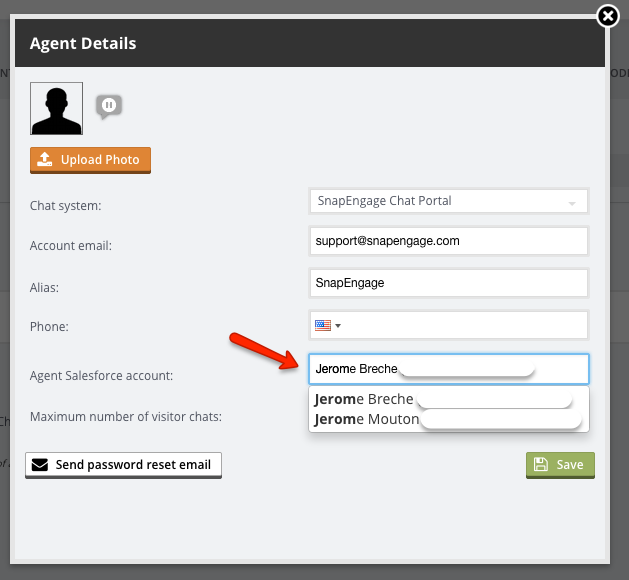
4. Select the correct user, you can now see the details in the agent Salesforce account box.
5. Click the “Save Changes” button to make the changes permanent.
If you are using Assignment Rules for Cases or Leads in Salesforce, you will also need to follow this guide to ensure Agents are mapped correctly.
Did you find this article helpful?

 (24 votes, average: 3.13 out of 5)
Published October 3, 2012
Reader Feedback
No comments yet