Home > How to Integrate SnapEngage with your Integration API
Categories: Integrations & Plugins
(Last Updated On: )
About This Article
The purpose of this article is to provide a comprehensive overview of how to integrate SnapEngage with the Integration API.
SnapEngage will automatically notify you when your website visitors contact you. You can either receive offline requests and chat transcripts by email or directly in your preferred Help Desk, CRM or Bug Tracker. You can see a list of our current Integrations with various systems here.
In case you are not using one of the systems that we integrate with, you still have the option to build your own integration using our Integration API. The SnapEngage Integration API allows you to easily interface SnapEngage with third-party applications like your CRM / Helpdesk.
If you would like to receive transcripts and messages from our Integration API then follow the steps below.
1. Log into your Admin Dashboard
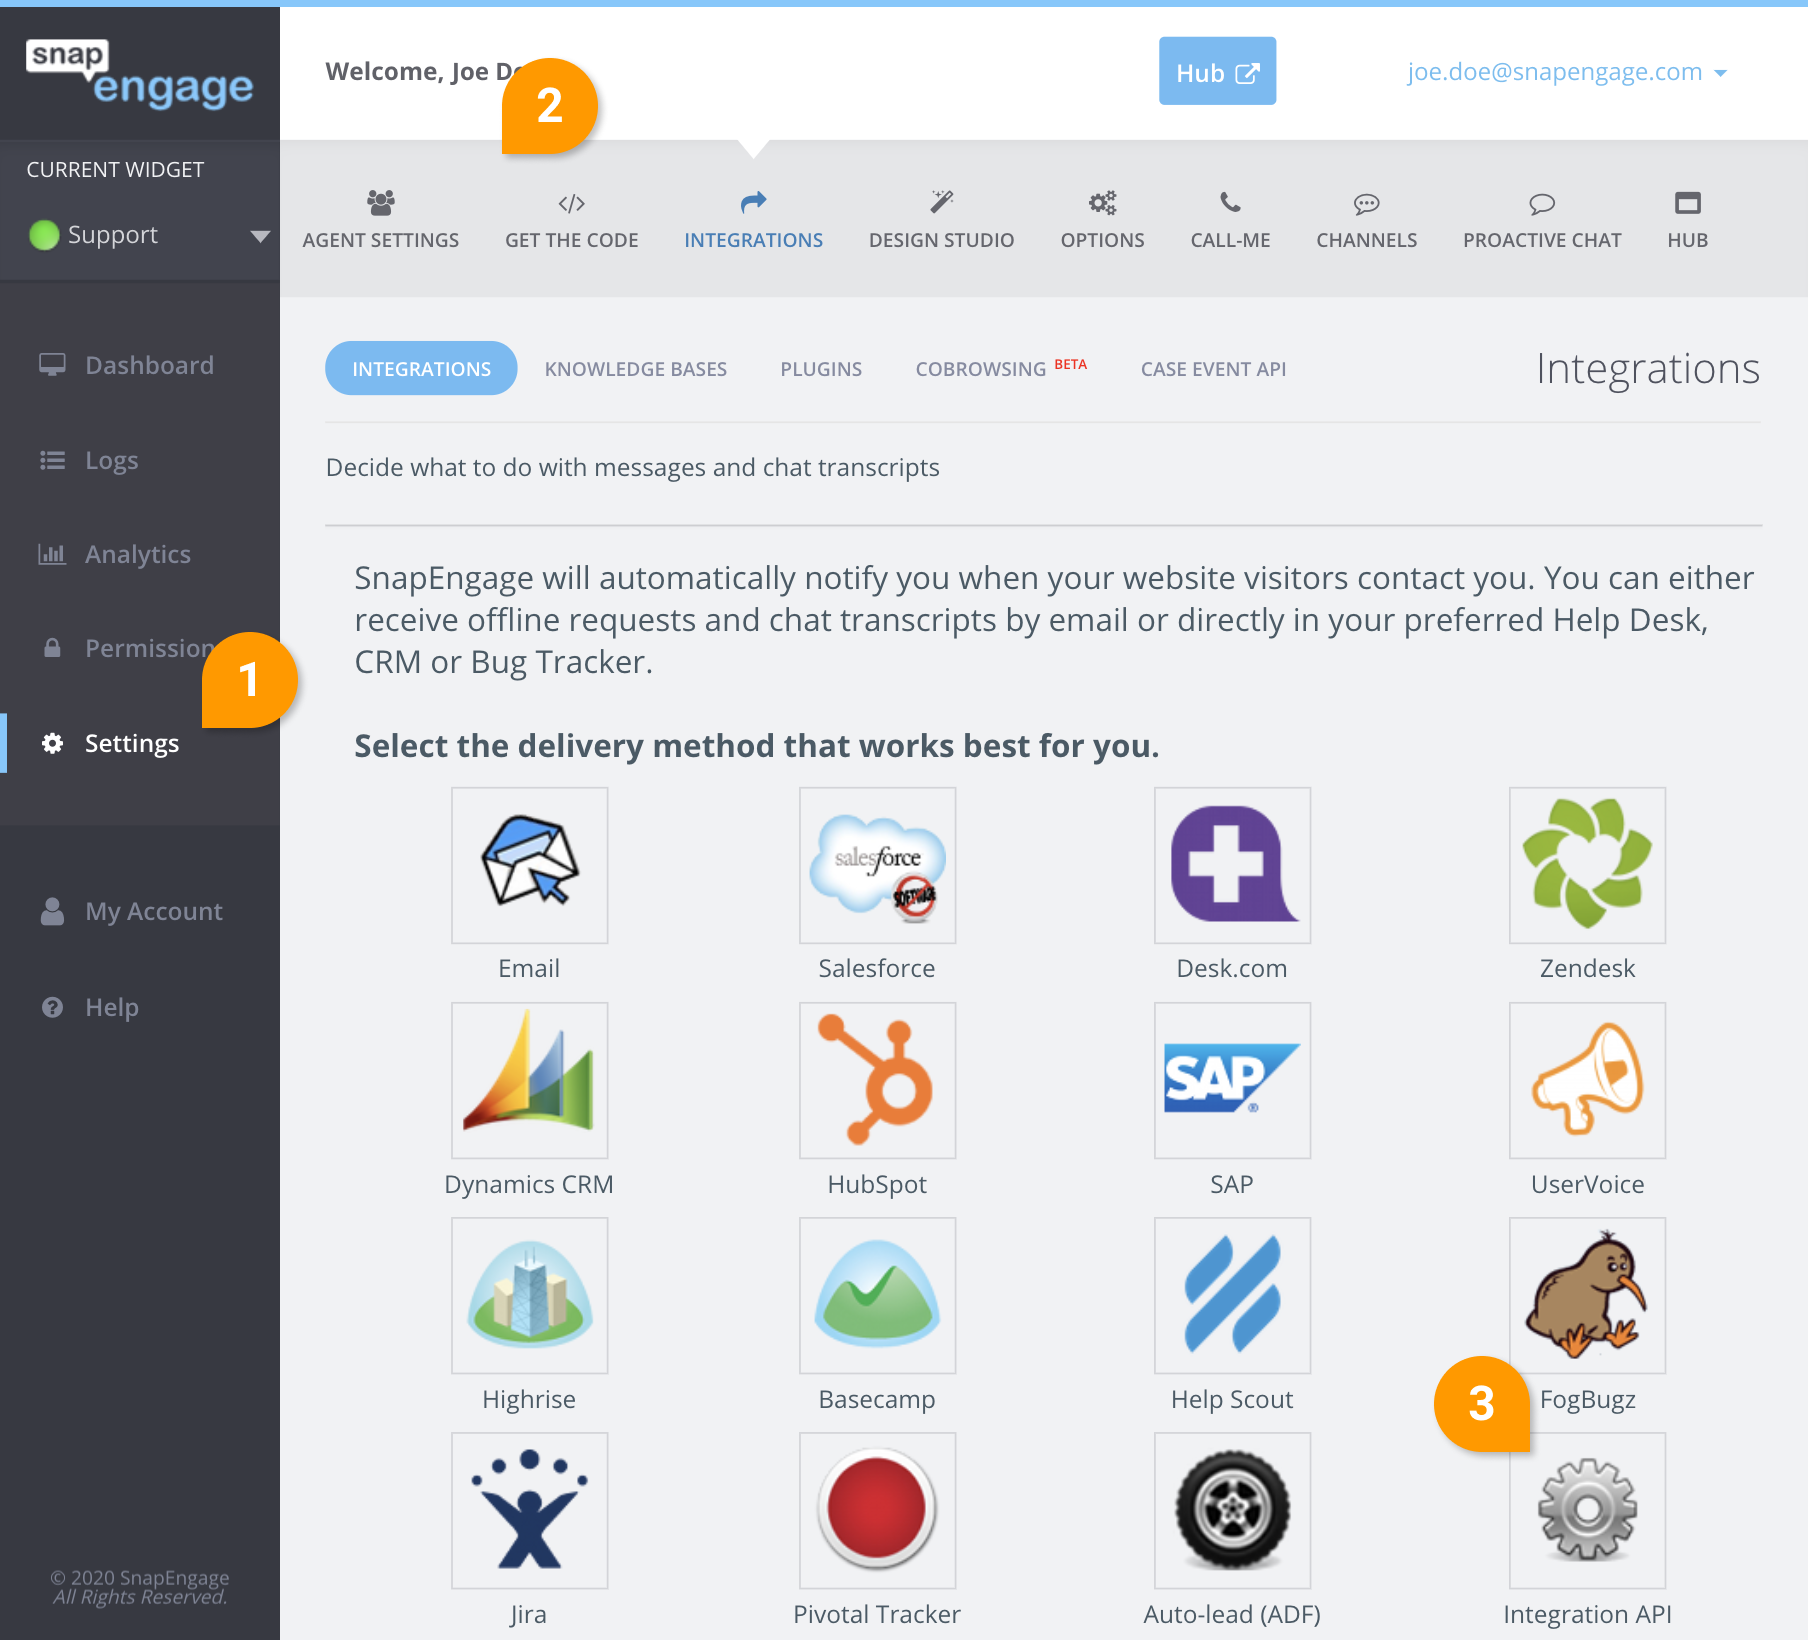
2. Go to Settings (1) select the Integrations tab (2) and then click on the “Integration API” image (3)

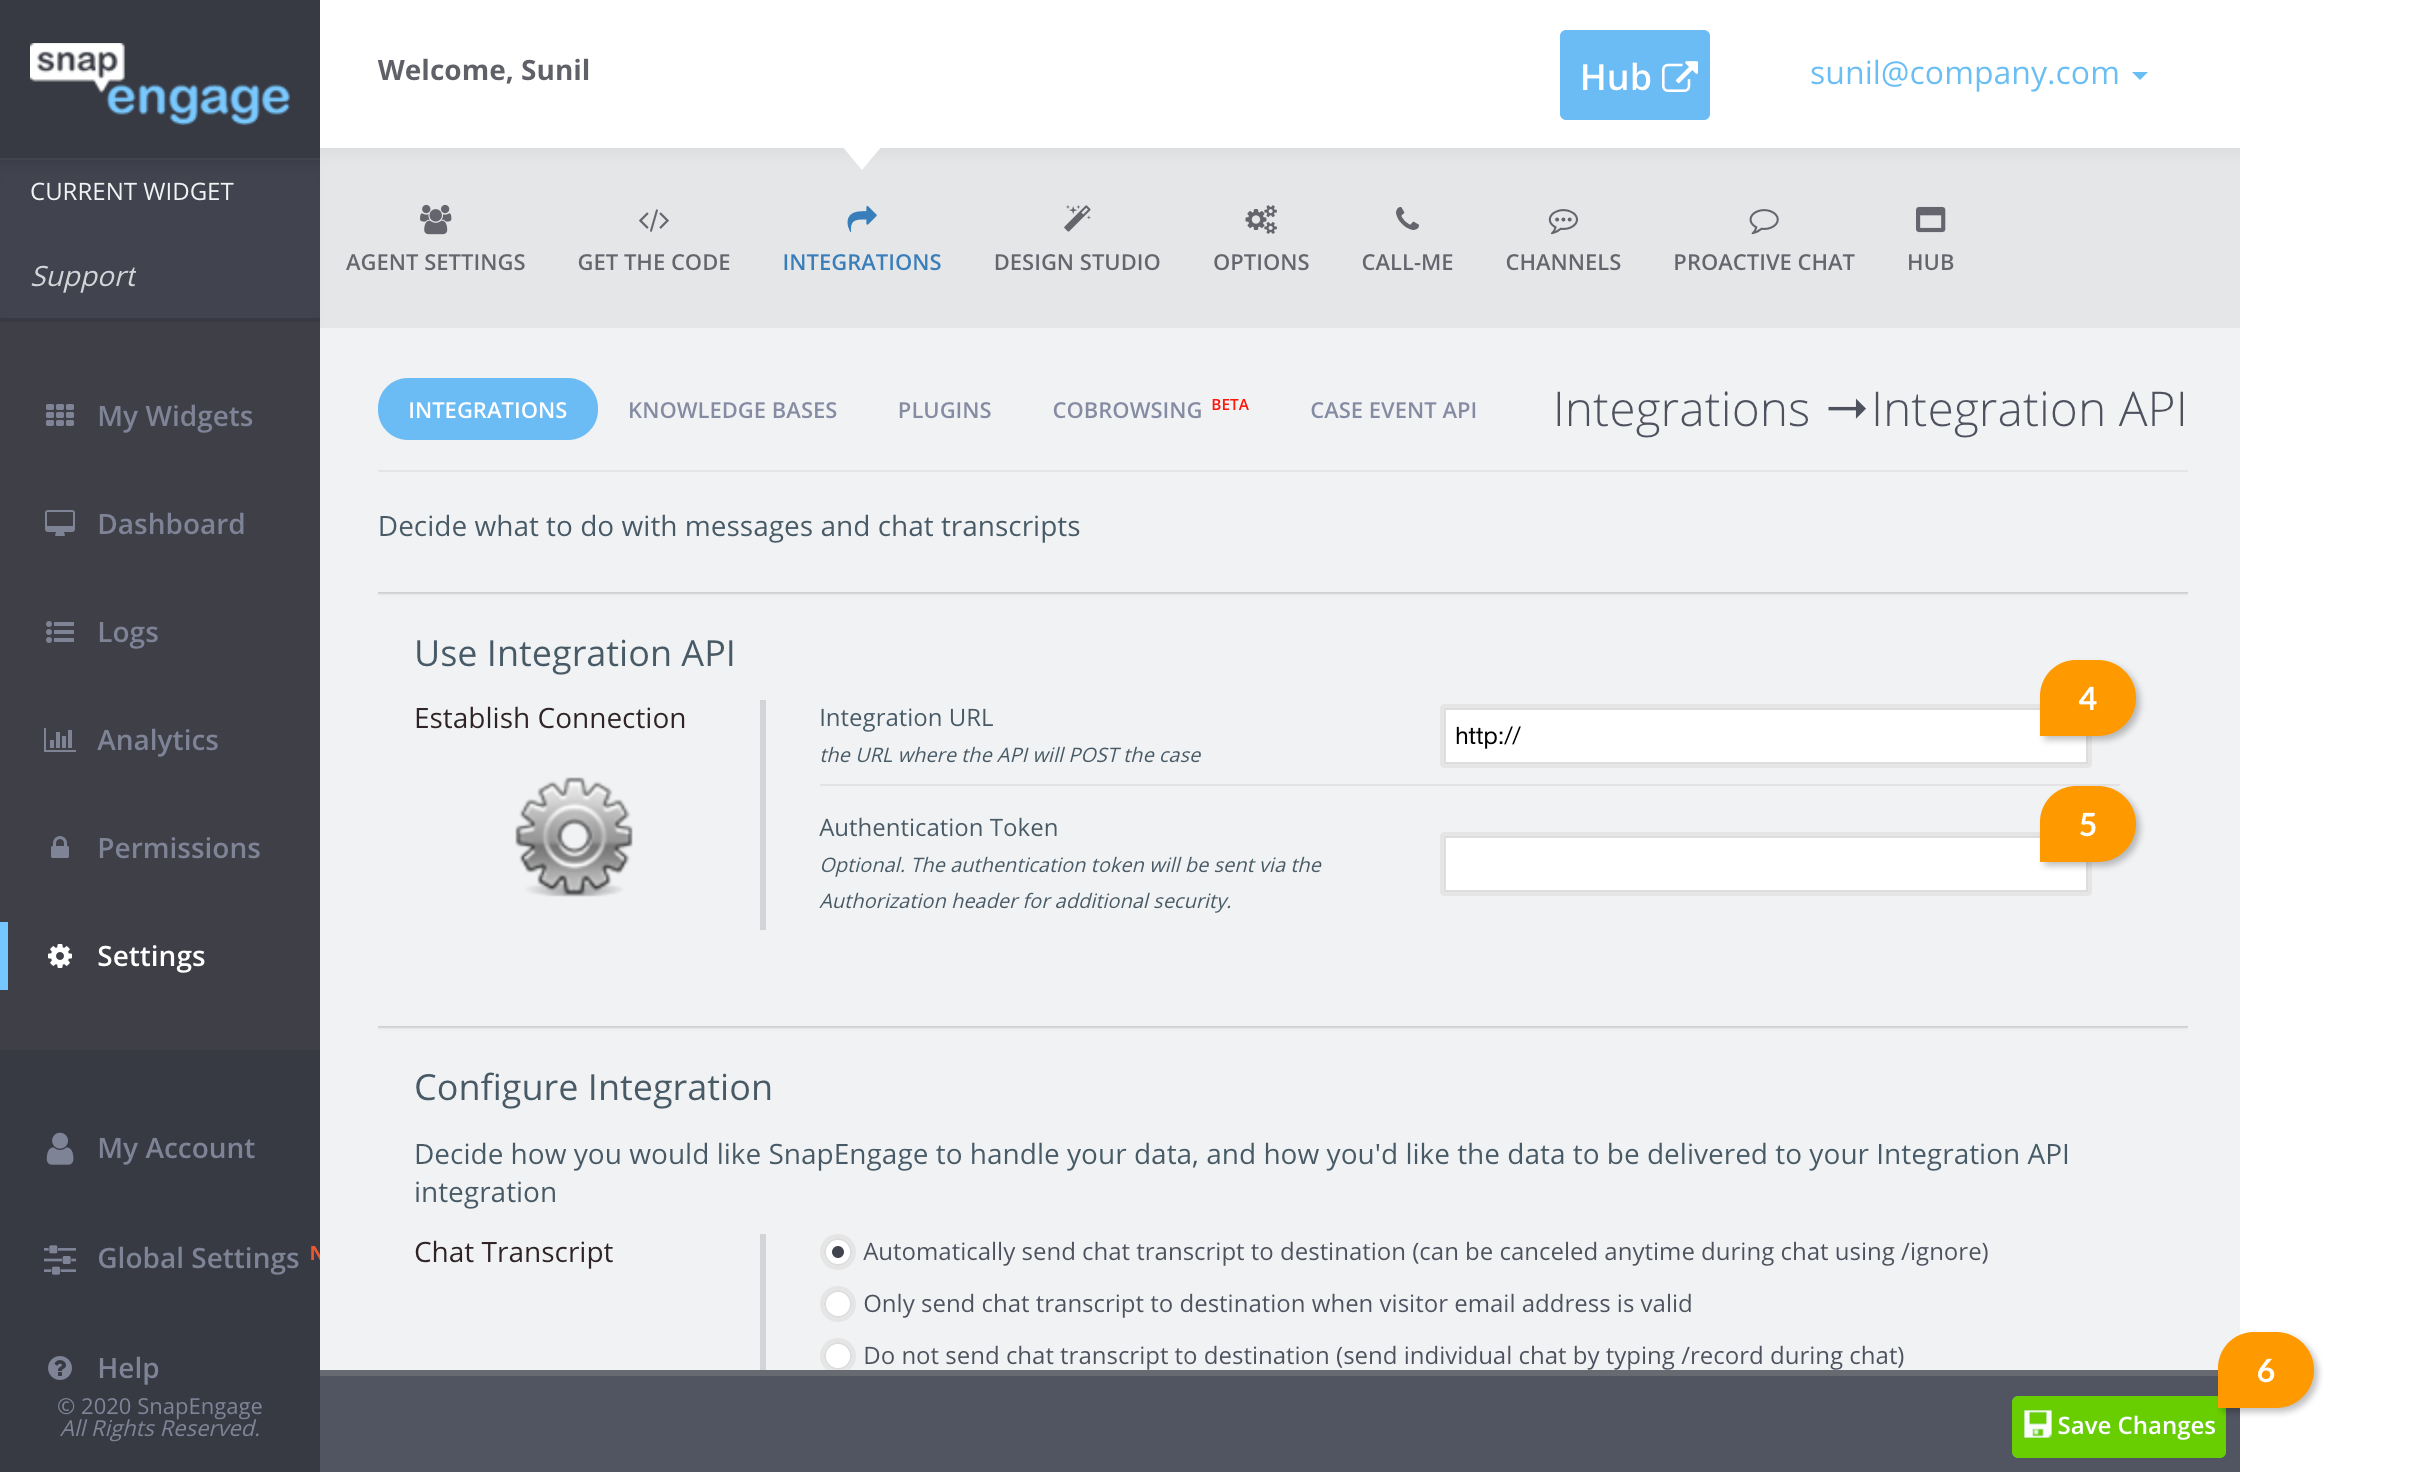
4. Enter the Integration URL (4) – This sets the location where data will be sent to.
5. If required, add an Authentication Token. For most integrations, this is not necessary, but the option is there if needed. The authorization will be sent on the header.

6. When Done, click on Save (6).
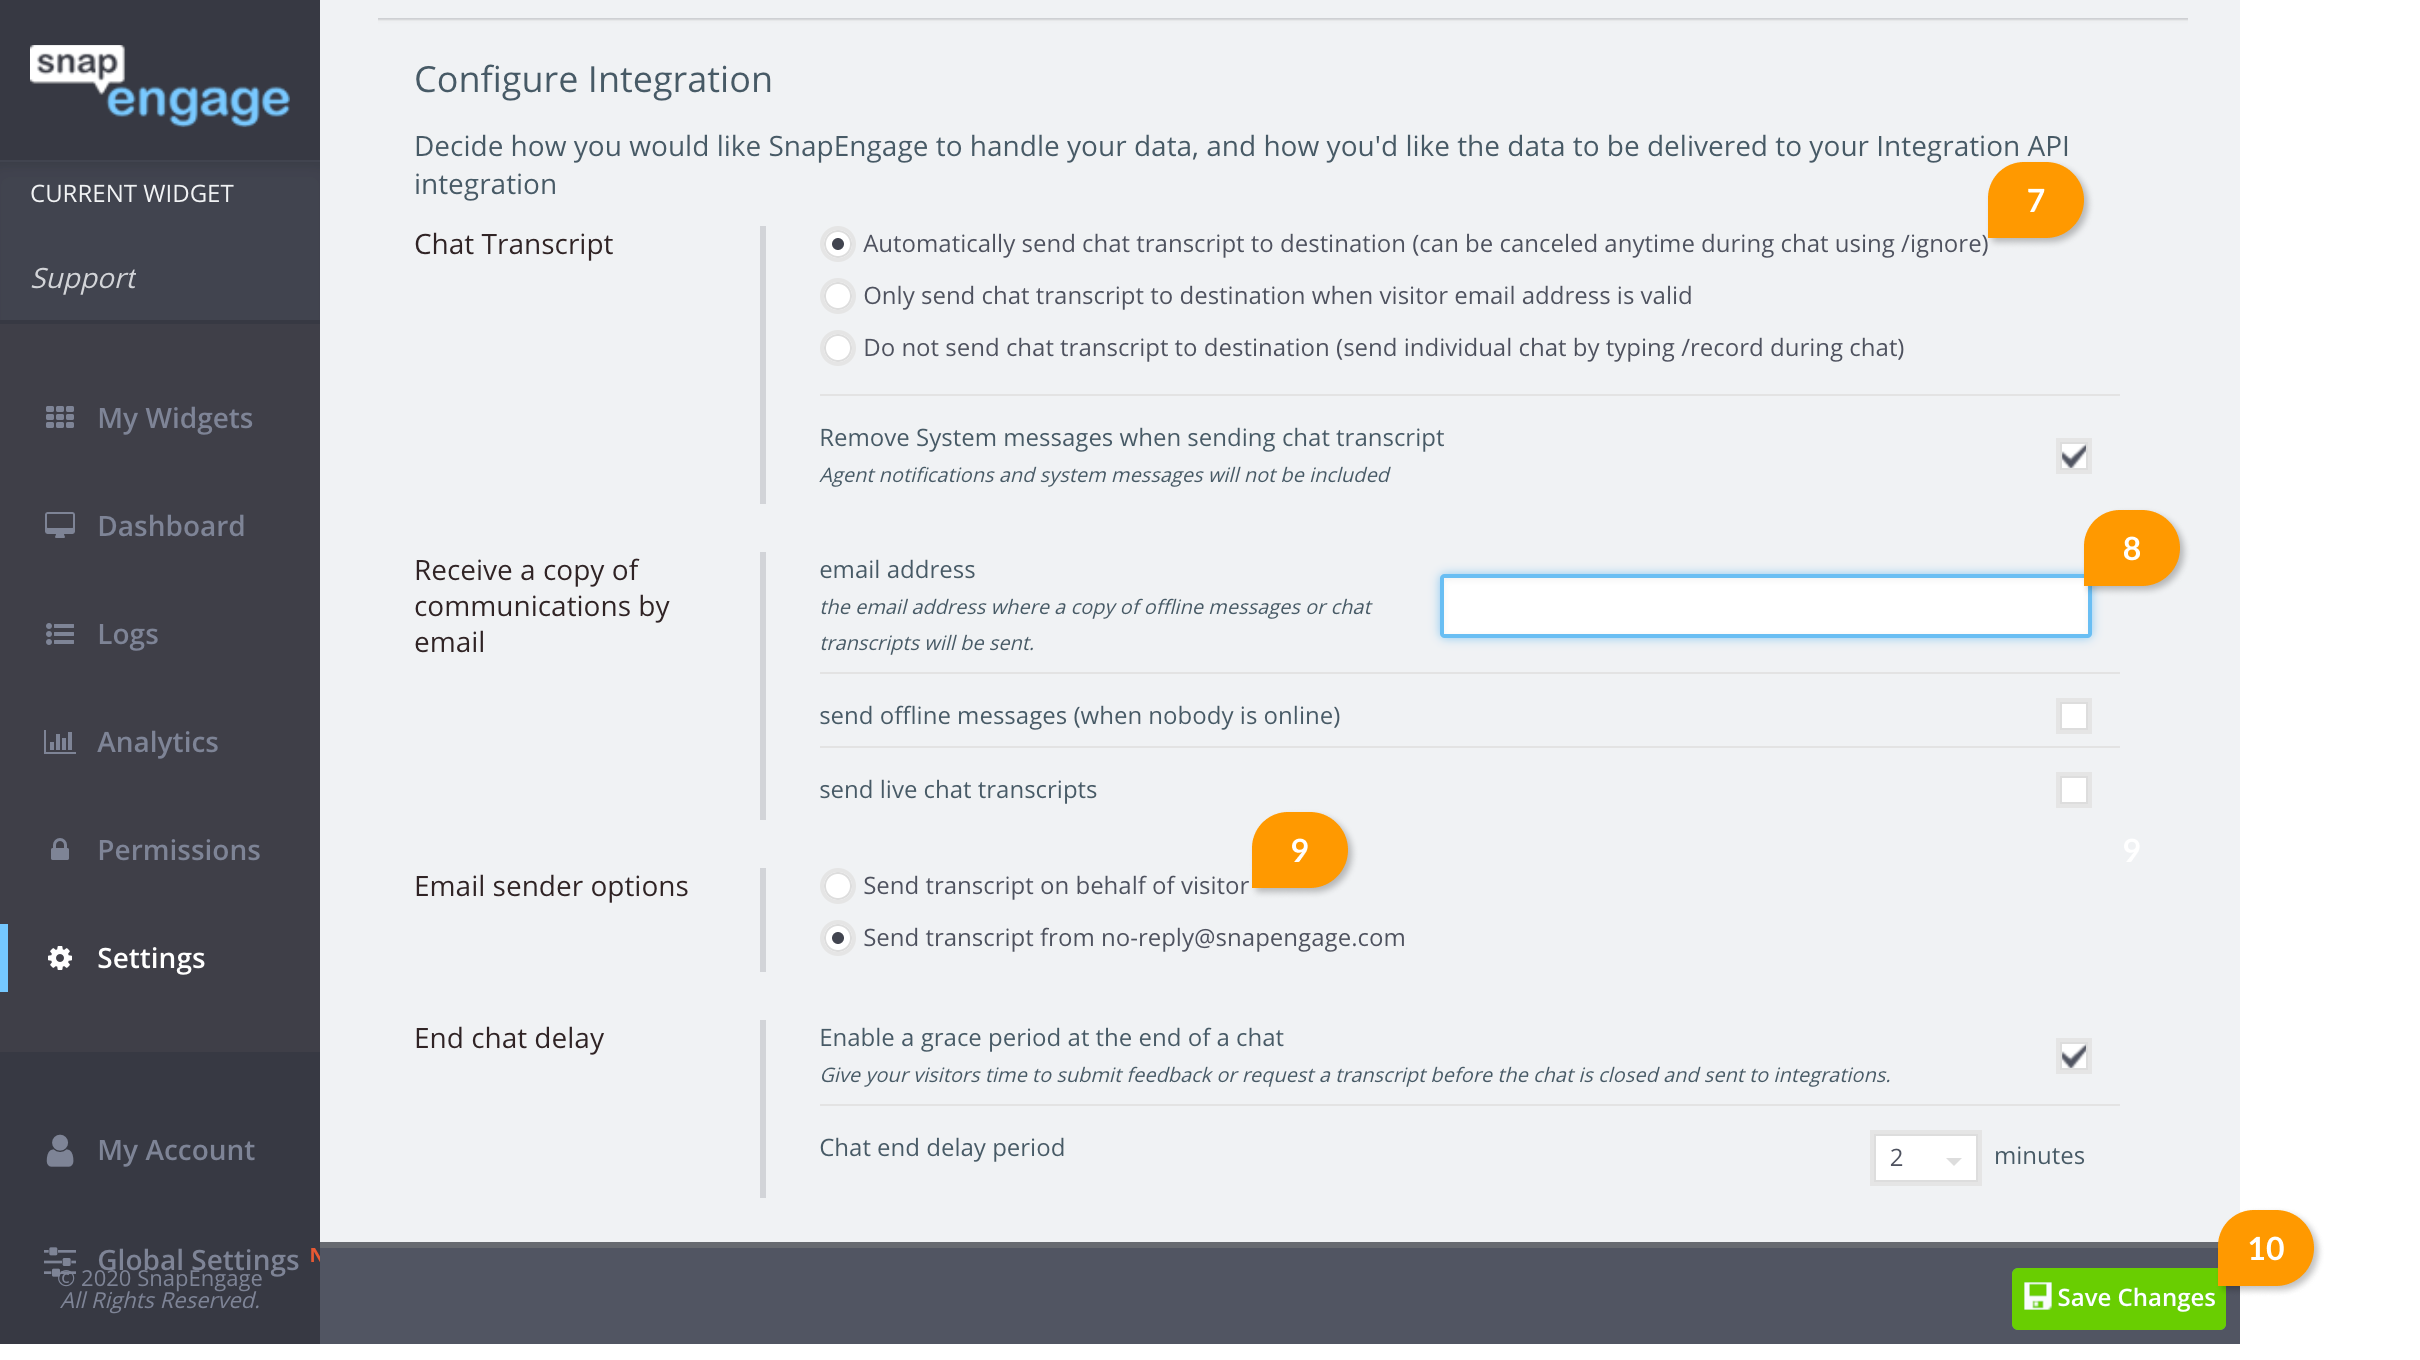
7. Then you can decide and configure how you would like your chat transcripts to be sent (7).
You can choose to automatically send all cases, only the ones with a valid email or to not send any unless the agent types in the /record command during an ongoing chat.
8. The next option allows you to also receive copies of the communication to your email address (8).
9. Finally, you will need to determine if the chat transcripts will be sent to you on behalf of the visitor’s email or from SnapEngage’s [email protected] address (9).

6. Please remember to click on Save (10) once you are done configuring all the above!
Published October 3, 2012
Reader Feedback
No comments yet
