Home > Basic rule configuration in Proactive Chat
Categories: Proactive Chat
(Last Updated On: )
About this Article-
This article goes over basic rule configuration set up for Proactive chat and how to set up a rule under the Settings > Proactive tab.
Our Proactive Chat system is extremely configurable, and it can get pretty complex.
It will allow you to create various rules to help you engage visitors. In this article we will go over the basic rules which is what about 90% of our customers use, and once you go over this you will have a much better understanding and grasp of how Proactive Chat Rules work and you will be able to set up your own rules to see what works best for you and your business.
Proactive Chat: General Settings
These settings will be applied to all of the rules you have set in this widget:
- Enable Proactive Chat
- All rules are Enabled or Disabled
- Proactive chat re-engagement delay
- A cookie is set on the visitor’s site with an expiration date in the future to prevent all additional proactive rules from being triggered. The default is 30 minutes.
- Visitor cookie lifetime
- This is an advanced setting to override when to consider the visitor’s session has ended. The default session is calculated when their browser is closed, but a time period can be assigned here instead.
Example 1: Time on page & Page Url
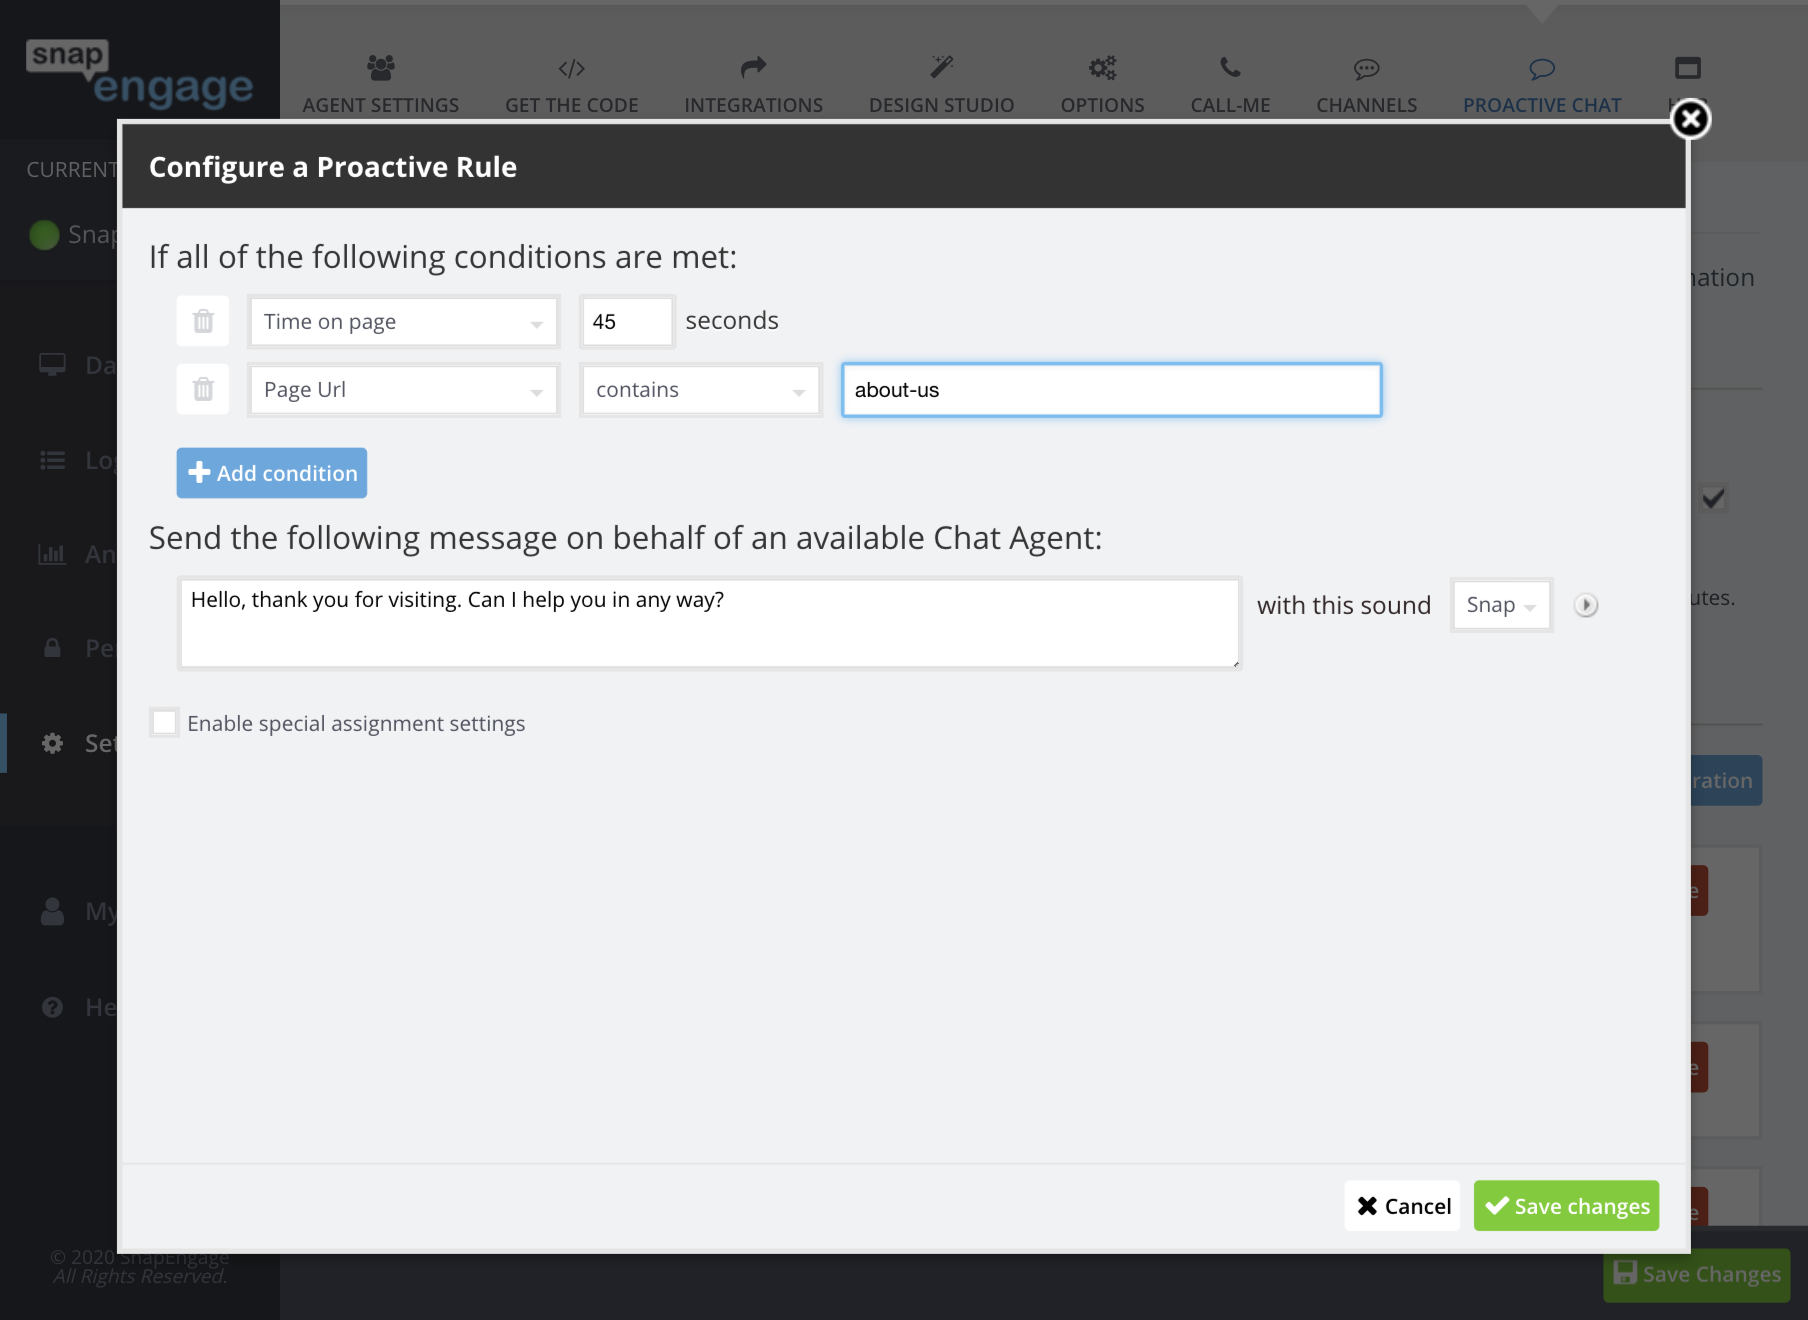
This rule will fire if:
- A Visitor has been looking at a page on your site for 45 seconds,
- and that page contains the string of characters “about-us” in the Page Url (or address).
Some example Page Url’s where this rule might fire:
- http://www.mysite.com/about-us
- https://mysite.com/about-us/who-we-are
- https://careers.mysite.com/info/about-us
If the above conditions are met: The Visitor will see a Proactive Invite from one of your online agents which says: “Hello, thank you for visiting. Can I help you in any way?”
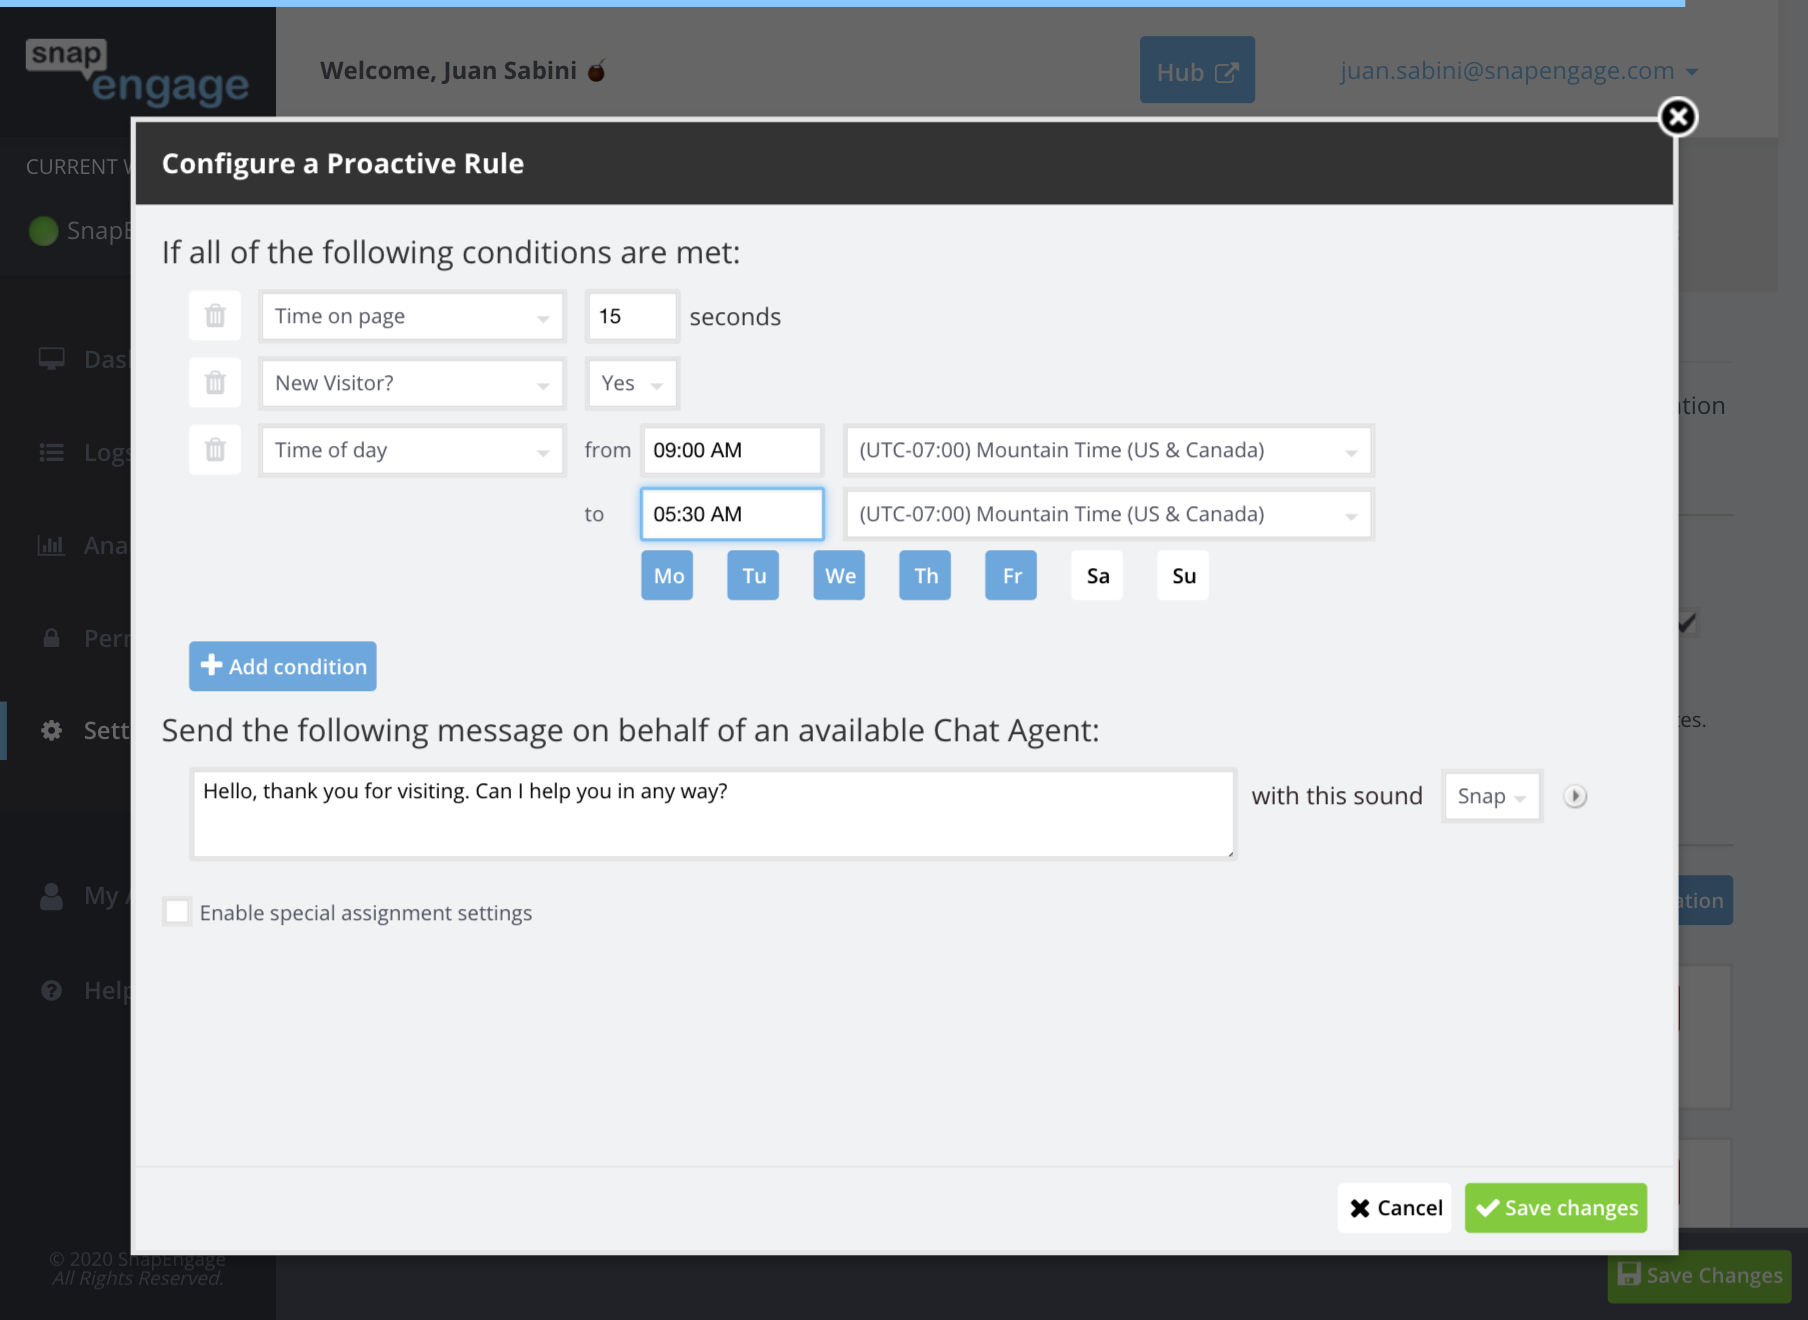
Example 2: Time on page, New visitor, & Time of day
This rule will fire if:
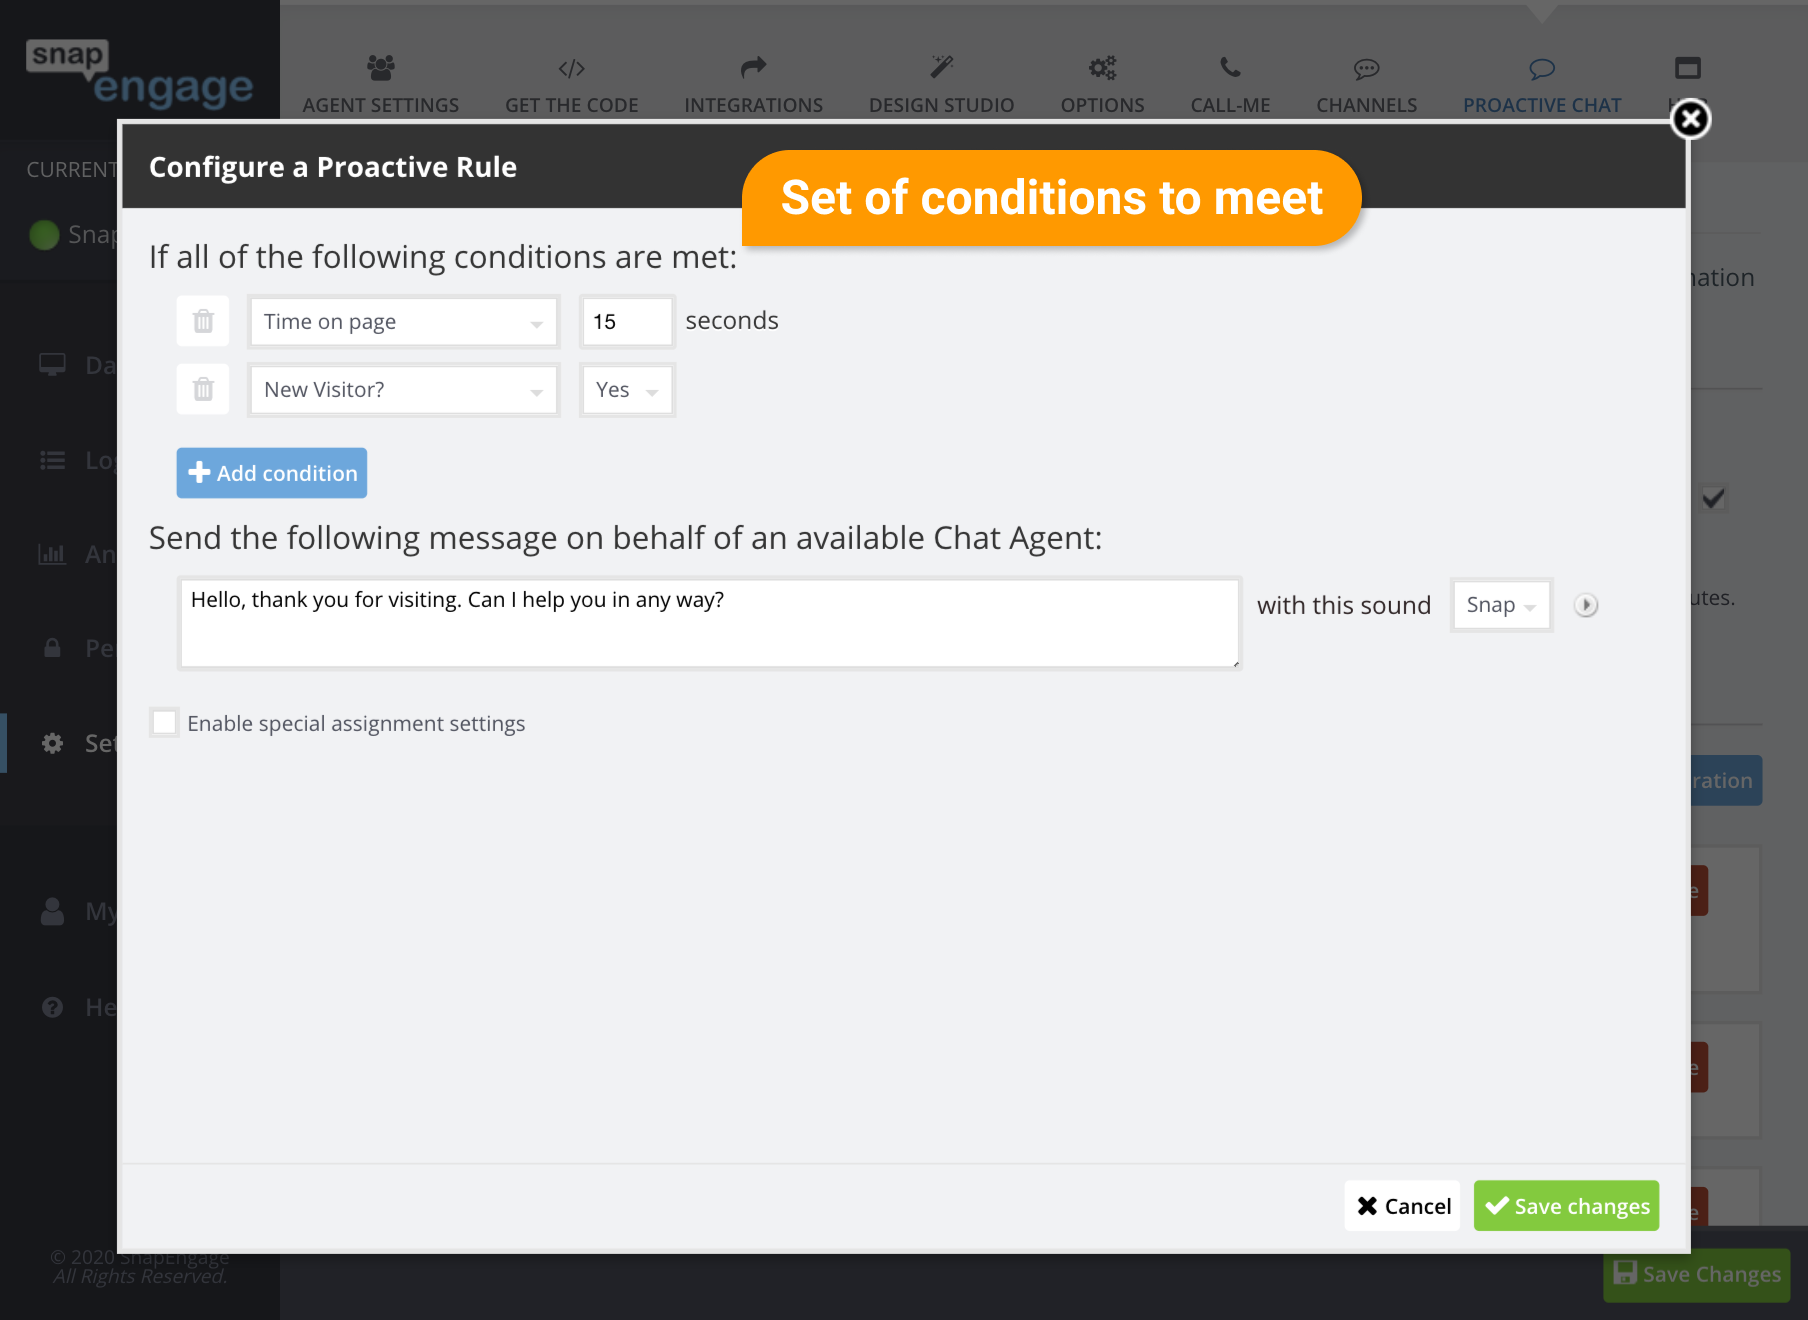
- A Visitor has been looking at a page for 15 seconds
- and it is the Visitor’s first time on your website,
- and the time is between 09:00am – 5:30pm (Mountain Standard time),
- and it is currently a weekday, Monday – Friday.
If the above conditions are met: The Visitor will see a Proactive Invite from one of your online agents which says: “Hello, thank you for visiting. Can I help you in any way?”
To learn more, please read on:
Hopefully these simple examples have given you a basic overview of how the system works. Depending on your needs, you may or may not need to get any more complex than this.
For a step-by-step look at creating or removing Proactive Rules, please continue reading.
How to add a new rule
In the “Proactive Chat” tab:
Click on “add proactive chat configuration” (1) to create a new rule.
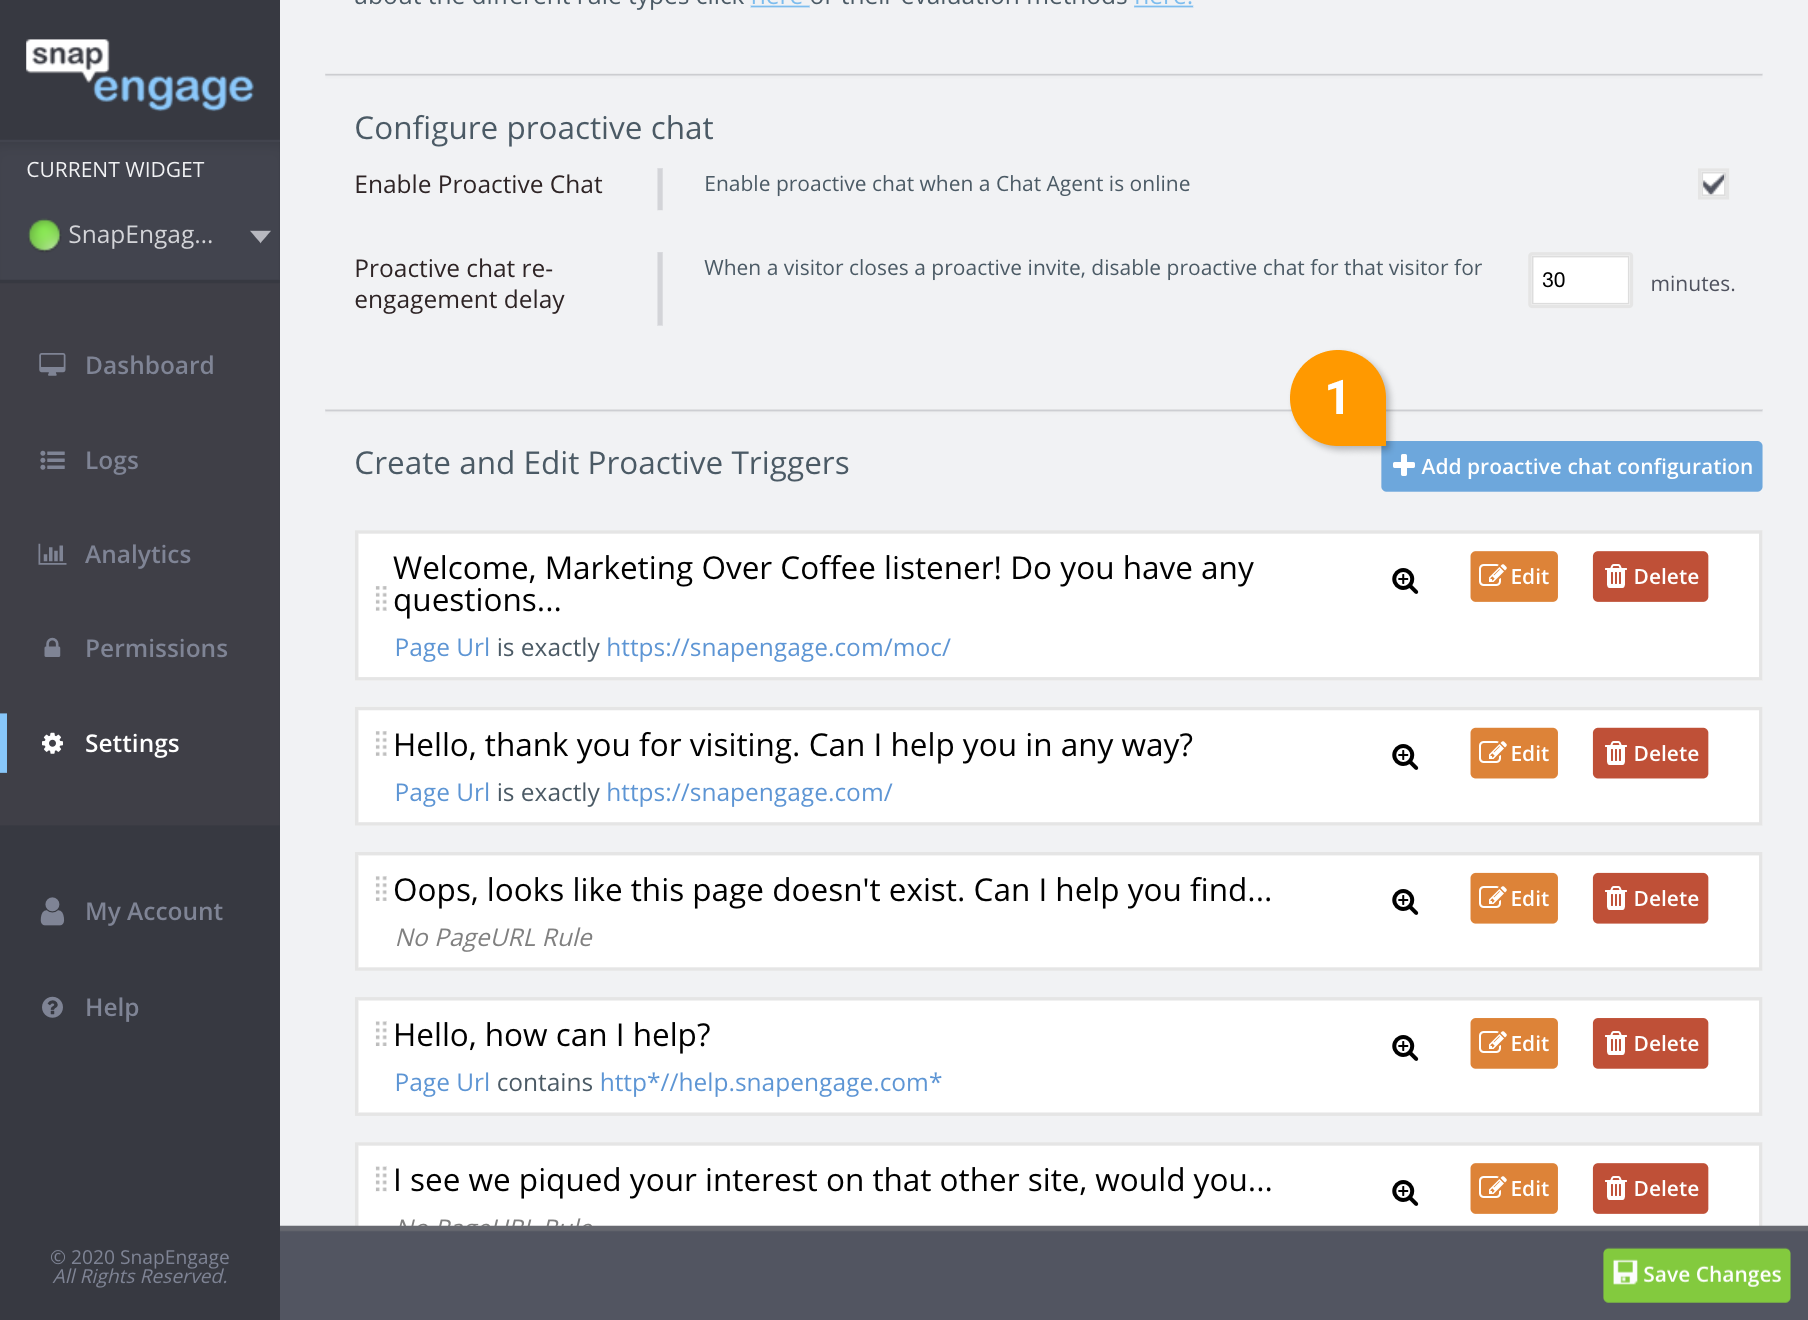
You will now see the Rule Configuration popup window.
This is where you will configure an individual Proactive Chat Rule.
- Creating a condition means all rules must be met to execute the proactive chat.
- Choose a Rule Type (?)
- Choose an Evaluation Operator (?) and a value to compare (see examples above).
- Add (+) or remove (-) a Rule Parameter
- The message you want to be presented to the user when this Proactive Invite fires
And don’t forget to click on Save.
How to remove / delete a rule
Not happy with a rule you created? Let’s remove it.
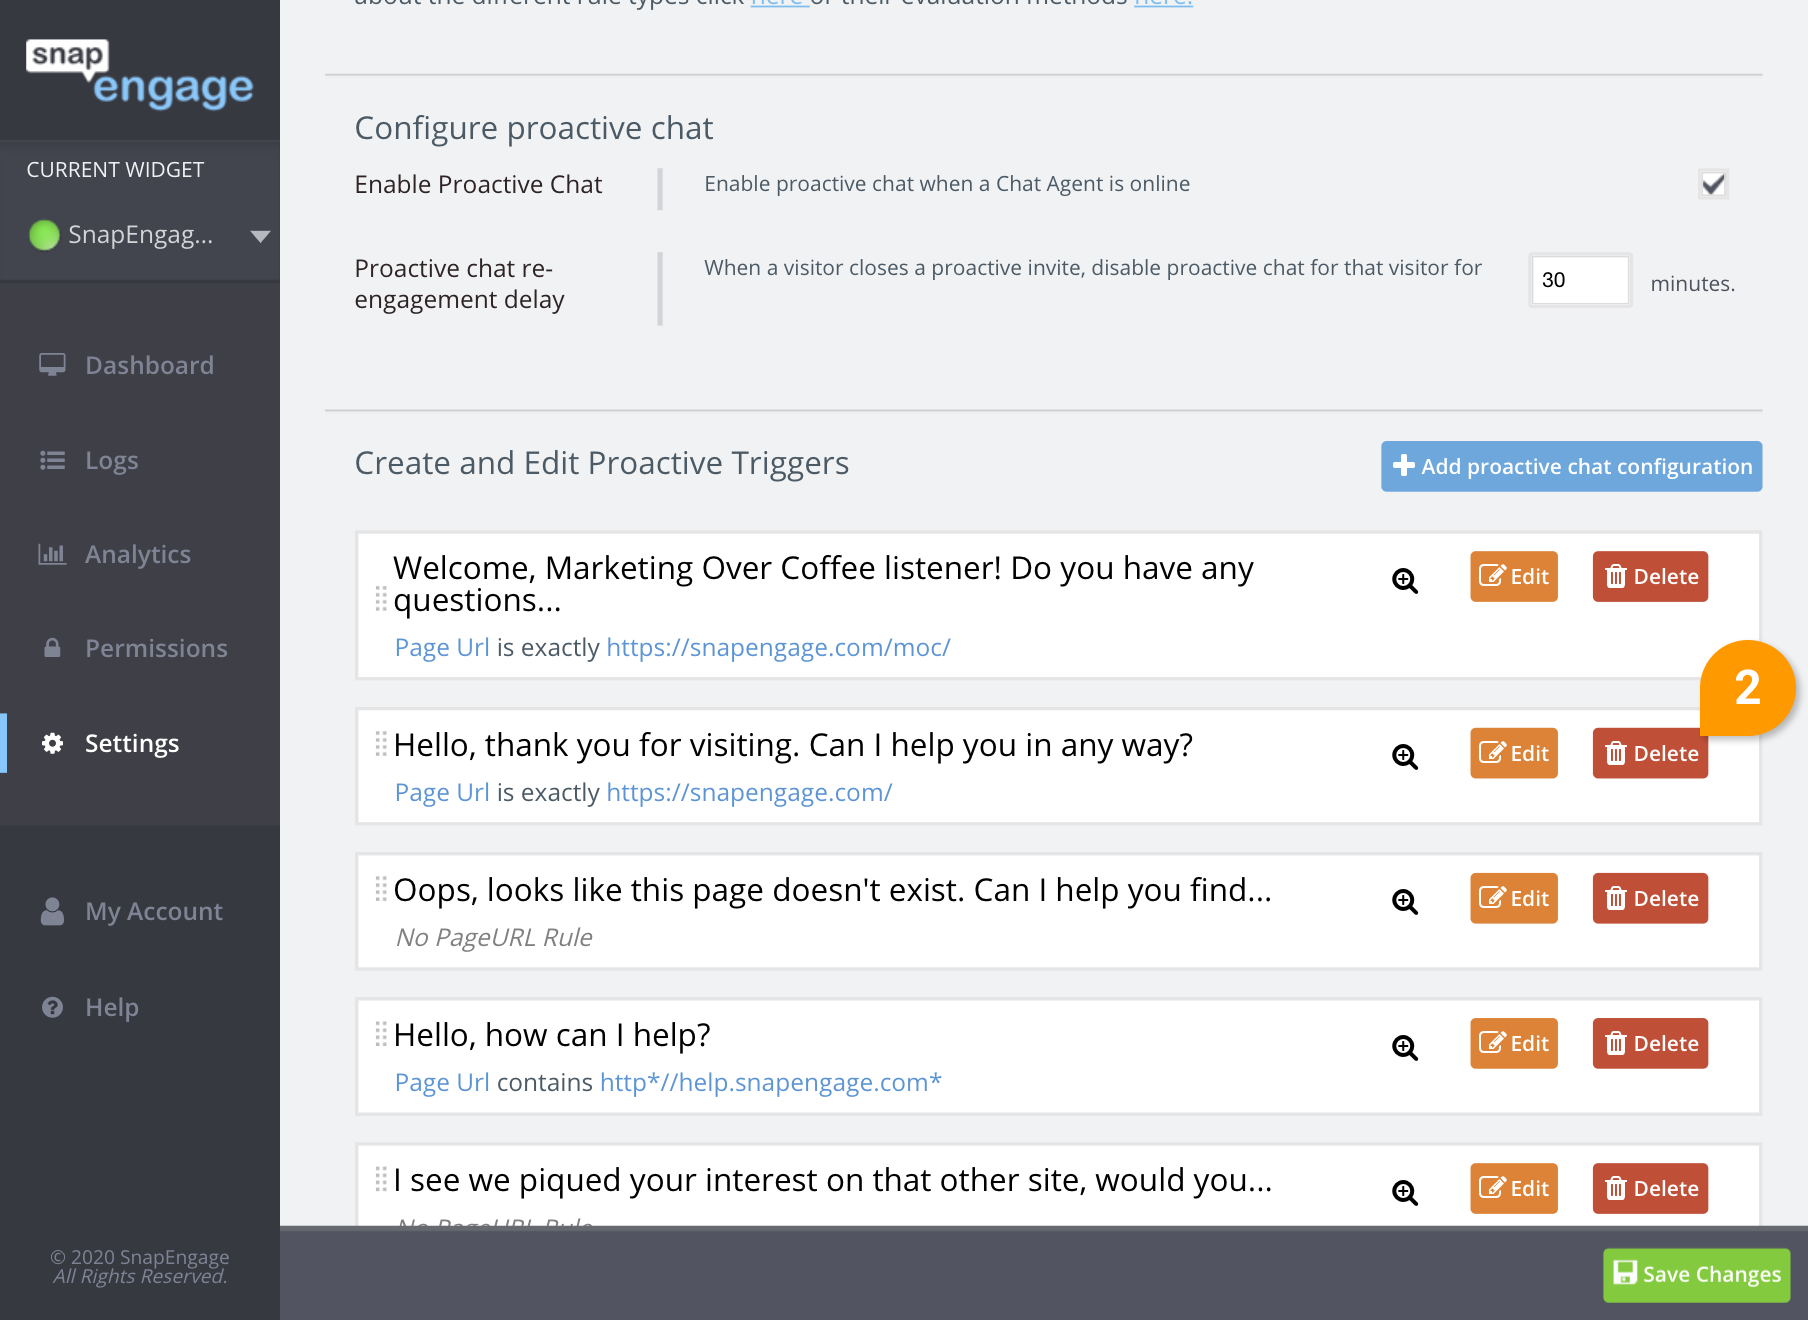
1. Click on the “Delete” (2) button of the rule you want to remove.
2. Click on the Save button.
Your rule is now deleted.
Published November 4, 2013

 (23 votes, average: 4.57 out of 5)