Home > Managing Chat Assignment Options
Categories: Customization
(Last Updated On: )
About This Article
The Chat Assignment tab in Agent Settings gives you extensive control over visitor experience and how chats are routed to agents. This article reviews all the options in this menu.
Getting Started
1. Log into your Admin Dashboard and go to Settings.
2. Select the Agent Settings tab.
3. Select Chat Assignment.
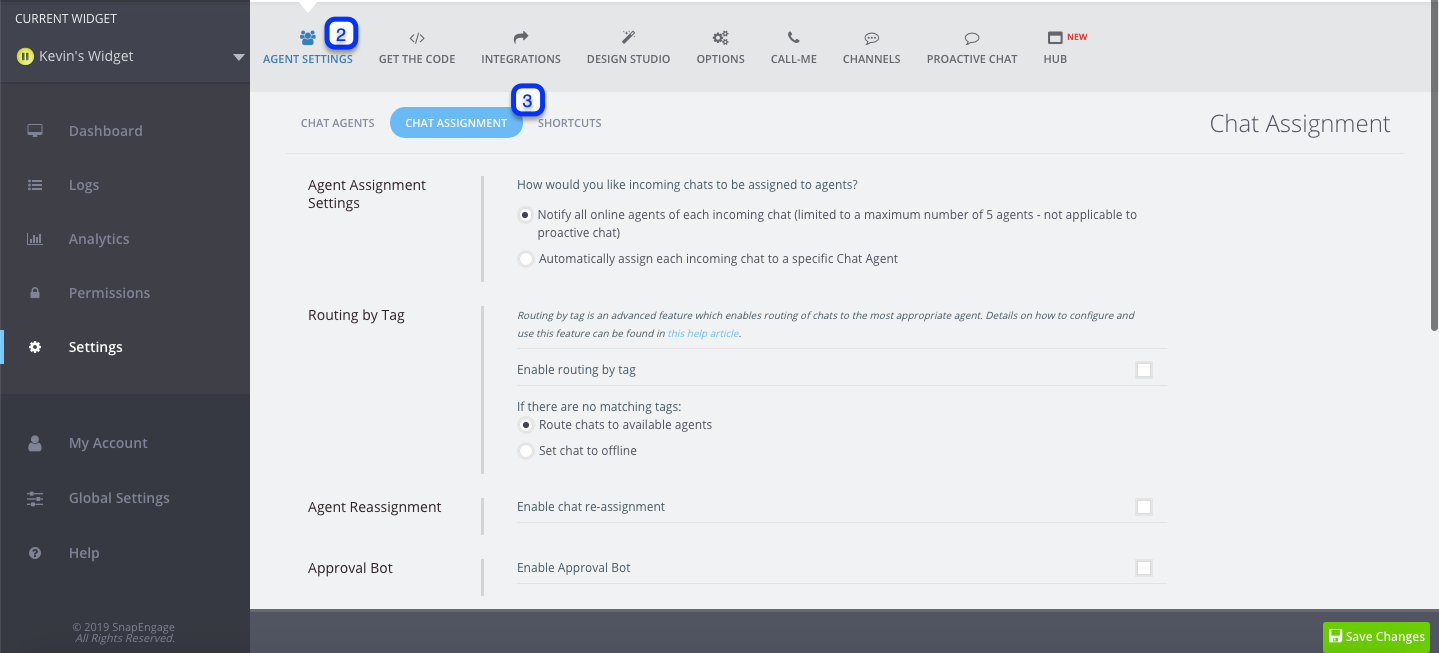
Agent Assignment Settings
- Notify all online agents for each incoming chat.All available agents will be notified of an incoming chat. Whichever agent responds to the chat first will claim ownership of this chat and all remaining agents are notified.Ex: [Chris is on the case]. For bigger teams (more than 5 agents) chat will be broadcasted to 5 randomly selected agents.
- Automatically assign each incoming chat to a specific agent.The reactive chat is assigned to agents with the least number of chats. If all agents have an equal number of chats then the system will randomly assign the chat to an agent.

Click here to read more about the way chats are being routed.
Continuous Conversations
- Continuous Conversations gives you the ability to allow your visitors to continue their conversation with the same agent when they chat multiple times. This allows for quicker resolutions, less visitor friction, and a more seamless experience.
- The chat will be routed to the last human agent who talked to the visitor.
- This applies to chats that happened within the previous 7 days. If it has been more than 7 days since the previous chat, the chat will be routed according to normal routing logic).
- Note: If you are presented with a proactive invitation as a visitor, and respond to it, the chat will be assigned to the agent the chat was presented on behalf of, not the most recent agent the visitor chatted into. What this means is it is not always continuous because proactive can over ride .
- Note: In scenarios where the chat is responded to by a chatbot on a widget, and then transferred to another widget where Continuous Conversations is enabled, upon transfer the Continuous Conversations will also be taken into account.

Enterprise only option.
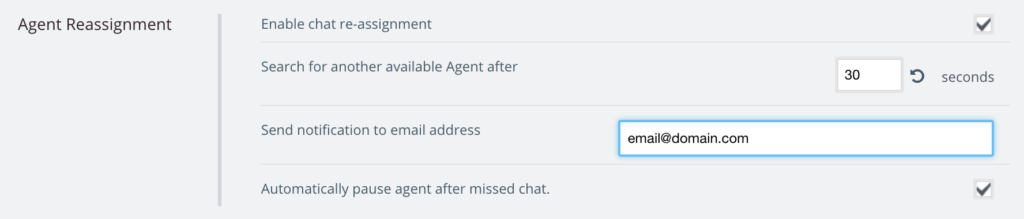
Agent Reassignment
Enabling Agent Reassignment will reduce the amount of the chats missed by the agents. The reassignment will be triggered when an agent fails to respond to a chat before the specified timeout. The system will search automatically for the next available agent and reassign the chat. The agent who missed the chat will receive a notification of the chat reassignment and be automatically paused. For new widgets Agent reassignment option and Automatically pause agent after missed chat. option is enabled by default.
Approval Checker
The Approval Checker allows you to ask visitors for consent before starting their chat, even on proactive chats. The visitor will no be able to start a chat, until they have confirmed they have read and understood the message. More details here

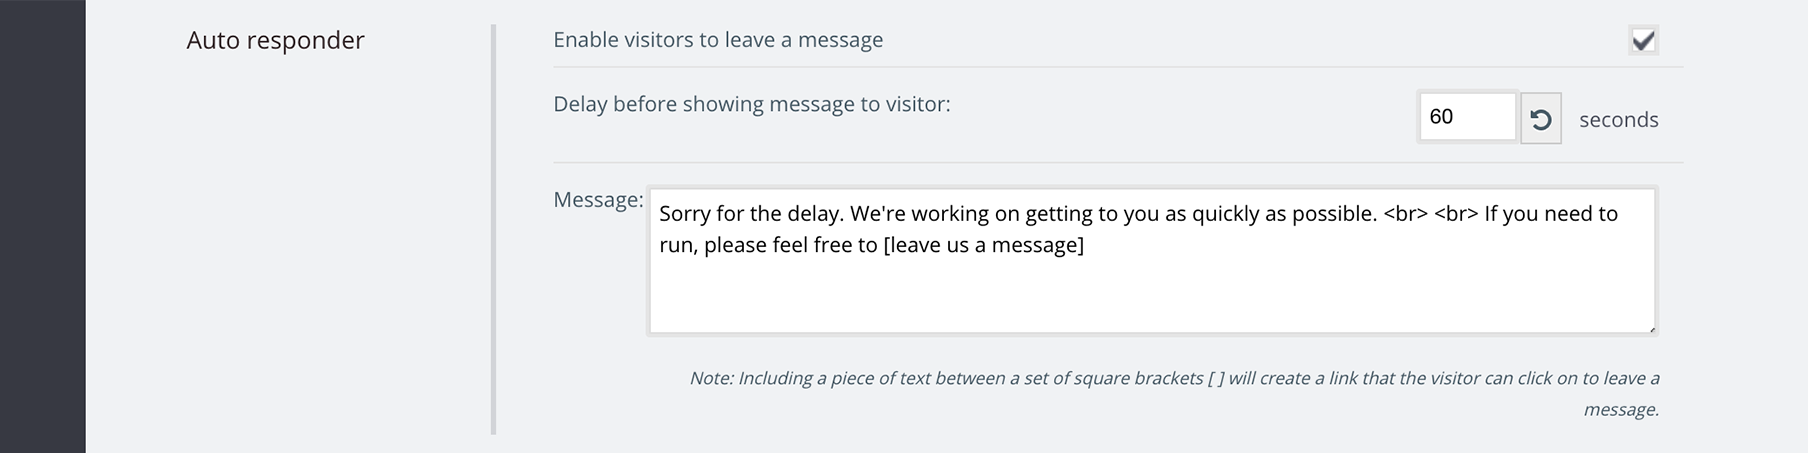
Auto Responder
Enable visitors to leave a message after waiting for a specific period of time. If all agents are maxed on chats and a visitor clicks “chat” on the pre-chat form or a visitor responds to a proactive chat (which would have been sent prior to all agents being maxed out) then visitors will receive a message that says “Just a moment…” By selecting this option you will be given an additional option to select a message for the visitor to see. Such as “Sorry for the delay. We’re working on getting to you as quickly as possible. If you need to run, please feel free to [leave us a message]”. Note: Including a piece of text between a set of square brackets [ ] will create a link that the visitor can click on to leave a message. You will also have the option of how long your visitor should wait before sending the message.
Maximum chats per Agent
This is the default value that is used for the ‘Maximum Number of Visitor Chats’ field when a new agent is added to a widget. The value can be found under the Agent Details tab and can be changed at any time

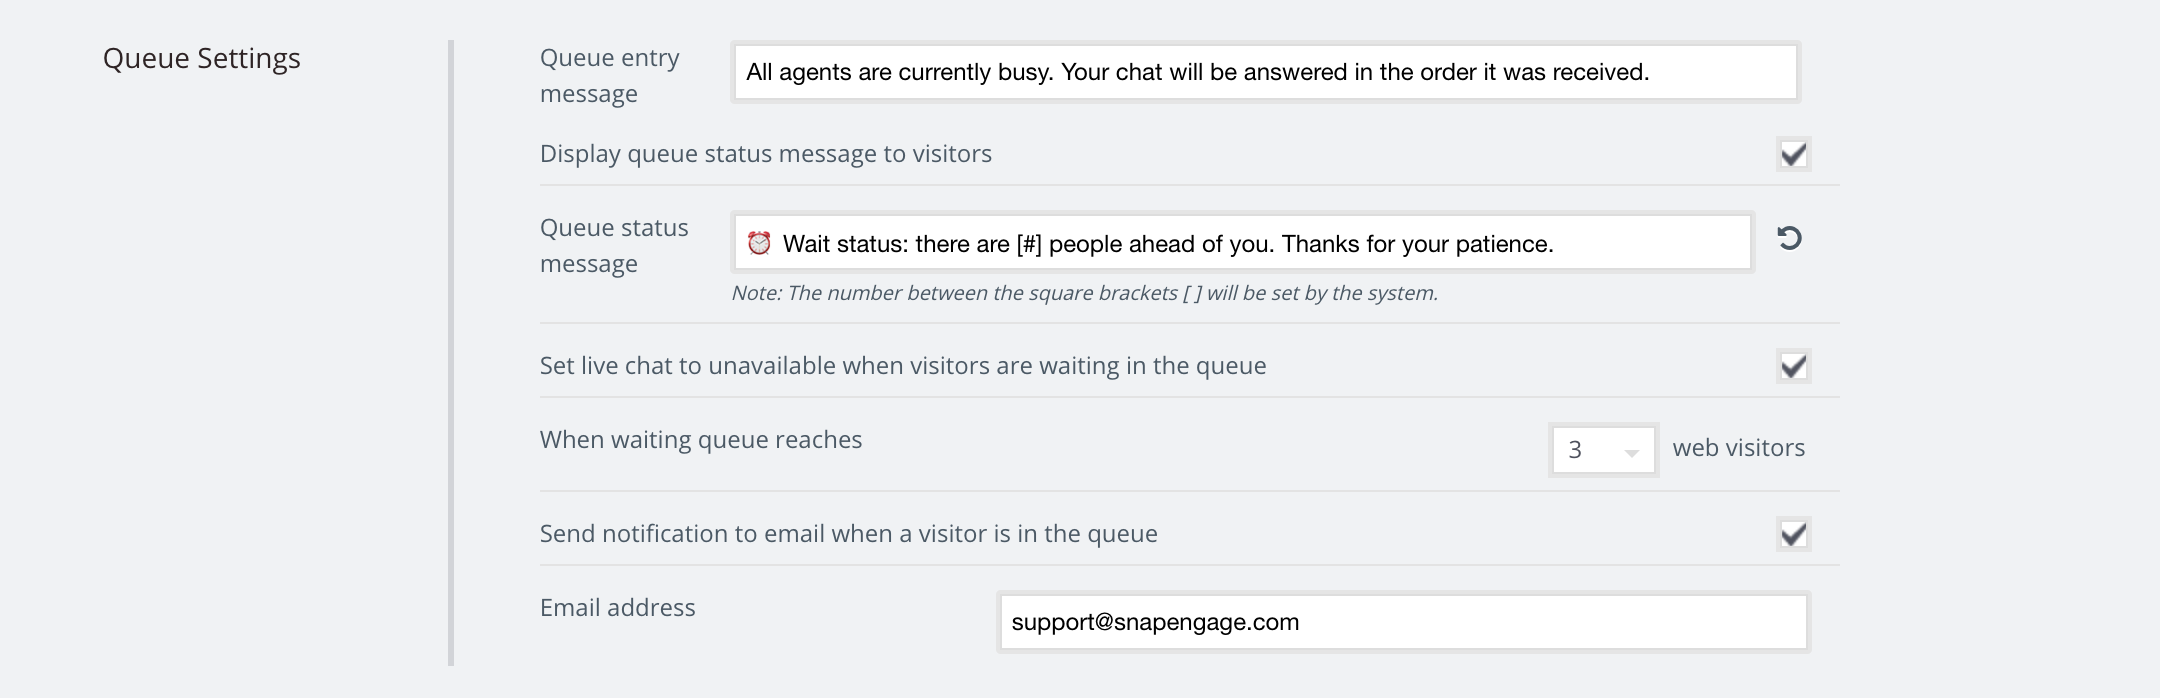
Queue Settings
Under normal circumstances the visitor queue operates as first in first out. The only exception is when routing by tag / agent tags are involved. In these cases, matching tags/tagged chats will bypass a queue of untagged chats.
Queue settings allows you to manage the visitor experience when your agents are at capacity. There are a number of options to tailor this experience to your needs.
Queue entry message: This is the message a visitor will see when your agents are at capacity.
Display queue status message to visitors: When this box is checked, you an edit the Queue status message to keep visitors updated as to their position in the queue.
Additionally, you can control how many visitors the system will allow in queue before it displays your offline messaging. Finally, you can trigger an email whenever a visitor is in queue.
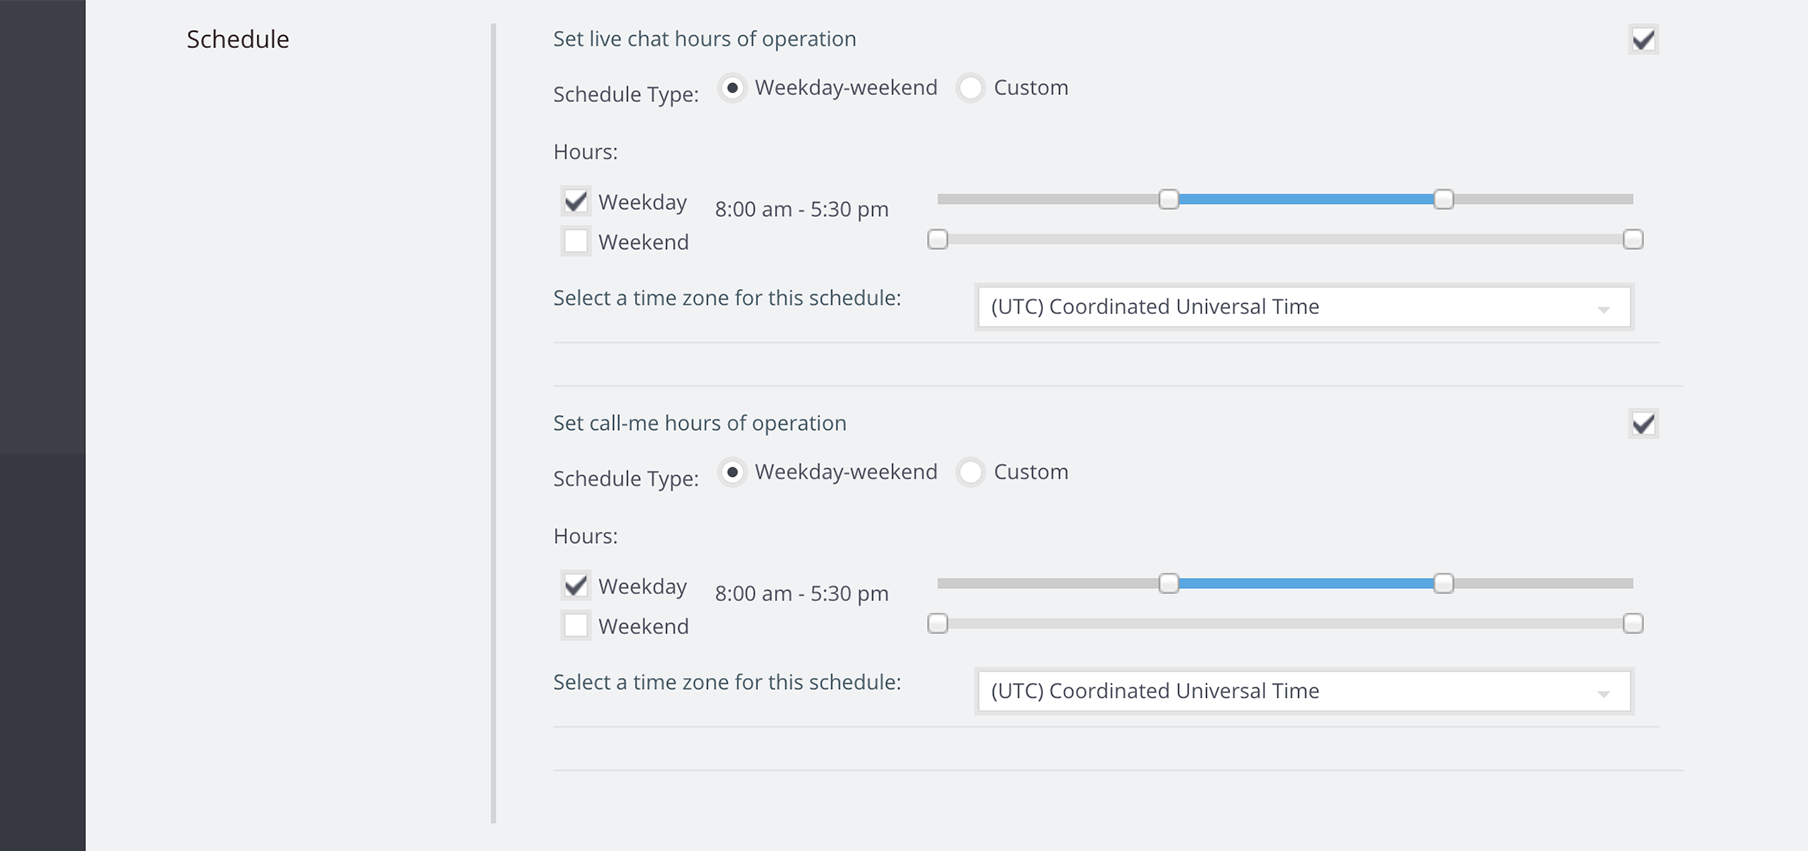
Schedule
- Set live chat hours of operation
If you select this option, you will have a drop down where you can set a start and stop time for hours that agents will appear available when agents are online. You can also set a schedule for weekday hours and weekend hours, or a custom schedule which will allow you to select hours for each day. After this selection, you can select which time zone this is based on.
- Set Call-me hours of operation
If you select this option, you will have a drop down where you can set a start and stop time for hours that agents will be available to take phone calls when agents are online. You can also set a schedule for weekday hours and weekend hours, or a custom schedule which will allow you to select hours for each day. After this selection you can select which time zone this is based on.
Conversations Hub transfer
Enable Chat Portal agents to transfer chats to this widget. This option will allow Conversations Hub agents to transfer chats to agents within this widget.

Enable chat transfers between agents. This option will allow an agent to transfer their current chat to another agent. If this is not checked, the ‘Transfer’ button within the Conversations Hub will not be available.

Did you find this article helpful?

 (8 votes, average: 4.38 out of 5)
Published April 24, 2014