Home > How to: Set Up the Pre-Chat Form
Categories: Customization | Featured Article
(Last Updated On: )
About This Article
This article explains how to set up a pre chat form.
The Pre-Chat Form
Tired of seeing leads come in with no email address or name attached? Want to ask the visitor what company they are from or if they agree to your terms and conditions? The Pre-Chat Form allows you to ask the visitor a series of questions prior to a live chat.
With the introduction of our Design Studio, setting this up is really easy.
The Pre-Chat Form with Design Studio
Firstly, you will need to enable the Pre-Chat form by going to Admin Dashboard -> Settings -> Design Studio, and enabling the “Pre chat form” option (1), once enabled go to “Clone” (2) and you will be editing a copy of the “Default Theme” or click on “Add Theme” (3)
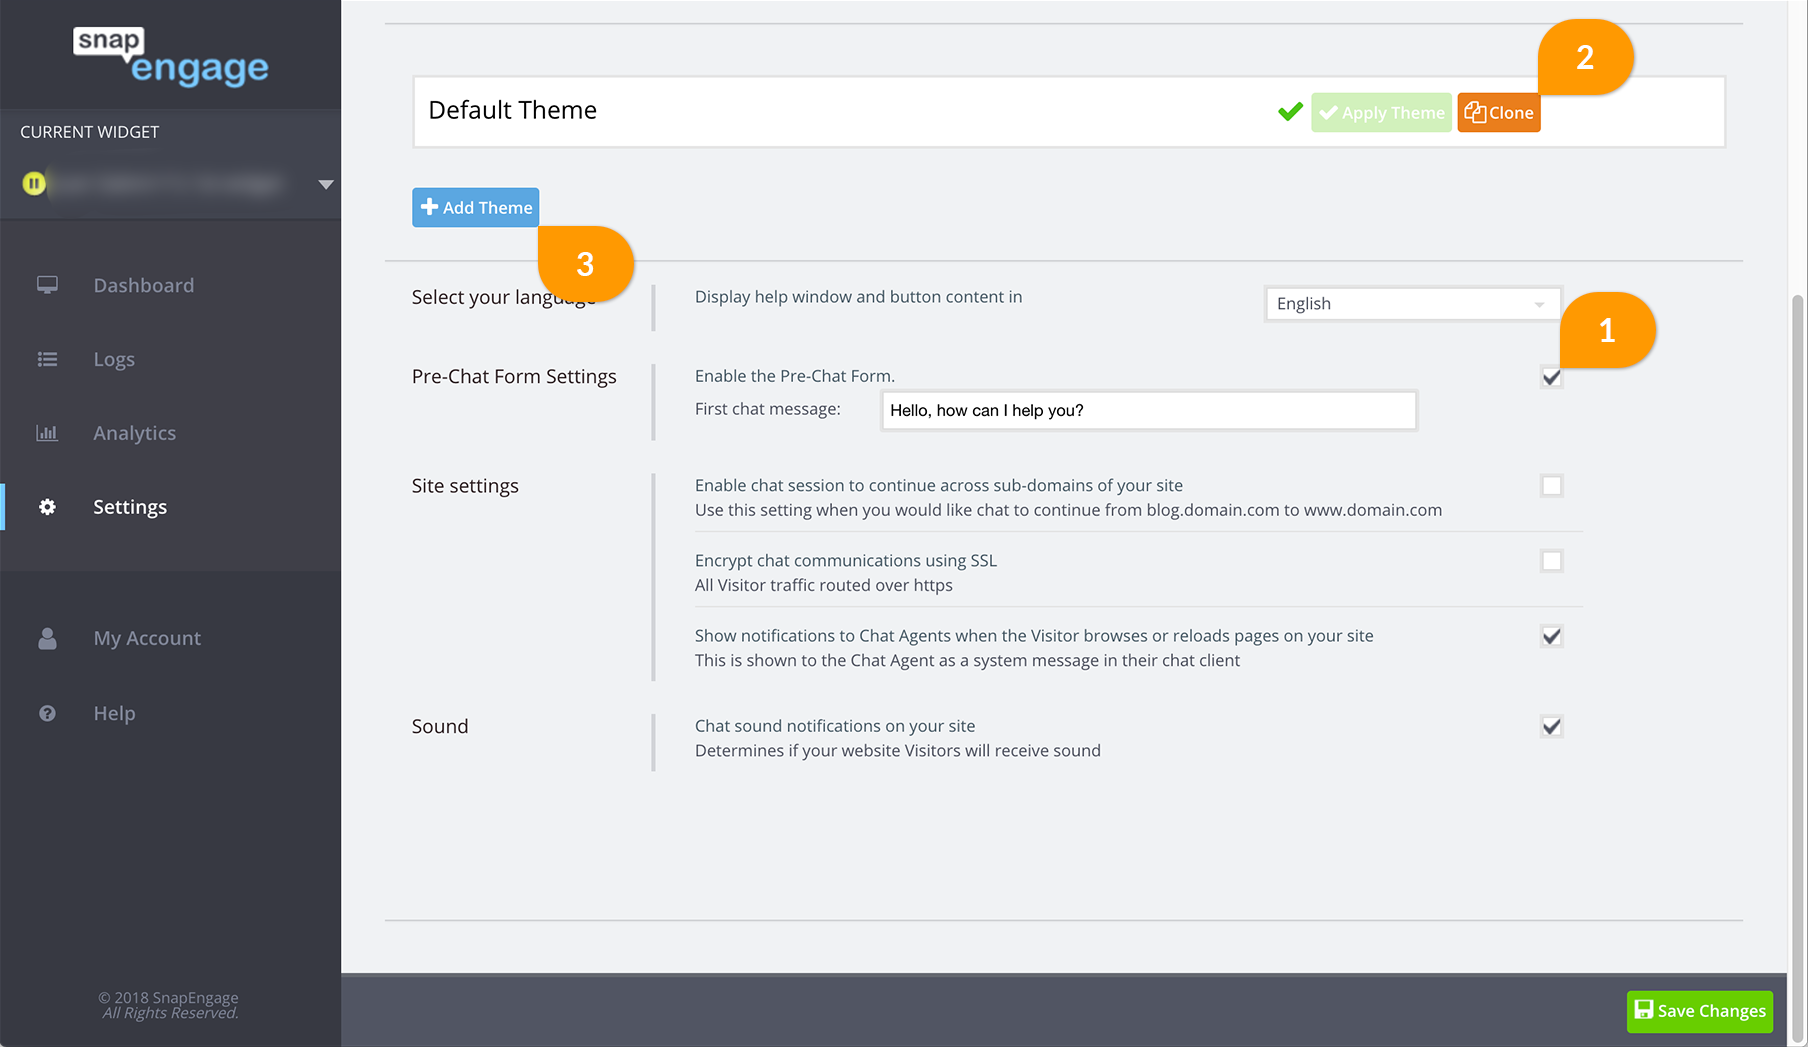
Please note that if you are just starting to use Design Studio, you will need to either clone the default design, or create a new one from scratch. The default design cannot be edited. To use the theme you created, simply click on Apply Theme, and this will be set as your theme. Themes can be used across widgets, so a design that you had on your test widget can be also utilised in your live chat widget. This is helpful as you can effectively test the design, and with that, the Pre-Chat Form, before going live.
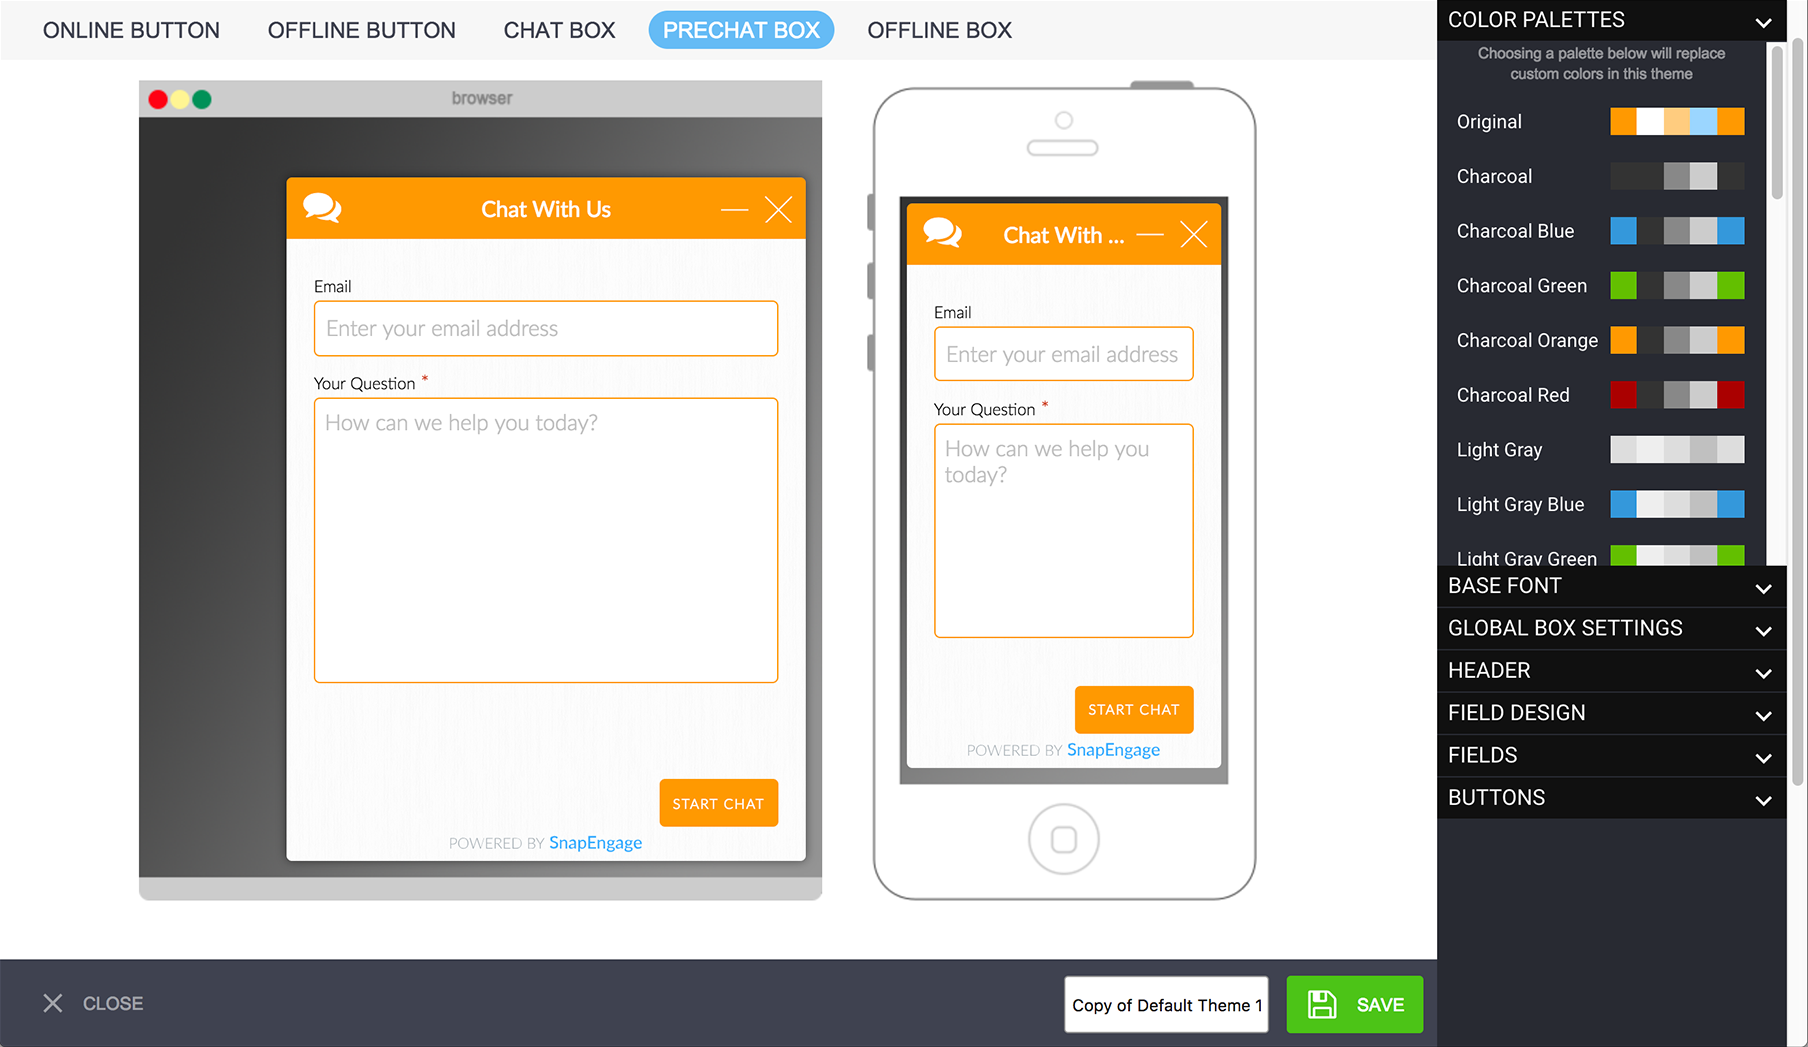
Inside the Design Studio go to the “Prechat box” tab (4), as shown below:

Keep in mind that while the Pre-Chat Box would appear to have separate design settings, these are still configured globally, meaning that any design changes you make to the Pre-Chat Box will also affect the main chat box. The first three tabs on the right hand side; Colour Palettes, Base Font and Global Box Settings, affect both the Pre-Chat Form and the Live Chat window. Let’s jump in to the Pre-Chat Form-only fields:
Header
To change the name of the Pre-Chat Form window, click on the Header tab on the right hand side bar, and add the new title in the field (5):
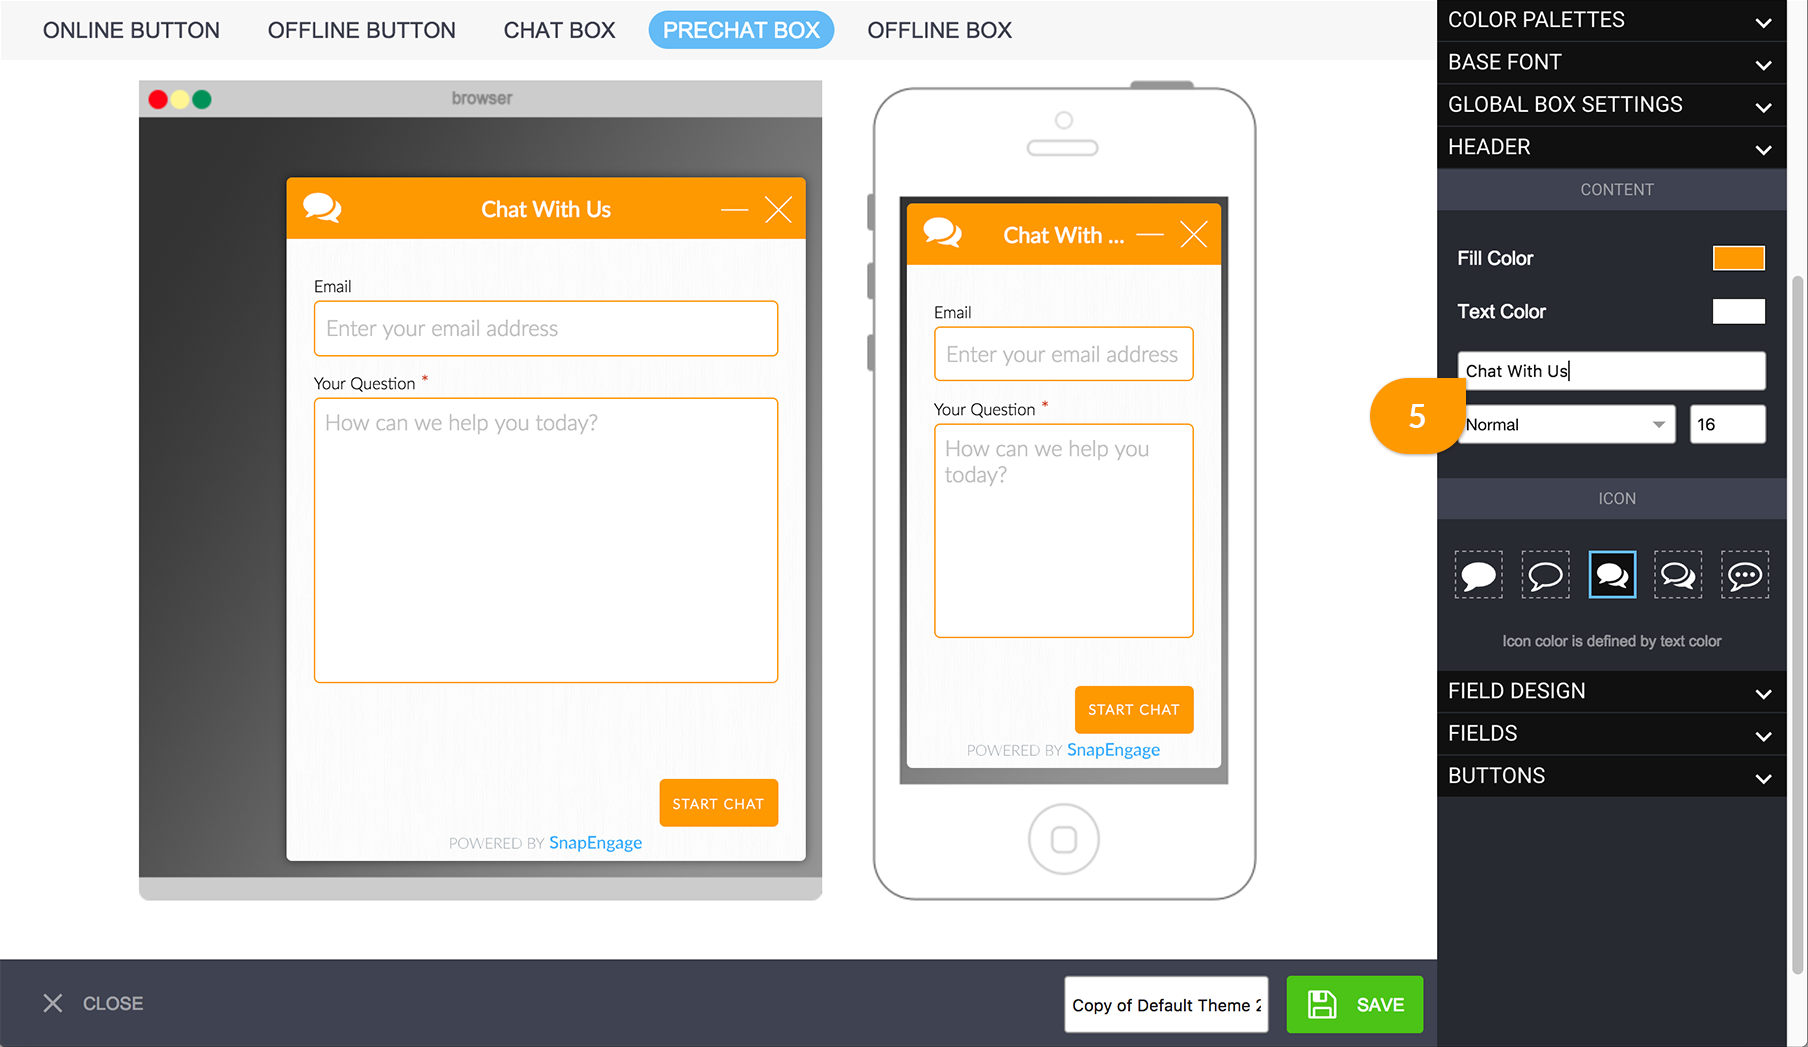
From here, you can also set the background color (Fill Color) and the text color (Text Color) of the window. You can also change the weight of the text and the font-size underneath the Name.
Lastly, you can also select the chat icon that is displayed next to the header in the chat.
Field Design
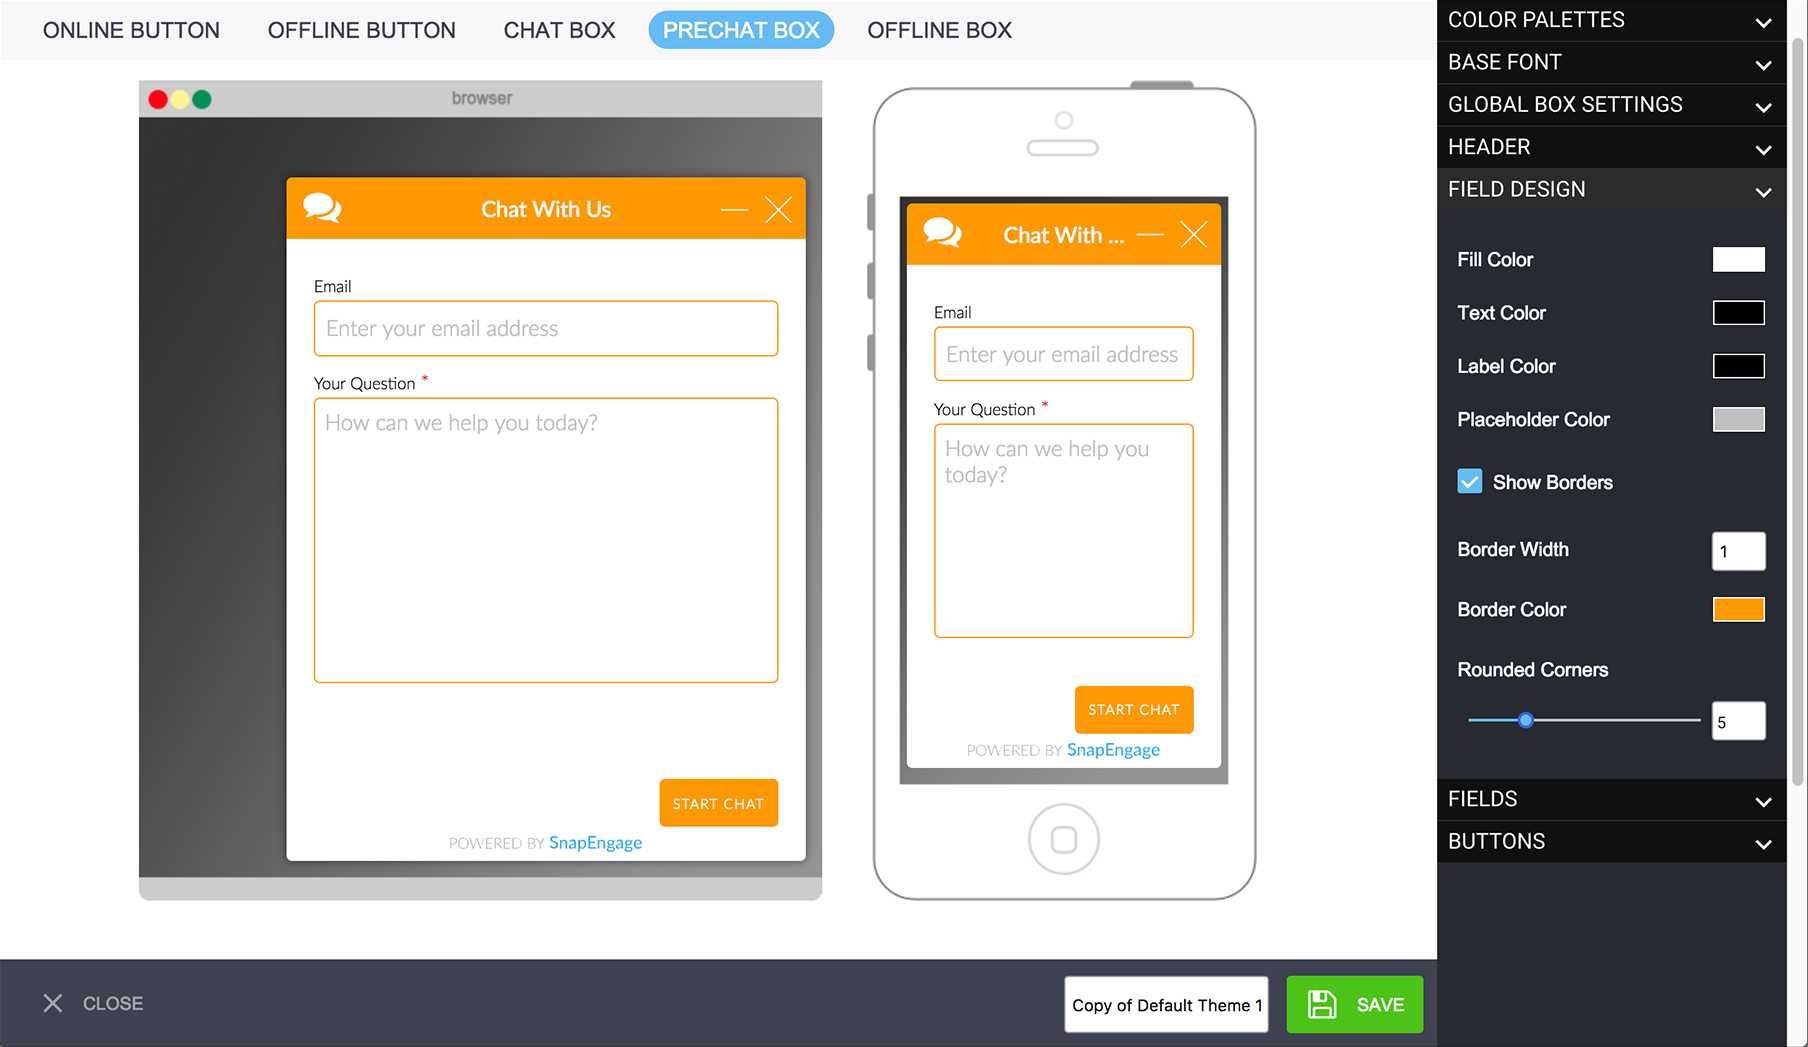
From here, you can change the design of the Pre-Chat Form. I will detail each setting below:
Fill Colour changes the background of the text fields.
Text Colour changes the colour of the text in the text field.
Label Colour changes the colour of the text in the labels above each text field.
Placeholder Colour changes the colour of the default pre-populated text in each text field.
Show Borders allows you to remove the borders of the text fields if unclicked.
Border Colour changes the colour of the border if it’s displayed.
Border Width changes the weight of the border.
Rounded Corners allows you to create smoother corners in the borders.
Fields
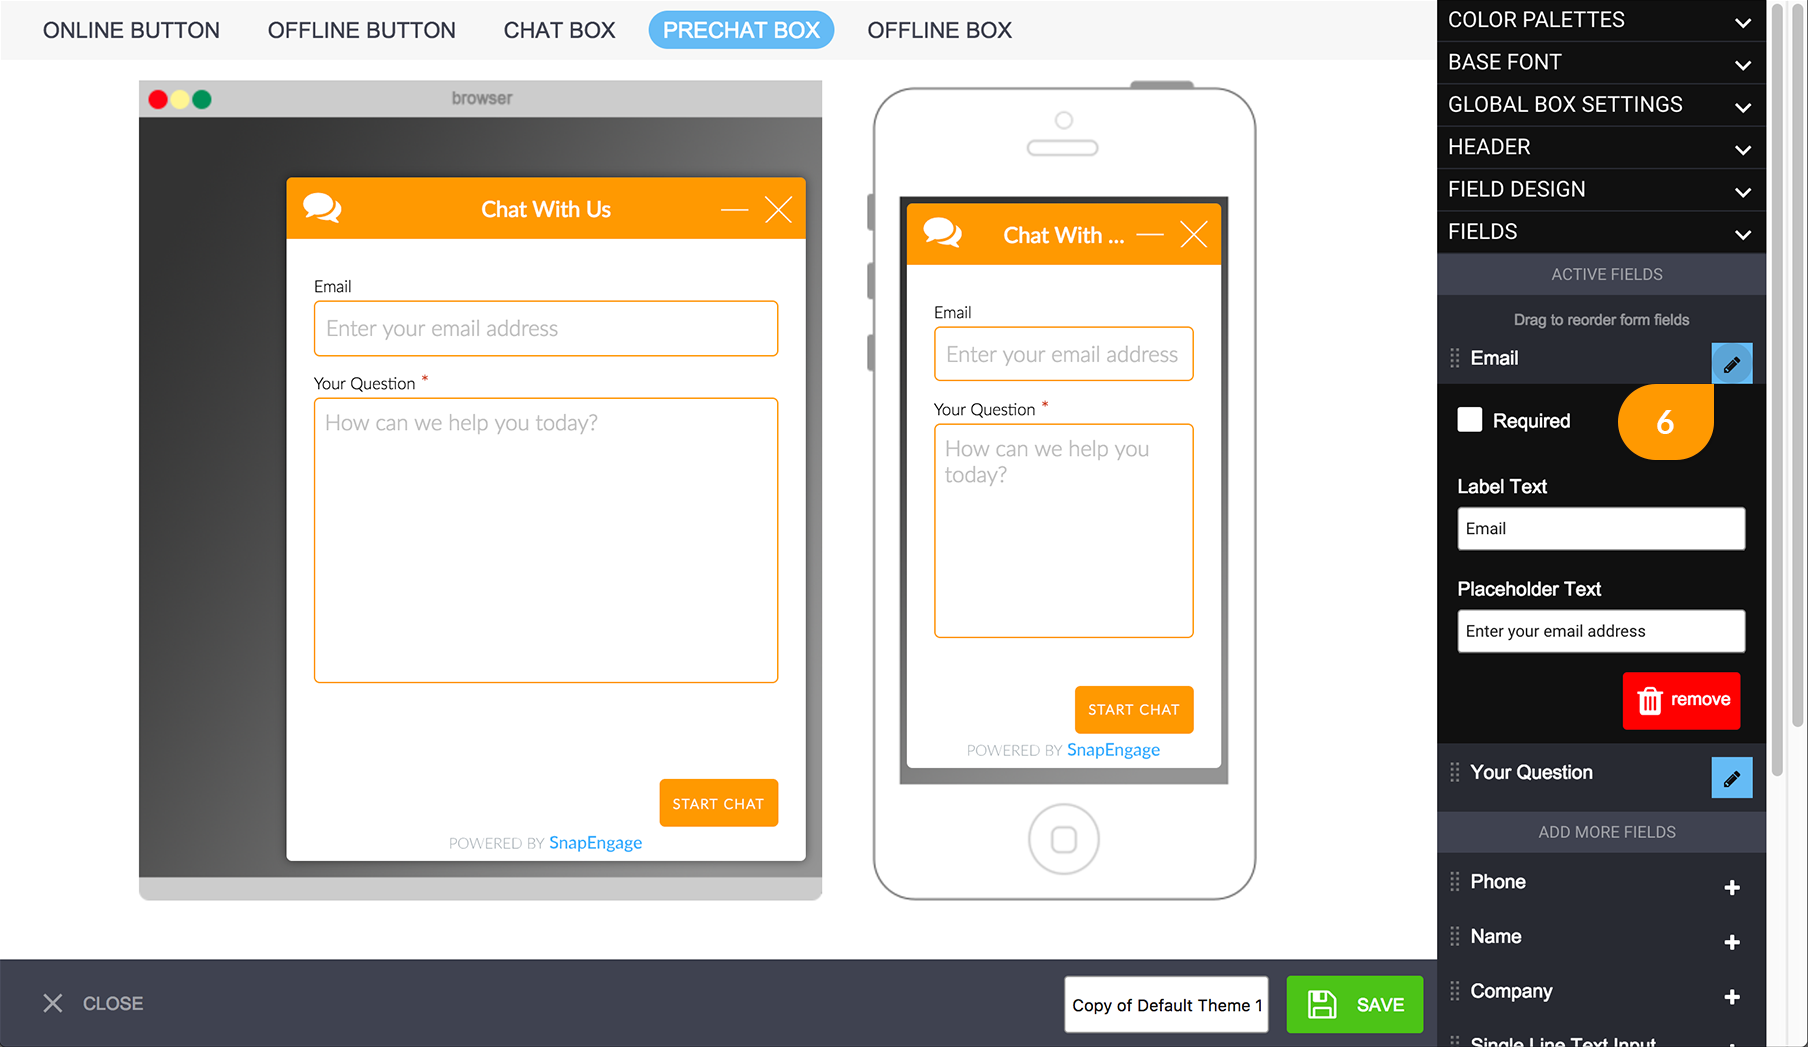
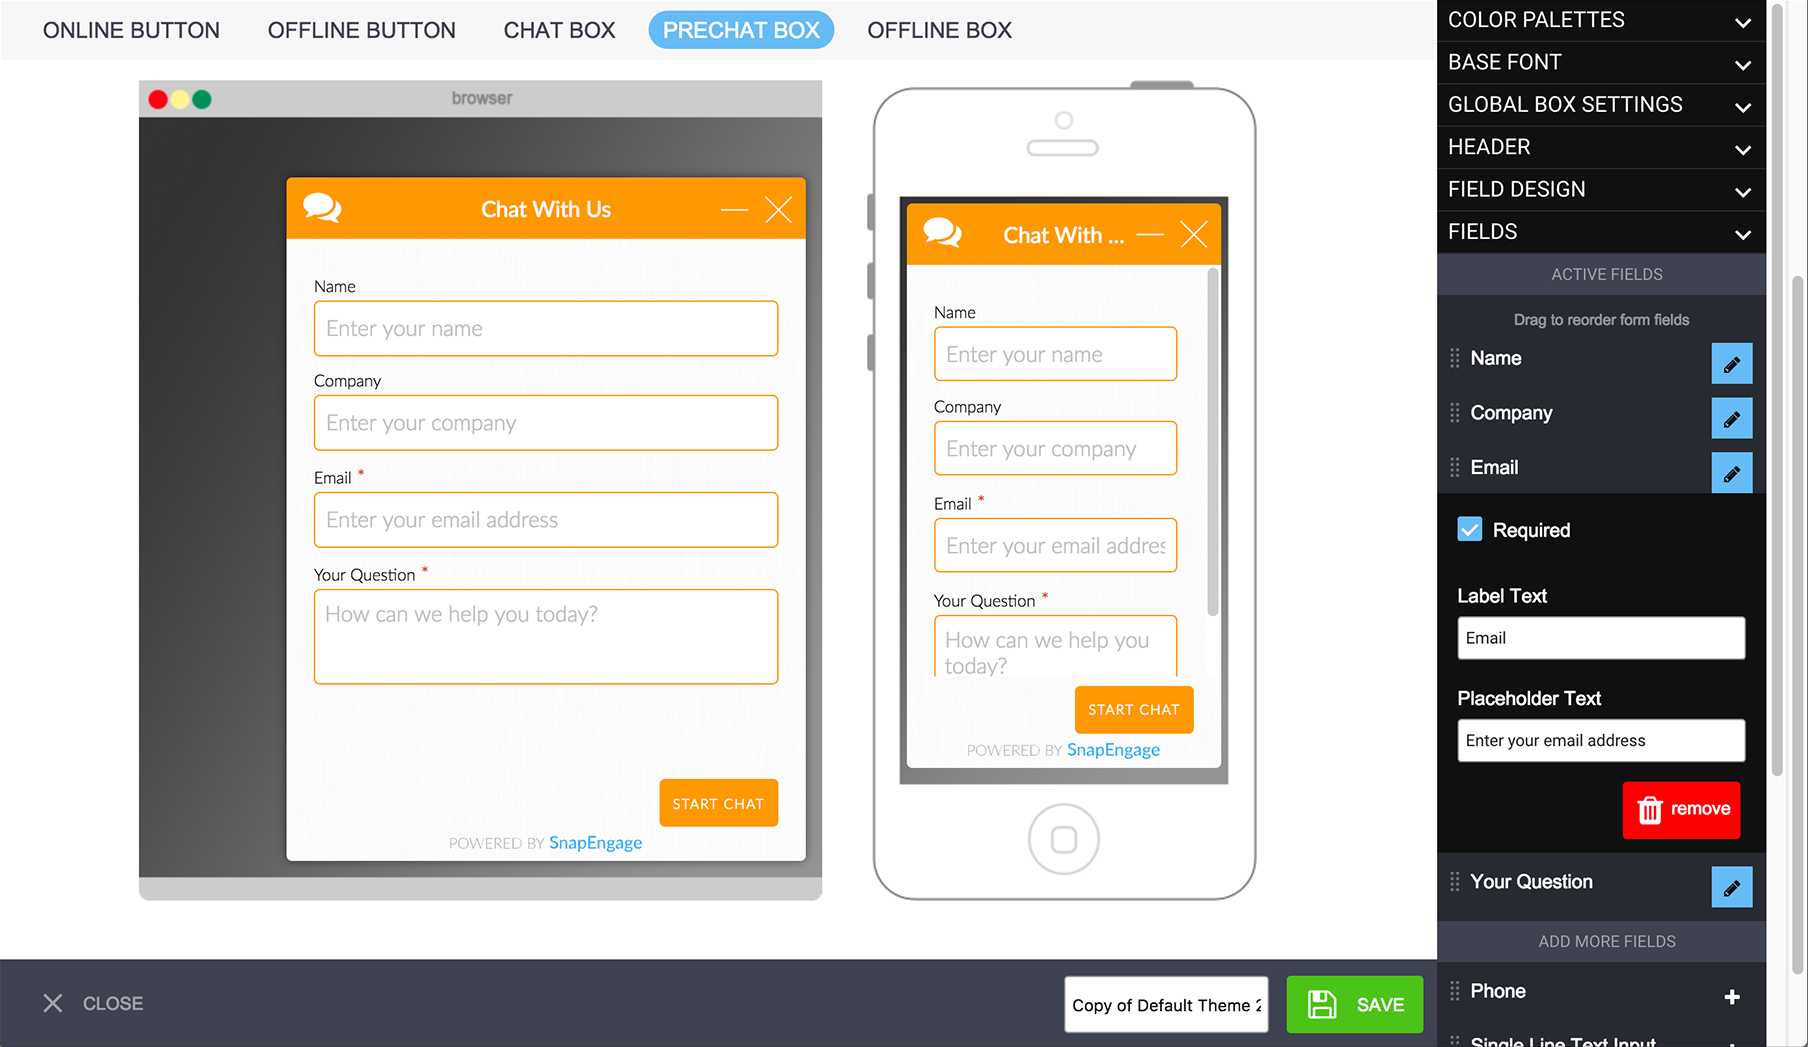
From the Fields tab, you can add, remove or edit fields in the Pre-Chat Form. To edit one of the pre-defined fields, click on the blue pencil icon (6) next to the field name, this will bring up the options for this particular field as in the example above.
Here, you have the option to make the field mandatory by clicking “Required”. This means that this field would require an answer before the visitor gets routed to a chat agent. For the best results, don’t make every field required, as the visitor might lose their patience. Enabling important fields like Email, or Name, is recommended to ensure a good visitor experience. Having too many required fields may result in the visitor not chatting in.
You can also change the label above the field by editing the Label Text. To edit the pre-populated text in the field, edit the Placeholder Text. If you want to delete the field completely, click the red Remove button.
To add a new field to the Pre-Chat Form, you simply need to drag and drop from the options provided below. If the type of field you are looking for isn’t provided in the available options, simply add one of the more generic fields like “Single Line Text Input” or “Multi Line Text Area” to capture this information. To add label text without a field, use a “Label Text” field.
Javascript Variables
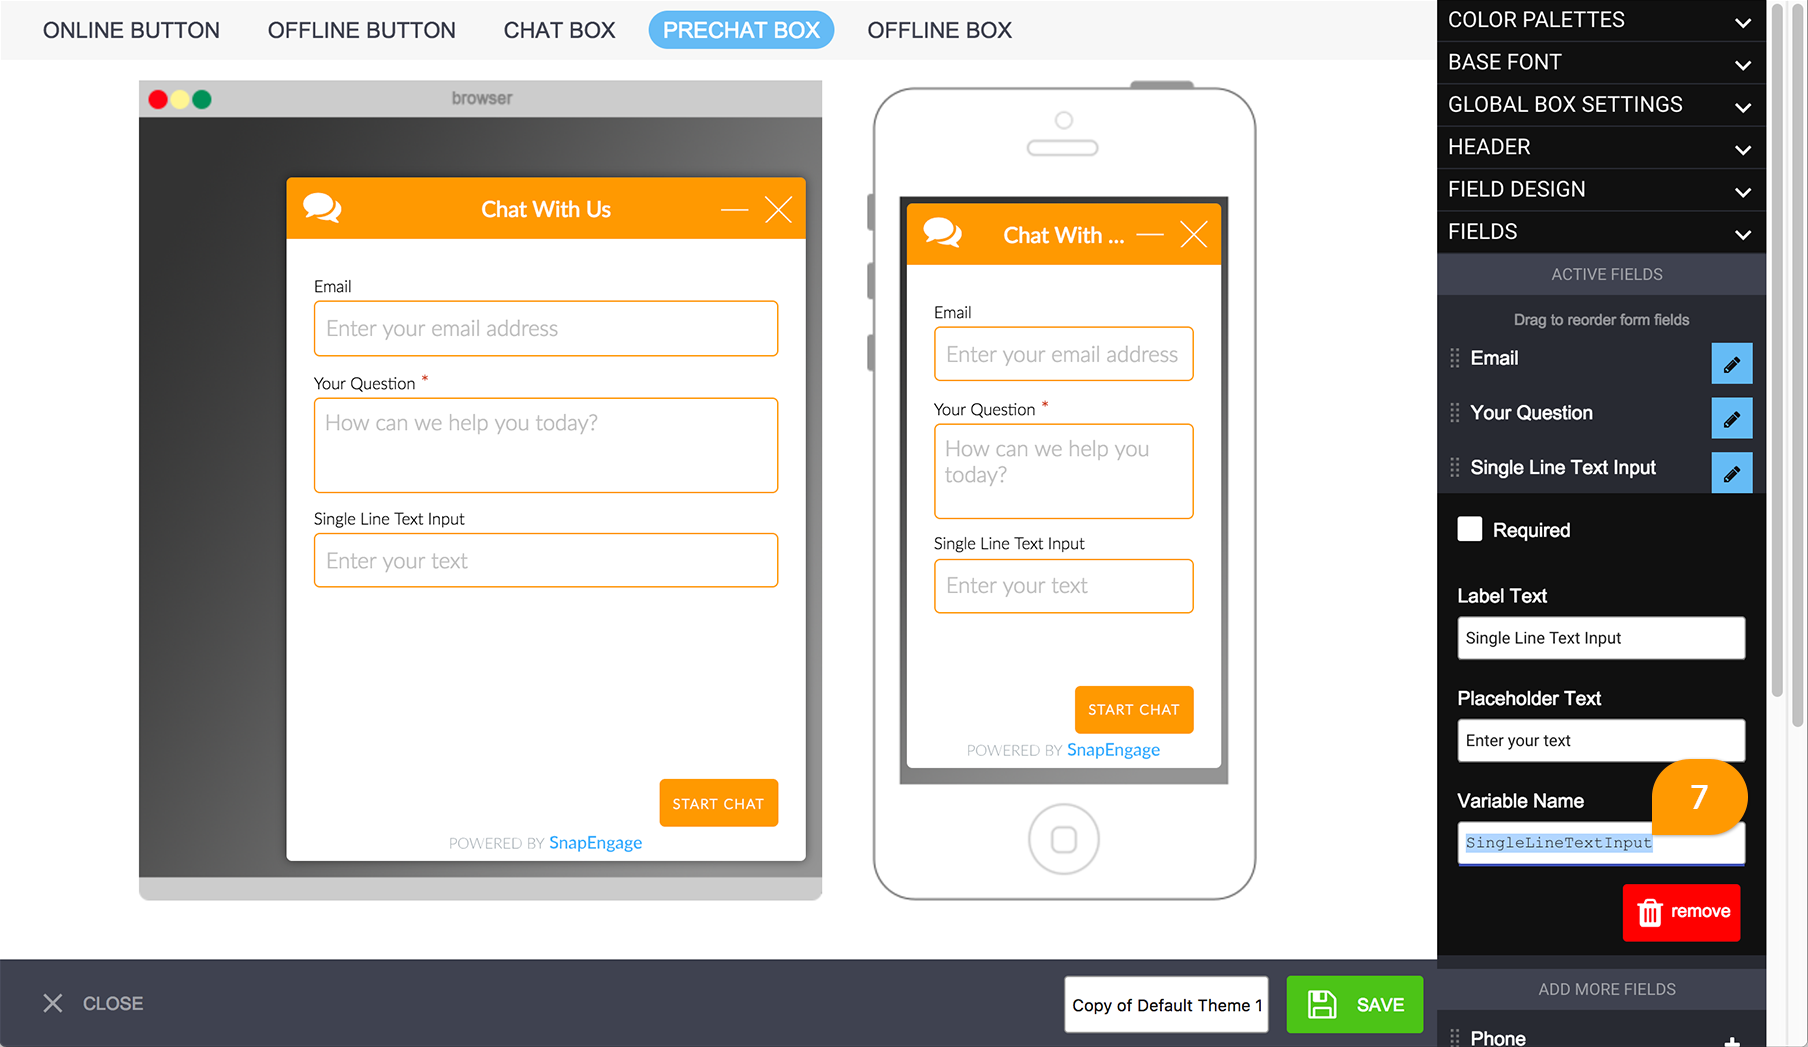
Using the Pre-Chat Form, you can capture information from a potential customer, but what can be done with this information? Using Javascript Variables (7), you can easily map this information to the relevant fields in your CRM or integration. This will help your sales or customer support teams to obtain as much information as possible, so that they can deal with the query efficiently.
To find out more about Javascript variables, check on this article.
Buttons
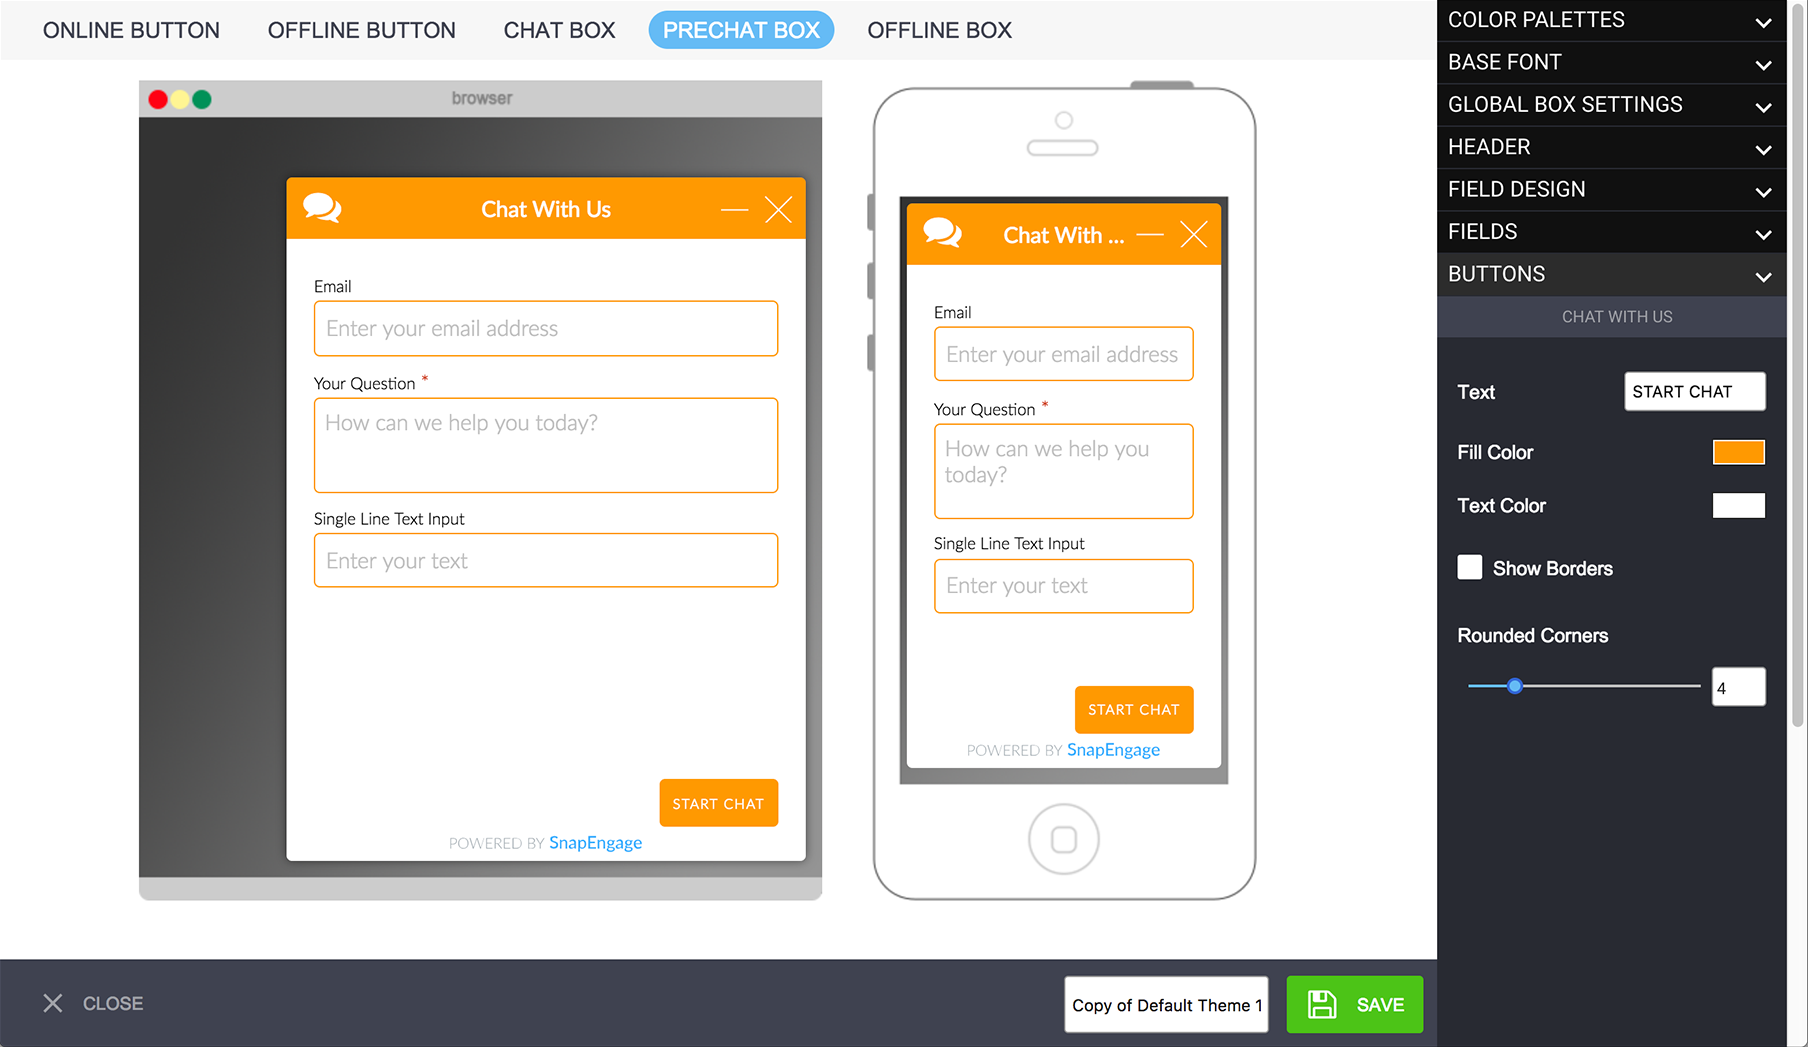
From this tab, you can control the display of the Start Chat button. You can configure the borders on the button as well as both the text and background colors.
Pre-Chat Form Settings
To find the Pre-Chat Form Settings options, log into SnapEngage Admin and click Settings on the left hand Navigation Bar, then click the Design Studio tab.
The option selected here determines what happens when a visitor clicks the chat button on there own.
- Use the Pre-Chat Form: The prechat form is configured in your them.
- Open chat box with a message: If you would prefer to not use the Pre-Chat form, this box allows you to configure a simpler message.
- Open chat box with Guide Bot prompt: From here you can choose an existing Guide Bot so that when a visitor clicks the Chat button, they will see the first message in the Guide Bot.

Getting the Most out of the Pre-Chat Form
The Pre-Chat form is incredibly useful for obtaining customer information, but add too many questions and your customer may not be bothered to chat to your agent. It’s a balancing act that may take some experimentation to get properly right. There are a few things you can do that will help to ensure the best possible experience for your customers.
Keep Required Fields to a minimum
You can opt to make any field mandatory by checking the “Required” checkbox in any editable field. This essentially means that this field will need to be filled in in order to progress to a live chat with an agent. This is great if you absolutely must capture a visitor’s email address or the name of the company they work for. However, please be aware that you should only have 1-2 mandatory fields in your Pre-Chat Form, so as to not scare away your customers. The end goal is to get them to chat with your agents, right? We need to make it as easy as possible for this to happen.
To follow on from this, it is important to select the fields in your Pre-Chat Form very carefully. Any field that isn’t absolutely necessary shouldn’t be there, as this information can be collected while on the chat. A general rule of thumb is that if you have to scroll to reach the bottom of the Pre-Chat Form, then it’s probably too long.
As you can see, the Pre-Chat Form is very powerful, and if utilized correctly, can be a great addition to your team. If you would like assistance with the setup of this, just chat to our team, and we’ll be happy to help!
Did you find this article helpful?


 (6 votes, average: 3.67 out of 5)
Published October 2, 2017