Home > How to set up the Options tab
Categories: Getting Started
(Last Updated On: )
About This Article
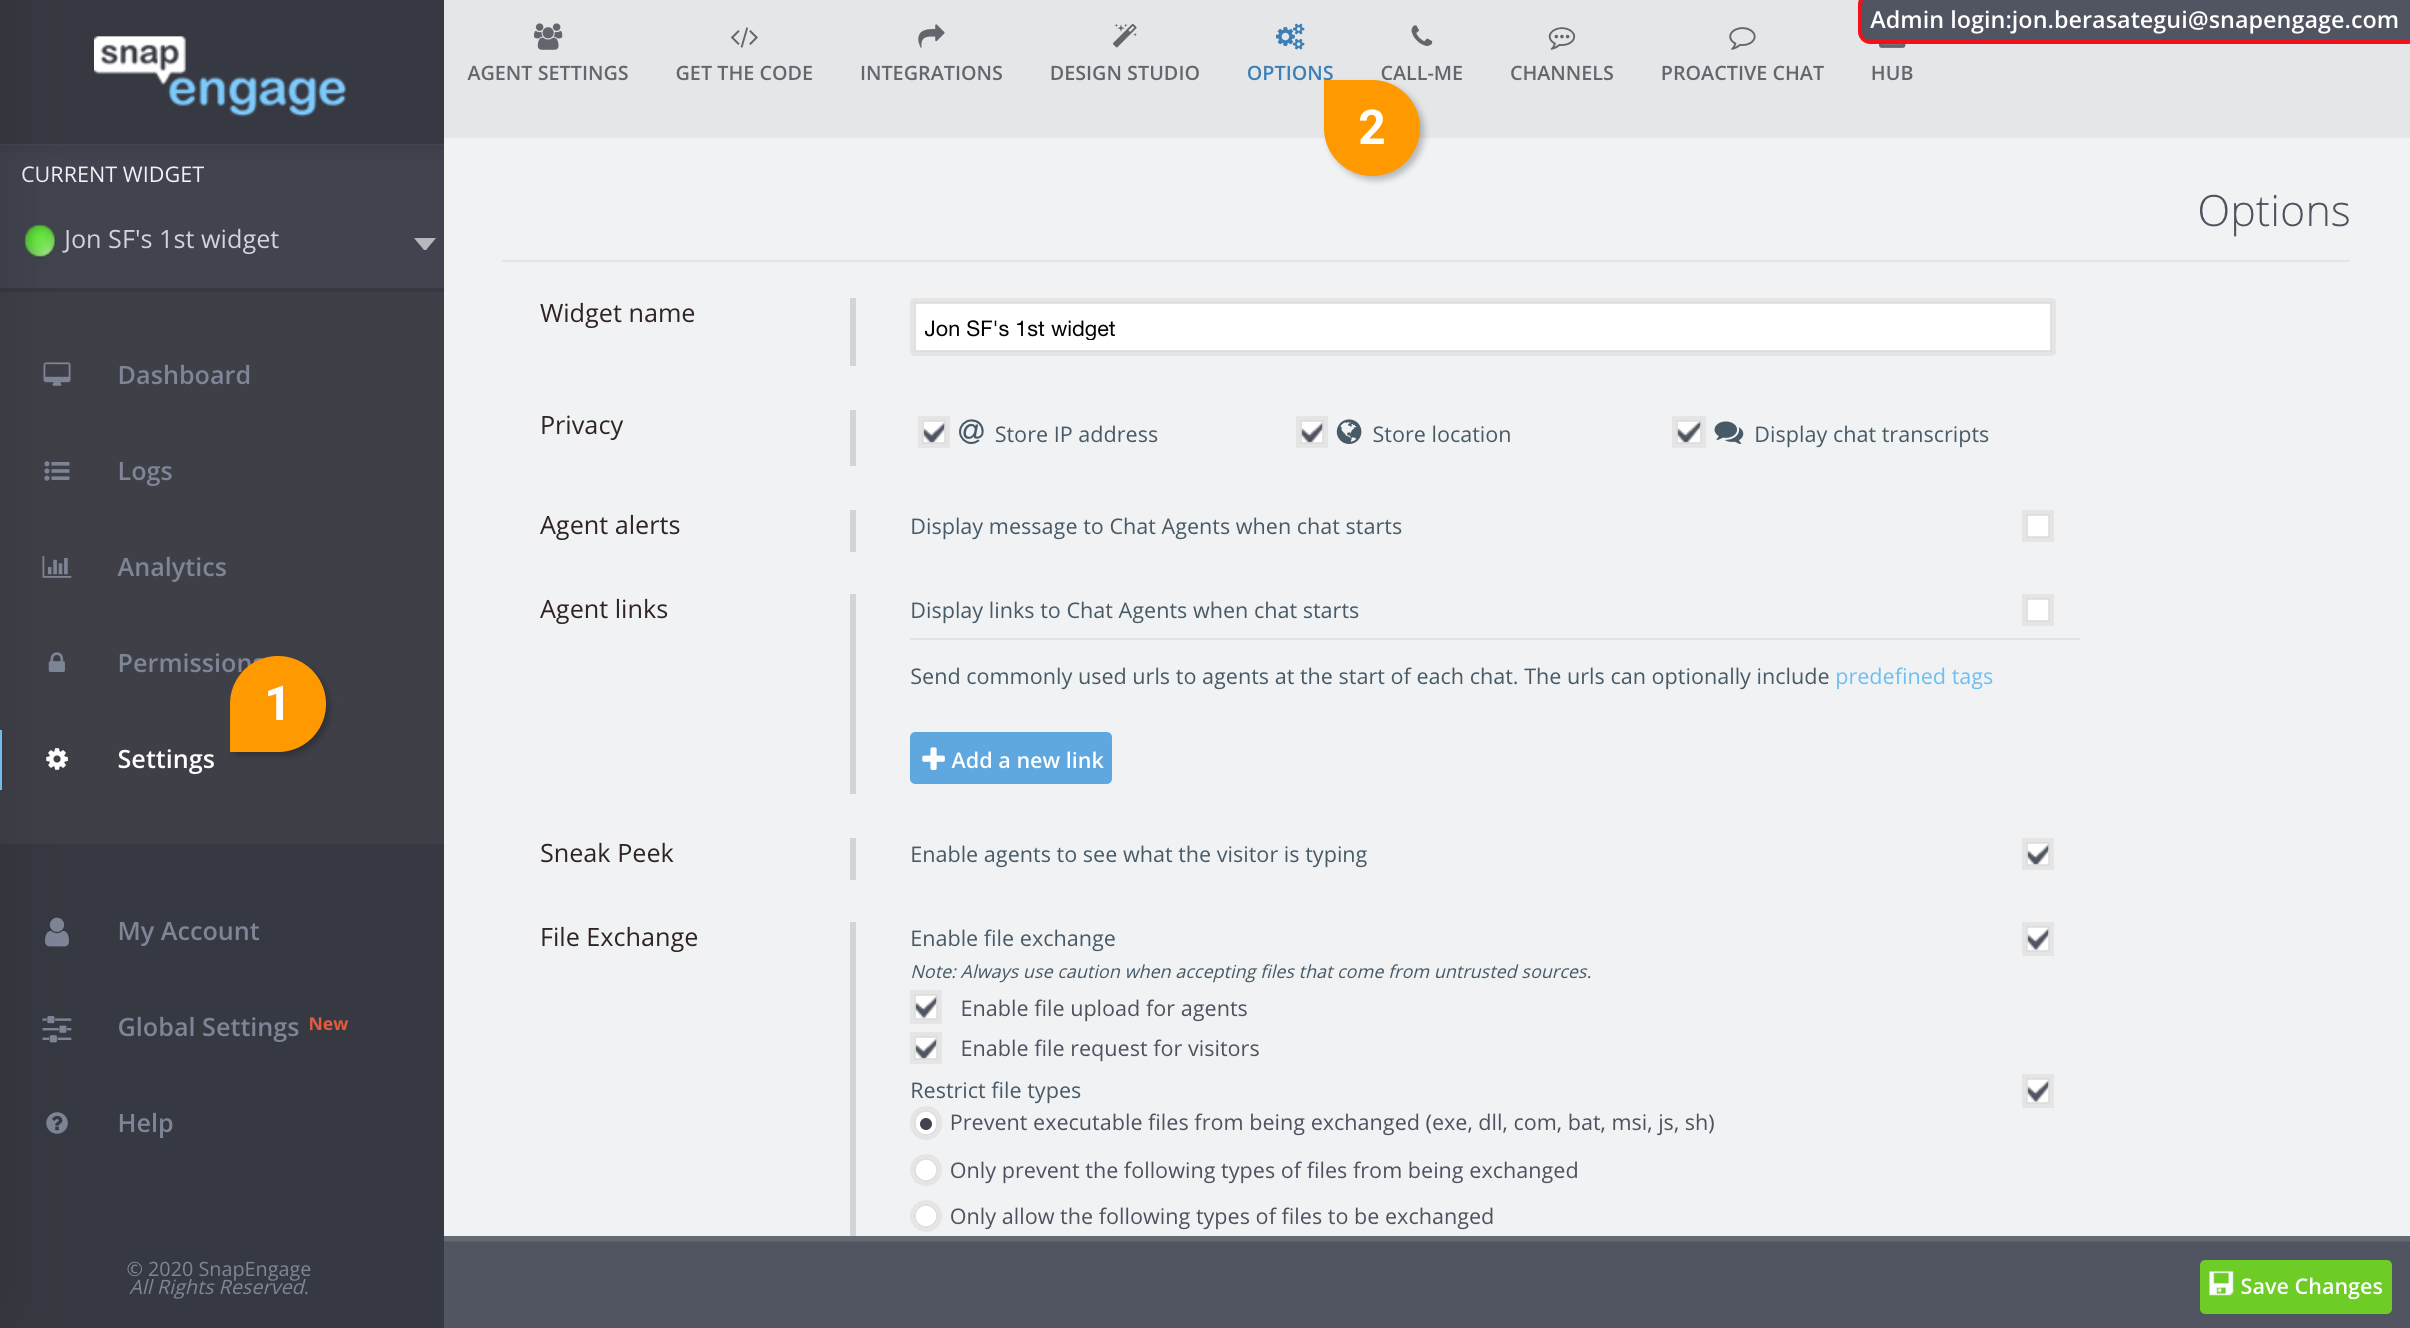
The purpose of this article is to provide a comprehensive overview of the options and capabilities in the Options tab in SnapEngage Admin. These features allow you a high degree of customization of you SnapEngage platform. To begin, log into your Admin Dashboard. Click Settings on the left hand navigation bar, then click the Options tab.

Widget name
Here you can enter the name of your widget. For more information on adding, removing, and renaming widgets, click here.
Privacy
Here you can choose if you would like to store the visitor IP, location and whether you would like agents to see previous chats with this visitor.
Agent Alerts
When this option is checked, a message displays to agents when chat starts.
Agent Links
This feature allows the administrator to provide the agent with urls to specific resources. These urls can optionally include predefined tags
Sneak Peek
Allow your chat agents to get a head start on the conversation by enabling them to see the text as the visitor types. Note: Sneak peek will only kick in after the agent’s first response. Before it, the agent cannot see if the visitor is typing something else.
File Exchange
This feature gives you control over the types of files that can be shared as well as whether or not a visitor has to be granted permission to share a file by the agent.

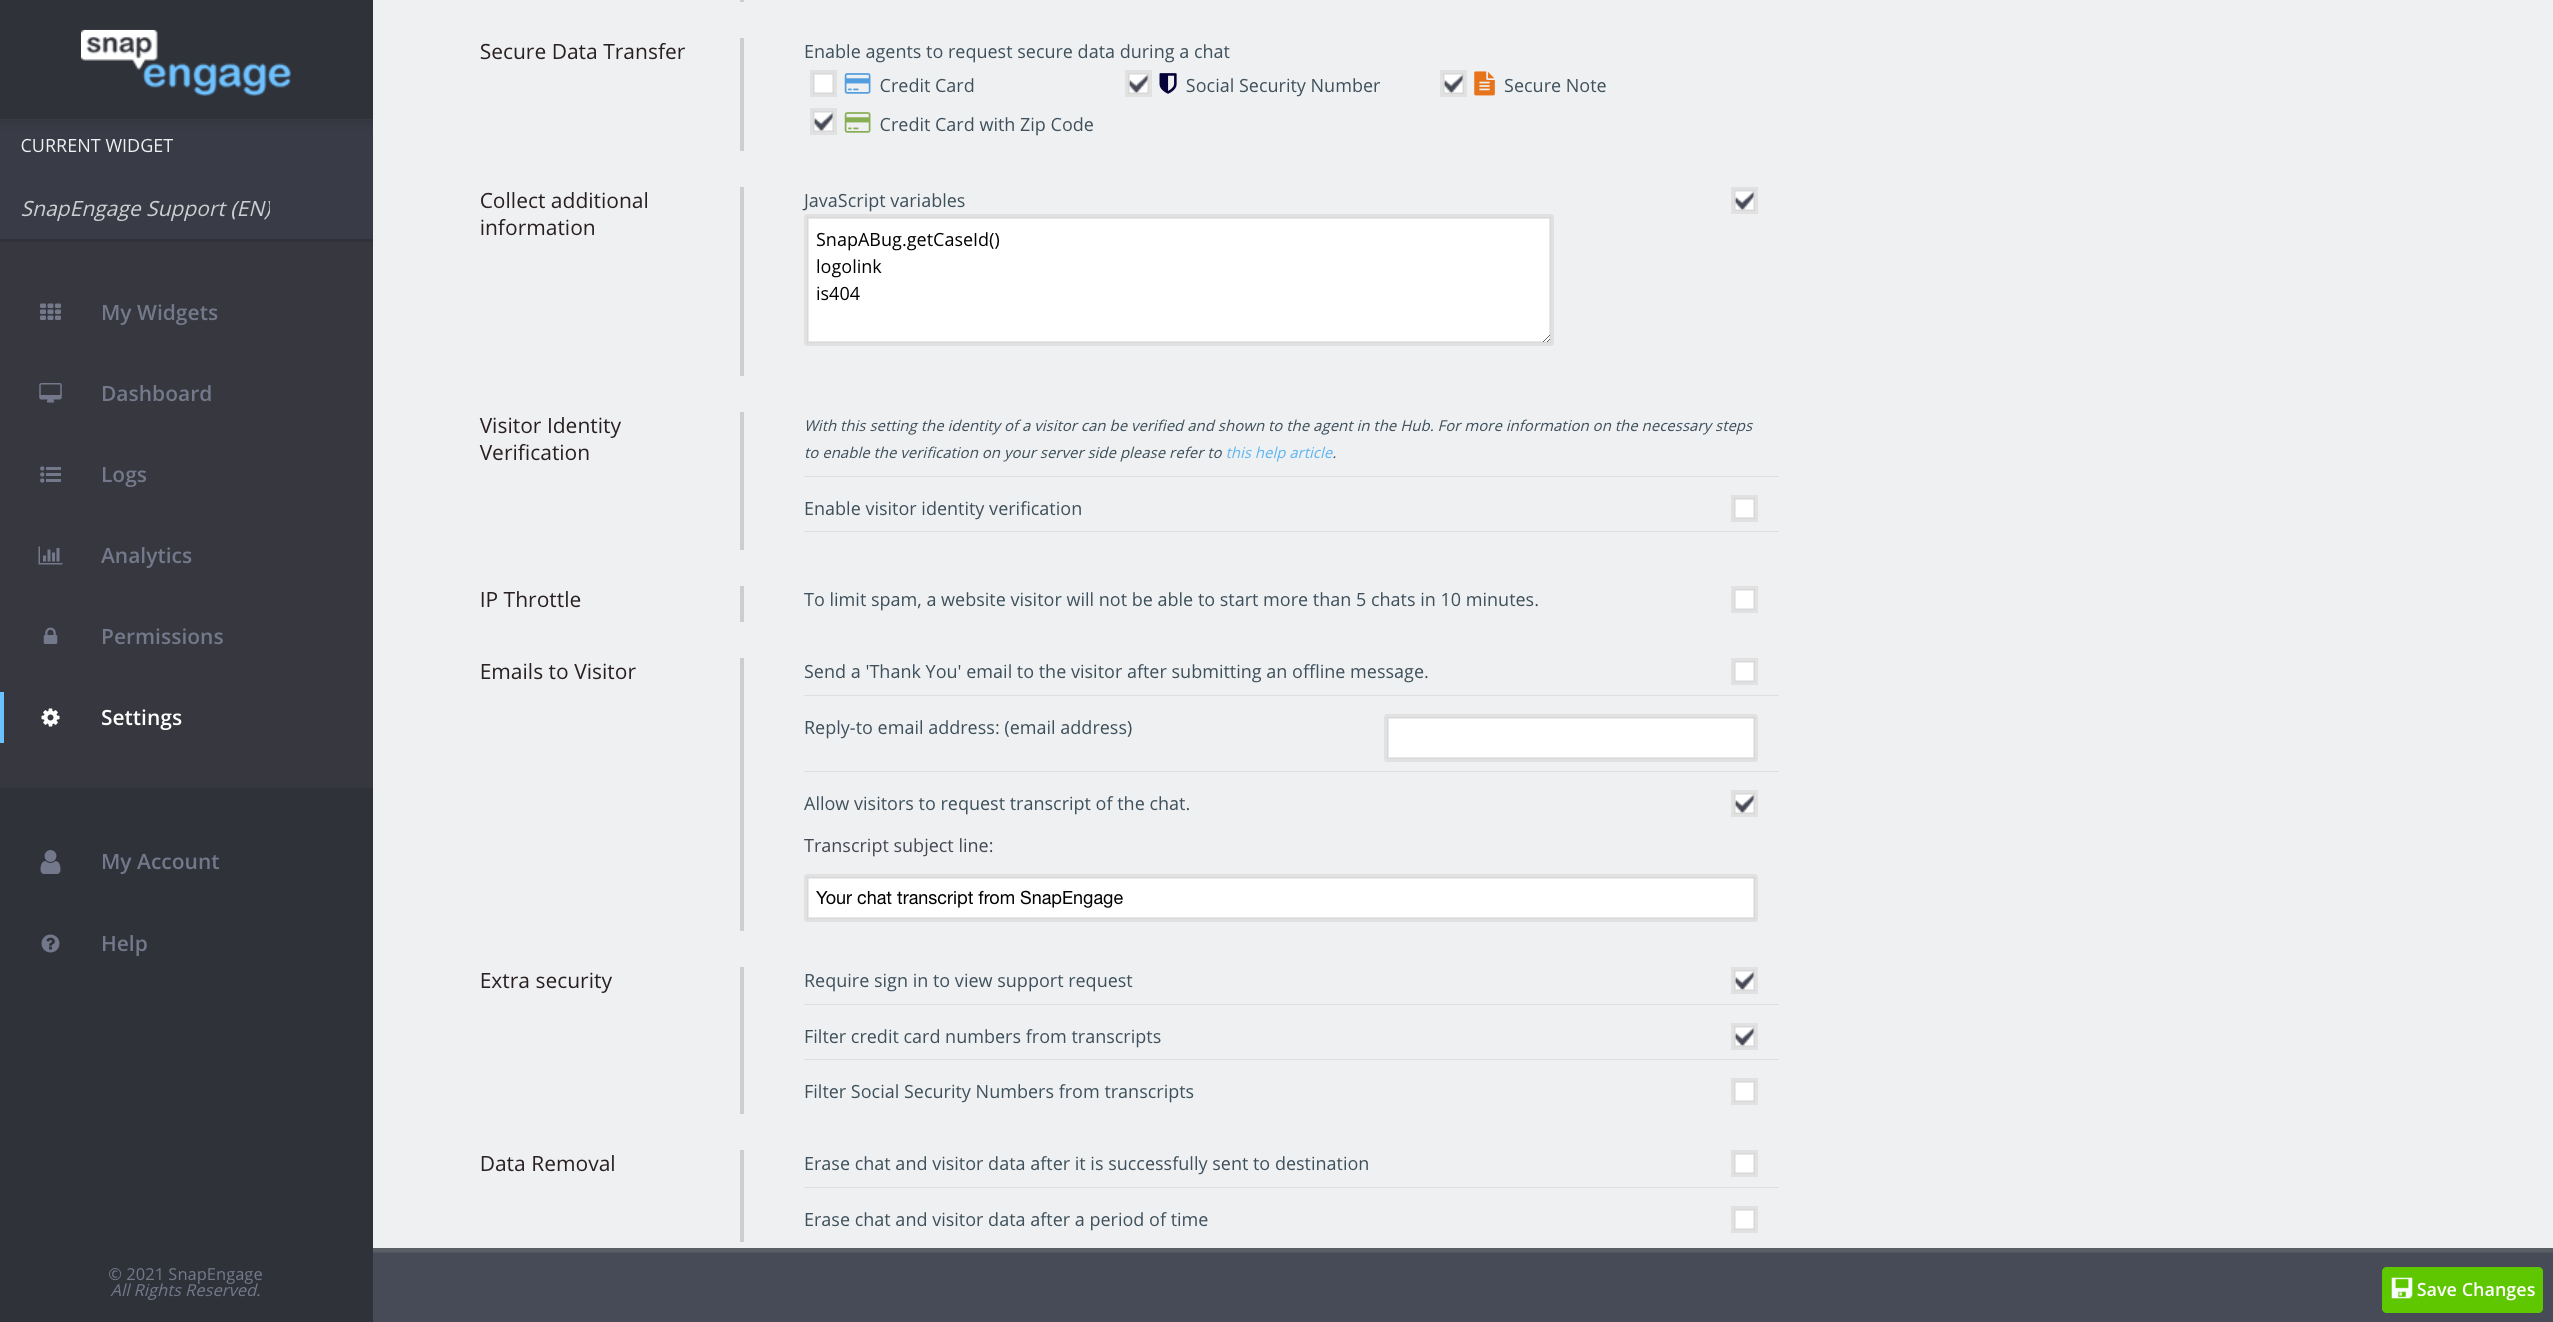
Secure Data Transfer
With Secure Data Transfer, you can allow the visitor to send over sensitive information like credit cards and social security numbers. This info is not stored post chat.
Collect Additional Information
- JavaScript Variables
By selecting this option you can collect additional information on the visitor by entering the variable names in the box as shown below. When a chat starts these variables will be reported to the agent. This information can be collected either with the use of a custom form and the respective fields (eg. Name) or by JavaScript fetching the variables on the user’s page.
Note: To allow your agents to manually collect information during a chat and map this to fields in your CRM / Help Desk (Salesforce, Desk.com, Microsoft Dynamics Cloud, Hubspot, SAP, UserVoice, and Zendesk), you will need to set up and use Labels.
Visitor Identity Verification
Visitor Identity Verification is an advanced security and identity protection for businesses that communicate with authenticated users (signed into an application, portal, or other backend system). This feature is available with Enterprise plans. Please come and speak to us if you would like to upgrade.
IP Throttle
The IP throttle is a mechanism that is turned on by default. To prevent “spammers,” this will block anyone trying to start more than 5 chats in a 10 minute period time. The IP address will be blocked, preventing the visitor from starting new chats for 5 minutes. Uncheck the Box to disable this feature.
Email Visitors
Our request email transcript feature allows visitors to enter their email during a chat with an agent, so they can receive a copy of the transcript for their records once it’s finished.
Thank You Note
You can send an email to requestor after submitting an offline request. If checked, whenever a visitor leaves an offline request they will receive an email that says “Thank you for submitting a message to (name of your widget) widget” along with the message that was sent. Contact us to if you would like to change the body of the message. The subject will default to the name of your Widget.
Extra Security
- Require sign in to view support request
- If enabled the cases can only be accessed after an admin or chat agent of this account logs in. If the option is not checked, then anybody with the link can see it.
- Filter credit card numbers from transcripts
- If enabled the chat transcript any credit card numbers in the transcript will be scrubbed and replaced with X’s.
- Filter Social Security Numbers from transcripts
- If enabled any social security numbers in the transcript will be scrubbed and replaced with X’s
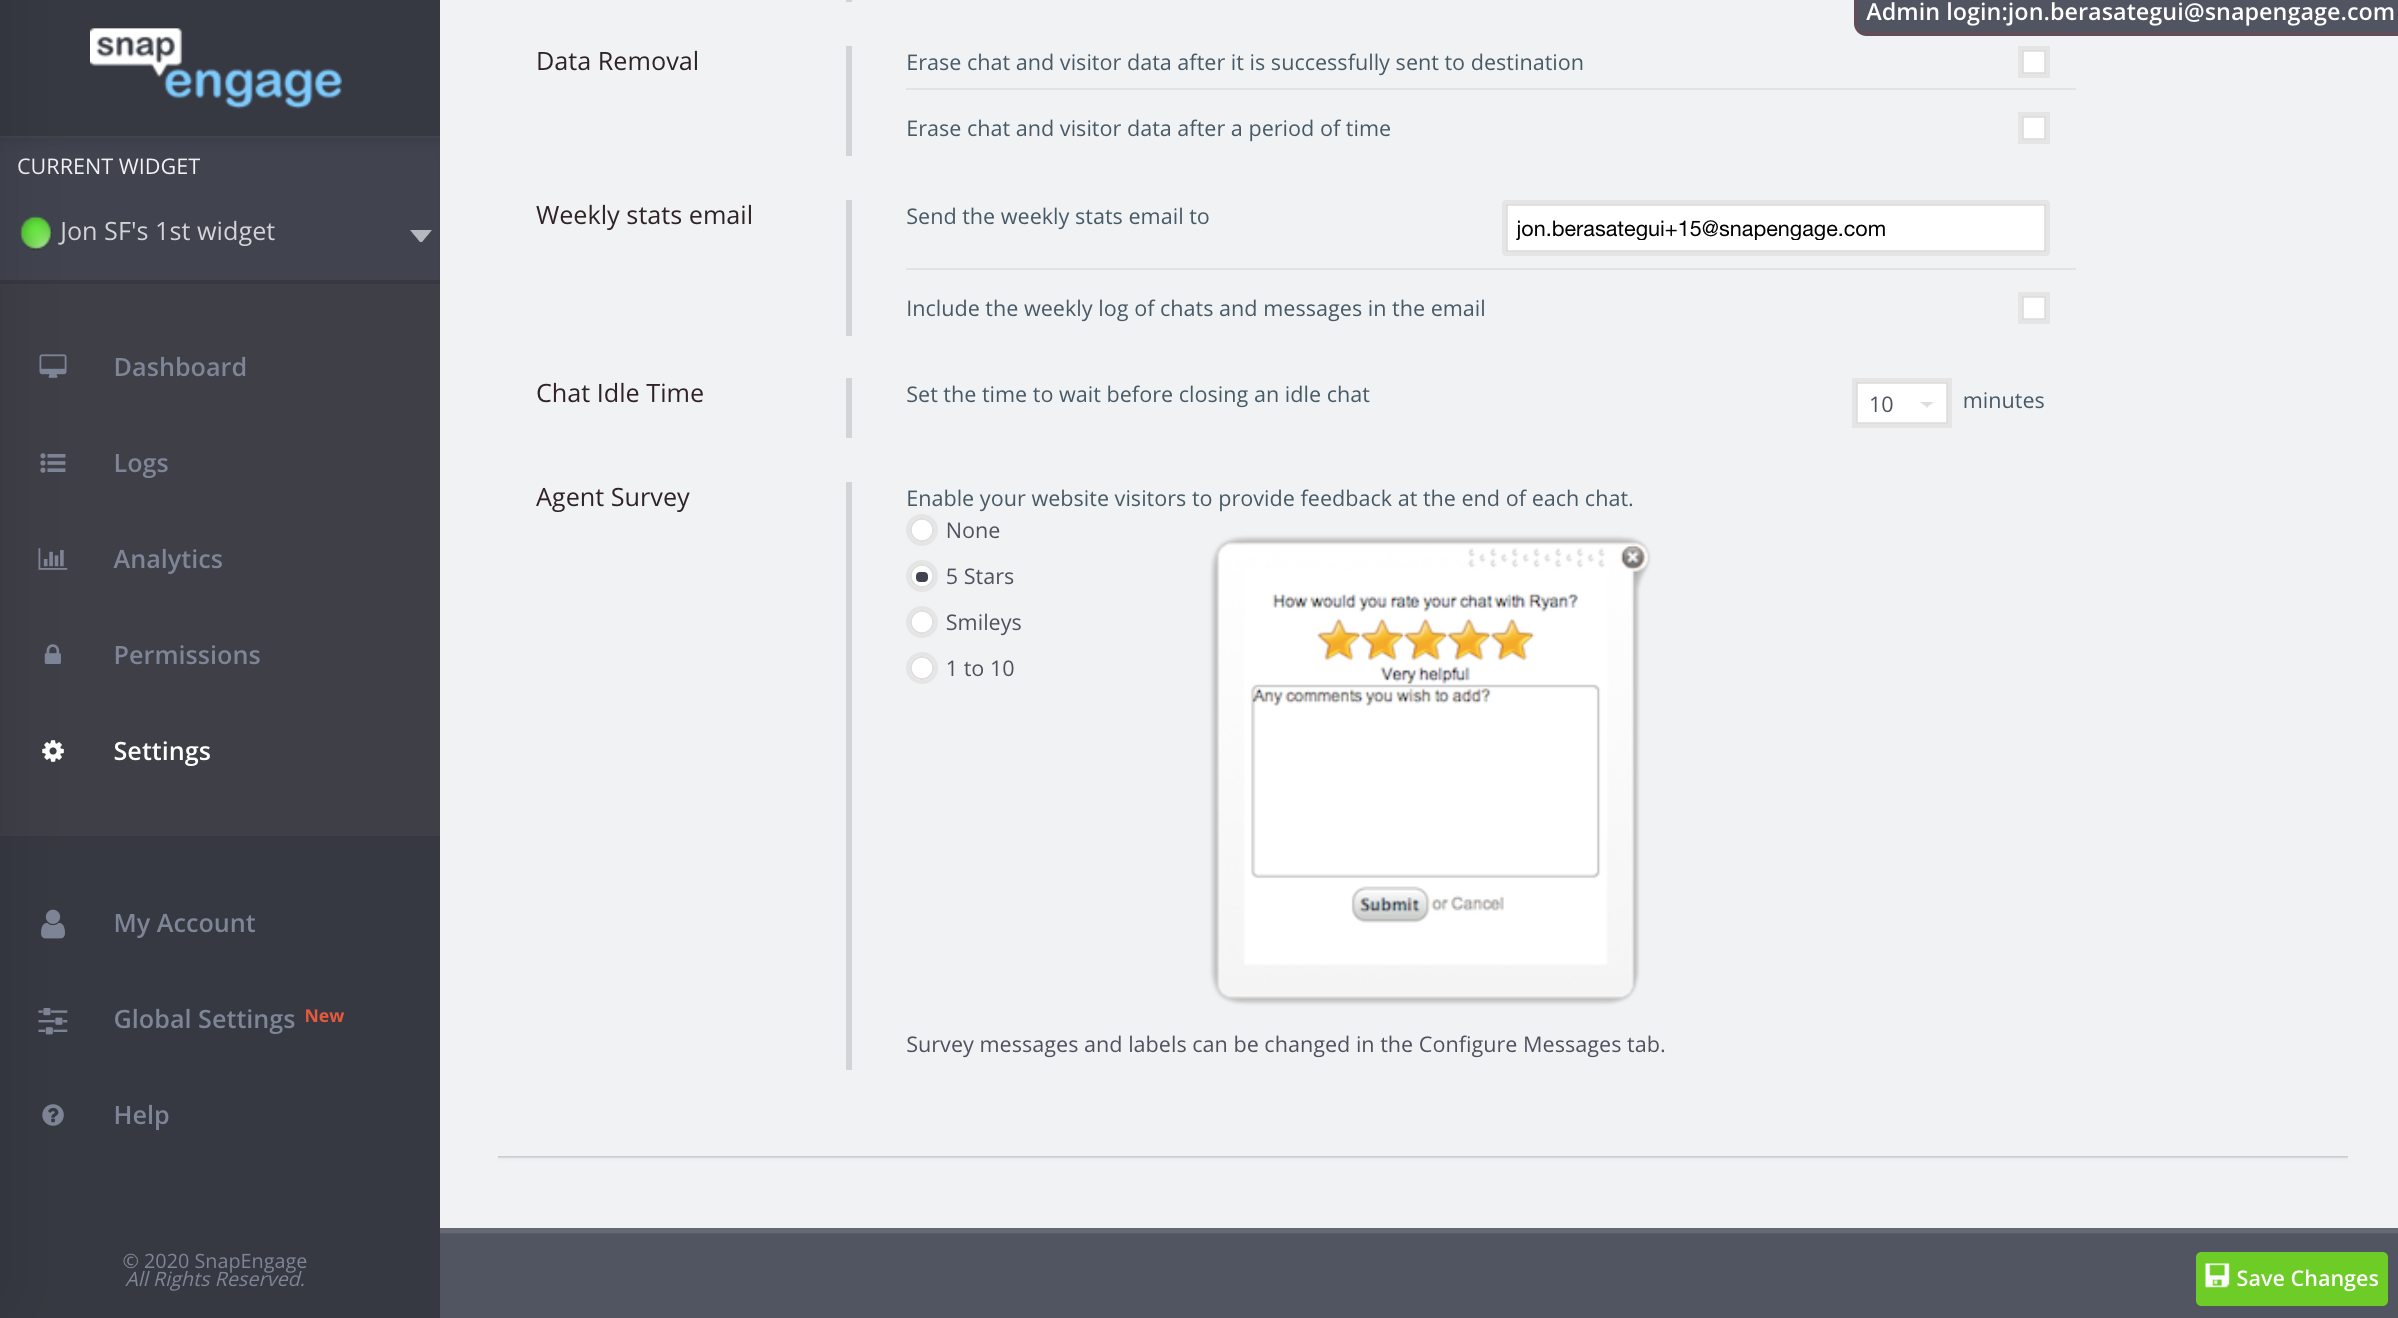
Data Removal
- Delete visitor data after it is successfully sent to the integration destination.
This feature removes all visitor information, IP, location, chat transcript, email after the end of the chat (and after any data that was collected was sent to any integrations).
- Delete case and visitor data after certain period of time. This feature (available on Professional plans or higher please reach out if you need upgrade assistance) will allow to select the timeframe after which all data will be deleted. You can choose from the following options : data older than one month, two months, four months, six months, one year, two years, five years, ten years.
Weekly stats email
Any emails entered here will receive a weekly stats email. These are the stats that are recorded in your Admin Dashboard under stats. For more information about stats and how to view them click here.
- click the checkbox to include the weekly log of chats and messages in the email. You can also view your chat transcripts under logs in your Admin Dashboard or in your CRM, helpdesk, or email depending on your integration selection.
Chat Idle Time
Configure the amount of time a chat can sit idle before it automatically closes. Once a chat sits with no response from either the agent or the visitor for the set amount of time, the chat session will close out and a message will be sent to both the agent and visitor letting them know the chat sat idle for too long. This time is based on the last response given and will reset with the latest response.
Agent Survey
Allow your visitors to rate their experience with your chat agent. Choose the survey type that is best for your agents.
Published November 5, 2012
Reader Feedback
No comments yet


 (11 votes, average: 3.73 out of 5)