Home > How to use Labels with Salesforce
Categories: Featured Article
(Last Updated On: )
About This Article
This article explains how to set Labels to use with Salesforce.
If you combine our Labels feature and our custom mapping, the results are limitless! Did you know you could set up a case to close directly on Salesforce from the chat itself? Or that you could map custom fields on Salesforce with information that the agent can add on the fly during the chat? Let’s look a little closer.
How to use Labels with Salesforce
With the custom mapping, you can specify which information you want to send over to your integration, like Salesforce, and where exactly. You can map some information captured by SnapEngage, or by javascripts, or on your Design Studio form, but you can also send information captured by your agents using labels.
With labels, you can ask agents to fill in some information during the chat. As an example, you could have a label called “Type of request” where you have different pre-populated options, let’s say :
- General question
- Issue
- Pricing information
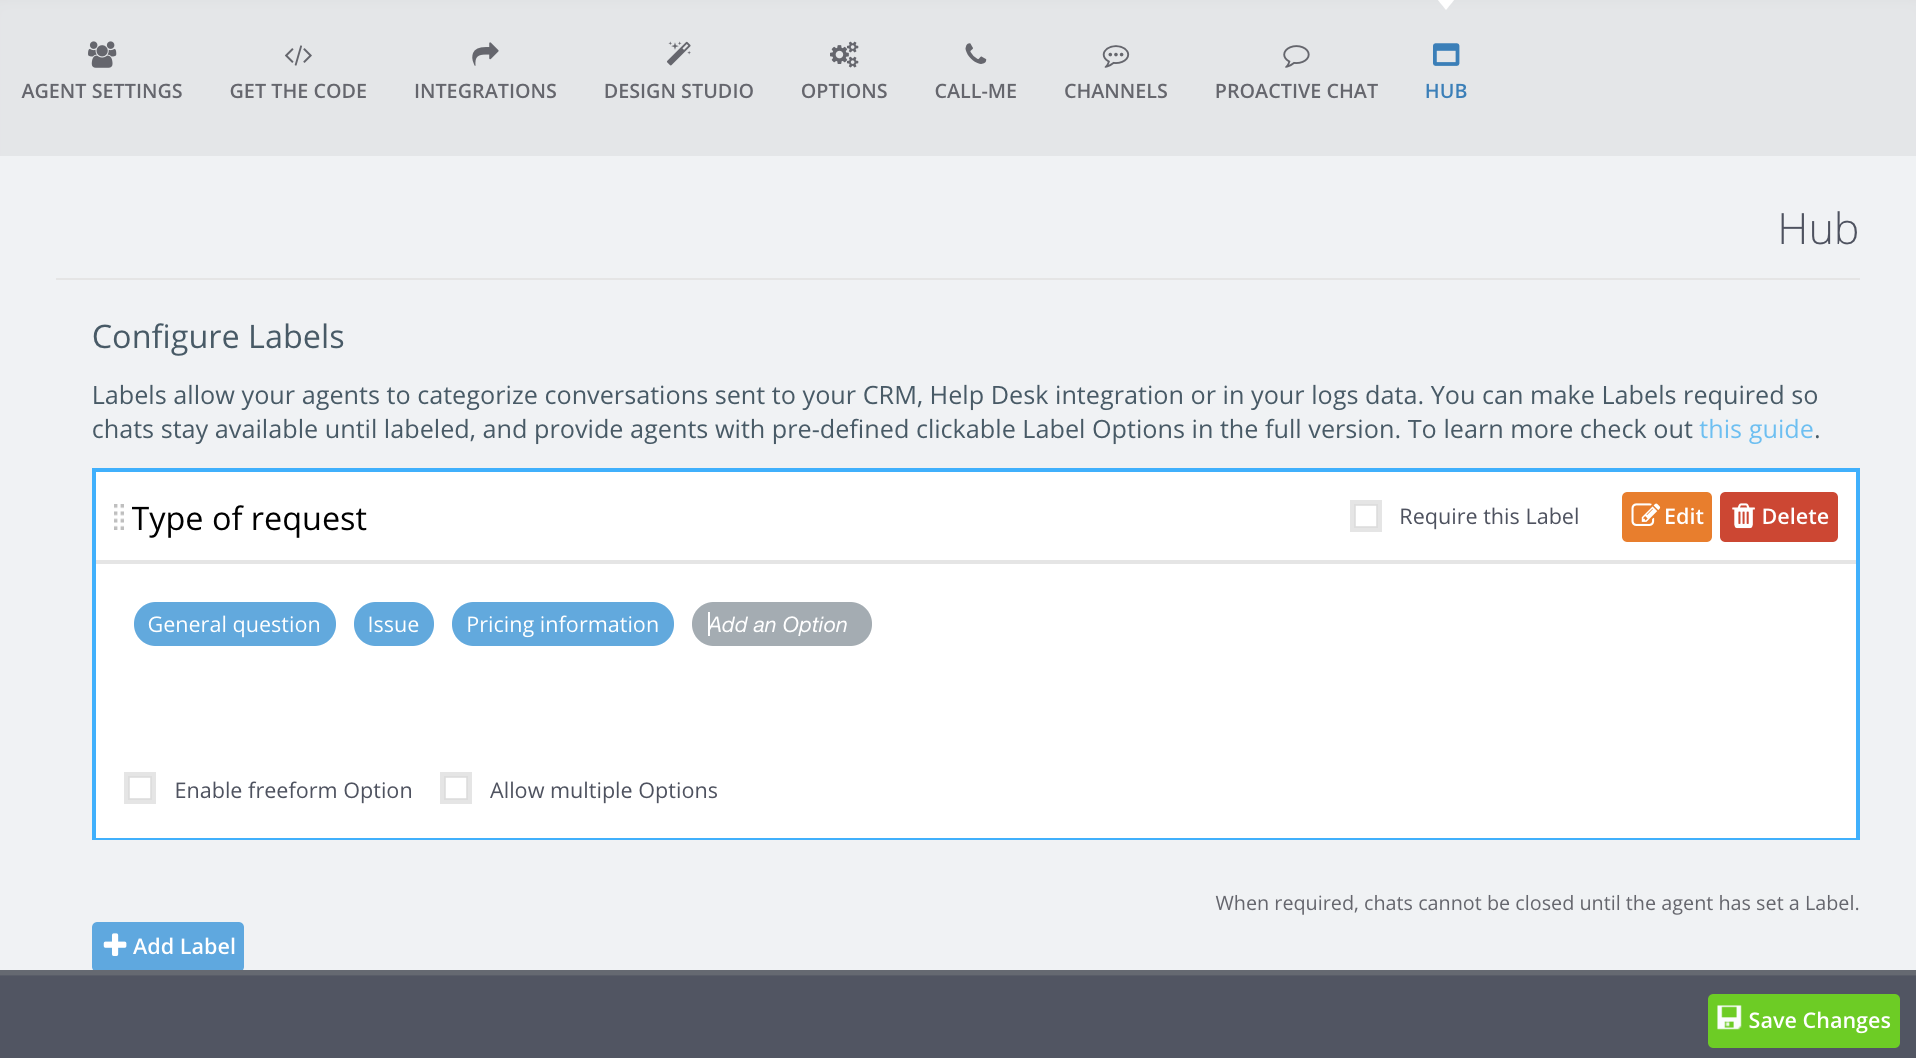
These are pre-defined labels, and the agents are forced to choose one of them if they are required (they will not be able to close the chat).
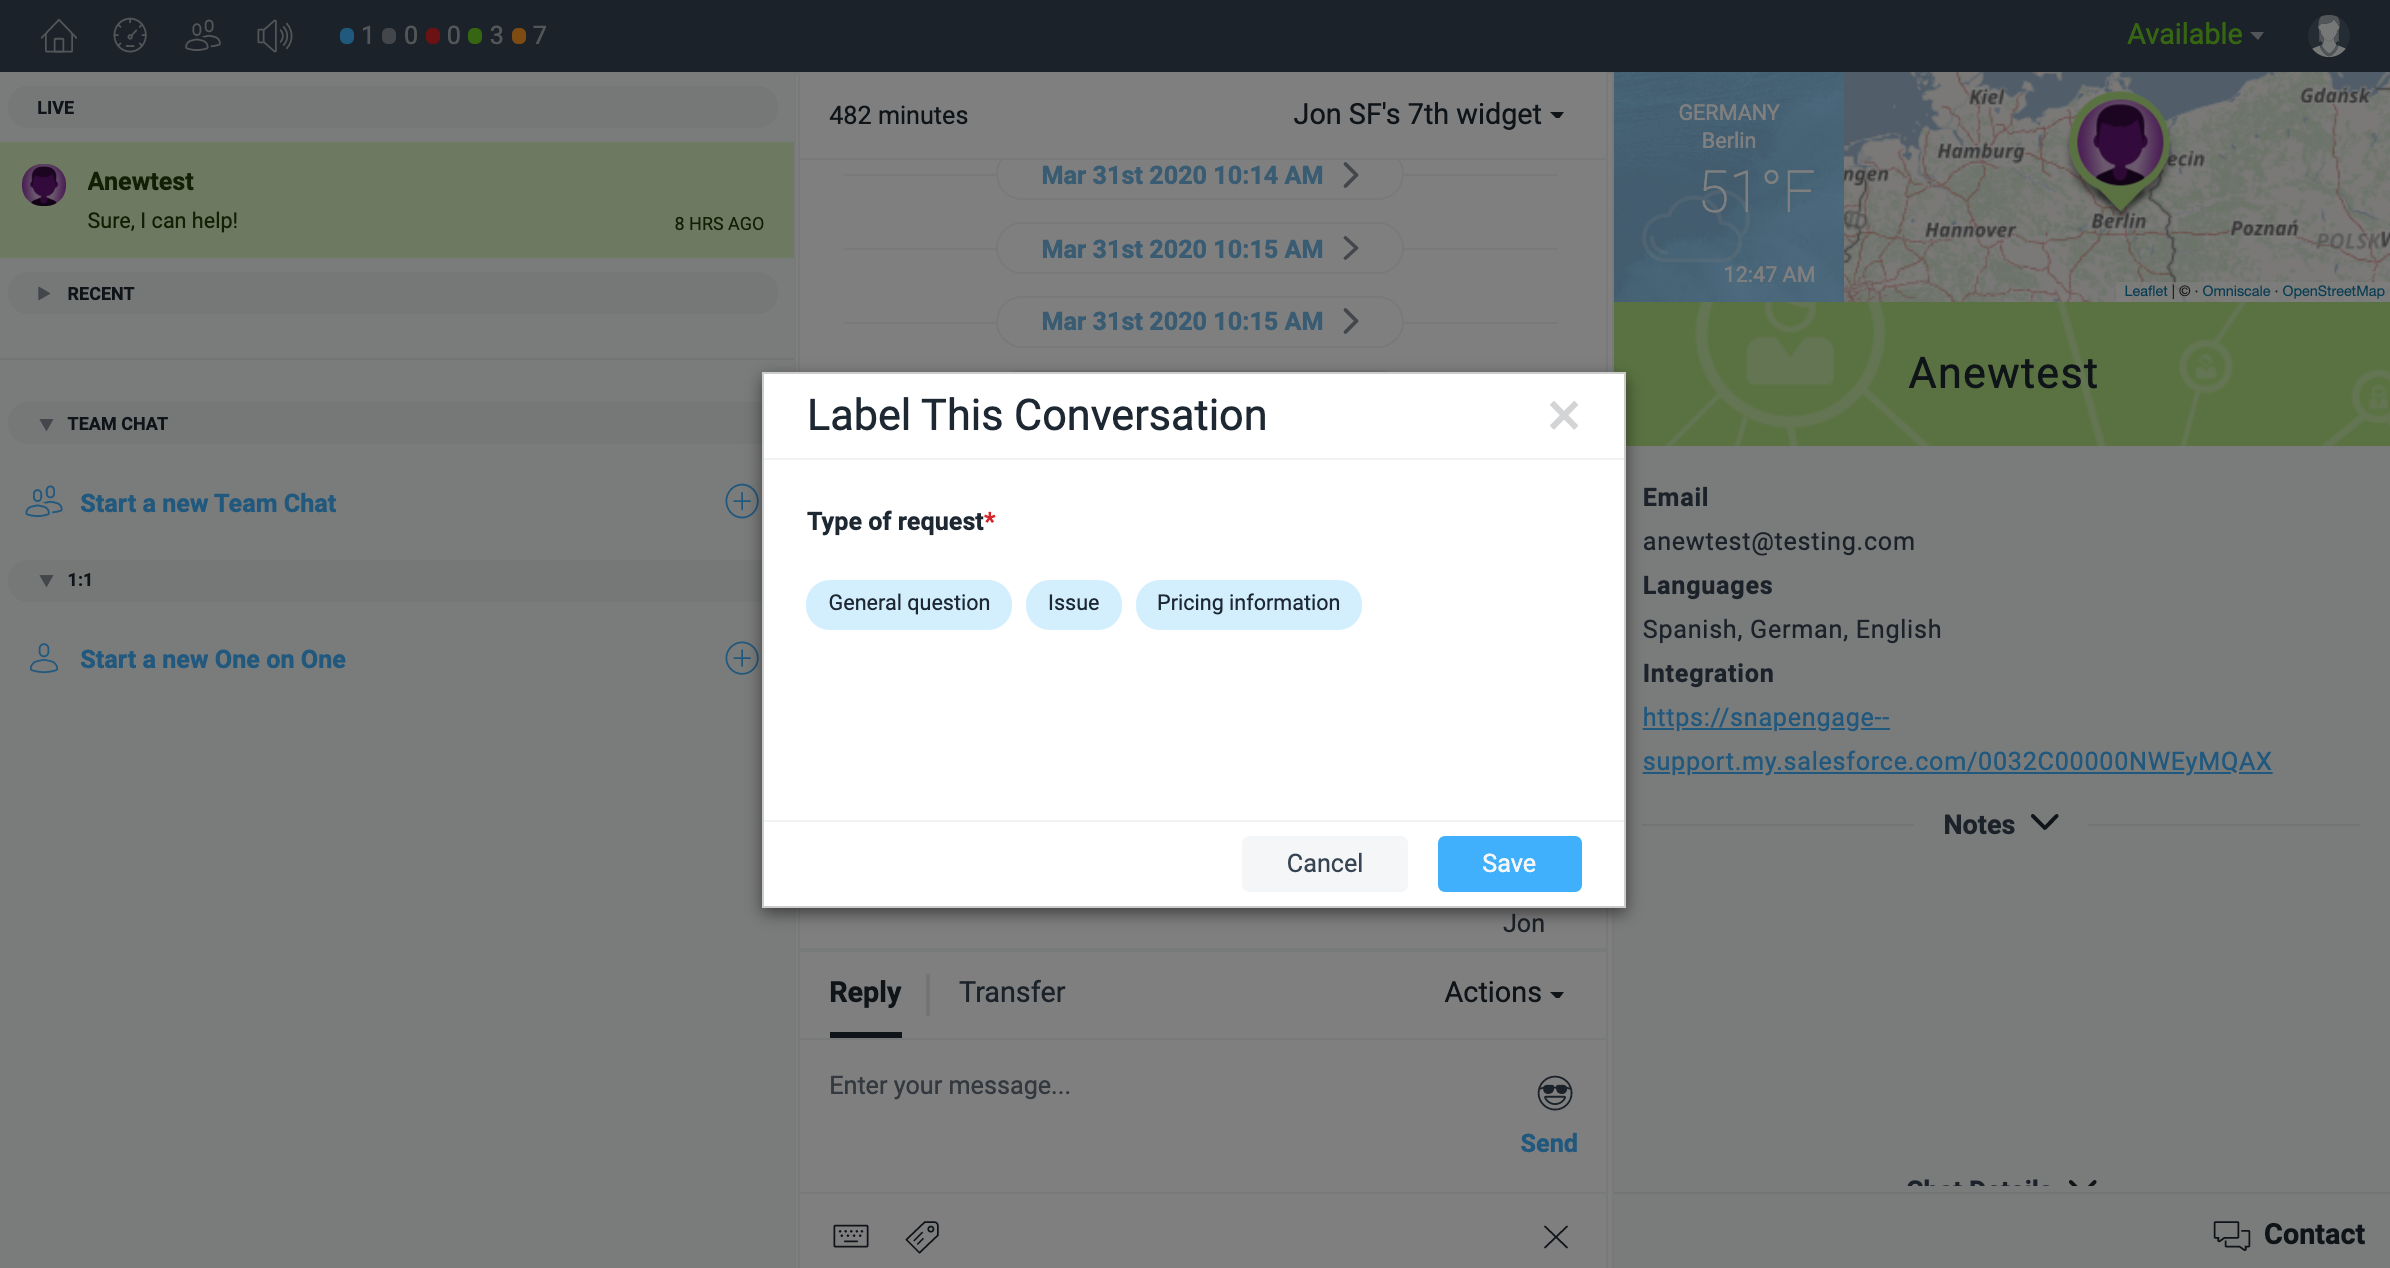
They can only choose one, and they cannot type. In that case, what I would want to do is have a field on Salesforce called “Type of request”, it can be a picklist (since these options are pre-defined) with the values typed exactly as they are in the label section, and I can map them. By doing this, on every chat, every agent would be sending information on whether the chat was about a general question, an issue, or pricing information.
Once you have that information on Salesforce, down the line, you could run reports, and see what your most common requests are.

Another great example of what you can do with the custom mapping is setting the status of the case directly from the chat.
Create a required label with pre-defined answers on SnapEngage called “status”. You can add as many statuses as you like as long as they match with the ones on Salesforce, for example “Open” if you need to look further into a case, “pending” if the client needs to get back to you, or “closed” if the agent has solved the problem on chat, and you want to create a case, but you want it closed.
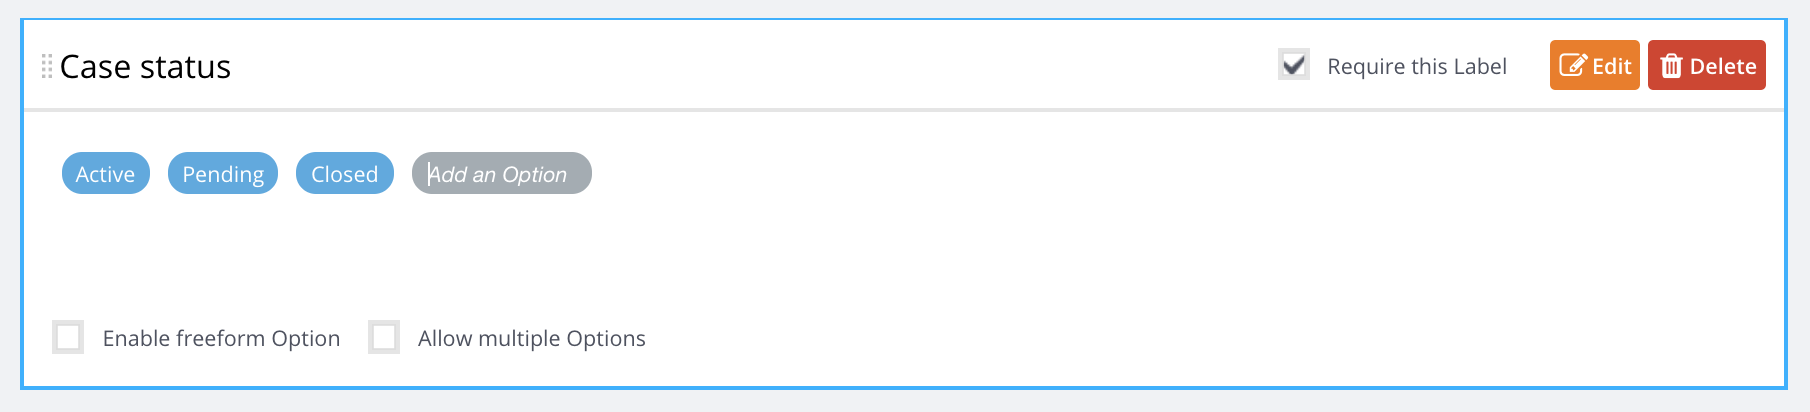
The agent can set the status during or at the end of the chat, and this will change the status directly on Salesforce.

One thing to be aware of is that you are mapping a field to a picklist, the value must match exactly. If the value doesn’t match, it will not populate, and if the picklist is a required field, then the case/lead will not get created on Salesforce.
If you are sending values over to a text field, then you may send whatever you like.
And these are just a couple of examples, you can also validates leads or reject them by sending a value to a specific field, you can also send notes from the agents, the options are limitless!
Did you find this article helpful?
 (1 votes, average: 5.00 out of 5)
Published January 21, 2020