Home > How to configure Answer bot
Categories: Chatbot Docs | Featured Article
(Last Updated On: )
About This Article
This article explains how to configure an answer bot.
Note: There is an extra per month fee for bots more details here.
This article explains how to configure an Answer Bot. An Answer Bot is a bot that allows visitors to ask questions, and then suggests articles from your knowledge base based on search terms. It can answer your customers’ routine and highly specialized questions quickly, relieve demand on your agents (keeping them free to answer the most difficult questions) and provide a backup when agents are busy or offline.
*Chatbots are available on Professional and Enterprise plans.
Step 1: Configure your knowledge base
Since the Answer Bot works with knowledge bases, you need to configure one first. You can do this under Integrations, Knowledge bases. You can find further instructions here. (Please be aware that the option to add the Answer Bot will be disabled and greyed out unless you add a knowledge base). If you don’t have a knowledge base, use the Google Custom search integration, enabling the bot to look through parts of your website.
Step 2: Configure Your Answer Bot
To configure the Answer Bot, please follow these instructions:
- Choose a widget where you want to enable an Answer Bot
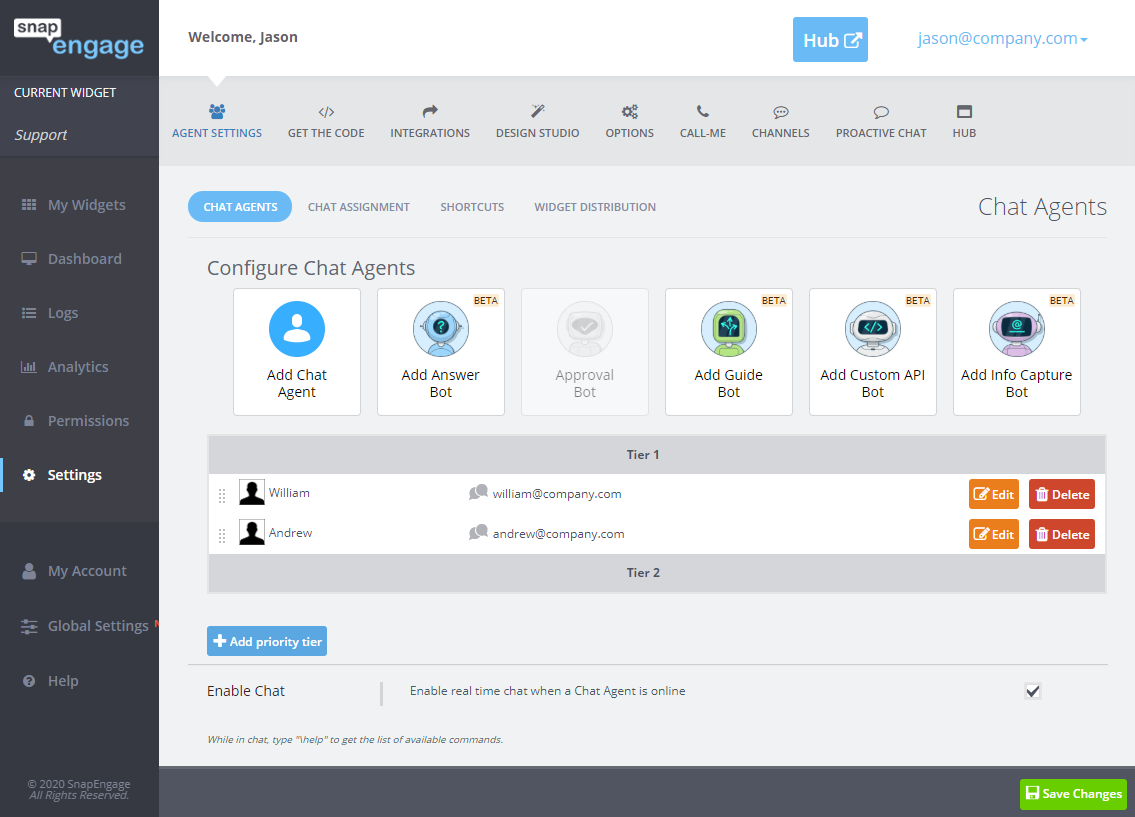
- Navigate to Settings -> Agent Settings -> Chat Agents
- Click the Add Answer Bot button
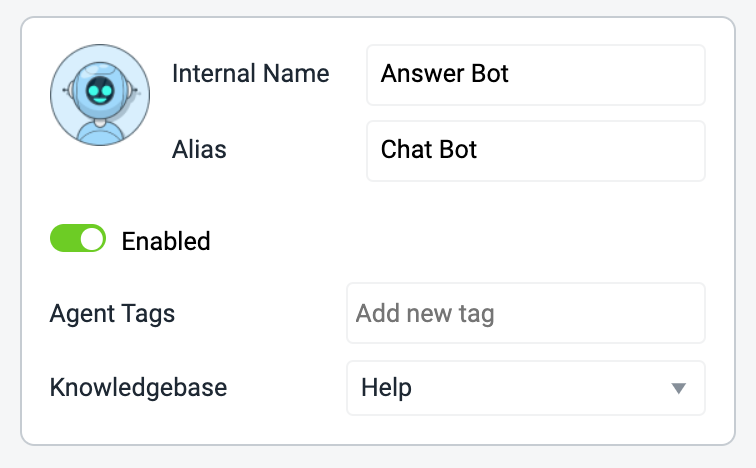
On the section of the left, you will be able to preview your prompts and buttons, and live test by toggling between the tabs “preview” and “live test”.
The section on the right is where you will do the configuration.
On the top right, you can name your bot internally (for reporting and configuring), and externally. The “Alias” is the name visitors will see. A best practice we recommend is adding a photo that indicates that visitors are talking to a chatbot. You can keep the SnapEngage bot photo suggestion, or you can click to change it. Make sure you turn the bot on from that menu as well by enabling it. You can also add Tags (if you want to transfer chats from other bots to the Answer Bot, for example), and choose the correct knowledge base if you have multiple configured.
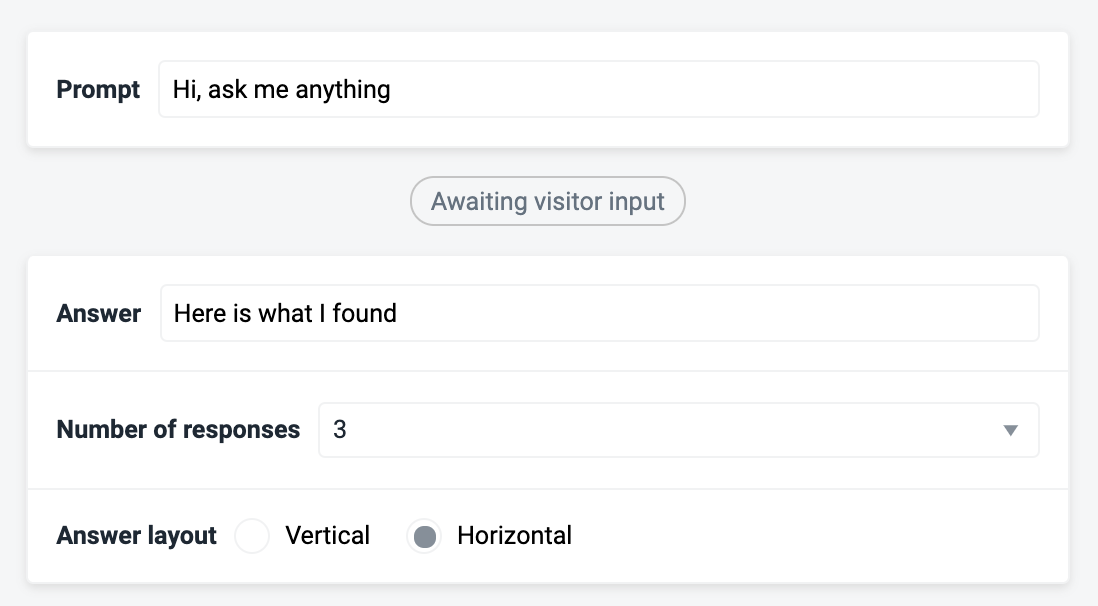
Feel free to edit the wording around the prompt and the answer. Choose how many responses from your knowledge base you would like to present to the visitor, and whether you would like to display responses vertically or horizontally. When you click on those options, you can also preview them on the left-hand side.
Below, you can configure what happens once the visitor is presented with search results. This will work in a very similar way to the Guide Bot.
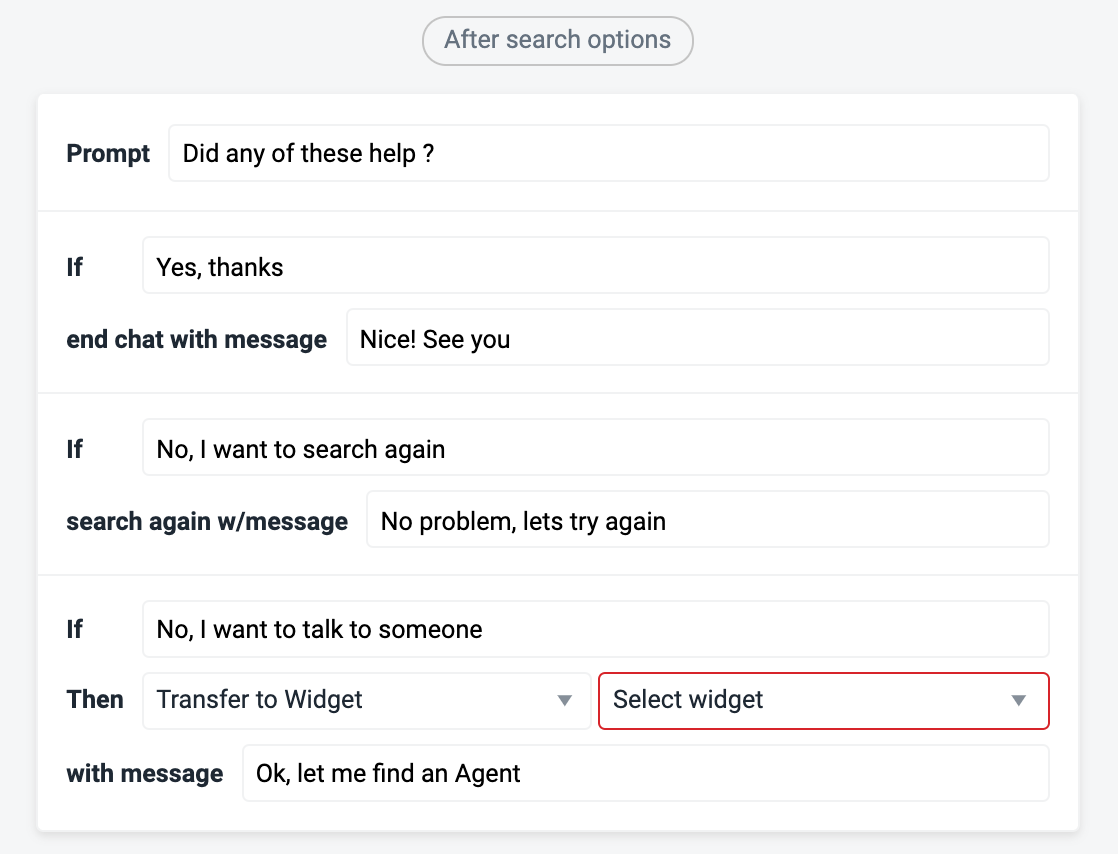
In the example, the question is, “Did any of these help” and the visitor is presented with two options. One that allows them to do another search, and where you can edit the text. The second option gives the visitor the option to speak to someone. In that case, you can choose to:
- Transfer to a widget
- Or router to a chat
Tip: If you want to give visitors the option to “End Chat”, change the text to “Close chat”.
On the following menu, you can configure what happens if the second search didn’t provide the desired results and all agents are offline. In this case, the visitor will is presented with an offline form. If you edit the text, make sure you leave the brackets, as this becomes a link for the visitor to open the offline form.
When your set up is ready, click on the “Live test” button on the left-hand side and do a real test, so you can test all the scenarios. What happens when you don’t find a result, what buttons do you see? Do you like the current set up? Make sure the Answer Bot is turned on (Enabled) and save!
Decide which Tier you want your bot to be on. Do you want the bot to answer questions first? Make sure it’s on Tier 1, so all visitors go through the bot before speaking to an agent. Do you want the bot to be available only when agents are unavailable? Add the bot to Tier 2 or higher.
Bonus: you can transfer from bot to bot and create longer scenarios, by also using Guide bots.
Using Answer Bot with Channels
You can now use your Answer Bot with our SMS and Facebook Messenger Channels. This means that queries coming from either channel can be picked up by your Answer Bot.
Facebook Messenger
On the Facebook Messenger Channel, the search results will be shown in a sliding carousel:
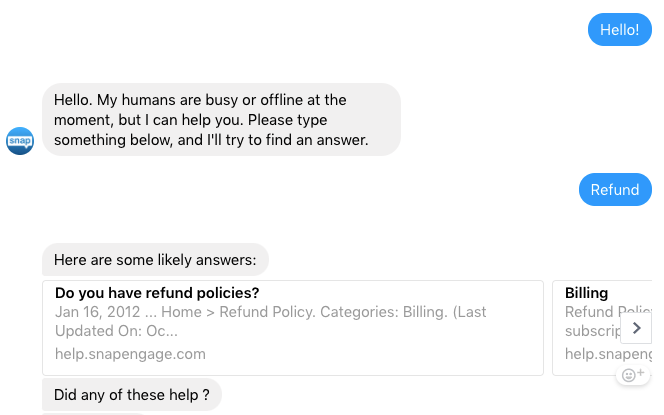
The visitor can click on one of the results, or search again.
SMS Live Chat
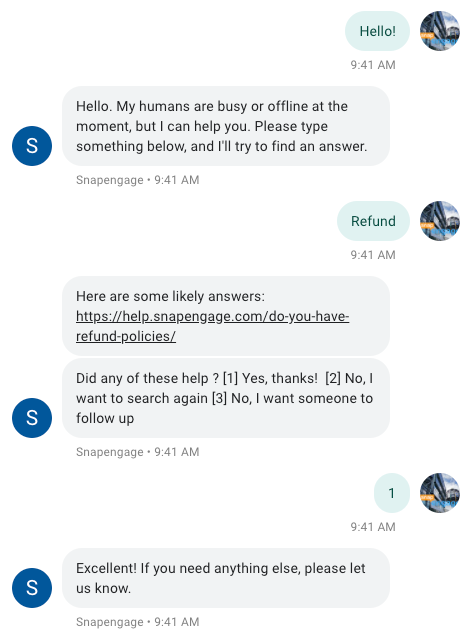
When sending a message via the SMS Live Chat Channel, we want to ensure that the visitor does not need to type out the whole answer. There are two reasons for this; It can cause frustration for your clients, and it can also result in mistakes, which would break the flow. To combat this, the visitor will be able to respond by typing a number:
Chat with us to learn more!
Published April 3, 2020
